
Related Manuals for Samsung SRN-4000


Summary of Contents for Samsung SRN-4000
- Page 1 NETWORK VIDEO RECORDER User Manual SRN-4000...
-
Page 2: User Manual
Disclaimer Samsung Techwin makes the best to verify the integrity and correctness of the contents in this document, but no formal guarantee shall be provided. Use of this document and the subsequent results shall be entirely on the user’s own responsibility. Samsung Techwin reserves the right to change the contents of this document without prior notice. -
Page 3: Important Safety Instructions
overview imporTAnT SAfeTy inSTruCTionS Read these operating instructions carefully before using the unit. Follow all the safety instructions listed below. Keep these operating instructions handy for future reference. Read these instructions. Keep these instructions. Heed all warnings. Follow all instructions. Do not use this apparatus near water. -
Page 4: Before Start
• SAMSUNG retains the copyright on this manual. • This manual cannot be copied without SAMSUNG's prior written approval. • We are not liable for any or all losses to the product incurred by your use of non-standard product or violation of instructions mentioned in this manual. -
Page 5: Operating Temperature
operating Temperature The guaranteed operating temperature range of this product is 0°C ~ 40°C (32°F ~ 104°F). This product may not work properly if you run right after a long period of storage at a temperature below the guaranteed one. Prior to using a device that has been stored for a long period in low temperatures, allow the product to stand at room temperature for a period. -
Page 6: Table Of Contents
overview ConTenTS overview Important Safety Instructions Before Start Contents Features Part Names and Functions (Front) Part Names and Functions (Rear) inSTALLATion Checking the installation environment Rack Installation HDD Addition ConneCTing wiTh oTher deviCe Connecting to an external device Connecting the USB Connecting the Alarm Input/Output Connecting the Network Live... - Page 7 SeArCh & pLAy Search Playback STArTing weB viewer What is Web Viewer? Connecting Web Viewer Live viewer 101 Live Viewer 103 Live Screen Configuration 110 Controlling a Connected Network Camera SeArCh viewer 112 Search Viewer SeTup viewer 116 Setup Viewer BACKup viewer 134 SEC Backup Viewer Appendix...
- Page 8 overview feATureS The product records video and audio from network cameras to a hard disk, and enables playback from the hard disk. It also provides remote monitoring environment for video and audio over the network using a remote computer. • User-friendly UI •...
-
Page 9: Package Contents
package Contents Please unwrap the product, and place the product on a flat place or in the place to be installed. Please check the following contents are included in addition to the main unit. ALARM POWER BACKUP NETWORK RAID Mouse Power Cable Network Viewer Software / User Manual or Quick Manual... -
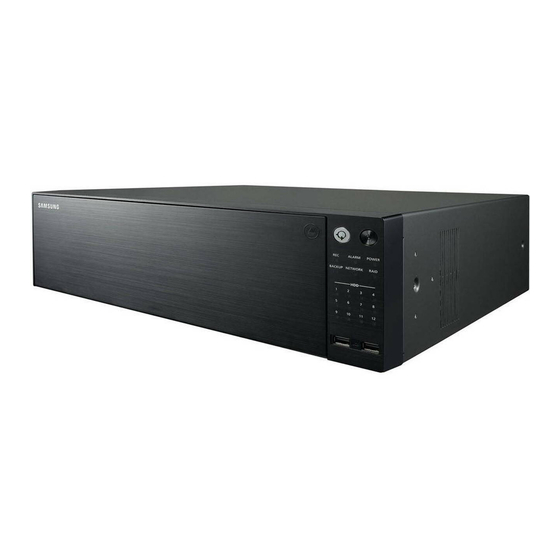
Page 10: Part Names And Functions (Front)
overview pArT nAmeS And funCTionS (fronT) ALARM POWER BACKUP NETWORK RAID Part Names Functions This is a locking device used to restrict access to the HDD. HDD door lock key Use the product key provided when you purchased the product. Power Used to turn the ON/OFF. -
Page 11: Part Names And Functions (Rear)
pArT nAmeS And funCTionS (reAr) L.FAN R.FAN ALARM ALARM IN RESET CAMERA1 VIEWER 3 4 5 6 7 8 AUDIO OUT HDMI CONSOLE CAMERA2 iSCSI NC NO ALARM OUT d e f Part Names Functions Terminal to connect power to. With duplex power supply, even if you connect only one power supply, it can operate properly. -
Page 12: Checking The Installation Environment
installation Please take note of the followings before using this product. • Do not use the product outdoor. • Do not spill water or liquid in the connection part of the product. • Do not impose the system to excessive shock or force. •... -
Page 13: Rack Installation
rACK inSTALLATion Install the Bracket-Rack as shown in the figure, and then fasten the screws on both sides (3 screws on each side). Fix the screws not to be loosened by vibrations. hdd AddiTion Make sure to unplug the power cord from the wall outlet to prevent possible electric shock, injury or product damage. Please consult your provider for further information on HDD installation since improper installation or settings may damage the product. - Page 14 installation when you mount an hdd 1. Press the <puSh> button on the front to open the front cover. 2. After pressing the blue button in the HDD bracket, pull it manually to separate the HDD bracket from the main body. 3.
-
Page 15: Connecting With Other Device
connecting with other device ConneCTing To An exTernAL deviCe AU DIO OU T VG A CA ME RA 1 HD MI VIE WE CO NS OL E ALAR RESE CA ME RA 2 NC NO OU T AUDIO OUT VIDEO OUT (VGA) HDMI OUT Unrated or improper power source may cause damage to the system. -
Page 16: Connecting The Usb
connecting with other device ConneCTing The uSB 1. On the front of the product, there is a USB port. 2. You can connect a USB HDD, USB CD/DVD player, USB memory or mouse to the USB port. 3. If a USB HDD is connected to the system, recognition and settings are available in "menu Setup > device > Storage device". -
Page 17: Connecting The Alarm Input/Output
ConneCTing The ALArm inpuT/ouTpuT The Alarm In/Out port at the back is composed of the following. FA N FA N AU DIO OU T VG A CA ME RA 1 HD MI VIE WE CO NS AL AR OL E M IN ALA RM RES ET... -
Page 18: Connecting The Network
connecting with other device ConneCTing The neTworK For more information about network connection, refer to "Network Configuration". (Page 80) network connection via ethernet (10/100/1000BaseT) IO OU VIE WE CO NSO ALAR RESE NC NO OU T Switch Switch Windows Network Viewer Network Camera Network... - Page 19 Connecting to internet through pppoe NETWORK Phone (PPPoE) IO OUT Line VIEW ALAR RESE NC NO PPPoE MODEM Switch Switch Windows Network Viewer Network Camera Network Camera Connecting the network camera IO OUT VIEW ALAR RESE NC NO Switch Switch Network Camera ex) IP : 192.168.2.10 Network Camera...
- Page 20 connecting with other device Connecting the iSCSi directly connecting to the nvr IO OU HD MI VIE WE CO NSO ALAR RESE NC NO OU T iSCSI A switch can be used for connection IO OU HD MI VIE WE CO NSO ALAR RESE...
-
Page 21: Getting Started
live geTTing STArTed Starting the system 1. Connect the power cable of the NVR to the wall outlet. If the power supply is connected, long press the power button on the front. 2. You will see the initialization screen. The initialization process will last about 2 minute. If a new HDD is installed, the initialization process may take longer. -
Page 22: Shutting Down The System
live Shutting down the System 1. In the live screen menu, select <Shutdown>. 2. The “Shutdown” confirmation pop-up window will appear. 3. Click on <oK>. The system will shut down. Only the user with the "shutdown" permission can shut down the system. -
Page 23: Live Screen Configuration
Live SCreen ConfigurATion icons on the Live Screen You can check the status or operation of the NVR with the icons on the live screen. FULL RAID RAID SCSI 2014-01-01 00 : 00 : 01 FULL RAID RAID SCSI FULL RAID RAID SCSI... -
Page 24: Live
live Name Description It is displayed when there is a malfunctioning HDD in the RAID. There are one or two HDD malfunctions but you can still read or write to it. FULL RAID RAID SCSI It is displayed when recovering a RAID Error. FULL RAID RAID... -
Page 25: Error Information
error information • If the built-in HDD is not connected, the “NO HDD” icon ( ) will be displayed in the top left corner. In this case, make sure you contact the service center for assistance as this may cause a failure of recording, playback or backup. - Page 26 live Single mode menu The single mode menu is available only in Single Mode. The context sensitive menu for the One Channel mode, in Split mode is different from that of the Single mode. Full Screen Channel Info Live Status Record Status Layout ►...
- Page 27 Split mode menu In Live split mode, right-click to display this context menu as shown. The context sensitive menu in split mode differs, depending on the login/logout status. Scene Mode ► Channel Info Live Status Record Status ► Layout Audio Off Freeze Stop Alarm Record...
- Page 28 live Menu Description Play Refer to "Search & Play > Play". (Page 96) Search Refer to "Search & Play > Search". (Page 92) Searches for a backup device and runs backup for each channel or schedule backup later at a Backup more preferable time.
- Page 29 view the Launcher menu The Launcher menu appears on the bottom of the live screen. 1. Select <Show Launcher> in the context menu of the Live screen. 2. Move the cursor to the bottom and click a desired item in the Launcher menu.
-
Page 30: Live Screen Mode
live Menu Description Freeze Freezes the Live screen temporarily. Capture Captures the screen of the selected channel. Play Enters Play mode if a file to play exist, and if not, enters Search mode. Record Start/End recording the Live screen. Live SCreen mode You can play up to 64 live video channels in single, 6-split, or auto sequence mode. - Page 31 In a split mode, If you have set <Multi CH SEQ Time> in "Setting the Device > Monitor", Auto Sequence will be conducted at the set interval. (Page 70) When you switch the channel, the video may be delayed depending on the network condition. manual Switching Click the arrow <◄/►>...
- Page 32 CH10 CH11 CH12 CH13 CH14 CH15 live CH16 CH19 CH19 CH10 CH10 CH11 CH11 CH12 CH12 CH13 CH13 Channel Setting CH10 CH11 CH12 CH10 CH13 CH14 CH13 CH14 CH15 You can display the channel in a desired area of a split screen. CH11 CH12 CH15...
-
Page 33: Live Status
Live Status Select <Live Status> from the live screen menu to display status and transfer information of connected camera to each channel. • Model : Displays the camera model name connected to each channel. • Status : Displays the status of camera connection set to each channel. -
Page 34: Zoom
live Zoom This is activated only in Live Single mode. After selecting a single screen, if you use the Magnify function, the selected area will be magnified by 2. 1. In the live screen menu, select <Zoom>. You can also click on < >... -
Page 35: Layout
LAyouT In the live screen, you can set the layout for each channel. 1. Select the <Layout Setup>. The layout setting screen will appear. • New : You can set the new layout. • Rename : You can make changes to the selected layout. When the layout is changed, the channel order is initialized. -
Page 36: Freeze
live freeZe This is available only in Live mode, this pauses playing the Live image temporarily. 1. Click < > of the launcher mode. Video playing is paused. 2. Click on < >. Pause is canceled. Playing is resumed. evenT moniToring This will display the channel in sync with a specific event (Sensor/Motion/Video Loss) if it occurs. -
Page 37: Ptz Control
Even if the connected network camera does not support the PTZ operations, you can configure the PTZ control settings (if possible) by installing the PTZ driver (physical device). It only supports a network camera with Samsung Techwin's PTZ function and a camera registered in the ONVIF. English _37... - Page 38 live using the pTZ camera You can use a single PTZ camera to perform the Pan, Tilt and Zoom operations to monitor multiple places, and configure the custom settings of the presets in a desired mode. 1. Open the <pTZ Control> menu. The <...
- Page 39 preset Preset is a specific position remembered by the PTZ camera. You can use the Preset function to define up to 255 presets for a single PTZ camera. To add a preset 1. Check the preset checkbox. 2. Select <Add>. The virtual keyboard will appear on the screen.
-
Page 40: Menu Setup
menu setup You can setup the system, devices, and options for recording, event and network. SySTem SeTup You can setup Date/Time/Language, User, System Properties and Log. date/Time/Language Setting the date/Time/Language You can check and setup the current Date/Time and time related properties, as well as the language used for the interface on the screen. - Page 41 • Holiday : A user can select specific dates as holidays according to their own preferences. Holidays are applied in the <recording Schedule> or <Alarm Schedule> setting too. e.g. every first day of a year is set to be a holiday if you select January 1 and check <1/1>, and every first day of a year and every first Wednesday of January are set to be holidays if you check <1/1>...
- Page 42 menu setup user You can set permissions of each user over the NVR's specific function and settings. Setting the Administrator You can set and change Administrator's ID and password. The administrator can use and set all menu items and functions. • ID : Change the admin ID.
-
Page 43: User Setting
user setting You can create a group or set permissions for each group. You can add a user and edit the registered user information. if you want to add a group 1. Click on the [ ] button to launch the Group Addition popup window. If you want to add a group, click on <oK>. - Page 44 menu setup if you want to register a user 1. Click on the [ ] button to launch the user addition popup window. To add a user, click on <oK>. 2. Select a group. When registering a user, the selected group will be automatically registered. A group can be changed after inputting all required information.
- Page 45 • Restriction on Network Access : Restricts remote access from a <restricted Access> network. - All Network : Restricts all access instances via Network Viewer and Web Viewer. - Web Viewer : Restricts access via the Web Viewer. • Auto Log out : A user will be automatically logged out if there is no operation on NVR for over set period of time.
-
Page 46: System Management
menu setup System management You can check the system version, update to a newer version, as well as data backup and initialization. Checking the System information You can check the current software version and MAC address before proceeding with the upgrade. • System Information : Shows the current system's information. - Page 47 To upgrade the current software version 1. Connect a device storing the software to be updated. It may take about 10 seconds to recognize the device. Upgradeable devices include USB memory, and network device. To update the network, the current NVR should have been connected to the network. Upgrade via the proxy server may not be enabled due to the restricted access.
-
Page 48: Settings
menu setup Settings You can copy and import the NVR settings by using a storage media. • Storage Device : Shows the connected storage device. • Export : Exports NVR settings to the connected storage device. • Import : Imports NVR settings from the storage device and applies to the NVR. - Uncheck the checkbox of an item(s) that you want to import. -
Page 49: Log Information
Log information You can browse logs on the system and events. Checking the system log System Log shows log and timestamp on every system start up, system shutdown, and changes on system settings. • Search Day : Click the Calendar icon to display the calendar window, or use the direction buttons to specify the search period of the system log. - Page 50 menu setup Checking the event log You can search recorded events including alarms, camera events and video loss. It also shows the log and its timestamp. • Search Day : Click the Calendar icon to display the calendar window, or use the direction buttons to specify the search period of the system log.
-
Page 51: Setting The Device
SeTTing The deviCe You can setup Camera, Storage Device and Monitor. Camera To register a camera You can register a network camera for each channel and make connection between. • Preview : View the video of the channel as a current image. • Protocol : Show the protocol information of a registered network camera. - Page 52 3. Select a channel and protocol used to connect to a camera. The input items may differ depending on the selected protocol. • SAMSUNG : Comply with the internal network protocols adopted by Samsung Techwin. • ONVIF : Means the camera supports ONVIF protocols. When connecting a camera that its name cannot be found from the list, select <onvif>.
- Page 53 • Model : Select a camera model. - Samsung Network Camera/Encoder : Means the camera/encoder supports Samsung Techwin's SVNP protocol. When connecting a camera that does not appear in the camera list, select Samsung Netowrk Camera/Encoder. However, you must select the correct model name of the camera, if it's in the list. Some of obsolete camera models may not be supported.
- Page 54 • user model modification : When registering a new camera, it is named according to the device's default if user set the model to <Samsung network Camera/encoder>. In case if automatic registration fails, user can change the model name of camera to be registered.
- Page 55 onvif Setup In the bottom of the camera addition screen, click on the <onvif Setup> button to set additional settings for cameras with the ONVIF protocol. You can change the information only if the user account (camera account used for camera registration) is used to read the user information and a connection is made with the admin privilege.
- Page 56 menu setup network You can set the details of the network. • IP Type : Select from either the IPv4/IPv6 IP types. • DHCP : Select whether to use the DHCP. • DNS / NTP Server : Only if the DHCP setting is <on>, the DHCP checkbox will be activated. If the DHCP is checked, you can manually enter the IP address.
-
Page 57: Camera Setting
event You can set details of the event. • Available events (camera) : It shows the list of all the events supported by a camera by using the ONVIF protocol. • NVR supported events : You can map the list of events supported by a camera to events that the NVR can detect. - Page 58 menu setup If you change the settings of a specific profile for each model, the effective range of the baud rate may be changed accordingly. Ex) if you set the baud rate of the first profile to 30fps, the send rate of the second profile will be changed to 15fps. Menu items except Codec, Resolution, Transfer Rate, and Transfer Quality can be configured in the network camera's settings menu.
- Page 59 exposure You can adjust the exposure of your camera. Brightness control, shutter, SSNR, Sens-up, shutter/lens, and gains can be set. day/night You can change the mode to adjust the color and contrast. Mode, switching time, brightness change, alarm time, alarm input/output, negative color, daytime/nighttime switching and simple focus, and activation time can be set.
- Page 60 menu setup focus You can adjust the focus of you camera's video. Items of Simple Focus and Focus-Initialize Setting can be set. flip Mirror and flip modes can be set. After finishing with setting camera, click on the <Close> button to move back to the previous screen. 60_ menu setup...
-
Page 61: Live Setting
Live Setting You can change the live transfer settings of the network camera. • Live Replacement : You can select the live profile setup mode. If you select <manual>, the profile setup items are enabled, and you can change settings manually. - Auto : For live monitoring, the profile which is approximate to the output resolution of each channel must be selected automatically. - Page 62 menu setup Channel Setting You can configure the video settings for each channel. • Apply to CH : If you select <Apply to Ch>, the "Apply to Ch" confirmation window will appear. After selecting channels that the settings will be applied to, click on <oK> to apply them to the selected channels.
- Page 63 Storage device You can check information on storage devices. device/format You can check storage devices and their capacity, usage as well as status. Devices available are HDD, and USB devices (Memory, HDD). • Storage Status : Displays the working status of a storage device. - Red : Displays the situation of video loss.
- Page 64 menu setup • Format : Select a device and click on format after which a format confirmation window appears. Click on the <oK> button to format the selected storage device. Formatting will delete all the recording data that has been saved. Be careful. While formatting is ongoing, you cannot record video.
- Page 65 Adding an iSCSi device manually 1. On the iSCSI screen, click <Add manually>. 2. On the Manual Add screen, enter the IP address, the connecting port, the ID and the password, and click <oK>. Canceling registration of iSCSi devices 1. In the <iSCSi usable name> list, select an iSCSI device to delete. 2.
- Page 66 menu setup rAid mode setting If you enable the RAID (Redundant Array of Independent Disks) mode, when a system HDD is damaged you can restore data safely. The NVR supports RAID level 5 and 6. RAID Level 5 supported by the NVR can work to restore data for a single HDD only in case of failure of that HDD.
- Page 67 rAid mode setting 1. Click on the <use> or <Setup> button. 2. In the use RAID window, select settings of RAID and click on the <oK> button. • Use/Not Used : You can select whether or not to use the RAID mode. • Level5/Level6 : It shows the type of RAID supported by the NVR.
- Page 68 menu setup recovering rAid Array 1. If you see a number for an HDD which <Status> states Faulty/Removed, then check the location of the HDD to be replaced in the HDD map. In addition, check the location of the HDD for which the HDD LED is highlighted in red.
- Page 69 hdd Alarm Setting For HDD malfunctions, you can set the inspection alarm output terminal, the replacement alarm output terminal, the iSCSI alarm output terminal and the alarm time. • Alarm - Alarm signal will output through the alarm out port on the rear side when selected <1>, <2>, <3>, and <4>. - If <Beep>...
-
Page 70: Monitor Settings
menu setup monitor You can set the information displayed on the monitor as well as the output system. monitor settings You can configure the monitor output-related settings including the displayed information, dwell time and output system. • Event Display : Sets the dwell time of the event channel display on the monitor when an event occurs. If you set <Continuous>, it will keep displaying until you cancel it. - Page 71 To adjust the display position Some monitors many not display information (camera name, icon, time information, etc.) about the NVR, depending on the condition. Then, you can change the display position of the data. FULL RAID RAID SCSI 1. From the monitor setup menu, select <display position Setup>. 2.
-
Page 72: Setting The Recording
menu setup SeTTing The reCording You can setup scheduled recording, event recording and other recording related settings. recording Schedule Make your reservation on a date and time to schedule the recording on specified time. • All : The entire time range (Monday through Sunday including holidays, AM 0~ PM 23) will be reserved with the same recording schedule • Apply to CH : If you select <Apply to Ch>, the "Apply to Ch"... -
Page 73: Record Setting
record Setting You can set resolution, IPS, and quality of recordings by channel, and by recording type of standard / event. You can check frame rates and data transfer amount of Full Frame and Key Frame recordings for each channel, and set the transfer limit for recordings. - Page 74 menu setup Setting the network camera's recording profile You can configure the video profile settings for instructing the network camera (connected to each channel) to make recording. You can configure the settings only for the profiles that are supported by the camera. If the profiles used for recording and network are different, camera's video feed may not comply with the frame rate as specified in the camera.
- Page 75 record option When the HDD capacity is full, you can set whether to stop recording or start overwriting. • Disk End Mode : Select a HDD repetitive recording type. - Overwrite : If the HDD is full, this will overwrite the existing data and keep recording. - Stop : If the HDD is full, this will stop recording automatically.
-
Page 76: Setting The Event
menu setup SeTTing The evenT You can make the setup for record in case of sensor detection, camera event or video loss detection. Sensor detection You can set the sensor's operating condition and connected camera, as well as alarm output and its duration. • Apply to other sensors : If you select <Apply to other sensors>, the "Apply to other sensors"... - Page 77 event detection You can set whether to run an event sent from the NVR or camera (motion detection, video analysis event, audio event) and the method for alarm output as well as the alarm time. • AMD : Select whether or not to use motion detection. • Profile : Shows the video profile set for each channel.
- Page 78 menu setup network Camera • Apply to CH : If you select <Apply to Ch>, the "Apply to Ch" confirmation window will appear. After selecting channels that the settings will be applied to, click on <oK> to apply them to the selected channels.
- Page 79 video Loss detection You can set the camera so that the camera can trigger the alarm if it is disconnected or the video is lost due to unstable network connection. • Apply to CH : If you select <Apply to Ch>, the "Apply to Ch" confirmation window will appear. After selecting channels that the settings will be applied to, click on <oK>...
-
Page 80: Network Configuration
menu setup neTworK ConfigurATion It provides networked monitoring of Live screen from a remote place, and supports mail forwarding function with events. You can configure the network environment which enables such functions. interface You can set the network connection route and protocol. Setting a network connection Sets the protocol and environment of the network. - Page 81 Connecting and Setting the network Networking may differ from the connection method, check your environment before setting the connection mode. when no router is used • Static ip mode - Internet connection : Static IP, leased line, and LAN environments allows connection between the NVR and remote user.
- Page 82 menu setup when a router is used To avoid IP address conflict with the NVR's static IP, check followings : • Setting the nvr with a static ip - Internet connection : You can connect the NVR to a router which is connected to an PPPoE/Cable modem or a router in a Local Area Network (LAN) environment.
- Page 83 port Setting • Protocol Type : Select the protocol type among TCP, UDP - Unicast and UDP - Multicast. • Device Port : Enter the connectable port number. Initially, <554> is set. - TCP : It has better stability and lower speed when compared to UDP, and recommended for internet environments.
- Page 84 menu setup ddnS If a remote user accesses the network, you can set whether or not to use DDNS and the site to be connected. • DDNS Site : Specify the use of DDNS and select a site that you registered. • Host Name : Provide the host name that you registered with the DDNS site.
-
Page 85: Ddns Setting
ddnS Setting DDNS is a short form of Dynamic Domain Naming System. DNS (Domain Name System) is a service that routes a domain name consisting of user friendly characters (ex : www.google.com) to an IP address consisting of numbers (64.233.189.104). DDNS (Dynamic DNS) is a service that registers a domain name and the floating IP address with the DDNS server so that the domain name can be routed to the IP address even if the IP is changed in a dynamic IP system. - Page 86 menu setup You can select a security connection system or install public certificates. • Secured Connection System : You can select a type of security connection system. - HTTP (Non-secured connection) - HTTPS (Secured connection using unique certificate) - HTTPS (Secured connection using public certificate) • Install Public Certificate : You can scan and register public certificates to be installed.
- Page 87 • Password : Enter the password provided by the RADIUS server administrator. If the password you entered does not match that of the client's private key, it won't be processed properly. • Certificates : Search for a device. Click on <rescan> to search for a device again. • CA Certificate : Select this only if your public certificate includes the public key.
- Page 88 menu setup e-mail You can send an e-mail to a NVR-registered user at a specific time interval, or if an event occurs. If the camera is set to <OFF> or the channel's event is Video Loss, a notification is sent to the designated email address only in text.
-
Page 89: Event Setting
event Setting You can set the interval and type of the event that will be sent to the user. • Event Interval : Set the event interval. If a series of events occurs, the e-mail will be sent at the specified interval, not on each event. • Use Event Transfer : Select an event type to send if an event occurs. - Page 90 menu setup Snmp Using the SNMP protocol, the system or network administrator can monitor the network devices remotely as well as the operating environment. • Enable SNMP v1 : SNMP version 1 is used. • Enable SNMP v2 : SNMP version 2 is used. - Read Community : Enter the name of read-only community to access the SNMP information.
-
Page 91: Network Setting
dhCp Server You can set the internal DHCP server and assign an IP address to the network camera. network Setting • Network 1/2/4 : Select <Setup>, and you can set the IP range operated by the server and time. To set the dhCp server 1. -
Page 92: Search & Play
search & play SeArCh You can perform the search for recorded data by the time or by the search criteria such as an event. You can access the <Search> menu directly in Live mode. Scene Mode ► Channel Info Live Status Record Status ►... -
Page 93: Event Search
3. The record data on the specific date will be listed. The display bar is different according to the data type. So check the data type for the color in the left pane. If DST (Daylight Saving Time) is configured, overlapping multiple recordings may be produced for a certain moment of time. Such a time section is distinguished with red color to mark DST section. - Page 94 search & play heat map search Using the heat map search function, you can check the frequency of all events such as humans, cars, and humans/cars through the use of eight different colors. After checking the heat map search results, in the preview screen you can set the area to check information of the events that occurred in it.
- Page 95 Backup Search Searches for backup data in the connected backup device. Only data in the format of NVR is included in the search. 1. Select <Backup Search> in the <Search> menu. 2. Set the channel, search date, and search conditions. • Channel : Displays the recorded channel.
-
Page 96: Playback
search & play pLAyBACK play You can play data stored in the HDD and backup a desired portion of the data. Scene Mode ► Channel Info Live Status Record Status ► Layout Audio Off Freeze Stop Alarm Record Play Search Backup Menu ►... - Page 97 using the playback Button Name Description Play Timeline Indicates the current playback point, and can be used to move. Skip Backward Moves backward by unit time. Backward Fast Used for quick backward search while in Play. Play Backward Slow Play Used for backward frame-by-frame search while in PAUSE.
-
Page 98: Starting Web Viewer
starting web viewer whAT iS weB viewer? WebViewer is a software program with which the operator can access a remote NVR (Network Video Recorder) for real-time monitoring, PTZ control (if configured) or search. NETWORK Network Camera ALARM POWER BACKUP NETWORK RAID NETWORK Remote PC... -
Page 99: Connecting Web Viewer
ConneCTing weB viewer 1. Open your web browser and type the IP address or URL of NVR into the URL address box. You need to connect network 3 before you can access the web viewer. "192.168.3.200" is set to IP by default. You must have specified the IP address in "Network >... - Page 100 starting web viewer 4. When a program installation wizard window appears, press the [install] button to install the program. The version of the program installed may vary depending on the update version. 5. When program installation is complete, click on the [finish] button.
-
Page 101: Live Viewer
live viewer Live viewer You can check the video from camera registered in the NVR connected from a remote PC. Also, you can adjust the camera and check the network transfer status. Live viewer Screen Menu Description System Stauts Displays icons to display the screen or system status. Indicator Menu Selection Switches into corresponding menu screen by clicking each menu. - Page 102 live viewer Menu Description Channel information Shows the channel information selected. Temporarily stops the videos in all the channels or deactivates the Pause function in Pause suspending status. Stop Alarm Deactivates an alarm when it occurs. Enter the camera menu screen that supports the OSD menu to change settings. Saves the real-time video, in AVI format, from the selected channel in a designated folder on PC recording the PC.
-
Page 103: Live Screen Configuration
Live SCreen ConfigurATion System Status You can check the status or operation of the NVR with the icons on the live screen. Item Description It is displayed when there is a problem with the fan. It is displayed when there is a problem with the power supply. It is displayed when there is an issue with the recording conditions. - Page 104 live viewer Item Description It is displayed when an iSCSI device is disconnected. It is displayed when the network is overloaded. It is displayed when the network is overloaded. It occurs when the max receiving performance is exceeded, causing an overload to the CPU.
- Page 105 Setting the layout If you don't add or save it in the layout after registering a camera, the live screen will not be displayed. Click on the < > button to launch the layout setting screen. if you want to add a layout Click on <...
- Page 106 live viewer if you want to delete the layout After selecting the layout to delete, click on < >. The selected layout will be deleted. Unless you press the Save or Delete button, changes will not be saved. Changing Split mode When clicking the Split Mode selection button, the screen is changed into the selected split mode.
- Page 107 To switch to full screen mode Click < >. Current split screen appears in full screen. Press the [eSC] key to exit the full screen mode. MAC Safari does not support full screen. Click on < >. To switch from the 64 channel split screen to the full screen. To exit full screen, press the [eSC] key.
- Page 108 live viewer Setting screen switching If you don't register the layout, the screen switching function will not operate. You can view the layouts one by one. Click on the < > button to launch the switching setting window. 1. Select the layouts to be shown in turn by pressing < >.
-
Page 109: Auto Sequence
CH10 CH11 CH12 CH10 CH11 CH12 CH13 CH14 CH15 CH16 CH10 CH11 CH12 CH13 CH14 CH15 CH16 CH10 CH11 CH12 CH13 CH14 CH15 CH16 To perform switching CH13 CH14 CH15 CH16 CH10 CH11 CH12 CH10 CH11 CH12 CH10 CH11 CH12 CH10 CH11 CH12... -
Page 110: Controlling A Connected Network Camera
live viewer ConTroLLing A ConneCTed neTworK CAmerA Controlling pTZ If PTZ camera is connected, the < > icon appears on screen. When selecting corresponding camera channel, the PTZ tab is provided to allow you to control the PTZ. Item Description Camera menu Displays the camera settings menu. - Page 111 Item Description Group Moves in the path specified by combining the preset. Trace Moves camera's framing in the predefined path. Tour Moves in the path specified by combining multiple groups. Focus Adjusts the focus of the camera. Zoom Zooms in/out the image by controling camera's zoom. Sensitivity Adjust the sensitivity of your camera operation.
-
Page 112: Search Viewer
search viewer SeArCh viewer You can search and play the video record saved in NVR by accessing NVR remotely. Search viewer Screen Item Description Menu Selection Switches to the corresponding menu screen by clicking each menu. Displays the video-recorded date in blue and today in red. Click the date in blue color to display Calendar the recorded video information in timeline. - Page 113 Item Description Sound Sets the sound connected to each channel to either ON/OFF. Capture Saves current video for selected channel in the designated path. Print Prints current video image for selected channel through the assigned printer. Section backup Backup the video for the selected section. Magnify/Shrink Magnify or shrink the current video for the selected channel.
- Page 114 search viewer To adjust timeline If searched data are overlapping, you can select a desired data, move its playback time point, and zoom in/out the timeline. 1. Select the number of data to search if data is overlapping. It appears only when data are overlapped and assigns <0> to the most recent data. 2.
- Page 115 names and functions of play Buttons Item Description Backward jump Returns to the previous event. Backward frame Move one frame in the reverse direction. movement Backward X times Used to rewind at X times the speed. speed playing Stop After finishing playing, move to the live mode. Play/Pause Video is played and paused.
-
Page 116: Setup Viewer
setup viewer setup viewer SeTup viewer You can configure the NVR settings remotely on the network. To configure the NVR settings, click <Setup>. Settings Screen Item Description Menu Selection Click each menu to switch into corresponding menu screen. Parent Menu Configure the settings or select a parent item to change the existing settings. - Page 117 System You can configure the various settings of the NVR system. date/Time/Language For more information, refer to "date/Time/Language" in the "System" menu. (Page 40) date/Time Set the date and time. Time Synchronization Setup Set the time synchronization. dST (daylight Saving Time) During the summer, Daylight Saving Time (DST) advances clocks one hour forwards from the standard local time zone.
- Page 118 setup viewer permission management For more information, refer to "user" in the "System Setup" menu. (Page 42) Admin You can change the admin ID or the password. ID allows alphanumeric characters only. If the admin ID is not used for access, you cannot change the ID. If the ID being used is changed, you will be automatically logged out.
- Page 119 System management For more information, refer to "System management" in the "System" menu. (Page 46) System information You can see information of the current system. Check the software version and MAC address. Settings Using a storage device, you can apply the current configuration of NVR to another NVR.
- Page 120 setup viewer event log The event log lists recorded events, such as sensor events, camera events, or image losses. Backup log You can inquire about a user who performed a backup, execution time, details (backup time, channel, backup device, backup file type). 120_ setup viewer...
- Page 121 device You can check a list of devices that are connected to the NVR and configure the necessary settings. Click <device> in the menu screen. For more information, refer to "Setting the device". (Page 51) Camera Cam registration You can add a network camera(s). Camera Setup You can change the settings of a connected network camera.
- Page 122 setup viewer Channel Setup You can configure the video settings for each channel. Storage device You can check and change the settings related to the data storage device. device/format You can check a storage device, amount of use, type of use and status of storage device.
- Page 123 rAid If you set the RAID mode, then even if the system HDD is damaged, you can safely recover data. hdd Alarm You can set the alarm output port and the duration in case an error occurs. monitor monitor You can configure the monitoring screen settings and set the output system.
-
Page 124: Record Setup
setup viewer record For more information, refer to "Setting the recording". (Page 72) recording Schedule If you set a recording schedule for a specific date and time, the recording will start at that specific time. record Setup Select a type of the normal/event recording frame rate for each channel. - Page 125 Camera You can set the recording profile for a network camera. record option You can set the Disk End Mode. English _125...
- Page 126 setup viewer event For more information, refer to "Setting the event". (Page 76) Sensor detection nvr / Camera You can set the sensor operation mode and the synchronized camera as well as the alarm output type and the duration. If the connected network camera that has configured the alarm in/out settings triggers an alarm, NVR will perform the alarm out.
- Page 127 Alarm out Schedule You can schedule the alarm output according to the day of the week and the time. The default setting is Event Sync, which activates the alarm only if an event occurs. network For more information, refer to "network Configuration". (Page 80) interface A remote user can access the NVR via the network to check the current mode and the IP address.
- Page 128 setup viewer ddnS network3 You can check the DDNS settings. ip filtering You can prepare the list of IP address to allow or block accesses to a specific IP address. You can select a security connection system or install public certificates.
- Page 129 802.1x When connecting to a network, you can select whether to use the 802.1x protocol and install corresponding certificate. Live Streaming You can configure the network transfer settings of the network camera. e-mail You can specify the SMTP server that sends a mail if an event occurs and set the recipient group and users. SmTp You can set the server that sends mails and specify if you use the authentication process.
- Page 130 setup viewer event You can set the event interval and specify which events the server sends mails for. recipient You can set groups and recipients to receive emails. Snmp Using the SNMP protocol, the system or network administrator can remotely monitoring the network devices and sets the environment.
- Page 131 dhCp Server network You can set the internal DHCP server and assign an IP address to the network camera. Check ip You can check the IP and MAC currently used through the DHCP server, and the connected network port. English _131...
- Page 132 setup viewer using the setting icons : Display the ID of user connected. • : You can register a network camera for each channel • and easily set the resolution and the number of shots in case of event occurrence or manaual recording. For more on how to register a camera, refer to "To register a camera".
- Page 133 - Recording : Select <record> to check the following for each channel : profile, recording type, inputs / recording transmission rate, settings / inputs / amount of recorded data. • < > : You will be immediately directed to the homepage of Samsung Techwin. (http ://www.samsungcctv.com/). English _133...
-
Page 134: Recommended System Requirements
backup viewer SeC BACKup viewer You can play a file that is backed up in the format of SEC. Backup in SEC format produces backup data file, library file and self-executable viewer file. If you run the backup file viewer, the backup data file will be played. d e f recommended System requirements PCs with a lower specification than the recommended below may not fully support forward/backward and high-... - Page 135 Item Description Enlarge the image by up to 100 times as big as the current one. Press the Zoom In ( ) button the enlarge the image; press the Zoom Out ) button to shrink the image. You can also use the slide bar ( ) in the pop-up window to zoom in/out.
-
Page 136: Appendix
Details Display Max. 64CH Inputs CIF ~ 5MP Network Camera Resolution Samsung, ONVIF Protocols HDMI/VGA Local Display Live [Local Monitor] 1 / 4 / 6 / 8 / 9 / 13 / 16 / Sequence Multi-Channel Display [Web] 1 / 4 / 9 / 16 / 32 / 64 / Sequence... - Page 137 Network RJ-45, Gigabit Ethernet x4 Interface TCP/IP, UDP/IP, RTP(UDP), RTP(TCP), RTSP, NTP, HTTP, DHCP, PPPoE, Protocol SMTP, ICMP, IGMP, ARP, DNS, DDNS, uPnP, ONVIF, HTTPS, SNMP Samsung iPOLiS DDNS DDNS Total throughput Up to 700Mbps Bandwidth Network Up to 400Mbps...
- Page 138 appendix Item Details English, French, German, Italian, Spanish, Russian, Turkish, Polish, Dutch, Swedish, Czech, Portuguese, Danish, Rumanian, Serbian, Language(24) Croatian, Hungarian, Greek, Norwegian, Finnish, Korean, Chinese, Japanese, Thai Supported OS : Window XP(service pack 2 or above), Vista, 7, 8, Mac OS X(10.6 or above) IE 8 or higher with bug patches (IE 9 recommended), IE 10, Chrome Web Browser...
- Page 139 Item Details Indicator/Interface LED Status indicator : HDD Action(12), RAID Status(1), Alarm(1), Power(1), Record(1), Indicator Backup(1), Network(1) Front PWR Switch 1EA Switch Key-Lock 1EA 1 EA 1 EA HDMI Out(1EA, RCA, Line) Audio Serial Connectors RJ-45(4EA, GbE) w/ LINK/ACT LED Ethernet In(8EA, Terminal Block) Alarm...
- Page 140 appendix Item Details Electrical 100 to 240 VAC ±10%; 50/60 Hz, 3~1.5A(Dual SMPS) Power Max 187W(546 BTU with 1TB 12 HDDs) Power Consumption Mechanical Black / Metal Color / Material W436.0 x D468.7 x H132.0 mm (3U) Dimension (WxDxH) 11.8Kg(without HDD) Weight Standards UL,KC...
-
Page 141: Product Overview
produCT overview unit : mm (inches) English _141... -
Page 142: Default Setting
appendix defAuLT SeTTing To reset the system, move to "System management > Settings > Load factory default" and press the <initialization> button. This returns the factory default settings. When you initialize the system without changing the <Authority Setting>, you must enter the ID and password to log into the system after it reboots. - Page 143 Category Details Factory Default Recording Schedule CH1~CH64 Both(Cont&Evnt) Standard Full Event Full Record Setup Pre Event Record POST Event 1 min Overwrite Disk End Mode Record Option Disk End Beep Auto Delete Sensor Operation Camera No. Alarm Out None Duration 10 sec Sensor Detection Sensor Operation...
- Page 144 appendix Category Details Factory Default IP Type Static IP Network 1(Camera) 192.168.1.200 Network 2(Camera) 192.168.2.200 Network 3(Viewer) 192.168.3.200 Network Network 4(iSCSI) 192.168.4.200 Subnet Mask 255.255.255.0 Gateway 192.168.1.1 Interface 168.126.63.1 Protocol Type Device Type UDP Port 8000~8159 Port Multicast IP Address 224.126.63.1 Multicast TTL Web Streaming Port...
-
Page 145: Troubleshooting
TrouBLeShooTing Problem Action The system does not turn on and the indicator on the y Check if the power supply system is properly connected. front panel does not work at all. y Check the system for the input voltage from the power source. y If the problem persists even after you have taken the above actions, check the power supplier and replace it with a new one if neccessary. - Page 146 appendix Problem Action In the web viewer, the screen does not switch y You need to select the desired layout for sequence operation, in the automatic automatically. switching menu. The Live screen is too bright or too dark. y Check the video settings of the registered camera. A message of "Need to reset date/time."...
- Page 147 Problem Action Recording does not work. y If your player does not display a Live image at all, that indicates recording does not work so first check if you see an image on the screen. y Recording does not work if the recording settings are not properly configured Scheduled Record: Specify a desired time in Menu –...
- Page 148 appendix Problem Action Recording is not performed in accordance with the y If the recording status shows that the input data is exceeded. settings. Then go to Menu – Recording – Recording Setting, and set the max data capacity to greater than the input data. y Exceeding of HDD performance is displayed in recording status.
-
Page 149: Open Source License Report On The Product
Corresponding Source code from us for a period of three years after our last shipment of this product by sending email to help.cctv@samsung.com If you want to obtain the complete Corresponding Source code in the physical medium such as CD-ROM, the cost of physically performing source distribution might be charged. - Page 150 c) If the modified program normally reads commands interactively when and conditions. You may not impose any further restrictions on the run, you must cause it, when started running for such interactive use in recipients' exercise of the rights granted herein. the most ordinary way, to print or display an announcement including an You are not responsible for enforcing compliance by third parties to this appropriate copyright notice and a notice that there is no warranty (or...
- Page 151 preamble LOSS OF DATA OR DATA BEING RENDERED INACCURATE OR LOSSES SUSTAINED BY YOU OR THIRD PARTIES OR A FAILURE OF THE PROGRAM TO OPERATE WITH ANY OTHER PROGRAMS), EVEN The licenses for most software are designed to take away your freedom IF SUCH HOLDER OR OTHER PARTY HAS BEEN ADVISED OF THE to share and change it.
- Page 152 Although the Lesser General Public License is Less protective of the These requirements apply to the modified work as a whole. If identifiable users' freedom, it does ensure that the user of a program that is linked sections of that work are not derived from the Library, and can be with the Library has the freedom and the wherewithal to run that program reasonably considered independent and separate works in themselves, using a modified version of the Library.
- Page 153 You must give prominent notice with each copy of the work that the 11. If, as a consequence of a court judgment or allegation of patent Library is used in it and that the Library and its use are covered by this infringement or for any other reason (not limited to patent issues), License.
-
Page 154: Gnu General Public License
preamble LOSSES SUSTAINED BY YOU OR THIRD PARTIES OR A FAILURE OF THE LIBRARY TO OPERATE WITH ANY OTHER SOFTWARE), EVEN IF SUCH HOLDER OR OTHER PARTY HAS BEEN ADVISED OF THE The GNU General Public License is a free, copyleft license for software POSSIBILITY OF SUCH DAMAGES. - Page 155 To "propagate" a work means to do anything with it that, without 3. Protecting Users' Legal Rights From Anti-Circumvention Law. permission, would make you directly or secondarily liable for infringement No covered work shall be deemed part of an effective technological under applicable copyright law, except executing it on a computer or measure under any applicable law fulfilling obligations under article 11 of modifying a private copy.
- Page 156 d) Convey the object code by offering access from a designated place a) Disclaiming warranty or limiting liability differently from the terms of (gratis or for a charge), and offer equivalent access to the Corresponding sections 15 and 16 of this License; or Source in the same way through the same place at no further charge.
- Page 157 the party's predecessor in interest had or could give under the previous License and any other pertinent obligations, then as a consequence you paragraph, plus a right to possession of the Corresponding Source of may not convey it at all. For example, if you agree to terms that obligate the work from the predecessor in interest, if the predecessor has it or you to collect a royalty for further conveying from those to whom you can get it with reasonable efforts.
- Page 158 To do so, attach the following notices to the program. It is safest to THE BASIC LIBRARY FUNCTIONS attach them to the start of each source file to most effectively state the Written by: Philip Hazel exclusion of warranty; and each file should have at least the "copyright" line and a pointer to where the full notice is found.
- Page 159 - Redistributions of source code must retain the above copyright notice, "This product includes software developed by the OpenSSL Project for this list of conditions and the following disclaimer. use in the OpenSSL Toolkit. (http://www.openssl.org/)" - Redistributions in binary form must reproduce the above copyright 4.
- Page 160 THIS SOFTWARE IS PROVIDED BY ERIC YOUNG ``AS IS'' AND ANY limitation the rights to use, copy, modify, merge, publish, distribute, EXPRESS OR IMPLIED WARRANTIES, INCLUDING, BUT NOT LIMITED sublicense, and/or sell copies of the Software, and to permit persons to TO, THE IMPLIED WARRANTIES OF MERCHANTABILITY AND FITNESS whom the Software is furnished to do so, subject to the following FOR A PARTICULAR PURPOSE ARE DISCLAIMED.
- Page 161 Redistribution and use in source and binary forms, with or without can be browsed and manipulated, and then written to disk or another modification, are permitted provided that the following conditions are met: output stream. You can also construct an XML document from scratch with C++ objects and write this to disk or another output stream.
- Page 162 Streams 1. If the non-standard but common "UTF-8 lead bytes" (0xef 0xbb 0xbf) begin the file or data stream, TinyXML will read it as UTF-8. With TIXML_USE_STL on TinyXML supports C++ streams (operator 2. If the declaration tag is read, and it has an encoding="UTF-8", then <<,>>) streams as well as C (FILE*) streams.
- Page 163 Windows project file for Vc6 contributors, contacts, and a Brief history • tinyxml: tinyxml library, non-STL Thanks very much to everyone who sends suggestions, bugs, ideas, and encouragement. It all helps, and makes this project fun. A special thanks • tinyxmlSTL: tinyxml library, STL to the contributors on the web pages that keep it lively. So many people • tinyXmlTest: test app, non-STL have sent in bugs and ideas, that rather than list here we try to give credit due in the "changes.txt"...
- Page 164 Samsung Techwin cares for the environment at all product manufacturing stages, and is taking measures to provide customers with more environmentally friendly products. The Eco mark represents Samsung Techwin's devotion to creating environmentally friendly products, and indicates that the product satisfies the EU RoHS Directive.
- Page 166 SAMSUNG TECHWIN AMERICA Inc. SAMSUNG TECHWIN EUROPE LTD. 100 Challenger Rd. Suite 700 Ridgefield Park, NJ 07660 Samsung House, 1000 Hillswood Drive, Hillswood Business Park Toll Free : +1-877-213-1222 Direct : +1-201-325-6920 Chertsey, Surrey, UNITED KINGDOM KT16 OPS Fax : +1-201-373-0124 TEL : +44-1932-45-5300 FAX : +44-1932-45-5325 www.samsungcctvusa.com...