Panasonic Lumix DMC-TZ7 Basic Operating Instructions Manual
Hide thumbs
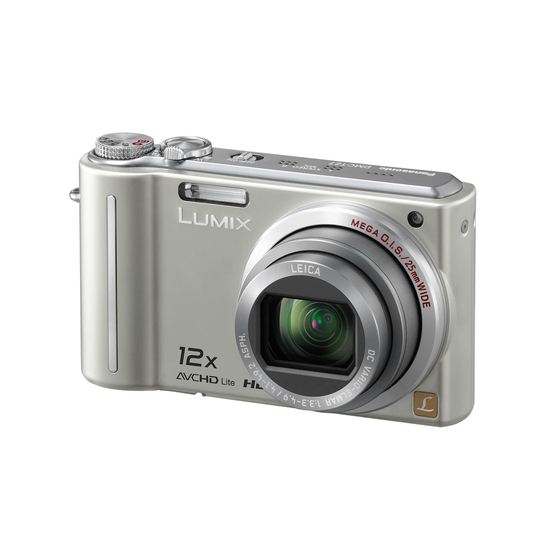
Also See for Lumix DMC-TZ7:
- Brochure & specs (22 pages) ,
- Operating instructions manual (64 pages) ,
- Operating instructions manual (66 pages)
Table of Contents
Advertisement
Model No.
Before use, please read these instructions completely.
All descriptions and logos pertaining to HDMI, VIERA Link,
AVCHD Lite, and Dolby pertain to DMC-TZ7/DMC-ZS3 only.
Please also refer to Operating
Instructions (PDF format) recorded on
the CD-ROM containing the Operating
Instructions (supplied).
You can learn about advanced operation methods and check
the Troubleshooting.
GC GJ SG GH
Basic
Operating Instructions
Digital Camera
DMC-TZ7/DMC-ZS3
DMC-TZ6/DMC-ZS1
VQT1Z96-1
M0209KZ1039
Advertisement
Table of Contents

Subscribe to Our Youtube Channel
Related Manuals for Panasonic Lumix DMC-TZ7


Summary of Contents for Panasonic Lumix DMC-TZ7
-
Page 1: Operating Instructions
DMC-TZ6/DMC-ZS1 Before use, please read these instructions completely. All descriptions and logos pertaining to HDMI, VIERA Link, AVCHD Lite, and Dolby pertain to DMC-TZ7/DMC-ZS3 only. Please also refer to Operating Instructions (PDF format) recorded on the CD-ROM containing the Operating Instructions (supplied). - Page 2 Information on Disposal in other INSTALLED NEAR THE EQUIPMENT The location of the fuse differ according thank you for purchasing this Panasonic Countries outside the European AND SHALL BE EASILY ACCESSIBLE. to the type of AC cable (figures A and B).
- Page 3 The appearance, specifications, and screen display vary depending on the model that is used. The descriptions in this manual are primarily based on the DMC-TZ7/DMC-ZS3. Details about functions specific to each model are indicated by symbols added to headings or at the end of descriptions, etc.
-
Page 4: Table Of Contents
Hanging any items other than damage. Direction detection function ......20 the supplied hand strap from the camera Mode dial .............20 Panasonic will not provide compensation can apply pressure against it.) Preparations Taking picture with automatic even if damage is caused by faults with •... -
Page 5: To Prevent Damage And Faults
The appearance, specifications, and screen display vary depending on the model that is used. The back pictures on the built-in memory when descriptions in this manual are primarily based on the DMC-TZ7/DMC-ZS3. you are not using a card. (P.13) DMC-TZ6/DMC-ZS1 has only one microphone (Monaural). -
Page 6: Charging Battery
To ensure that safe products are used we would CIPA is an abbreviation of [Camera & Imaging Products Association]. recommend that a genuine Panasonic battery pack is used. • Temperature 23 °C, humidity 50 % • First picture taken 30 sec. after power turned •... -
Page 7: Inserting Battery And Card
Card (check orientation) Compatible memory cards (optional) OPEN SD memory card/ The following SD standard-based cards (Panasonic brand recommended) SDHC memory card • SD memory cards (8 MB - 2 GB) Do not touch terminal (optional) • SDHC memory cards (4 GB - 32 GB) LOCK Can only be used with devices compatible with SDHC memory cards. -
Page 8: Setting The Clock
To enable optimum usage of the Setting the clock ( The clock is not set when the Using menus camera, various functions can camera is shipped.) be activated and setting can be changed from the menus. (Example) Change ‘VOLUME’ in SETUP menu when in NORMAL PICTURE mode. Set REC/PLAY switch to before turning on power. -
Page 9: Menu Type
To enable optimum usage of the Basic shooting operation Using menus camera, various functions can Please set the clock before (Continued) be activated and setting can be shooting (P.14). changed from the menus. Turn on the power Menu type Status indicator illuminated for approx. -
Page 10: Holding The Camera/Direction Detection Function
Take images with customized settings (P.24). Taking images in frequently-used scene MY SCN MODE modes. SCENE MODE Take images according to scene. CLIPBOARD Mode Take pictures as memos. For the operating procedures for the DMC-TZ7/DMC-ZS3, see P.17. VQT1Z96 (ENG) (ENG) VQT1Z96... -
Page 11: Holding The Camera/Direction Detection Function
Taking picture with automatic settings Basic shooting operation Please set the clock before ‘INTELLIGENT AUTO Mode’ shooting (P.14). (Continued) Mode: Optimum settings are made automatically from information such as ‘face’, ‘movement’, Holding the camera/Direction detection function ‘brightness’, and ‘distance’ just by pointing the camera at the subject, meaning that clear pictures can be taken without the need to make settings manually. -
Page 12: Face Detection And Face Recognition
Taking picture with automatic settings ‘INTELLIGENT AUTO mode’ (Continued) Mode: Backlight compensation Face Detection and Face Recognition Backlight refers to the light that shines from behind the subject. When this occurs, the subject appears darker, and so backlighting is automatically corrected by increasing the If the camera automatically identifies the scene and determines that people appear brightness of the entire image. -
Page 13: Taking Pictures With Your Own Settings
Taking pictures with your own settings ‘NORMAL PICTURE mode’ Mode: Using REC menu to change settings and set up your own recording environment. Align focus for desired composition Turn on the power Useful when subject is not in centre of picture. First adjust focus according to subject Status indicator illuminated for Shutter button... -
Page 14: Taking Pictures/Motion Pictures With Zoom
Taking pictures/motion pictures with zoom Taking pictures with flash Mode: Mode: You can zoom in up to 12 times with ‘optical zoom’, and up to 21.4 times with ‘Extra optical zoom’ Display ‘FLASH’ (pictures only) with lower picture quality. You can also use ‘digital zoom’ to zoom in even further. Zoom In/Out Do not block the lens barrel movement while zooming. -
Page 15: Taking Images With Self-Timer
Taking images with self-timer Viewing your pictures (NORMAL PLAY) Mode: REC/PLAY switch: We recommend using a tripod. This is also effective for correcting jitter when pressing the When there is no card inserted, the pictures played back from the built-in memory. shutter button, by setting the self timer to 2 seconds. -
Page 16: Deleting Pictures
To uninstall the Operating Instructions (PDF format) step Select ‘YES’ Delete the PDF file from the ‘Program Files\Panasonic\Lumix\’ folder. When the contents in the Program Files folder cannot be displayed, click the [Show the contents of this folder] to display them. -
Page 17: Specifications
CHARGE 4.2 V 0.65 A Max. 100 pictures (When using a card, it may differ depending on the type 110 V to 240 V 50/60Hz, 0.2 A (DMC-TZ7(GC/GJ), DMC-ZS3GH) of card and the recording conditions) Input 100 V to 240 V 50/60Hz, 0.2 A (DMC-TZ7SG) - Page 18 Approx. 7 pictures/second (Image priority) Battery charger Number of recordable Approx. 15 pictures (When using the built-in memory, immediately after (Panasonic DE-A66B): Information for your safety pictures formatting) Max. 100 pictures (When using a card, it may differ depending on the type Output CHARGE 4.2 V...
- Page 19 “AVCHD Lite” and “AVCHD Lite” logo are trademarks of Panasonic Corporation and Sony Corporation. Manufactured under license from Dolby Laboratories. Dolby and the double-D symbol are trademarks of Dolby Laboratories. QuickTime and the QuickTime logo are trademarks or registered trademarks of Apple Inc., used under license therefrom.
Need help?
Do you have a question about the Lumix DMC-TZ7 and is the answer not in the manual?
Questions and answers