
Related Manuals for SIZZIX Eclips


Summary of Contents for SIZZIX Eclips
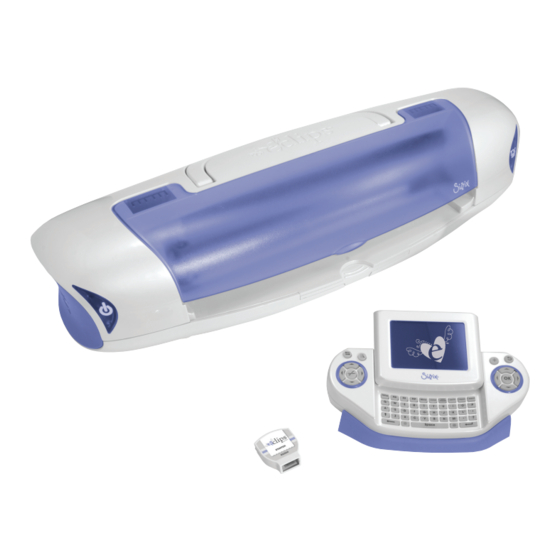
- Page 1 Electronic Shape-Cutting Machine and Handheld Remote Control USER’S GUIDE Now you’re in control. Read Guide Before Operating Product. Save for Reference.
-
Page 2: Welcome
WELCOME Brace yourself for the total eclips! It all starts with one touch. The eclips™ Electronic Shape-Cutting Machine and Handheld Remote Control combines the creativity of award-winning Sizzix artwork with the amazing cutting precision and remote-controlled intelligence of our most innovative creative product ever. -
Page 3: Table Of Contents
TABLE OF CONTENTS TABLE OF CONTENTS Welcome ......2 Add to Queue . . . . . . . . . . . . . . . . . . . . . . . . .15 Edit Queue . -
Page 4: Important Safety Instructions
THIS DEVICE IS INTENDED FOR HOUSEHOLD USE ONLY! WARNING To reduce the risk of fire, electrical shock or personal injury, read and understand all the instructions and warnings that come with your eclips™ Electronic Shape-Cutting Machine and Handheld Remote Control (“Product”). ELECTRICAL SHOCK HAZARD Product is an electrical device. -
Page 5: Contents
4. eclips User‘s Guide – Multi-Language 11. 6' (1 .8m) USB 2 .0 Cable 5. Universal Power Supply 12. eclips Starter Design and Font Cartridge 6. Power Cord 13. eclips Starter Design and Font Cartridge Booklet ACCESSORIES SOLD SEPARATELy – Available at your local Sizzix retailer or online at Sizzix.com. 14. Shape and Font Cartridges – More shapes in fun 18. Spatula/Burnisher – Lifts shapes off Cutting Mat, themes, styles and occasions plus burnishes rub-on designs 15. eclips Replacement Blades – Keeps cutting crisp 19. Die Pick – Helps remove tiny cut pieces from Cutting Mat 16. 12" x 24" (30 .5cm x 61 .0cm) Cutting Mat –... -
Page 6: Set Up
SET UP SET up CONNECTING Back of machine Back of Handheld Remote Control 1. Plug Power Cord into Universal Power Supply . 2. Plug Universal Power Supply into back of eclips Machine . 3. Plug USB cable into back of eclips Machine . 4. Plug flat end of the USB cable into Handheld Remote Control . SETTING yOUR BLADE DEPTH NOTICE DO NOT adjust blade depth while Machine is operating. Printed on a ring around the Blade Holder top are Blade Depth Settings . Ranging from 1 to... -
Page 7: Inserting Blade In Blade Holder
SET UP INSERTING BLADE IN BLADE HOLDER CAUTION: CUTTING HAZARD Blade is sharp, handle with care. Non-cutting side Blue Safety Cap Angled Cutting edge Insert this end into Blade Holder Carefully remove Blue Safety Cap from Blade, Carefully insert non-cutting side of Blade into Note that blade is exposed but barely exposing angled cutting edge . hole at bottom of Blade Holder . Blade is held visible when inserted properly . in place magnetically . INSTALLING THE CUTTING BLADE HOLDER WARNING: MOVING PARTS Keep fingers, hair and clothing away. -
Page 8: Workspace
SET UP WORKSPACE 12" – 24" PLACEMENT Leave 12" to 24" clear space behind your eclips Machine to allow full Cutting Mat movement . Place your eclips Machine at least 12" from the edge of your table to prevent it from tipping over and causing possible injury . ENVIRONMENT 12" Place eclips Machine on clean, level, dry and sturdy surface . STARTING THE MACHINE DO NOT unplug USB cable from Handheld Remote Control while Machine is NOTICE in use. This will cause data loss. Pressing Power button again will turn the Machine OFF. -
Page 9: Handheld Remote Control
HANDHELD REMOTE CONTROL HANDHELD rEMOTE CONTrOL Screen slides up Display Window Add to Queue Preview Escape Toggle Queue Display Options Main Display Menu Selection Display Shift Screen Blade Return Navigator Positioner ALT Red Control Control Circle ALT Blue Rectangle Delete Function Keys ALT keys add options to keypad. -
Page 10: Introduction Screen
. press . SPEED: 4 PRESSURE: 3 12"x12" CARDSTOCK M ADD TO FAV SIZE 1.50" QTY: 1 Please insert Cartridge Insert a cartridge to begin . INSERTING A CARTRIDGE Note that cartridges are interchangeable while Machine is on. Select eclips cartridge with logo side up . Slide eclips cartridge into right side of Handheld Remote Control . -
Page 11: Easy Start Basics
To RESUME Cutting: Press to resume cutting. To POSITION CUTTING BLADE: Use Blade Positioner Control to move Cutting Blade. To ESCAPE: Press to go back one screen. SELECTING MATERIAL TyPE The eclips Machine can cut a variety of materials from paper and vellum to construction paper, cardstock, vinyl, foam and light chipboard . Select the material to be cut in the Options Menu as shown below . SPEED: 4 SPEED: 4 SPEED: 4 PRESSURE: 3... -
Page 12: Selecting A Shape
EASY START BASICS DIMENSIONS, LASER, SPEED & PRESSURE ADJUSTMENTS Once you learn the basics of the Machine, you may want to check out the following ADVANCED features starting on pg. 20. Here is just a preview: Dimension Option allows input of custom material measurements into Machine . Laser Option recognizes any unique material size on the Cutting Mat and helps you make adjustments before cutting . This intelligent feature saves wasted material . -
Page 13: Selecting A Font
EASY START BASICS SELECTING A FONT Fonts are available on selected eclips cartridges . Fonts have a unique option that allows you to cut individual letters out of tags and charm shapes . These can be placed together to form words . SPEED: 4 SPEED: 4 SPEED: 4 PRESSURE: 1 PRESSURE: 1 PRESSURE: 1 8"x8" 8"x8" 8"x8" Paper Paper Paper ADD TO FAVS ADD TO FAVS ADD TO FAVS Solid Flowers... -
Page 14: Beyond The Basics
BEYOND THE BASICS BEyOND THE BASiCS: intermediate For even more creative possibilities, use the Options Menu to modify basic shapes . Options vary by design, and not all options are available on all shapes . OPTIONS MENU SOLID: OUTLINE: SHADOW: the shape fully filled in a hollow version of the proportionately larger solid without details . shape . shape to layer behind an Original or Solid shape . SPEED: 4 SPEED: 4 SPEED: 4 PRESSURE: 2 PRESSURE: 2 PRESSURE: 2 12"x12" 12"x12" 12"x12"... -
Page 15: Border
BEYOND THE BASICS BORDER: option on some shapes to create a repeated design in lengths of 6" (15 .2cm), 12" (30 .5cm), 18" (45 .7 cm) or 24" (61 .0 cm) . An optional 24" Cutting Mat is needed to cut 18" and 24" Borders . SPEED: 4 SPEED: 4 PRESSURE: 2 PRESSURE: 2 12"x12" 12"x12" Cardstock L 6" Cardstock L 6" 6" ADD TO FAVS ADD TO FAVS Solid Solid Shadow Shadow Border Border SIZE 2.31"... -
Page 16: Add To Favs
Press to return to Options Menu Designs that were selected in ADD TO To delete shape from FAVORITES, where a FAVORITES category FAVS now appear in Selection Display . press to highlight . Press now appears . Use to scroll To cut, highlight and press on Keypad . up to FAVORITES . Press FUNCTION KEyS At the top of the eclips Keypad is a row of ten Function keys . The following pages offer a brief summary of each Function key . Setup allows you to change Greetings, Language, Dimensions and Sound . SPEED: 4 SPEED: 4 SPEED: 4 PRESSURE: 2 PRESSURE: 2 PRESSURE: 2 12"x12" 12"x12" 12"x12" Cardstock L... -
Page 17: Fill
BEYOND THE BASICS FUNCTION KEyS Fill takes the selected shape and automatically fills the material with as many as possible . This function can also be used to cut multiple shapes from the Queue . SPEED: 4 SPEED: 4 PRESSURE: 2 PRESSURE: 2 12"x12" 12"x12" Cardstock L Cardstock L ADD TO FAVS ADD TO FAVS Outline Outline Shadow Shadow Pieces Pieces SIZE 1.00" QTY: 1 SIZE 3.00"... -
Page 18: Mirror
BEYOND THE BASICS FUNCTION KEyS Pressing Mirror key once = ON Mirror displays the selected design or font in reverse . Pressing again = OFF SPEED: 4 SPEED: 4 SPEED: 4 PRESSURE: 2 PRESSURE: 2 PRESSURE: 2 12"x12" 12"x12" 12"x12" Cardstock L Cardstock L Cardstock L ADD TO FAVS ADD TO FAVS ADD TO FAVS Solid... -
Page 19: Load/Unload
BEYOND THE BASICS FUNCTION KEyS Load/ Unload loads or unloads the Cutting Mat into or out of Machine using the Keypad . you can also load/unload Cutting Mat using the button on front right side of Machine. Last Pt. realigns the Cutting Blade at the last point before Cutting Mat was unloaded . Reload the Cutting Mat, press Last Pt. and the blade will align to begin cutting the next shape at the point where it ended . This function optimizes the use of the cutting material . Repeat stores the last shape that was cut into the Queue . SPEED: 4 SPEED: 4 SPEED: 4 PRESSURE: 2 PRESSURE: 2... -
Page 20: Advanced
ADVANCED ADvANCED Beyond the basic and intermediate settings, the advanced settings provide more access and more control to Speed, Pressure and Laser settings, as well as allow Cut Preview . Please note: material option will change to Custom on the screen as material settings are manually changed . SPEED SETTINGS For even more control of cutting various materials, the Speed Option allows manual adjustment of cutting speed to produce the best result . Higher number = Faster SPEED: 4 SPEED: PRESSURE: 2 cutting speed. 12"x12" Cardstock L Lower number = slower ADD TO FAVS cutting speed. SIZE 3.00" QTY: 1 SIZE 3.00" QTY: 1 to select speed options to change speed 1-9... -
Page 21: Adjusting For The Perfect Cut
ADVANCED ADJUSTING FOR THE PERFECT CUT To make cutting easy, the Machine has preset adjustments for various materials that may be selected . Choose a material, and the Pressure and Speed are automatically adjusted for you . However, since there are so many options of material thicknesses, the Machine gives you the ability to manually adjust settings for the perfect cut (see pg . 20 for details) . We suggest that you begin with the preset options and do a test cut on a similar weighted material . Some other general cutting guidelines to keep in mind: • If material wrinkles as it cuts, then Speed should be manually set at a slower, lower number . Material will also wrinkle if Cutting Mat has lost its adhesion . In this case, replace the Cutting Mat . • If material is not cutting all the way through, try increasing Pressure or Blade Depth number . • If material appears scraped or bruised near Blade, try decreasing Pressure . • If shape being cut is simple, try increasing Speed . • If shape is highly detailed, try decreasing Speed . • Adjust the Blade Depth for a deeper or shallower cut (see pg . 6 for details) . • For optimal results, try a test cut first and make necessary adjustments to settings before making final cut . -
Page 22: Blade & Material Positioning
ADVANCED Up Vertical BLADE & MATERIAL POSITIONING The Blade Positioner Control (shown here) controls the positioning Left Right of the Cutting Blade in the four directions indicated . Horizontal Horizontal Top left corner of material must be perfectly aligned to top left corner of Cutting Mat for Down Vertical blade guidance system to work properly. To move slowly, press and hold directional arrows . To move quickly, press twice quickly and hold . -
Page 23: Laser Setting
ADVANCED LASER SETTING This option allows further customizing of material size . Use this option when cutting an odd-sized (i .e ., scrap) piece of material or when wanting to confine a design to one area of the material . Just input top left corner and bottom right corner of area to be cut . The Machine will now stay within this area . SPEED: 7 Blade Holder PRESSURE: 4 12"x12" CUSTOM ADD TO FAVS 12"x12" 8 1/2" x 11" 8"x8" 6"x6" SIZE 3.00" QTY: 1 12"x24" Laser Point Dimensions to select Laser Dimensions Laser for more options;... -
Page 24: Frequently Asked Questions
FREQUENTLY ASKED QUESTIONS FrEQuENTLy ASKED QuESTiONS • What types of materials does the eclips Machine cut? The eclips is designed to cut a wide range of materials – from paper, vinyl, construction paper, cardstock (light, medium and heavy), adhesive cardstock (light, medium and heavy), vellum and light chipboard . • What is the cutting range of the eclips? The eclips cuts thousands of shapes ranging in sizes from approximately .01" ( .025cm) to 24" (61 .0cm) . The Cutting Mats allow you to cut paper sizes up to 12" x 12" (30 .5cm x 30 .5cm) or 12" x 24" (30 .5cm x 61 .0cm) . • How long does an eclips Cutting Blade last? Each Cutting Blade typically lasts for 2,500 inches (6,350cm) worth of cuts, depending on the types of materials cut . -
Page 25: Maintenance
Always unplug Machine before removing or installing Blade Holder. After prolonged use, the Cutting Blade may not cut as it once did and may be in need of cleaning . To help prolong the life of the Cutting Blade, remove it from Blade Holder and clean with Isopropyl alcohol (rubbing alcohol) poured onto a clean paper towel . Remove any material fragments collected inside Cutting Blade Holder by using Blade Pick from optional Tool Kit . Visit Sizzix .com to see complete selection of accessories . ADJUSTING THE CUTTING BLADE DEPTH CAUTION: CUTTING HAZARD Blade is sharp, handle with care. WARNING: CHOKING HAZARD Small parts. Keep away from children. -
Page 26: Cleaning The Machine
MAINTENANCE CLEANING THE MACHINE CLEANING yOUR ECLIPS SySTEM COMPONENTS CAUTION: Always unplug Product before cleaning. CLEANING THE MACHINE Over time, and due to normal use, the Machine may become dirty or dusty . To clean, use only Isopropyl alcohol (rubbing alcohol) poured onto a clean paper towel . Do not pour liquid onto the Machine . Rub over the Machine Cover and Cutting Blade Track until it evaporates . Remove any material fragments col- lected around the Cutting Blade and Blade Track . Use cotton swabs to get into areas the paper towel doesn’t reach . With clean, dry paper towel, wipe off any residue . It is a good idea to clean the Machine every time the Cutting Mat is changed . Never use bleach, solvents or abrasive cleaners on the Machine . CLEANING THE CUTTING MAT Use the Spatula, available separately, to remove debris from the Cutting Mat and maintain the sticking ability of the Cutting Mat surface . -
Page 27: Troubleshooting
• Problem: Material keeps shifting from its original position during cutting. Try this: If your material is no longer adhering to the Cutting Mat, it is time to replace the Cutting Mat . Or this: If you are using a material that has an adhesive side covered by a protective, slippery backing, turn it with the adhesive side facing up so that the material can better adhere to Cutting Mat . Be sure to use Mirror feature to reverse artwork to proper orientation . • Problem: eclips system will not turn on. Try this: Unplug system from wall outlet before troubleshooting . Make sure all components and connectors are plugged in properly (see pg . 6) . When everything is connected, plug system into wall outlet and press power ON . • Problem: Nothing shows on Handheld Remote Control screen. Try this: Make sure power is off and the USB cable is plugged into the Handheld Remote Control and Machine . -
Page 28: End User License Agreement
Ellison Educational Equipment, Inc., doing business as to you in this Agreement. No right to use Sizzix, eclips Sizzix (“Sizzix”) is willing to grant to you a license to use or any other brand of Ellison Educational Equipment is the eclips™... -
Page 29: Warranty
RIGHTS, AND YOU MAY ALSO HAVE OTHER determined to be defective. If Sizzix elects to replace the RIGHTS WHICH VARY FROM STATE TO STATE. product after this Labor Warranty has expired but while... - Page 30 WARRANTIES SHALL BE LIMITED TO THE covers manufacturing defects in material and workmanship DURATION OF THE EXPRESS WARRANTY in the hardware components of your eclips design and/or SET FORTH ABOVE. SOME STATES DO NOT font cartridge (the “Product”). ALLOW THE EXCLUSION OR LIMITATION OF...
-
Page 31: Notes
NOTES NOTES... - Page 32 ©2010 Ellison Educational Equipment, Inc. All rights reserved.
Need help?
Do you have a question about the Eclips and is the answer not in the manual?
Questions and answers