Peg-Perego Primo Viaggio Sip Owner's Manual
Side impact protection
Hide thumbs
Also See for Primo Viaggio Sip:
- Instructions for use manual (93 pages) ,
- Owner's manual (47 pages)
Table of Contents
Advertisement
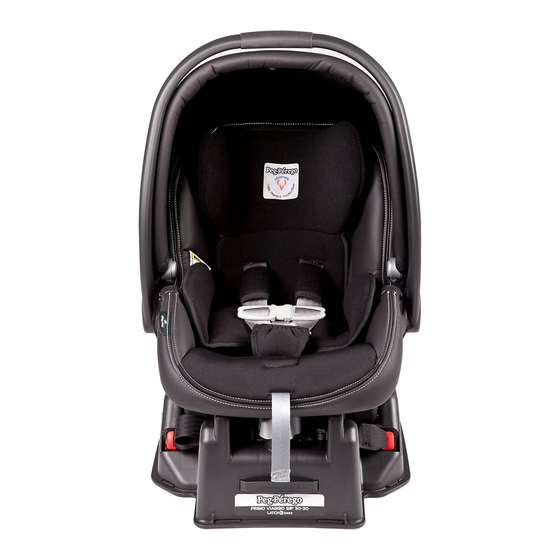
PRIMO VIAGGIO SIP
Side Impact Protection
WARNING:
Do not install or use this Infant restraint
until you read and understand all
instructions in this manual. To avoid
serious injuries to your baby, follow the
instructions carefully and be sure to
buckle your baby using the
5-point harness.
O W N E R ' S
M A N U A L
Infant Requirements:
Weight:
From 2,3 kg (5 pounds) up to 10 Kg
(22 pounds)
Maximum height: 76 cm (30 inches)
FICA1001I140
CANADA
Instructions for use EN
(IMMI)
Advertisement
Table of Contents

Related Manuals for Peg-Perego Primo Viaggio Sip


Summary of Contents for Peg-Perego Primo Viaggio Sip
- Page 1 CANADA Instructions for use EN (IMMI) PRIMO VIAGGIO SIP Side Impact Protection O W N E R ’ S M A N U A L WARNING: Infant Requirements: Weight: Do not install or use this Infant restraint From 2,3 kg (5 pounds) up to 10 Kg...
-
Page 2: Table Of Contents
Table of Contents Before You Start Installing the Car Seat on the Base Customer Service Installing the Car Seat without the Base Registration Form Installing the Seat with Different Types of Seat Belts Safety How to Buckle Your Baby into the Safety Rules Car Seat Your Car Seat... -
Page 3: Before You Start
Before You Start Please read this manual carefully. Keep this manual in the plastic pocket on the base of the Infant car seat. Review car seat parts and read through instructions. Also read the labels. Read and understand all instructions before using this car seat. Fill in and return the registration card (see page 4). -
Page 4: Customer Service
Registration Form Customer Service Important! Infant restraints could be Call Peg Perego CANADA customer service at 1-800-661-5050 (toll free) recalled for safety reasons. You must for information about repairs or spare register this restraint to be reached parts. If any part is missing or damaged, in a recall. - Page 5 Safety Warning unit (read your vehicle owner’s manual for instructions on where to install an • This car seat meets or exceeds all infant car seat in your vehicle). applicable Canada Motor Vehicle Safety Standard 213.1 requirements for use in motor vehicles and aircraft. •...
-
Page 6: Registration Form
LATCH (Lower for more information. Anchorages and Tether for infants). • Do not use Primo Viaggio SIP with • Always buckle your baby into the bases manufactured before July car seat with the harness. Be sure to 2006. -
Page 7: Safety Rules
Safety Rules • Use only with infants who weigh • Do not place car seat on countertop, between 2.3 and 10kg (5 and 22 table, or soft surfaces. pounds) and whose height is 76 cm • Never leave your baby alone in the (30 inches) or less. -
Page 8: Your Car Seat
Your Car Seat 5-POINT HOOD HARNESS SYSTEM Chest harness clip Harness latch plate Harness buckle FRONT BACK Release lever Seat handle Side Impact Head protection Harness strap Anchor buckles Slide adjuster Seat pad for infant Harness adjuster button Harness adjuster strap... -
Page 9: Your Car Seat Base
Your Car Seat Base SIDE LOCKING CLIP STORAGE Belt slots with Level indicator anti-slip rubber pads FRONT BACK Level knob Lower connector system hereinafter Locking clip referred to as LATCH strap Anchor latches Instruction Manual book pocket... -
Page 10: Travel System
Travel System Duette SW Pliko P3 Sì Triplette SW Seat Aria Twin 6040 - Aria Pliko Switch Vela GT3 ForTwo - GT3 Skate System Base... -
Page 11: Serial Numbers
Serial Numbers The following information can be found under the front of the seat of the Primo Viaggio Sip: product name, production date and serial number. Buckle production date. Harness production date. In the event of problems with the product, these details will be of use to customers. -
Page 12: Installation Instructions
Installation Instructions Peg Perego Primo Viaggio Sip is certified for use with or without the base. Use of the base is highly recommended because it makes installation easier and therefore safer. It is also certified for use on aircraft with... -
Page 13: Installing The Base
Installing the Base When using Primo Viaggio Sip with its base, first you install the base, and then you install the car seat on the base. Important! Read your vehicle manual for instructions on where to best install an Infant car seat in your vehicle. -
Page 14: How To Install The Base Using The
I - How to Install the Base Using the LATCH SYSTEM Install the base with your vehicle parked on level ground. 1• Take the car seat off the base by moving the handle to the upright position. Place your hand on the top of the seat back and pull up on the handle with your fingers. - Page 15 3• Remove the two anchor latches from their storage housings. The latches are on the sides of the base. First loosen the latch strap by pressing on the gray button and pulling the strap as shown. Then press the red button on top of the latch and pull the latch out of its housing.
- Page 16 5• Make sure that the latch strap is threaded flat against the base. 6• Tighten the base against the seat by pulling the free end of the latch strap. Press down on the base with your body weight and tighten further.
-
Page 17: How To Install The Base Using Your
II - How to Install the Base Using Your VEHICLE SEAT BELT Important! Not all seat belts work the same way. To make sure that the infant car seat is properly installed using your seat belts, read your vehicle owner’s manual. It will suggest proper placement of an infant car seat in your particular vehicle. - Page 18 3• Thread the lap belt through the slots on the base and lock the latch plate into the buckle as shown. 4• Pull the strap to tighten the seat belt. Press down on the base with your body weight and pull the strap tighter.
-
Page 19: Installing The Base With Different
Installing the Base with Different Types of Seat Belts Primo Viaggio Sip is designed for use with lap or lap/shoulder seat belts. Four of the most common types are listed below. Please read your vehicle manual for instructions on installing an infant car seat using your vehicle seat belts. - Page 20 If not, read your vehicle an emergency (ELR), do not use it manual for specific instructions. to secure the Primo Viaggio SIP car seat. Please consult a certified infant Passenger Safety Technician for other IV Different Types of Lap Belts installation options.
-
Page 21: How To Install The Locking Clip
How to Install the Locking Clip To install the locking clip, hold the shoulder strap and lap belt together just above the buckle. Unbuckle the belt while holding the straps. Hook the locking clip around both straps as shown. Leave 13 mm (1/2 inch) space between the clip and latch. - Page 22 Different Types of Vehicle Seat Belts Important! Do not install this car seat on seats with: A Lap/motorized shoulder belts. B Belts mounted on the door. C Side-facing seats. D Rear-facing seats or seats that rotate. For your infant’s safety, always read your vehicle manual for instructions on installing infant car seats.
- Page 23 Installing the Car Seat on the Base Now that you have installed the base in your vehicle, you are ready to install the car seat on the base. 1• H olding the car seat by the handle, press it rear facing on the base until you hear the click.
- Page 24 2• Rotate the handle forward towards the car seat backrest as shown in the figure.The correct forward position is reached when it clicks into position. Any other position may injure your baby in an accident. To rotate the handlebar, press each of the round buttons (located on each side of the handle where it attaches to the seat) and rotate it to...
-
Page 25: Installing The Car Seat Without The Base
Please, use and install Primo Viaggio Sip without the base only if needed. Park the vehicle on level ground. 1• Adjust the restraint on the seat. - Page 26 Warning! If you cannot get the belt tight enough, refer to your vehicle manual for instructions on how to secure the seat using the type of seat belt in your vehicle. Your baby is not safe riding in a loose car seat. 3•...
- Page 27 19 and 20. Should your vehicle belt need a locking clip, please refer to page 21 for installation details. Illustration in this page shows the completed installation. Primo Viaggio Sip should not be installed on seat types shown on page 22.
- Page 28 How to Buckle Your Baby into the Car Seat This restraint uses a 5-point harness system to secure your baby into the car seat. See illustration on page 8. 1• P ush the red buckle button to release the harness. Press and hold the harness adjuster button while pulling the shoulder straps out.
- Page 29 3• Insert both latch plates into the buckle until you hear them click. Pull on straps to make sure that both plates are latched securely. (Note: You may need to adjust the shoulder height. See How to Raise or Lower the Shoulder Straps on page 33).
- Page 30 5• To undo the chest clip, press the buttons on the side of the clip and pull apart as shown. 6• To undo the latch plates, press the red button and pull the latches up.
- Page 31 7• Adjust the chest clip to the arm pit level. To tighten the harness, pull the adjuster strap at the bottom of seat until strap is snug. Make sure you leave one finger width between the harness and your baby’s collar bone. Tuck the loose end of the adjuster strap under the seat padding.
- Page 32 9• As your baby grows, you may need to lengthen the shoulder straps. This is done by moving the harness straps to the second position on the slide adjuster as shown. Important! A snug strap should not allow any slack. It lies in a relatively straight line without sagging.
-
Page 33: How To Raise Or Lower The Shoulder Straps
How to Raise or Lower the Shoulder Straps Primo Viaggio Sip is fitted with a new and innovative feature to make strap adjustment easy and safe. Removing the shoulder strap and threading through the slots is not required anymore. 1• To raise or lower the harness strap,... - Page 34 2• T he correct position is when the shoulder strap slot is located just below shoulder level, as shown. Important! This restraint is designed for infants up to 76 cm (30 inches) in length. The top of the infant head should not exceed the top of the seat back.
-
Page 35: Using The Car Seat Outside The Vehicle
Using the Car Seat Outside the Vehicle This unit can be used as an infant seat. The special shell shape is designed for rocking your baby. The hood provides shade for your baby. 1• To rock your baby, move the handle into the up position as shown. - Page 36 2• To attach the hood, push the hood latch into the slot on the seat shell as shown. To open the hood, pull the frame until it clicks open. 3• To adjust the hood position, simply push into the desired position. 4•...
- Page 37 5• Carrying handle for Base. Warning! Do not use with the seat attached to the base. Warning! Do not use as a means of transporting infant.
- Page 38 How to Use the Car Seat on Aircraft without Base This unit is certified for aircraft use. 1• Position the restraint on the seat, adjust the handle so it rests at the top edge of the car seat as shown. Any other position may injure your baby in an accident.
- Page 39 How to Use the Car Seat on Aircraft with Base This unit is certified for aircraft use. 1• B uckle the base to the aircraft seat using the lap belt as shown. A secondary belt path can also be used as shown in Fig.
- Page 40 move it more than 2,5 cm (1 inch), tighten the belt further. Position the car seat rear facing over the base. Press the seat into the base until you hear the click. Make sure the seat is correctly locked in place. Important! Follow the harness instructions beginning with “How to Buckle Your Baby into the Car Seat”...
-
Page 41: Cleaning And Maintenance
Cleaning and Maintenance This unit needs minimal maintenance. • Keep all moving parts clean. Lubricate with light oil, if necessary on moving parts. • Clean the plastic parts often with a damp cloth. Do not use solvents or harsh products. •... - Page 42 How to Wash the Chair Padding - Cover removal 1• T o remove the safety seat harness: • Press the harness adjuster button in the centre of the seat to extend the safety harness straps; • Press the red button on the crotch strap buckle to release the harness; •...
- Page 43 • Unscrew the two headrest screws with a screwdriver, press the teeth on the slots and pull the headrest to release it. 3• To remove the padding: • Slide off the four padding fixing tabs from the edge of the safety seat; • Remove the two side guide covers for the car seat belt;...
- Page 44 How to Wash the Chair Padding - Refitting 1• T o refit the padding: • Slide on the padding; • Insert the four padding fixing wings on the edge of the safety seat; • Reposition the harness adjuster button cover in the centre of the safety chair and engage it from under the chair;...
- Page 45 with the headrest. • Screw on the headrest and replace the cover. 3• To refit the safety harness: Important! make sure the straps are not twisted. • Insert the harness braces from the front of the safety seat, first through the shoulder covers and then through the headrest slots, attaching them to the metal buckle at the back of the safety seat;...
-
Page 46: Replacement Parts
Replacement Parts 1) BSAPVS• 2) SPST6491GR 3) SPST6341DGR 4) SPST6341SGR 5) SAPI5714GR 6) BCAUNI• 7) MUCI0055GR 8) BAKUNI• 9) SPST6160KGL 10) SAPI6475NFGR 11) IAKADSCANF NOTE: Spare parts available in different colors* to be specified when ordering. NOTE: This rear-facing only car seat does not require a tether strap.
Need help?
Do you have a question about the Primo Viaggio Sip and is the answer not in the manual?
Questions and answers