Peg-Perego Primo Viaggio SIP Convertible Instructions For Use Manual
Hide thumbs
Also See for Primo Viaggio SIP Convertible:
- Instructions for use manual (52 pages) ,
- Instructions for use manual (128 pages)
Table of Contents
Advertisement
Quick Links
- 1 Installing Your Child Restraint in a Vehicle
- 2 Weight and Dimension Range
- 3 Proper Levelling of Child Restraint in Rear Facing Mode
- 4 Rear Facing Mode Using Latch System
- 5 Forward Facing Mode Using Latch System
- 6 Forward Facing Mode Using Lap/Shoulder Belt (Type II)
- 7 Cleaning and Maintenance
- Download this manual
See also:
Instructions for Use Manual
WARNING:
Do not install or use this child restraint
until you read and understand all
instructions in this manual. To avoid
serious injuries to your child, follow
the instructions carefully and be sure
to buckle your child using the 5-point
harness.
Weight limits in
rear-facing mode:
2.3 - 20.4 kg (5 - 45 lbs)
Maximum height:
119 cm (47 inches)
Instructions for use EN
FICA1202I141
65
Weight limits in
forward-facing mode:
10 - 30 kg (22 - 65 lbs)
Maximum height:
125 cm (49 inches)
CA
Advertisement
Table of Contents

Related Manuals for Peg-Perego Primo Viaggio SIP Convertible


Summary of Contents for Peg-Perego Primo Viaggio SIP Convertible
- Page 1 Instructions for use EN FICA1202I141 WARNING: Do not install or use this child restraint Weight limits in Weight limits in until you read and understand all rear-facing mode: forward-facing mode: instructions in this manual. To avoid 2.3 - 20.4 kg (5 - 45 lbs) 10 - 30 kg (22 - 65 lbs) serious injuries to your child, follow the instructions carefully and be sure...
-
Page 2: Table Of Contents
3 - Forward facing mode using lap belt (Type I) ..........36 Installing your child restraint in an aircraft ................. 38 Securing your child in Primo Viaggio SIP Convertible ............40 Securing your child in Primo Viaggio SIP Convertible (Crotch strap adjustment)..45 Cleaning and maintenance ......................47 Replacement Parts..........................52 ©... -
Page 3: Introduction
Introduction Thank you for choosing a PegPerego Primo restraint in sight, checking every point and Viaggio SIP Convertible. As with any other understanding it. Install the child restraint in PegPerego product, your Convertible has your vehicle taking the necessary time and been designed and certified by a dedicated making fitting trials before using it with your team of engineers inside Peg Perego... - Page 4 Introduction Should you see any malfunctioning feature, after taking the necessary familiarization or if you see broken parts, do not hesitate to call Peg Perego Canada customer service at 1-800-661-5050 (toll free) for information about repairs or spare parts. Now that you know your new Primo Viaggio SIP Convertible, you are ready to enjoy safe and happy journeys with your family and your...
-
Page 5: Warning
• Use Primo Viaggio SIP Convertible in rear in this manual and the labels on the product. facing mode with children weighing 2,3 - 20,4... - Page 6 Warning owner’s manual for further details. case of accident: if this car seat is involved • When using Primo Viaggio Convertible in rear in a car accident, it may be no longer safe facing mode, never place it in vehicle seats for use.
-
Page 7: Safety Information
Safety information • Use only with children who weigh between countertops, tables or soft surfaces. Do not 2.3 and 30 kg (5 and 65 lbs). use this unit after seven (7) years from the • When placing your child in the seat, make date of production labelled on the seat. -
Page 8: Registration Form
Registration form Important! Child restraints could be recalled Model number, model name, date of for safety reasons. You must register this manufacturing, etc. are indelibly printed on a restraint to be reached in a recall. Send your label located in the picture shown here. name, address and the restraint's model number and manufacturing date to: Peg Perego Canada, Inc. - Page 9 Registration form Harness serial number is also indelibly printed on the buckle and the webbing and could provide useful information in case of accident or defects. See picture below for location explanation. - 9 -...
-
Page 10: Your Child Restraint
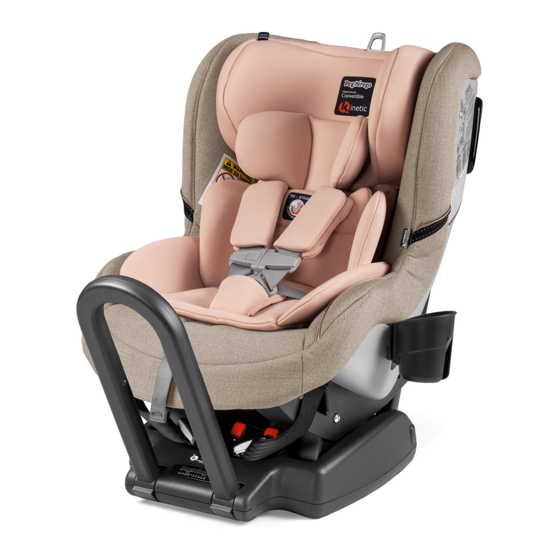
Your child restraint Headpad adjustment strap EPS padded head panel Rebound 5 point harness Shoulder pads Chest clip Newborn ller cushion Locko clip Buckle Base Recline handle Harness release button Latch Top tether Instruction connector strap manual pocket Adjuster strap - 10 -... -
Page 11: Installing Your Child Restraint In A Vehicle
. buses . motorcycles . three - wheeled vehicle . trucks Vehicle seatbelts design and compatibility Primo Viaggio SIP Convertible is designed to be installed with vehicle belts commonly fitted on most of the available cars. However, in the market there are several different types of vehicles manufactured in different periods. - Page 12 Vehicle seatbelts design and compatibility 1. Lap/shoulder belt (3-point) with Automatic Locking Retractor (ALR) and free sliding latch plate. This type of seat belt has a latch plate that moves freely along the belt. To activate ALR retractor for child restraint installation, some vehicle models may require to pull the belt all the way out;...
- Page 13 Vehicle seatbelts design and compatibility Lap/shoulder belt (3-point) with Emergency Locking Retractor (ELR) and with a locking latch plate. This type of belt can be adjusted by pulling/releasing the strap at the latch plate adjuster. Please refer to your vehicle owner’s manual for details. - 13 -...
- Page 14 Vehicle seatbelts design and compatibility 3. Lap/shoulder belt (3-point) with Emergency Locking Retractor (ELR) and free sliding latch plate. This type of seat belt has a latch plate that moves freely along the belt; it will only lock in an emergency (sudden stop or crash) so you must use a Locking Clip to secure this type of belt.
- Page 15 Vehicle seatbelts design and compatibility 4. Lap belt (2-point) with Automatic Locking Retractor (ALR). This type of seat belt has a latch plate that is sewn to the end of the belt. To activate ALR retractor for child seats installation, some vehicle models may require to pull the belt all the way through;...
- Page 16 Vehicle seatbelts design and compatibility 6. Lap belt (2-point) with a locking latch plate. This type of belt can be adjusted by pulling/releasing the strap at the latch plate adjuster. Some vehicles may have seatbelts with large rigid buckles. These designs may cause the installation to be troublesome and affect stability of the child restraint during normal use.
-
Page 17: Non Compatible Vehicle Seat Designs
Vehicle seatbelts design and compatibility 2. Side facing seats NON COMPATIBLE VEHICLE SEAT DESIGNS WARNING: do not use Primo Viaggio SIP Convertible with the following vehicle belt design: 1. Lap/motorized shoulder belts. Belts mounted on the door 3. Rear facing seats or seats that rotate in different positions For your child’s safety, always read your vehicle... -
Page 18: Weight And Dimension Range
Installing your child restraint in the vehicle WEIGHT AND DIMENSION RANGE REAR FACING MODE • Use rear facing with children who weigh between 2.3 and 20.4 kg (5 - 45 lbs); and whose maximum height is 119 cm (47 inches). •... -
Page 19: Proper Levelling Of Child Restraint In Rear Facing Mode
Installing your child restraint in the vehicle PROPER LEVELLING OF CHILD RESTRAINT IN REAR FACING MODE When properly installed according to the following sections, the child restraint used in rear facing mode should have a backrest angle of 35° - 45° from vertical. If it is not possible to reach such angle, use a pool noodle or a rolled towel to further recline the seat. -
Page 20: Use Of Top Tether Strap
Installing your child restraint in the vehicle USE OF TOP TETHER STRAP 1. The top tether is a strap attached at the top of the Primo Viaggio SIP Convertible shell equipped with a hook and an adjuster. When used in forward facing mode,... - Page 21 Installing your child restraint in the vehicle 2. To use top tether, open the plastic pouch, detach the hook from its rear attachment pressing on adjuster button in order to lengthen the strap to the required length. When not in use, keep the tether attached to the shell, in order to prevent injury hazard to your child or other occupant due to a metal part free to move inside the vehicle interior.
- Page 22 Installing your child restraint in the vehicle 3. The tether is used to prevent excessive rotation in an impact in forward facing mode, thus reducing the risk for the child to impact objects in front of him. Attach the tether hook to the designated tether anchor and pull the free strap until the tether is fully tensioned and free of any slack.
- Page 23 Installing your child restraint in the vehicle 4. Attach the tether to the designated tether anchor and pull the free strap until the tether is fully tensioned and free of any slack. Picture shows the tether anchor located on the back of the seat.
-
Page 24: Rear Facing Mode Using Latch System
Installing your child restraint in the vehicle REAR FACING MODE USING LUAS STRAPS 1. Recline the child restraint to the rearfacing position as shown in the picture. To recline the child restraint, pull the handle located below the front edge of the shell (A)as shown in detail. - Page 25 Installing your child restraint in the vehicle 5. Attach the lower connectors to the lower anchors of your vehicle located at the joint line between seat and backrest. Check your vehicle owner’s manual to learn what is the best place for your child restraint. When the LUAS straps are connected to the lower anchors, an audible click will be heard.
- Page 26 Installing your child restraint in the vehicle IMPORTANT NOTE Unless where specified differently, lower anchors (LUAS) may be used for a child whose weight is less than 18 kg (40 lbs). However most car lower anchors can withstand much greater forces. Please, check your vehicle owner’s manual or contact the vehicle manufacturer in order to determine what the weight limit is for...
-
Page 27: Rear Facing Mode Using Lap/Shoulder Belt (Type Ii)
Installing your child restraint in the vehicle REAR FACING MODE USING LAP/ SHOULDER BELT (TYPE II) 1. Recline the child restraint to the rearfacing position as shown in the picture. To recline the child restraint, pull the handle located below the front edge of the shell (A) as shown in detail. - Page 28 Installing your child restraint in the vehicle 4. Buckle the vehicle belt and check under the seat that the adjuster strap is not entangled with the vehicle seat belt. 5. Push the child restraint firmly into the vehicle seat and pull the vehicle belt in order to eliminate any slack.
-
Page 29: Rear Facing Mode Using Lap Belt (Type I)
Installing your child restraint in the vehicle REAR FACING MODE USING LAP BELT (TYPE I) 1. Recline the child restraint to the rearfacing position as shown in the picture. To recline the seat, pull the handle located below the front edge of the shell (A) as shown in detail. An audible "click"... - Page 30 Installing your child restraint in the vehicle 4. Under the seat that the adjuster strap is not entangled with the vehicle seatbelt. 5. Push the seat firmly into the vehicle seat (1) and pull the vehicle belt (2) in order to tighten the seat, eliminating any slack.
-
Page 31: Forward Facing Mode Using Latch System
Installing your child restraint in the vehicle Important! Remove newborn filler cushion in forward facing mode (see page 46). Important! Do not use rebound bar in forward facing mode. FORWARD FACING MODE USING LUAS STRAPS 1. Recline the child restraint pulling the handle located below the front edge of the shell (A) as shown in detail. - Page 32 Installing your child restraint in the vehicle 4. Attach the lower connectors to the lower anchors of your vehicle located at the joint line between seat and backrest. Check your vehicle owner’s manual to learn what is the best place for your car . When the LUAS straps are connected to the lower anchors, an audible click will be heard.
- Page 33 Installing your child restraint in the vehicle IMPORTANT NOTE Unless where specified differently, lower anchors (LUAS) may be used for a child whose weight is less than 18 kg (40 lbs). However most vehicle lower anchors can withstand much greater forces.
-
Page 34: Forward Facing Mode Using Lap/Shoulder Belt (Type Ii)
Installing your child restraint in the vehicle WARNING: Do not use lockoff clips in forward facing mode for children whose weight is less than 11 kg (25lbs). Important! Remove newborn filler cushion in forward facing mode (see page 46). Important! rebound forward facing... - Page 35 Installing your child restraint in the vehicle 5. Push the child restraint firmly into the vehicle seat and pull the vehicle belt in order to tighten the child restraint, eliminating any slack. Follow the procedure shown in the picture making sure that while the seat is pushed down (A), the lap portion of the belt is pulled from the fixed point toward the buckle (B).
-
Page 36: Forward Facing Mode Using Lap Belt (Type I)
Installing your child restraint in the vehicle Important! Remove newborn filler cushion in forward facing mode (see page 46). Important! Do not use rebound bar in forward facing mode. FORWARD FACING MODE USING LAP BELT (TYPE I) 1. Before installing the child restraint in the vehicle, make sure that the backrest is in the upright position or adjust it using the handle located below the front edge of the shell (A) - Page 37 Installing your child restraint in the vehicle 5. Push the child restraint firmly into the vehicle seat (A) and pull the vehicle belt (B) in order to tighten the seat, eliminating any slack. 6. Make sure that the belt passes through the opened lockoff clips and then close them on both sides following the procedure shown in picture (C and D).
-
Page 38: Installing Your Child Restraint In An Aircraft
FAA regulations. However, due to the size and weight of the Primo Viaggio SIP Convertible, it is recommended that airline is contacted for further information prior to booking or flight. Aircraft seatbelts are waist only type (Type I belt). - Page 39 Installing your child restraint in an aircraft 2. Installation in forward facing mode: please refer to page 36 for proper belt fit. Use of lockoff clips is not required. After installation make sure that the child restraint is properly levelled and safely firm on the aircraft seat.
-
Page 40: Securing Your Child In Primo Viaggio Sip Convertible
Securing your child into the child restraint 1. This child restraint uses a 5 point harness system to secure your child. Before placing your child in the seat, push the release button (A) and pull the shoulder straps (B) as shown in the picture. - Page 41 Securing your child into the child restraint 4. Put your child in the child restraint with his/ her bottom and back flat against the child restraint. Bring the two shoulder straps over your child’s shoulders. Make sure that the straps are not twisted behind the backrest or over your child’s chest.
- Page 42 Securing your child into the child restraint 6. To adjust the shoulder strap level, from bottom to top, pull the arrow strap located on top of headrest until the panel is disengaged and able to move. Once the desired position is reached, make sure that the panel is properly latched.
- Page 43 Securing your child into the child restraint 8. The harness is equipped with a chest clip. This device is used in order to guarantee that the shoulder harness is positioned correctly shoulder, preventing the risk of the straps falling down the shoulder in an accident.
- Page 44 Securing your child into the child restraint 10. When the harness is tightened, check that the chest clip is at arm pit level. If necessary remove the shoulder pads (attached with Velcro) as they are not considered as safety features. Important! A snug strap should not allow any slack.
-
Page 45: Securing Your Child In Primo Viaggio Sip Convertible (Crotch Strap Adjustment)
Securing your child into the child restraint CROTCH STRAP ADJUSTMENT 12. Your Primo Viaggio SIP Convertible is equipped with a repositionable crotch strap. The child restraint is assembled with the crotch located in the forward position (A). However, for children up to 10 kg (22 lbs), the crotch strap must be relocated in the rear position (B). - Page 46 Securing your child into the child restraint 13. To complete the operation, put the soft cover on the crotch in the new position by sliding the buckle through the openings in the upholstery and in the croch protection 14. Important! The seat is supplied with specifically designed...
-
Page 47: Cleaning And Maintenance
Cleaning and maintenance Your child restraint requires a minimum of cleaning and maintenance. Do not clean with harsh products or solvents. Keep moving parts clean. In case, clean plastic parts with a damp cloth. Do not use water with harness and latching mechanisms. Protect it from extreme cold, water, rain and sun exposure. - Page 48 Cleaning and maintenance 2. Remove head panel padding following the procedure (1, then 2). Take care of the soft white EPS insert. 3. Undo the lower part of upholstery and remove it from the crotch strap. The crotch portion of the harness does not need to be removed.
- Page 49 Cleaning and maintenance 5. Check that the adjuster is free of food particles or debris that could prevent correct functioning. 6. Remove the padding from bottom to top making sure that the side impact wings white EPS are not bent or broken in the process. - 49 -...
- Page 50 Cleaning and maintenance 7. To reassemble the upholstery, start from the head panel opening as shown in the sequence. Then put the head panel cover on. Pull shoulder straps up through slots in the bottom of the upholstery. Pull crotch strap through hole in upholstery.
- Page 51 Cleaning and maintenance PADDING CLEANING INSTRUCTIONS Machine wash, max temperature 30°C (86°F). ° - 51 -...
-
Page 52: Replacement Parts
Replacement Parts 1) BSACOB* NOTE: Spare parts available in different 2) BRICOB* colors* to be specified when ordering. 3) MUCI0076GR 4) BAKCOB* - 52 -...
Need help?
Do you have a question about the Primo Viaggio SIP Convertible and is the answer not in the manual?
Questions and answers
Does the recline feature work when the seat is installed in forward facing position? If so can the seat be reclined while the child is in it?