Table of Contents
Advertisement
Advertisement
Table of Contents

Summary of Contents for Beastx Aircraft
- Page 1 Version 3.0 INSTRUCTION MANUAL...
- Page 3 BEASTX A b S O L U T e S T A b L e Version 3.0 INSTRUCTION MANUAL...
-
Page 4: Table Of Contents
CONTENTS CONTeNTS . . . . . . . . . . . . . . . . . . . . . . . . . . . . . . . . . . . . . . . . . . . . . . . . . . . . . . . . . . . . . . . . . . . 4 SAFeTY NOTeS . - Page 5 I Setting the swashplate servo directions ........50 J Teaching the cyclic pitch geometry .
-
Page 6: Safety Notes
SAFETY NOTES Radio controlled (R/C) helicopters are not toys! The rotor blades rotate at high speed and pose potential risk. They may cause severe injury due to improper usage. It is necessary to observe common safety rules for R/C models and the local law. You can gather information from your local R/C model club or from your national modelers association. - Page 7 Radio controlled (R/C) models consist of several electrical components. It is therefore necessary to protect the model from moisture and other foreign subtances. If the model is exposed to moisture this may lead to a malfunction which may cause damage to the model or a crash. Never fly in the rain or extremely high humidity.
-
Page 8: General Information
GENERAL INFORMATION Please note that these instructions are only valid for the MICRObeAST firmware Version 3 .x .x ! The delivered software version is printed on a sticker on the outside of the MICROBEAST packaging. You can also read it out on a computer by using the optional USB2SYS Interface and you can directly read on the MICROBEAST unit during the initialization phase, what firmware version your MICROBEAST is running: The MICROBEAST first carries out a brief LED test by lighting up all menu LEDs simultaneously, and... -
Page 9: Introduction
The included overview map of the setup menu can be taken out to the flying field as a quick reference to the various menu options. Check our website WWW .beASTX .COM where we will inform you about the latest updates and down- loads. -
Page 10: Box Content
2. BOX CONTENT Receiver wiring leads 15 cm Instruction manual MICROBEAST Gyropads Adjustment tool Optional accessories (sold separately) USB-Interface Receiver wiring leads 8 cm Cable for stand-alone tail gyro use Spektrum Adapter... -
Page 11: Mounting And Connection
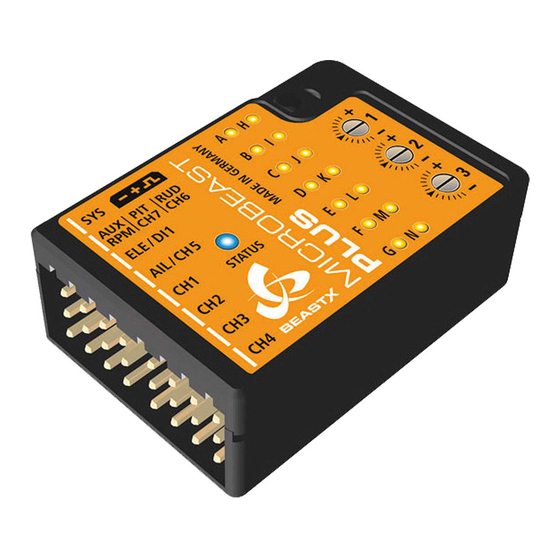
3. MOUNTING AND CONNECTION 3 .1 Mounting the MICRObeAST unit Attach the MICROBEAST unit by using one of the provided gyropads at a preferably low vibrating position on your helicopter such as the gyro platform or receiver platform. You may also need to choose another type of mounting pad depending on the vibration pattern of your helicopter. -
Page 12: Preparing A Transmitter For Flybarless
3 .2 Preparing a transmitter for flybarless (This step is unnecessary when using the MICROBEAST with the optional cable for stand-alone tail gyro use. Please see 4.1.2) First create a new model in your radio‘s model memory. When using the MICROBEAST you have to disable any mixing functions for the swashplate or tail. -
Page 13: Servo Connections And Auxiliary Channels
3 .3 Servo connections and auxiliary channels In slot CH1 is the elevator servo. With electronic swashplate mixing the two roll servos have to be con- nected to CH2 and CH3, with a mechanical mixed head (H1) the roll servo connects to CH2 and pitch servo to CH3. -
Page 14: Receiver Connection
4. RECEIvER CONNECTION In relation to the control of MICROBEAST you have the opportunity to use different types of receivers. It is distinguished between conventional standard receivers and socalled single-line receivers: A standard receiver is a receiver that is connected to the MICROBEAST by using any single servo output of the receiver to connect the five control channels between MICROBEAST and receiver. -
Page 15: Connection Of A Standard Receiver
4 .1 Connection of a standard receiver Fig. 4 4 .1 .1 Flybarless usage Rudder (orange) Pitch (red) Tail Gain (brown) Elevator Aileron Elevator servo Aileron servo 1 Aileron servo 2 / Pitch Tail servo Now plug the receiver cables for aileron, elevator, pitch, rudder and tail gain between the MICROBEAST and the receiver. - Page 16 AUX2 brown AUX1 GEAR JR / Spektrum orange RUDD ReCeIVeR ELEV AILE THRO brown orange FUTAbA ReCeIVeR Abb. 5 The illustrations are only examples. Of course, the MICROBEAST also works with other receivers and remote control systems. Remember that it is not the receiver that is crucial for the channel order but that this depends primarily on the allocation of control functions in the transmitter.
- Page 17 4 .1 .2 Usage as stand-alone tail gyro The MICROBEAST can also be used as high-end stand-alone tail gyro. This requires the use of a special patch cable which can be purchased separately. This ensures that the MICROBEAST is provided with power and that the signals for rudder and tail gain are available from the receiver.
-
Page 18: Use Of Single-Line Receivers
4 .2 Use of single-line receivers The MICROBEAST enables the use of conventional receivers with individual channel outputs or the use of special receivers which output the channel signals as a merged single-line signal. These include Spek trum® satellite receivers, PPM composite signal receiver (e.g. Futaba® SP Series receiver or the satellite receiver from Jeti ®), receivers with Futaba®... - Page 19 4 .2 .2 Spektrum® Satellite receiver To connect a Spektrum® satellite (remote) receiver on the MICROBEAST a special optional adapter is required. This adapter is connected to the [DI1] input of the MICROBEAST. Please observe correct polarity, the orange signal line must be next to the cover. The cable for the Spektrum® satellite receiver is then plugged into this adapter.
- Page 20 binding procedure In the case of using a Spektrum® satellite receiver it is very important to bind the receiver first before programming the MICROBEAST. This step is essential to perform, even if the satellite was already in use elsewhere (e. g. in connection with a “standard” Spektrum® receiver) and was already bound to the transmitter earlier.
- Page 21 hold down button release button Bind Plug DSMX satellite selected DSMX - satellite power supply (either on CH1 - CH5) LED H flashes switch on power supply Bind Plug DSM2 satellite selected DSM2 - satellite power supply (either on CH1 - CH5) LED N flashes Now start bind procedure on...
- Page 22 4 .2 .3 Connecting single line receivers without additional servo outputs (e .g . PPM composite signal receivers) For the connection of PPM composite signal receivers there is usually no special adapter required. In most cases (e.g. Futaba ®-receivers of the SP-series) the receiver can be connected to the MICROBEAST with one of the supplied regular 3-wire cables.
- Page 23 4 .2 .4 Connection of single line receiver with additinal servos connectors (e .g . S-bus, SRXL) Connect the receiver to the MICROBEAST with one of the supplied regular 3-wire cables. Plug the cable into the MICROBEAST input [DI1] and the other to the receiver to the output [S. BUS] or [B | D] ® for Multiplex. Please make sure that the connectors are plugged in with the correct polarity.
-
Page 24: Receiver Type Setup
5. RECEIvER TYpE SETUp Beside using conventional receivers, the MICROBEAST supports the use of different types of sin gle-line receivers. These are receivers which transmit the control signals only over one single cable wiring. If using such a receiver because of the different signal protocols the receiver type must be selected in the receiver menu before the first use and further steps such as allocation of individual channels or failsafe setting are needed. - Page 25 convention: LED lights: LED is flashing: Then press the button, but only briefly, to save the setup and switch to receiver menu point B. If you have already briefly pressed the button by mistake and it did not change the receiver type but switch to menu point B, switch off the power and repeat the above procedure.
-
Page 26: Input Channel Assignments (Receiver Menu Points B - H)
5 .2 Input channel assignments (receiver menu points B - H) If not a standard receiver but a single-line receiver was selected at menu point A, it must be established which control function is controlled by what channel. This is necessary because all the control functions are transmitted via one single line and thus there is no possibility of plugging the cables in each individual channel matching at the receiver. - Page 27 SRXL beASTRX Multiplex transmitter channel function function assignment channel 1 aileron aileron channel 2 elevator elevator channel 3 throttle (CH5) rudder channel 4 rudder pitch channel 5 tail gyro gain throttle (CH5) channel 6 pitch tail gyro gain channel 7 auxiliary (CH6) auxiliary (CH6) If you are on receiver menu point B, please wait until the Status-LED lights blue.
- Page 28 Release button LED N lights Status-LED is flashing LED B lights blue blue Status-LED: Hold button a long time Loading of standard channel assignment Menu point B Menu point N Fig. 12 (Failsafe setting) 5 .2 .2 Teaching of customized channel order If you need a customized channel order, please first prepare (if not already done) your transmitter as described in section 3.2 .
- Page 29 Receiver menu point Function pitch aileron elevator rudder tail gyro gain throttle (CH5) auxiliary (CH6) If you have moved the wrong stick/switch, you can reactivate the correct function again. The MICROBEAST remembers only the last function that was operated and confirms it with blue flashing of the Status-LED. Press the button after learning each function to save the assignment and to go to the next function.
- Page 30 If the Status-LeD stays red, it means that there is no valid remote control signal available. In this case, a channel assignment is impossible! If the Status-LED doesn’t turn blue after a few seconds, check if the receiver is properly bound to the transmitter (bind already done successfully?) and that a receiver of the correct type is selected in receiver menu point A.
-
Page 31: Programming The Failsafe (Receiver Menu Point N)
5 .3 Programming the Failsafe (receiver menu point N) At receiver menu point N you have to program the fail-safe position for the throttle channel. If during ope- ration, the received signal is interrupted, the throttle servo / motor controller (connected to the output CH5) is automatically reset to this fail safe position. -
Page 32: Setup Procedure Overview
6. SETUp pROCEDURE OvERvIEW After powering on the MICROBEAST will initialize. During this phase, do not move the MICRObeAST unit or the helicopter . First the MICROBEAST runs a short LED test and then the firmware version is displayed for 3 seconds. After that, the running LEDs A to G show the calibration of the sensors and the LEDs H to N the initialization of the receiver inputs. - Page 33 Never fly while the MICRObeAST is in one of the setup or parameter menu! In this condition the gyro control and the stick controls are disabled. Operation Mode Menu LEDs: Amount of tail gain A=0% to N=100% (only after powering up or when adjusting the gain) Button: - to enter setup menu push down several seconds until LED A is steady on...
-
Page 34: Setup Menu
6 .1 Setup menu Fig. 16 No Menu LED is on Push button for about 3 seconds Menu LED A steady on Operation mode Setup menu – menu point A 6 .2 Parameter menu Fig. 17 no Menu LED is on Press button shortly Menu LED A is flashing quickly Operation mode... -
Page 35: Example: Selection Within The Menus
6 .3 example: Selection within the menus Status-LED: flashing red purple By moving the tail stick to the left or right, you can select the different options within a menu point. blue flashing blue The number of possibilities depends on the menu point. Fig. -
Page 36: Setup Menu
7. SETUp MENU Before the first flight the MICROBEAST has to be adjusted to your helicopter and the used components. When the MICROBEAST shows that the system is ready, press and hold the button down, the menu LED next to menu point A will begin to flash and then after a while will be steady on. Now and only now you can release the button. -
Page 37: A Mounting Orientation Of The Microbeast
A Mounting orientation of the MICRObeAST The MICROBEAST unit can be mounted in nearly all possible orientations. The only restriction is that the plug connectors have to point in or against flying direction (see chapter 3). At setup menu point A, you have to choose whether the MICROBEAST is mounted horizontally (prin- ted surface 90 degrees to the main shaft) or vertically (printed surface in parallel with the main shaft). -
Page 38: B Swashplate Servo Frequency
You may need to check with the manufacturer of the servos. WWW .beASTX .COM you can find a list of parameters for the most common servos. To optimize the performance of the MICROBEAST, the rule is the higher the better! Nevertheless if you experience an unusually high power consumption of the receiver power supply or if the servos get hot, you should reduce this frequency. - Page 39 To select the desired servo frequency, move the tail stick repeatedly in one direction until the Status-LED lights in the correct color. The option “user defined” allows you to define your own setting with the PC software. The MICROBEAST can be used with nearly all available servo types. However, the selected servos should be adequate for flybarless operation (high torque and also fast and precise).
-
Page 40: C Tail Servo Center Position Pulse Length
The center position pulse-setting always has priority, since a servo can run without problems at a too low frequency but can not be operated with an incorrect center position pulse. WWW .beASTX .COM you can find a list of parameters for the most common servos. The color of the Status-LED... -
Page 41: D Tail Servo Frequency
Analog Servos usually tolerate only 50Hz. Digital servos usually allow higher frequencies, but this has to be verified in the datasheet of the servo. You may need to check with the manufacturer of the servos. WWW .beASTX .COM you can find a list of parameters for the most common servos. - Page 42 The option “user defined” allows you to define your own setting with the PC software. Next attach a servo horn to the tail servo in such a way that the tail linkage rod forms a 90 degree angle to the servo horn (or as close as possible) and then adjust the linkage rod as described in the manual for your helicopter.
-
Page 43: E Setting The Tail Rotor Endpoint
E Setting the Tail rotor endpoint At setup menu point E you adjust the best possible servo throw for your tail rotor. This best throw is determined by the maximum possible control travel of the tail mechanism or based on the maximum allowed angle of attack of the tail rotor blades, that will not lead to an aerodynamic stall of these bla- des. - Page 44 Then adjust the servo limit for the other direction. Drive the tail pitch slider by using the tail stick to the other maximum endpoint and then release the tail stick. After a short moment, the color of the Status-LED should start flashing followed by lightning steady purple, (mix of red and blue) indicating that the servo endpoint adjustment is complete.
-
Page 45: F Setting The Tail Sensor Direction
F Setting the Tail sensor direction Here you have to check if the MICROBEAST‘s tail gyro does compensate into the right direction. At setup point F, you can find this out very easily: The gyro always tries to steer in the opposite direction of the rotation that is applied to the helicopter. If you move the helicopter by hand around its vertical axis, the gyro must actuate a tail servo movement to compensate this rotation. - Page 46 Once again repeat the test as described above. The MICROBEAST should now correct in the right way: wrong correct rotation rotation Fig. 24 Push the button to save the configuration and to proceed to setup menu point G . If using the MICROBEAST as a stand-alone tail gyro with the optional patch cable (see chapter 3.5) you do not have to do any further adjustments within the setup menu.
-
Page 47: G Adjusting The Swashplate Servo Centering
G Adjusting the swashplate servo centering When entering setup menu point G connect all swashplate servos as described in chapter 3.3. They now will be running to their zero position (1520 µs) what we call reference position here when the Status-LED is off. - Page 48 Now adjust the linkage rods according to your helicopter manual. The swashplate should now be at the midpoint and perpendicular to the main shaft and the rotor blades should have 0 degrees of pitch. Always work this out from bottom (servos) to top (blade grips). Fig.
-
Page 49: H Swashplate Mixer
H Swashplate mixer At setup menu point H you can choose the electronic swashplate mixer your helicopter requires or choose “mechanical“ for switching of the electronic swashplate mixer if your helicopter has a mechanical mixer. For the electronic mixer, the MICROBEAST supports 90°, 120° and 140° swashplates. Besides these choices, you can set any swashplate geometry with the PC software and “mechanical“... -
Page 50: I Setting The Swashplate Servo Directions
I Setting the swashplate servo directions At setup menu point I, you adjust the correct swashplate servo directions. To facilitate this setup, you don’t need to adjust every servo by its own, but just try the 4 possible combinations. Move the pitch stick and check if the swashplate moves horizontally up and down. The direction itself is not yet important. -
Page 51: J Teaching The Cyclic Pitch Geometry
J Teaching the cyclic pitch geometry At this setup point J, you have to tell the MICROBEAST the available cyclic pitch range. First don‘t touch any stick on your transmitter when entering setup menu point J. Orientate one of the rotor blades so that it is parallel to the tail boom (Fig. 28). Then attach a pitch gauge to this rotor blade. - Page 52 1. Orientate the rotor blades parallel to the longitudinal axis of the helicopter. Fig. 28 2. Adjust the cyclic pitch to exactly 6 degrees. Move the aileron stick until 6 degrees (+ or -) of cyclic pitch is reached Fig. 29...
-
Page 53: K Adjusting The Collective Pitch Range
K Adjusting the collective pitch range At setup point K you adjust the maximum desired negative and positive collective pitch. Move the pitch stick all the way up and stay there. Now you can increase or decrease the maximum amount of pitch using the tail stick. -
Page 54: L Adjusting The Cyclic Swashplate Limit
L Adjusting the cyclic swashplate limit At setup menu point L you adjust the maximum possible tilting of the swashplate for aileron and elevator. The deflection will be limited in a circular path similar to a cyclic ring function. For adjustment proceed in the following way: Carefully move the sticks for aileron, elevator and pitch to all maximum end points and watch out if the swashpla- te, the linkage rods or servos are binding somewhere or even getting not more driven. -
Page 55: M Setting The Swashplate Sensor Directions
M Setting the swashplate sensor directions At setup menu point M, you check if the sensors for aileron and elevator are working in the correct direction. This can be directly verified in this menu point: If you roll or tilt the helicopter by hand the swashplate has to steer against this movement. - Page 56 Tilt the helicopter forwards The swashplate has to move backwards Fig. 30...
- Page 57 The swashplate has to steer Roll the helicopter to one side to the opposite direction Fig. 31...
-
Page 58: N Setting The Pirouette Optimization Direction
N Setting the pirouette optimization direction When entering setup menu point N the swashplate will tilt forwards or backwards depending on your helicopter‘s setup (servos, linkages,…) this resulting tilt will correspond into a specific com- pass heading. Now grab your helicopter at the rotor head and rotate it on the vertical (yaw) axis by hand. The swash- plate must continue to maintain the same compass heading (see fig. - Page 59 1. Swashplate points to the left 2. Rotate the helicopter around the vertical axis 3. Swashplate must still point left, as before Fig. 32...
-
Page 60: Dials And Tail Gyro Gain
Dial 2: direct cyclic feed forward Dial 3: tail dynamic Fig. 33 To adjust the dials please only use the original plastic beASTX adjustment tool to prevent damage to the dials! 8 .1 Swashplate: cyclic gain (Dial 1) Turn dial 1 clockwise to increase the swashplate gain. -
Page 61: Swashplate: Direct Cyclic Feed Forward (Dial 2)
8 .2 Swashplate: direct cyclic feed forward (Dial 2) Turn dial 2 clockwise to increase the swashplate’s direct cyclic stick feed forward. This is the part of the stick input that is going directly to the servos. If correctly adjusted, this relieves the control loop which will work more efficiently by only having to make residual corrections. -
Page 62: Tail Gyro Gain (Adjusted By The Transmitter)
8 .4 Tail gyro gain (adjusted by the transmitter) As with a conventional tail gyro, the tail gain can be adjusted by one of the transmitter‘s auxiliary channels. In one direction you can select the Normal-Rate mode and in the other direction HeadingLock mode. The color of the Status-LeD indicates the selected mode when the MICRObeAST is ready for operation . -
Page 63: Parameter Menu
9. pARAMETER MENU When the MICROBEAST is ready, hold down the button until the Menu LED next to point A flashes quickly and then release the button. This is how to enter the parameter menu. To switch to the next parameter menu point, just briefly press the button once again. After the last menu point pressing the button one time more exits the parameter menu and the MICROBEAST is ready for flight again. -
Page 64: A Swashplate Cyclic Center Adjustment
A Swashplate cyclic center adjustment The first menu point in the parameters menu gives you the possibility to easily adjust your servo centers on the flying field as for instance your helicopter is wobbling during pirouettes or when it doesn’t climb out straight on quick pitch inputs. Never use the trim functions of your remote control! The MICROBEAST will see trim as a control command and not as servo trim. -
Page 65: B Control Behavior
B Control behavior At parameter menu point B you can choose between different control behaviors for your helicopter. This includes the maximum rotation rate of the helicopter as well as how sensitive the MICROBEAST will react to stick inputs for aileron, elevator and rudder around the stick centre. Factory setting for this option is “sport“! This should be suitable for most pilots. - Page 66 When using the predefined control behaviors we do not recommend to additionally adjust con- trol curves (expo/Dual rates) in your transmitter as this will mix indefinable the preset curves of the Microbeast with the curves of the transmitter . But if you only make little changes (e.g. slightly increasing the servo throw to increase rotation rate) this should be no problem.
-
Page 67: C Swashplate - Pitching Up Compensation
C Swashplate – pitching up compensation While in fast forward flight apply jerky collective pitch inputs to test this function. The helicopter should mainly remain in its horizontal path during climbing and descending. If the nose of the helicopter is pitching up and down heavily like a swimming dolphin, increase the value at parameter menu point C to compensate for this effect. -
Page 68: D Tail Headinglock Gain
D Tail HeadingLock gain At parameter menu point D the HeadingLock gain for the tail can be adjusted: The HeadingLock gain determines how constant the tail will maintain the rotation rate predetermined by the stick (this includes a rotation rate of height 0 = stick center position). Start with the HeadingLock gain set to low or very low and find out the highest possible tail gain in your transmitter. - Page 69 If the tail pirouettes and stops unevenly in both directions, it is recommended to set the tail gyro to Normal-Rate mode in order to test, whether the tail will drift in a particular direction during hover. If it does, adjust the tail link rod length accordingly, so that the tail blades have the required compensation pitch.
-
Page 70: E Stick Deadband
E Stick deadband At parameter menu point E you can adjust the stick dead band for elevator, aileron and rudder. The deadband is the range around the very center of the stick where the MICROBEAST will not react. Unfor- tunately, some on the market available transmitters have the problem that when the sticks are brought back, after an input, to the middle position, they aren’t exactly at the same center position as before. -
Page 71: F Tail - Torque Precompensation (Revomix)
F Tail – torque precompensation (RevoMIX) The advantage of always knowing the pitch and cyclic load on the flybarless system, allows the MICRO BEAST to pre-compensate for the torque variations on the tail before any noticeable deviation. This method of torque pre compensation (RevoMIX) relieves the tail control loop and improves the tail performance especially when using MICROBEAST on helicopters with insufficient tail authority and/or extreme motor torque (well powered electric helicopters). -
Page 72: G Cyclic Response
G Cyclic response With point G can be set how aggressive the MICROBEAST responds to cyclic control commands (roll and pitch). This can reduce the usual uniform and linear control feeling of flybarless systems and approach it to the feeling of a flybared helicopter. If you want to use this feature, start from the “slightly increased“... -
Page 73: H Pitch Boost
H Pitch boost Parameter point H allows you to set up the pitch boost function. This function causes that the faster you move the pitch stick the more additional collective pitch will be exposed. This can be especially useful in 3D aerobatics when very rapid pitch changes are necessary for certain flight maneuvers, as hereby dynamically the required control stick deflection will be reduced. -
Page 74: The First Flight
10. THE FIRST FLIGHT Now it‘s time to fly your helicopter with the MICROBEAST! After powering up the receiver, wait until the MICROBEAST has initialized completely. This is indicated by a short move of the swashplate servos and the Status-LED lighting steady blue or purple. - Page 75 We recommend to remove main and tail rotorblades before the first flight and let the motor/engi- ne run at all speeds. Caution: Risk of injury! Watch whether the swashplate automatically starts to tilt in one direction or begins to twitch at a specific speed.
-
Page 76: Version Display
11. vERSION DISpLAY After powering up the MICROBEAST, it performs a brief initialization phase. A quick LED test turns all menu LEDs on simultaneously, and the Status-LED cycles through all colors. Then for about 3 seconds, the Status- LED turns red and the first two digits (X and Y) of the internal firmware version are displayed. Then, in the remaining time a running light of the LEDs A - G signals that the sensors are being calibrated and the LEDs H - N do indicate the initialization of the receiver signals. -
Page 77: Trouble Shooting
12. TROUBLE SHOOTING Description Reason Solutions The MICRObeAST does The MICROBEAST - Helicopter must stand absolutely still not initialize . signals a sensor during initialization process. failure - Strong wind can shake the helicopter and The Status-LED is flashing red. therefore the sensors. - Page 78 Description Reason Solutions Selection in the menus with Too little control travel - Increase the servo throw / dual rate the rudder control stick does on the rudder channel. for the rudder channel in the TX. not work . Connector from the - Check that the connector for the rudder channel rudder channel (orange wire) is...
- Page 79 Description Reason Solutions The helicopter wobbles The MICROEBAST setup is - In setup menu point J adjust the on aileron and elevator not done correctly. cyclic pitch to exactly 6 degrees: the axis . color of the Status-LED should be The helicopter‘s linkage “blue”, otherwise the linkage ratio Reducing the swashplate...
- Page 80 The voltage during after landing . occurred. operation dropped in a critical area or there was a discharge or transfer of high voltage. If you need more support you can connect to the forum at WWW .beASTX .COM .
-
Page 81: Legal Terms
All statements in this document have been checked for accuracy. However we cannot guarantee accuracy, integrity or actuality. Do not hesitate to send us any suggestions for improvement by e-mail to info@beastx.com. DISCLAIMER The provided information was proofed for accuracy and integrity. However potential mistakes cannot be excluded. -
Page 82: Microbeast Overview
MICROBEAST OvERvIEW SeTUP MeNU (Menu LED is steady ON ) Status-LED: purple red flashing blue flashing blue Mounting orientation upright (vertical) flat (horizontal)* Swashplate servo - frequency user defined 50 Hz* 65 Hz 120 Hz 165 Hz 200 Hz Tail servo - center position pulse length user defined 960 μs 760 μs... -
Page 83: Adjustment Options - Overview
ADjUSTMENT OpTIONS - OvERvIEW Menu LEDs: Amount of tail gain A=0% to N=100% (only after powering up or when adjusting the gain) Button: - to enter setup menu push down several seconds until LED A is steady on Status-LED: - to enter Parameters menu push shortly Tail gyro mode: until LED A is flashing off, flashing blue or blue... -
Page 84: My Servo Setup
MY SERvO SETUp Heli Swashplate servo Status-LED red flashing blue flashing purple blue user defined 50 Hz 65 Hz 120 Hz 165 Hz 200 Hz Swashplate servo - frequency Tail servo Status-LED purple red flashing blue flashing blue user defined 960 μs 760 μs 1520 μs... - Page 88 Version 3 .0 .2 eNG - October 2011 WWW.BEASTX.COM...
Need help?
Do you have a question about the Aircraft and is the answer not in the manual?
Questions and answers