Table of Contents
Advertisement
Quick Links
Advertisement
Table of Contents

Related Manuals for DOEPFER Dark Time


Summary of Contents for DOEPFER Dark Time
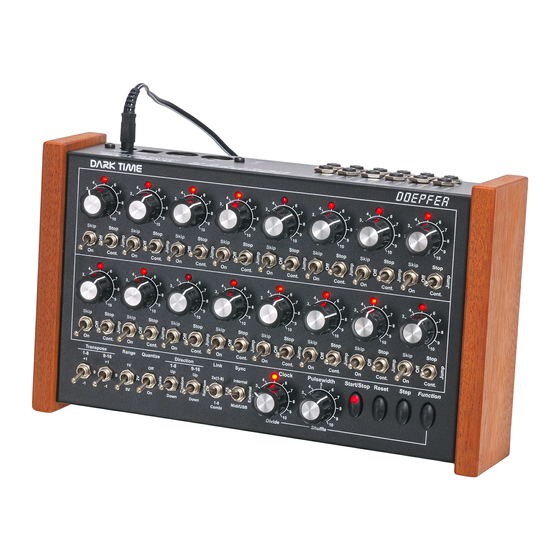
- Page 1 Dark Time Owners Manual V1.1 DOEPFER MUSIKELEKTRONIK GmbH...
-
Page 2: Safety Instructions
Never use the instrument in the immediate proximity of electronic devices (e.g. monitors, power supplies, computers) as these interferences could cause malfunctions within Dark Time and corrupt memory data. -
Page 3: Table Of Contents
3.2. Synchronization and 1.2. Preparations……………………………5 remote control………………………...15 1.2.1. Setup………………………….5 3.2.1. MIDI-Interface.………………15 1.2.2. Connections………………….5 3.2.2. MIDI-Clock…………………...16 3.2.3. Analog-Interface…………….17 2. Function Overview 3.2.4. Dark Time as simple …………………………….7 MIDI-Clock to Sync Interface……………………...19 3. Functions 3.3. Firmware-Update…………………...20 3.1. The Controls…………………………. 9 3.4. +12V Modification………………….21 3.1.1. -
Page 4: Introduction
Dark Time sports a USB port, MIDI sockets, and connectors for analog control voltages and gate signals. Yet, Dark Time is a modern tool for sound creation and can easily be connected not only to our Dark Energy analog synthesizer (hint, hint), but also to all sorts of other analog and digital gear which is suitably equipped with a MIDI/USB port and/or CV/Gate connectors. -
Page 5: Preparations
Dark time DOEPFER 1.2. Getting started When lifting Dark Time out of its box for the first time, please make sure that everything is in its right place. You will find the following component parts in the box: • Dark Time sequencer •... - Page 6 ”Synchronization and remote control of Dark Time” on page 15. • CV/Gate: You only need to connect at least Gate 1 out and CV1 out jacks to run Dark Time with a CV/Gate- based synthesizer. Gate triggers the synthesizer envelopes (which, in turn, normally control the VCF and output VCA), CV1 determines the pitch of the VCO(s).
-
Page 7: Function Overview
(e.g. transpose, reset etc.) while in progress. Clock input and output makes synchronization with external analog gear easy. Thanks to the built-in MIDI interface, Dark Time can easily be tied into a MIDI setup via DIN sockets or USB port. - Page 8 Overview Dark time DOEPFER Analog Interface Power Supply – St/St Out: Provides +5V/+12V* voltage while sequence is running (12V AC, 500 mA) – St/St In: Starts resp. keeps sequence running while +5V/+12V* voltage is received – Reset Out: Provides +5V/+12V* trigger when sequence is resetted –...
-
Page 9: Functions
3. Functions In this section we will explore all functions of Dark Time in detail. We will also have a closer look at the way the functions interact, and finally we will briefly deal with the MIDI and analog interfacing section. -
Page 10: Cv/Gate-Ouput Sockets
3.1.2. CV/Gate output sockets Each step set to ”on” will generate several signals at a time when active. These can be tapped from the sockets on the rear interface panel of Dark Time. They can be used to control other sound sources connected. -
Page 11: Sequence-Control
Functions Dark time DOEPFER 3.1.3. Sequence Control The sequence control functions allow control over the previously programmed sequence. They determine or alter pitch and / or the playback order of the step registers. • Transpose With these switches you can transpose both registers of the sequence up or down by one octave. -
Page 12: Tempo/Timing
Set to ”MIDI/USB”, the tempo is controlled by a MIDI clock signal coming in via the MIDI-In socket or the USB-port. The Clock control of Dark Time will not be active in this case. The Pulsewidth control will remain active and allow to set the gate time as well as the shuffle amount (see below). - Page 13 Functions Dark time DOEPFER Clock-divider note-value Number of lighted Step-LEDs 1/4. 1/8. 1/16. 1/4T 1/16 1/8T 1/32 1/16T 1/64 1/128 • Pulswidth-control / Function-key Pulswidth: This control determines the duration of gate signals, generated by all active steps resp. their note values.
-
Page 14: Individual Gate-Length
Divide Shu e ”1-8 Combi“ 3.1.6. Transport keys These three keys control the so-called transport functions of Dark Time. • Start/Stop key Hitting the Start/Stop key once will get the sequencer going. Hitting it once again, the sequencer will stop. The next hit will restart the sequence and play back will continue from where it was stopped. -
Page 15: Synchronization And Remote Control
Sending and receiving MIDI notes Each active step of Dark Time generates and sends MIDI note messages. They are made up of a note-on and a note-off command as well as a MIDI note number. They will define pitch (i. e. note name / number) and note length. -
Page 16: Midi-Clock
Dark Time as slave: If an external device is to control Dark Time’s tempo via MIDI clock, it has to be set up as master, with Dark Time acting as slave. Set Dark Time’s Sync switch to “MIDI/USB”. Dark Time will now obey to incoming MIDI clock data and respond to external start/stop/continue commands. -
Page 17: Analog-Interface
Some vintage synthesizers require a gate signal of +10V or higher (e.g. ARP 2600). In order to match also withh these machines, Dark Time gate output level can be changed from +5V (default) to +12V by setting of an internal jumper. Please refer to page 21, section 3.4. - Page 18 – a clock signal is needed. A clock signal is a pulse wave, its frequency (pulses per time) determi- nes the tempo of the synchronized device. When active, Dark Time will generate such a clock signal and make it available at the Clk Out socket.
-
Page 19: Interface
+5V). Dark Time performs a reset function. The same goes for the ST/ST In socket: As soon as a positive voltage is received (+5V), Dark Time starts running resp. keeps on running as long as this voltage is received. As soon as this voltage goes down to zero (0V), the sequencer stops. -
Page 20: Midi-Clock To Sync
Dark Times firmware can easily be updated via USB. In case a new firmware version is available, you can Drummaschine / Dark Time MIDI download it from our website (www.doepfer.de). A detailed description of the update process can be found Analog-Sequenzer / Drummaschine / in the additional technical description of Dark Time. You can download this documentation here: Modular-Synthesizer Sequenzer o.ä. -
Page 21: Modification
DOEPFER 3.4. +12V Modification As you allready know, Dark Time puts out gate-, clock-, start/stop- and reset-voltages via it‘s analogue inter- face. By default, these voltage have +5V level. Some vintage synthesizers may require higher voltages. In order to match with these machines, the levels of these signals can be changed from their default setting (+5V) to +12V by changing the position of an internal jumper on one of Dark Times boards. - Page 22 Dark time Nuts and bolds of sequencing DOEPFER +12V position of JP7: Place the jumper into the middle and rightmost pins (please refer to the lower picture) and the gate-, clock-, start/stop- and reset-voltages will have +12V.
- Page 23 In case step sequencers – or sequencers in general – are new to you, please read this section thoroughly. You will learn about the nuts and bolts of these machines that will help you to grasp Dark Time’s nasty (well, sort of…) little secrets fully.
- Page 24 Apart from that, you are always free to record a rocking pattern into your computer sequencer in order to use it as a part of a bigger composition and to free up Dark Time for creating new and even more rocking patterns.
- Page 25 – nothing to be ashamed of –, an electronic chromatic tuner is a very good tuning aid. Now Dark Time’s Range switch comes into play: In 1V position, a full turn of a step control covers a range of twelve semitones, thus one octave.
- Page 26 LFO, that generates continuous voltages. You may also use a MIDI keyboard or a MIDI controller for this purpose and connect it to Dark Time’s MIDI-In socket or the USB port (do not forget to set the MIDI-channel number…. see page 17).
-
Page 27: Addendum
Specifications subject to change without notice. Although the content of this owners manual has been thoroughly checked for errors, Doepfer Musikelektronik GmbH cannot guarantee that it is error-free throughout. Doepfer Musikelektronik GmbH cannot be held liable for any misleading or incorrect information within this guide. - Page 28 Dark Time DOEPFER MUSIKELEKTRONIK GmbH...
Need help?
Do you have a question about the Dark Time and is the answer not in the manual?
Questions and answers