
Related Manuals for Motorola MTX8250


Summary of Contents for Motorola MTX8250
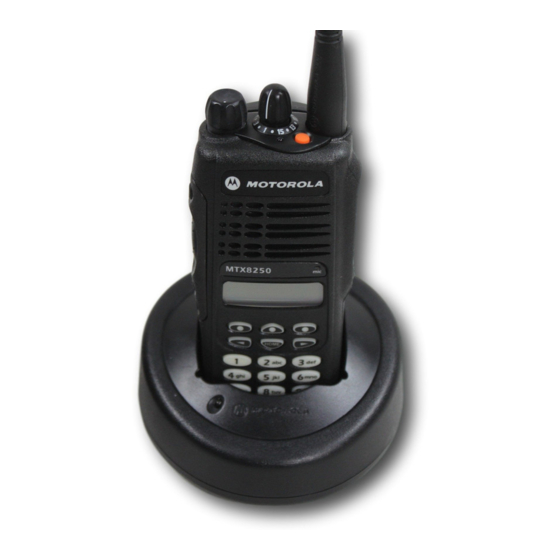
- Page 1 MTX8250 and MTX9250 ™ Portable Radio for Privacy Plus Systems Radio Portatif pour Systémes Privacy Plus ™ reliable flexible powerful User Guide Guide de l´usager...
-
Page 3: Table Of Contents
Parts of the Radio ....15 Selecting a Trunked or Conventional Zone .33 MTX8250 and MTX9250 Models ..15 Selecting a Zone ....33 On/Off/Volume Knob. - Page 4 Selecting a Mode (Either a Trunked Scan......55 Talkgroup or a Conventional Channel) . . 34 Scan Operation .
-
Page 5: Computer Software Copyrights
Motorola. Furthermore, the purchase of Motorola products shall not be deemed to grant either directly or by implication, estoppel, or otherwise, any license under the copyrights, patents or patent... - Page 6 Notes English...
-
Page 7: Safety
RF energy. PORTABLE RADIO OPERATION SAFETY AND GENERAL AND EME EXPOSURE INFORMATION Your Motorola radio is designed to comply with IMPORTANT INFORMATION ON SAFE AND the following national and international EFFICIENT OPERATION standards and guidelines regarding exposure... -
Page 8: Two-Way Radio Operation
- Human Exposure) Standard 1999 exceed FCC RF exposure guidelines. If you (applicable to wireless phones only) do not use a Motorola approved body-worn accessory and are not using the radio in To assure optimal radio performance and the intended use positions along side of the... -
Page 9: Approved Accessories
Any use of a radio higher power level than needed. must be in accordance with applicable Approved Accessories regulations per airline crew instructions. For a list of approved Motorola accessories Medical Devices look in the appendix or accessory section of • Pacemakers your radio’s User Guide. -
Page 10: Safety And General
• use the ear opposite the pacemaker to When using your radio while driving, please: minimize the potential for interference. • Give full attention to driving and to the road. • turn the radio OFF immediately if you • Use hands-free operation, if available. have any reason to suspect that inter- ference is taking place. -
Page 11: Operational Cautions
not remove, install, or charge batteries in such OPERATIONAL CAUTIONS areas. Sparks in a potentially explosive ANTENNAS atmosphere can cause an explosion or fire Do not use any portable radio resulting in bodily injury or even death. that has a damaged antenna. If C a u t i o n a damaged antenna comes into Note: The areas with potentially explosive... -
Page 12: Intrinsically Safe Radio Information
INTRINSICALLY SAFE RADIO housing. The FM Approval mark is shown below: INFORMATION FMRC Approved Equipment Anyone intending to use a radio in a location APPROVED where hazardous concentrations of flammable WARNINGS material exist (hazardous atmosphere) is advised to become familiar with the subject of •... -
Page 13: Repair Of Fmrc Approved Products
FM Approval labeling. RESPONSIBILITY OF THE USER. Radios will not be “upgraded” to this capa- You should not repair or relabel any Motorola- bility and labeled in the field. manufactured communication equipment bearing the FMRC Approval label (“FMRC •... - Page 14 WARNINGS internal electrical circuits of the unit. You do not have to be an FMRC Approved Repair Facility • Incorrect repair or relabeling of to perform these actions. any FMRC Approved Product W A R N I N G unit could adversely affect the Relabeling Approval rating of the unit.
- Page 15 Do Not Substitute Options or Accessories The Motorola communications equipment certified by Factory Mutual is tested as a system and consists of the FM Approved portable, FM Approved battery, and FM Approved accessories or options, or both. This FM Approved portable and battery combination must be strictly observed.
- Page 16 Notes English...
-
Page 17: Radio Overview
PARTS OF THE RADIO RADIO OVERVIEW MTX8250 and MTX9250 Models Mode Selector Knob On/Off/Volume Knob Top Button (D) (programmable) LED Indicator Side Button 1 (A) (programmable)/ Select Button Microphone Push-to-Talk (PTT) Button LCD Screen Menu Keys Side Button 2 (B) -
Page 18: On/Off/Volume Knob
(see table below): With PTT switch pressed (radio transmitting) Radio is transmitting (PTT button Steady red pressed) LED unlit Radio is not transmitting Low battery (conventional mode Flashing red only; programmable by authorized Motorola dealer). Momentary Radio has powered-up green successfully English... -
Page 19: Keypad Keys
Keypad Keys 1 2 3 4 5 6 7 8 9 * 0 # These keys are used for: • dialing a phone number • entering a specific radio ID number when ™ making a Private Conversation or Call Alert radio call •... -
Page 20: Menu Keys
• When editing existing information, controls the middle feature, and the right key pressing 1 will ALWAYS start the controls the right feature. character cycle at the blank space and Softkeys (l;l) NOT at 1. When already in Menu Mode, these keys are Menu Keys used to make Menu selections. -
Page 21: Menu Display
The menu items can be displayed in normal video or in reversed video (programmable by your authorized Motorola dealer). All the menu items in the examples in this manual are shown in reversed video. The order in which the menu items are displayed is programmable. - Page 22 Symbol Name and Description Symbol Name and Description XPAND™ Indicator Direct Indicates whether you are talking Indicates that your radio has the directly to another radio (talkaround), or companding feature activated. through a repeater; Power Level Indicator ON = DIRECT OFF = REPEATER.
-
Page 23: Alert Tone Indications
Contact your authorized Motorola dealer for • Valid (Good) Key Press – A short, service. medium-pitched tone when a keypad key is •... - Page 24 • Failsoft (Trunked Systems Only) – A faint • Call Alert (Page) Sent – A single medium- “beeping” tone every ten seconds indicates pitched tone (central acknowledge), fol- that the radio is operating in the failsoft lowed by a group of four medium-pitched mode.
-
Page 25: Programmable Buttons
Check with your dealer for a complete list of radio illustration at the front of this manual. functions your radio supports. Check with your authorized Motorola dealer for Programmable buttons include: a complete list of features your radio supports. •... - Page 26 Feature Short Press Long Press Hold Down Button Monitor/ Temporarily monitors the Continually Monitors the selected Permanent selected channel for any activ- monitors the channel for any activity. Monitor ity. selected channel. Volume Set — — Sounds a tone for adjusting the radio’s volume level.
-
Page 27: Trunked Radio Systems
TRUNKED RADIO SYSTEMS • No channel monitoring required prior to transmission. The MTX8250 and MTX9250 radio can • Improved system access. operate on both Privacy Plus™ trunked and conventional radio systems. • Automatic channel selection. Conventional typically refers to radio-to-radio •... - Page 28 Notes English...
-
Page 29: Getting Started
GETTING STARTED Charger LED Battery Status Color BATTERY INFORMATION Battery unchargeable or not Flashing Red* Charging the Battery making proper contact. If a battery is new, or its charge level is very Battery in rapid-charge Steady Red low (indicated by the battery level indicator mode. - Page 30 Battery chargers will only charge the Motorola- authorized batteries listed below; other batteries may not charge. Part No. Description HNN9008 High-Capacity/NiMH HNN9009 Ultra-High-Capacity/NiMH Ultra-High-Capacity/Factory HNN9010 Mutual/NiMH High-Capacity/Factory Mutual/ HNN9011 NiCd HNN9012 High-Capacity/NiCd HNN9013 High-Capacity/Lithium-Ion English...
-
Page 31: Attaching The Battery
Attaching the Battery Removing the Battery Battery Latches Fit the extensions at the bottom of the Turn off the radio (see page 32). battery into the bottom slots on the radio. Slide both battery latches downward. Press the top part of the battery toward the radio until you hear a click. -
Page 32: Accessory Information
ACCESSORY INFORMATION Removing the Antenna Attaching the Antenna Turn the antenna counterclockwise to Turn the antenna clockwise to attach it. remove it. English... -
Page 33: Attaching The Belt Clip
Attaching the Belt Clip Removing the Belt Clip Belt Clip Tab Align the grooves of the belt clip with those Use a key to press the belt clip tab away of the battery. from the battery. Press the belt clip downward until you hear Slide the belt clip upward to remove it. -
Page 34: Attaching The Side Connector Cover
If the radio still does not pass the self Tighten the thumbscrew to hold the cover in check, a problem exists in the radio. Contact place. Do not overtighten the thumbscrew. your authorized Motorola dealer. English... -
Page 35: Adjusting The Volume
ADJUSTING THE VOLUME Before you use your radio to receive or send messages, you should first select the desired Turn the On/Off/Volume knob clockwise to zone and mode. increase the volume or counterclockwise to Selecting a Zone decrease the volume. –or–... -
Page 36: Selecting A Mode (Either Atrunked Talkgroup Or Aconventional Channel)
SELECTING A MODE (EITHER A SENDING A TRUNKED CALL TRUNKED TALKGROUP OR A Turn the radio on and select the desired CONVENTIONAL CHANNEL) trunked zone and talkgroup (see “Selecting a Trunked or Conventional Zone”). Turn the Mode Selector knob to the desired mode. -
Page 37: Sending A Conventional Call
The monitor feature can be accessed through This feature is programmable by your one of your programmable buttons. authorized Motorola dealer. • If the mode-busy feature is enabled, a The “failsoft” system ensures continual radio... -
Page 38: Coded Squelch Operation (Conventional Channels Only)
conventional mode. When the trunked system Whenever the radio is operating in carrier squelch, the display will show C. returns to normal operation, the radio will automatically leave failsoft operation and REPEATER OR TALKAROUND return to trunked operation. MODE (CONVENTIONAL During failsoft operation: OPERATION ONLY) This feature allows you to bypass the repeater... -
Page 39: Variable Rf Power Level
OPERATION ONLY) state appears on the display for a few This feature is programmable by your seconds. authorized Motorola dealer. DIRECT MODE Smart PTT is a per-mode feature which gives Then, the display the system manager better control of radio... -
Page 40: Muting The Keypad Tones
programmable period – the default is one ; (the softkey You will see the second – of each other) the radio. below current mute state MUTE momentarily Note: If you try to transmit (press the PTT button) on a smart PTT mode that is TONES ON busy, a continuous alert tone is generated until the PTT button is... -
Page 41: Radio Calls (Trunked Operation Only)
Note: If your radio has been so programmed, RADIO CALLS (TRUNKED you can press the Call button for quick OPERATION ONLY) access to viewing your radio’s ID number. This takes you directly to step Note: PLANT POLICE is used to indicate the radio’s ENHANCED PRIVATE CALL home display. -
Page 42: Receiving A Private Conversation Call
Receiving a Private Conversation Call After viewing the caller’s ID number, you can decide to either talk privately (go to next step), Upon receiving a Private Alternates between: or not answer the call by pressing the call Conversation Call, two response or call button to return to the home CALL alert tones will sound... -
Page 43: Sending A Private Conversation Call
Sending a Private Conversation Call Note: Exactly six digits must be entered for the radio ID number. If fewer than six There are four steps in sending a Private digits were entered, you will hear a Conversation Call: bad-keypress tone, and the display will show INVALID ENTRY when 1. - Page 44 Note: The last member of the list is also the 4c When at a member of Alternates between: last ID transmitted or received at posi- the list, the display tion 00 on the list. CK TANG alternates between showing the member’s If you enter a location number that does not name and ID number.
-
Page 45: Call Alert Operation
ing alert sounds every six seconds to If the party you are calling answers the call, remind you that dispatch calls are not you will hear his/her voice. able to be heard. After two minutes, a permanent invalid mode tone sounds. Note: If the radio you are calling is not in ser- vice, you will not hear the ringing and... -
Page 46: Sending A Call Alert
Receiving a Call Alert Page with a Group Sending a Call Alert Call There are three steps in sending a Call Alert: When a Call Alert page is received, four alert 1. Initiating a Call Alert tones will sound (repeats every 5 seconds). / until PAGE The green LED lights and the Call Received... - Page 47 o enter a number from the call list To enter a new number 4a , or /. 4a Enter the new six-digit ID number using the keypad. 4b / takes you forward to the first or next member of the list; , takes you 4b On the display, the old ID number disappears backwards to the last or previous member of and the new digits appear as they are being...
- Page 48 If the page is successful 4e The radio goes to that Alternates between: position in the list. The 6a If you hear five beeps, the ID number has CK TANG display alternates been received by the system, and the radio between showing the you are paging is on the air and has received member’s name and ID...
-
Page 49: Programming The Radio's Call Lists
PROGRAMMING THE RADIO’S When you stop on a Alternates between: CALL LISTS member of the list, the POLICE DEPT display will alternate Programming the Telephone List Numbers between showing the member’s name and This feature allows you to use the radio’s keypad telephone number. -
Page 50: Programming The Call List
the / key will cause you to leave the edit 10 When you have finished changing the tele- mode without making any changes. phone number, press the select key again. The change is saved in the radio’s memory. You can only enter a maximum of 16 digits in any entry for the telephone list. - Page 51 / or , Use any of the alphanumeric keys to make —or— the changes. The blinking cursor indicates the Use the keypad to enter the desired mem- position of the next number to be added. ber’s position number (1 to 19) to view the 10 When you have finished changing the num- other members of the call list.
-
Page 52: Trunked Telephone Operation
left. When the last digit on the display has been Press the pre-pro- erased, additional presses of this key or the PHONE CALL grammed Phone button / key will cause you to leave the edit mode or call response button without making any changes. - Page 53 6c The telephone number will be sent out; you 3 Your radio attempts to access the telephone will hear tones as they are sent. If you hear a system. busy signal, go to step 8 for hang-up proce- 4 If you connect successfully, you will hear a dial dure.
- Page 54 Having the Conversation and Hanging Up 6f If you hear a busy signal, go to step 8 for hang-up procedure. 7 If call is answered, communicate in the normal manner. Press the PTT button to talk; release Sending the telephone number using a location the PTT button to listen.
- Page 55 • If the trunked phone interconnect is in use, • Motorola trunked radios generate a a busy tone sounds and PHONE BUSY is high-pitched go-ahead tone when the displayed. system’s PTT button is released. This is heard by the land-line party and is an •...
- Page 56 Notes English...
-
Page 57: Scan
This list can be SCAN ON programmed by your auathorized Motorola dealer and is user programmable. The table below lists the types of scan SCAN OFF operations available. -
Page 58: Deleting Nuisance Modes
SCAN ). The button (programmed by your authorized FIRE DEPT display shows the Motorola dealer). first member of the A valid-keypress chirp is heard, indicating scan list. that the mode has been deleted. Every subsequent press of / will scroll... -
Page 59: Programming A Scan List
Notes: , or / to select the required zone. If the scan status annunciator, G, is The programming-mode annunciator, K, • displayed, the mode is part of the scan list. is displayed while list view mode is active. Press the select key to enable or disable the The scan status annunciator, G, appears, •... - Page 60 Notes English...
-
Page 61: Warranty
One (1) Year such equipment is expressly excluded from this warranty. Because each system which may use Motorola, at its option, will at no charge either the Product is unique, MOTOROLA disclaims repair the Product (with new or reconditioned liability for range, coverage, or operation of the parts), replace it (with a new or reconditioned system as a whole under this warranty. - Page 62 TIME, INCONVENIENCE, COMMERCIAL authorized warranty service location. Warranty LOSS, LOST PROFITS OR SAVINGS OR service will be provided by Motorola through one OTHER INCIDENTAL, SPECIAL OR of its authorized warranty service locations. If you CONSEQUENTIAL DAMAGES ARISING OUT...
- Page 63 Product or interfere with Motorola's normal warranty inspection and testing of the Product to verify any warranty MOTOROLA will defend, at its own expense, any claim. suit brought against the end user purchaser to Product which has had the serial number the extent that it is based on a claim that the removed or made illegible.
- Page 64 Product such claim; or any parts thereof. B) that MOTOROLA will have sole control of the Laws in the United States and other countries defense of such suit and all negotiations for preserve for MOTOROLA certain exclusive rights its settlement or compromise;...
-
Page 65: Accessories
HEADSETS ACCESSORIES Lightweight Headset with Boom AARMN4018_ Microphone & In-Line PTT. Motorola offers a number of accessories to Lightweight Headset with Swivel Boom enhance the productivity of your two-way AARMN4031_ Microphone radio. Many of the available accessories are Ultra-Light Headset AARMN4017_ listed below. -
Page 66: Earpieces
EARPIECES BATTERIES HNN9008_R Small NiMH, High-Capacity Two Wire Earpiece with Microphone & AARMN4022_ PTT (Beige) HNN9009_R Large NiMH, Ultra-High-Capacity Two Wire Earpiece with Microphone & HNN9010_R Large NiMH, Ultra-High-Capacity FM AARMN4029_ PTT (Black) HNN9011_R Large NiCd, High-Capacity FM One Wire Earpiece (Beige) AARMN4021_ HNN9012_R Large NiCd, High-Capacity... - Page 67 1. / until ZONE is displayed. 2. l (the softkey below ZONE). The current zone name blinks on the display. MTX8250 and MTX9250 Quick Reference Card 3. / until the desired zone name is displayed. —or— Enter the number of the Record the functions for your radio’s programmable buttons in the table provided below.
- Page 69 Motorola, the stylized M logo, Professional Radio - As Dedicated As You Are, Privacy Plus, and Private Conversation are trademarks of Motorola, Inc. ® Reg. U.S. Patent & Trademark Office. © 2000, 2001 Motorola, Inc. All rights reserved. Printed in U.S.A.