Table of Contents
Advertisement
Advertisement
Table of Contents

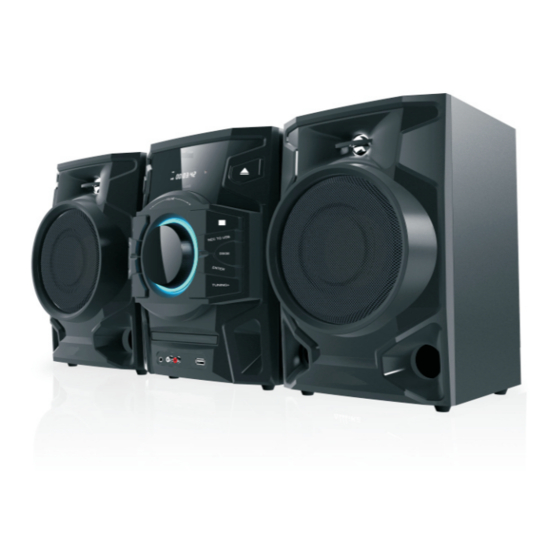
Summary of Contents for LENCO MN-002
- Page 1 MN-002 CD Music system...
-
Page 2: Table Of Contents
CONTENT WARNING......................1 PANELS......................4 REMOTE CONTROL..................5 AMPLIFIER CONNECTION................6 AUX IN/ USB CONNECTION................7 BASIC OPERATION..................8 CD OPERATION.....................10 FM OPERATION....................11 TROUBLE SHOOTING/ SPECIFICATION...........12 WARNING Please read and understand all the warnings provided below, as well as and those ma ked on the unit. This unit has been designed and manufactured to assure personal safety. Only use power source that is specified Keep the unit and power plug in the User Manual or on the system. -
Page 3: Warning
IMPORTANT SAFETY INSTRUCTION 1. Read these Instructions - All the safety and operating instructions should be read before this product is operated. 2. Keep these Instructions - The safety and operating instructions should be retained for future reference. 3. Heed all Warnings-All warnings on the appliance and in the operating instructions should be adhered to. - Page 4 -This lightning flash with arrowhead symbol within an equilateral triangle is intended to alert the user to the presence of non-insulated dangerous voltage within the product’s enclosure that may be of sufficient magnitude to constitute a risk of electric shock. - Warning: To reduce the risk of electric shock, do not remove cover (or back) as there are no user-serviceable parts inside.
-
Page 5: Panels
PANELS DISPLAY SCREEN INDICATOR LIGHT IR SENSOR STANDBY EJECT/OPEN/CLOSE VOLUME KNOB STOP PLAY/PAUSE FUNCTION TONE SEARCH FAST REWIND FAST FORWARD PREVIOUS NEXT PANEL LED LIGHT DISC TRAY EARPHONE USB PORT EARPHONE PORT R/L AUX IN SOCKETS POWER SWITCH L/R AUDIO OUTPUT L/R SPEAKERS FM ANTENNA POWER SUPPLY... -
Page 6: Remote Control
REMOTE CONTROL 1. Turn on the unit, insert the batteries into the remote control, and direct the remote control at the remote sensor on the front panel. 2. The distance of the remote control should not exceed 7 meters, or it will not work. 3. - Page 7 SPEAKERS CONNECTION Disconnect power cables until you have finished all the connections. → Right Speaker Left Speaker CONNECTION WITH AMPLIFIER 1. Connect the unit with the amplifier via the audio cable to enjoy a more vivid music entertainment. 2. Pay attention to the picture below. Each connection must be safe and firm. 3.
-
Page 8: Aux In/ Usb Connection
AUX IN/ USB CONNECTION 1. You can enjoy music via other audio devices or USB stick. 2. Pay attention to the picture below for each connection must be safe and firm. Earphone RCA cable EARPHONE USB stick AUX IN operation 1. -
Page 9: Basic Operation
BASIC OPERATION Preparation 1. Before the unit is turned on, please check if all the connections are right and safely made. Insert the plug in the corresponding power socket. 2. Press the POWER ON/OFF button on the rear panel of this unit. 3. - Page 10 BASIC OPERATION Enter Press the ENTER button to enable the selected items. Play/Pause While playing a track, press the PLAY/PAUSE button to pause the playback, press again to resume playback. Stop In playing mode, press the STOP button to stop playback, press PLAY/PAUSE button to start playing from the beginning.
- Page 11 SPECIAL OPERATION FOR CD Program This function is available in stop mode while playing a CD disc. This function makes tracks of CD be played in a programmed order. a) Press the STOP button to stop playing, then press PROGRAM button to enter the program interface: PR 0100.
-
Page 12: Radio Operation
RADIO OPERATION Please make sure that the aerial on the back of the radio is fully extended and adjusted before you attempt to tune to an FM station (a vertical position is recommended). This will ensure that the maximum signal strength is available when the radio begins to scan. Extending the aerial also ensures the best possible sound quality. -
Page 13: Trouble Shooting/ Specification
TROUBLE SHOOTING For your convenience, we have listed some methods to solve some common problems you may encounter when you use the system. If the problem occurs repeatedly, contact the nearest maintenance center. Problem Possible cause Solution Power plug is not fully Power supply does Fully insert the power plug inserted into the power socket... -
Page 14: Service And Support
The helpdesk is accessible from Monday till Friday from 9 AM till 6 PM. When contacting Lenco, you will always be asked for the model and serial number of your product. The serial number can be found on the back of the device. Please write... - Page 15 Notice, statements and information Lenco is not liable for printing errors in the manual. The specifications and external appearance of the set are subject to change without prior notice. This symbol indicates that the relevant electrical product or battery should not be disposed of as general household waste in Europe.


Need help?
Do you have a question about the MN-002 and is the answer not in the manual?
Questions and answers