
Related Manuals for LENCO MDV-8


Summary of Contents for LENCO MDV-8
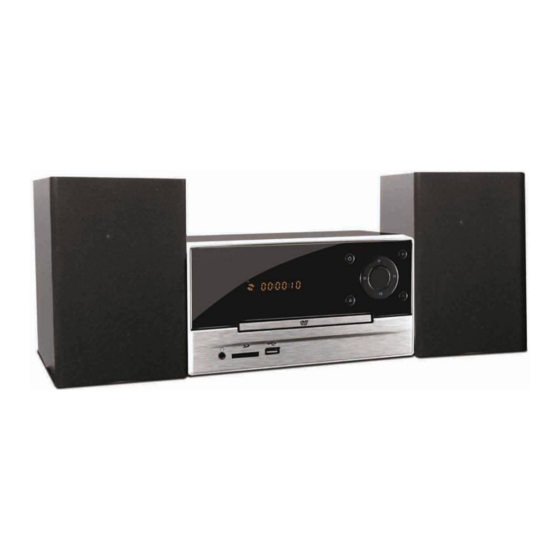
- Page 1 DVD MICRO HI-FI SYSTEM WITH USB & SD/MMC MDV-8 For information and support, www.lenco.eu User manual...
-
Page 2: Table Of Contents
Table of Content Table of Content Safety Information Locations and function of the player Connection Remote Control DVD Operation Radio Operation Troubleshooting Specification Dear Customer: Thank you for purchasing this DVD MICRO HI-FI SYSTEM WITH USB & SD/MMC. When opening the box for the first time, please check whether all the accessories are present. -
Page 4: Safety Information
Safety In formation The lightning flash with an arrowhead symbol within an equilateral triangle is intended to alert the user of the presence of uninsulated "dangerous voltage" within the product's enclosure that may be of sufficient magnitude to constitute a risk of electric shock to persons. -
Page 5: Locations And Function Of The Player
Locations and Function of the Player Front Panel /AUTO 1. POWER /FM/AM 2. / 7. VOLUME knob 9. CARD READER interface 3. Stop button 10. USB interface /CHANNEL- button /CHANNEL+ button Notes: Use the FUNCTION button to select the proper input signal source. The sequence □... -
Page 6: Table Of Content
Locations and Function of the Player Playback Content from USB or CARD This unit has a USB/SD interface, you can insert a USB device or an SD card with USB/SD Interface to play the audio/video files and JPEG files. All the function is the same with the DISC operation. - Page 7 Locations and Function of the Playe Rear Panel Elements of the rear side SPEAKER OUTPUT AM Antenna jack FM Antenna jack AUDIO INPUT jacks AUDIO OUTPUT jacks COAXIAL OUTPUT jack VIDEO OUTPUT jacks AC Power cable Scart socket...
-
Page 8: Connection
Connection Connecting to TV/Amplifier T o T V c o m p o s i t e A U D I O / V I D E O I N P U T j a c k s... - Page 9 Connection Connecting the Speakers P lace t he Spea ke rs For the best result, please arrange the two speakers as shown in the following picture: Align the speakers vertically at the ear level and at a horizontally angle of 45 degrees to the primary listening area.
- Page 10 Connection Connecting Antennas Connect the supplied AM loop antenna and FM antenna to the respective terminals. Adjust the position of the antenna for optimum reception. AM indoor loop antenna Connec t the AM Antenna Open cable terminal by pressing back on tab Insert wire end Release tab;...
-
Page 11: Remote Control
R e m o t e C o n t r o l Insert batteries and Operation radius Remove the battery cover on the back side of the remote control to place the batteries. Remove battery during storage or when you are not using the DVD player for a long time. - Page 12 R e m o t e C o n t r o l...
- Page 13 R e m o t e C o n t r o l Buttons of the Remote Control: 1. POWER button: press to turn on or off the unit. 2. EQ button: press to select different audio modes, such as NORMAL, CLASSIC, POP, JAZZ, ROCK and VOCAL.
-
Page 14: Dvd Operation
DVD Operation DVD VIDEO MENU PLAY ※ When playing a DVD disc in the DVD player: 1) The disc will be played automatically and stop at menu picture. / cursor buttons on the remote control to move between the highlight bars in the menu. 2) Press ENTER button on the remote control to confirm the selected item. - Page 15 DVD Operation 1) Item: TT Function: Display the current title number and total title number. 2) Item: CH Function: Display the current chapter number and total chapter number. 3) Item: (This icon only displayed for several seconds, after several seconds it will disappeared.) Function: Display the played time of the current chapter.
- Page 16 DVD Operation ※ SPECIAL FUNCTIONS FOR DVD Multi-subtitle Language Function Press SUBTITLE on the remote control during playback. The corresponding information will be shown on the screen. Each time the button is pressed, the subtitle language changes in sequential order. Notes: The language number is different according to the disc.
- Page 17 DVD Operation cursor buttons to select the items you want to program. The items you selected will become highlight. Input the sequence number you want to program by numeric buttons (0-9) on the remote control. Use cursor buttons to select PLAY character, then press ENTER button on remote control to confirm.
- Page 18 DVD Operation T V S Y S T E M According to the color system of the TV, you can choose the TV system. * AUTO: Choose this setting if your DVD player is connected to a multi-system TV. *NTSC: Choose this setting if your DVD player is connected to a NTSC TV. * PAL: Choose this setting if your DVD player is connected to a PAL TV.
- Page 19 DVD Operation V I D E O Set the video mode T V T Y P E *4:3PS (Pan&Scan): Choose this setting if your DVD player is connected to a normal ratio TV. You can fill the movie to the entire screen of your TV. This might mean that parts of the picture (the left and right edges) won't be seen.
- Page 20 DVD Operation P A S S W O R D The password option is initialized locked, and you cannot set the ratings limit or change the password in order for the Ratings feature work, the password mode must be turned on. If you want to set the ratings limit, you will need to enter the default password, which is 0000, and then press ENTER to confirm.
- Page 21 DVD Operation 2) LANGUAGE SETUP The language setup page is displayed as below: *OSD LANGUAGE: you can select the OSD language among: ENGLISH, SPANISH, FRENCH and ITALIAN. *AUDIO LANG: you can select the default AUDIO language among: ENGLISH, FRENCH, SPANISH, ITALIAN. *SUBTITLE LANG: you can select the default SUBTITLE language among: ENGLISH, FRENCH, SPANISH, ITALIAN.
- Page 22 DVD Operation K E Y Use the buttons to adjust the tone among a certain range. 4) VIDEO SETUP The video setup page is displayed as below: Use the buttons on the remote control to adjust the value of the BRIGHTNESS, CONTRAST, HUE, SATURATION and SHARPNESS among a certain range.
- Page 23 DVD Operation 6) DIGITAL SETUP The digital setup page is displayed as below: D Y N A M I C R A N G E DYNAMIC RANGE: Choose this setting to adjust the line out ratio and get different effect, If adjusting to FULL, the audio signal peak value will be the minimum, while adjusting to OFF, maximum.
-
Page 24: Radio Operation
Radio Operation With the unit you can listen radio by using the FM/AM Radio Tuner. Please connect the player to the antenna. How to change to the Radio mode? Press the FUNCTION button to select the radio mode. Then use the FM/AM button to switch between FM or AM band. -
Page 25: Troubleshooting
Troubleshooting FOR DVD Symptom Correction No power Check if AC adapter of power is connected securely. Switch the device On by pressing the power button. No sound Ensure that the equipment is connected properly Ensure that the input settings for the TV and stereo system are proper. -
Page 26: Troubleshooting
Troubleshooting FOR RADIO No Signal Please check if unit is in Radio mode? If not please switch to this mode. Please press the FUNCTION button until RADIO appears on the screen. Please make sure, that you receive really analogue Radio signals. Bad reception quality? Please, align your antenna optimally. -
Page 27: Specification
Specification General Power AC 100-240V 50/60 Hz 65 W Power consumption: Radio Tuner FM 87.5 - 108MHz Frequency AM 522-1620KHz > 46 dB > 46 dB S/N Ratio Monophonic DVD-Player NTSC/PAL TV System Resolution Greater Than 500 lines Ratio Video S/N Ratio 65 dB Frequency Response 96 kHz /24bit...
Need help?
Do you have a question about the MDV-8 and is the answer not in the manual?
Questions and answers