Table of Contents
Advertisement
owner's manual
v3
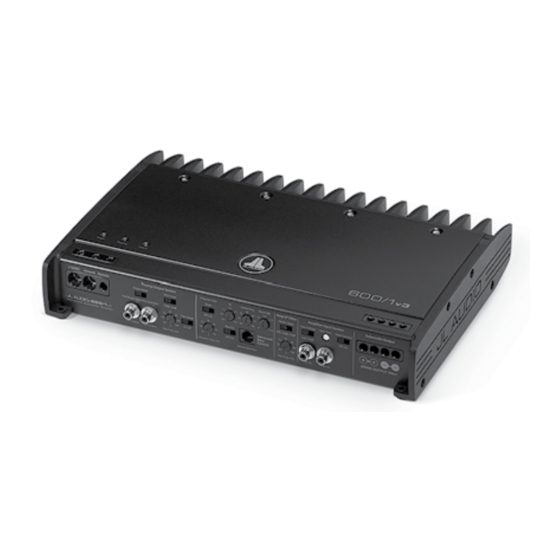
600/1
600 W CLASS-D MONOBLOCK SUBWOOFER AMPLIFIER
Thank you for purchasing a JL Audio amplifier
for your automotive sound system.
Your amplifier has been designed and manufactured to exacting
standards in order to ensure years of musical enjoyment in your
vehicle. For maximum performance and extended warranty
coverage, we highly recommend that you have your new amplifier
installed by an authorized JL Audio dealer. Your authorized
dealer has the training, expertise and installation equipment
to ensure optimum performance from this product. Should you
decide to install the amplifier yourself, please take the time
to read this manual thoroughly so as to familiarize yourself
with its installation requirements and setup procedures.
If you have any questions regarding the instructions in this
manual or any aspect of your amplifier's operation, please
contact your authorized JL Audio dealer for assistance. If you
need further assistance, please call the JL Audio Technical
Support Department at (954) 443-1100 during business hours.
Advertisement
Table of Contents

Related Manuals for JL Audio 600/1v3


Summary of Contents for JL Audio 600/1v3
- Page 1 owner’s manual 600/1 600 W CLASS-D MONOBLOCK SUBWOOFER AMPLIFIER Thank you for purchasing a JL Audio amplifier for your automotive sound system. Your amplifier has been designed and manufactured to exacting standards in order to ensure years of musical enjoyment in your vehicle.
-
Page 2: Protect Your Hearing
ProteCt Your Hearing! installation aPPliCations We value you as a long-term customer. For This amplifier is designed for operation in Cooling efficiency Considerations: If mounting the amplifier under a seat, that reason, we urge you to practice restraint in vehicles with 12V, negative-ground electrical Your JL Audio amplifier employs an make sure there is at least 1 inch (2.5 cm) of the operation of this product so as not to damage... -
Page 3: Product Description
11) Carefully review the amplifier’s control be tight and corrosion-free to ensure proper If only the 600/1v3 is being run from that installation. This step is not optional! settings to make sure that they are set connectivity. -
Page 4: Turn-On Options
While holding signal sensing mode and will not be present when the 600/1v3. You may run a stereo or a mono AWG pure copper wire when installing amplifier the wire in the terminal, tighten the set screw the amplifier turns off. -
Page 5: Crossover Controls
RCA cables or plugs or use the input sensitivity downward, if the amplifier 600/1v3 is fully variable between 40 Hz and 200 Hz via the “Filter Freq.” control knob JL Audio ECS Speaker Wire to RCA adaptor requires attenuation to achieve the desired (XD-CLRAIC2-SW). - Page 6 2) “Amp Filter”: The preamp output delivers shaping of a bottom-heavy system. With ported C A U T I O N the same signal that is feeding the 600/1v3’s enclosures, the use of the infrasonic filter is amplifier section, including all the processing The signal level of the “Preamp Output”...
-
Page 7: Subwoofer Output
I M P O R TA N T to the 600/1v3, power will drop by half with material causes a weak charging system to dip every doubling of impedance above 4Ω. If you Do NOT attempt to “bridge”... - Page 8 (within the frequency input section: design is beneficial for many reasons. One of range to be amplified by the 600/1v3) at 3/4 Input Type: Differential-balanced with RCA jack inputs these reasons is ease of setup. Because each source unit volume.
- Page 9 aPPendix C: Precise Frequency selection Chart CHart a-1 CHart a-2 CHart a-3 CHart a-4 amPliFier low-Pass Filter PreamP outPut seCtion inFrasoniC Filter eq Center FrequenCY detent Panel actual detent Panel actual detent Panel actual detent Panel actual number marking Freq. number marking Freq.
- Page 10 Left Ch. Right Ch. amplifier) and two “Slave” amplifiers. Switches and controls that are defeated in the “Slave” Connect Slave A 600/1v3 Preamp Output to Slave B 600/1v3 Input amplifiers are printed in gray. SLAVE (B): The last Slave amplifier’s...
- Page 11 Please refer to Appendix A (page 14) to set the input sensitivity for Check your voltage source and grounding point. The power supply maximum, low-distortion output. of the 600/1v3 will operate with charging system voltages “my amplifier doesn’t turn on” down to 10V. Shutdown problems at higher volume levels Check the fuse, not just visually, but with a continuity meter.
- Page 12 installation notes: Use this diagram to document your amplifier’s switch and control positions. +12VDC Ground Remote Preamp Output Section Amp LP Filter Amplifier Input Section Subwoofer Output Infrasonic Filter “Q” Center Freq. Boost (dB) Output Mode Filter Slope Mode Mode | Slope Input Voltage Input Sens.
- Page 13 limited warrantY - amPliFiers (usa) JL AUDIO warrants this product to be free of defects in materials and workmanship for a period of two (2) years. The warranty is extended to three (3) years total if installation is performed by an authorized JL Audio dealer using a JL Audio Premium Power Connection System for power wiring.
Need help?
Do you have a question about the 600/1v3 and is the answer not in the manual?
Questions and answers