Toshiba IP5000 Series User Manual
Ip telephone, messaging and call manager user guide
Hide thumbs
Also See for IP5000 Series:
- User manual (197 pages) ,
- Installation instructions manual (58 pages) ,
- Quick reference manual (13 pages)

Related Manuals for Toshiba IP5000 Series


Summary of Contents for Toshiba IP5000 Series
- Page 1 TOSHIBA Telecommunication Systems Division IP Telephone, Messaging and Call Manager User Guide Title Page January 2012...
- Page 2 To view the latest version of this or other documents refer to the Toshiba FYI web site. Toshiba America Information Systems shall not be liable for any commercial losses, loss of revenues or...
- Page 3 In accordance with U.S. Copyright Law, a license may be required from the American Society of Composers, Authors and Publishers (ASCAP), or other similar organization, if radio or TV broadcasts are transmitted through the music-on-hold feature of this telecommunication system. Toshiba America Information Systems, Inc., strongly recommends not using radio or television broadcasts and hereby disclaims any liability arising out of the failure to obtain such a license.
- Page 4 WARRANTIES FOR NON-TOSHIBA BRANDED THIRD PARTY PRODUCTS A valuable element of Toshiba’s product strategy is to offer our customers a complete product portfolio. To provide this value to our customers at the most optimal prices, we offer both Toshiba-branded and third- party manufactured products that support our Toshiba IPedge product portfolio.
-
Page 5: Table Of Contents
Switching Between Handset and Speakerphone................26 Microphone (Mic/Mute) Button......................26 Hold ..............................26 Message Waiting..........................27 Responding to a Lit Msg LED ......................27 Turning On/Off MW LED on Another Extension ................27 LED Indicator Details .......................... 28 TOSHIBA IPedge UG 01/13... - Page 6 Paging ..............................56 Privacy ..............................58 Redial ..............................59 Speed Dial............................59 Time and Date Setting (Local) ......................60 Tone First / Voice First Signalling ....................... 61 Tone First Signalling ......................... 61 Voice First Signalling ........................61 TOSHIBA IPedge UG 01/13...
- Page 7 Message Notification........................... 77 To Activate or Deactivate Message Notification.................. 77 Set a Wake up Call ..........................78 Change your Mailbox Password ......................78 Personal Assistant ..........................79 Follow me............................79 Setting up Follow me ........................80 TOSHIBA IPedge UG 01/13...
- Page 8 Fax Queue ............................113 Cover Information ...........................113 Redirect fax messages........................114 Chapter 10 –Call Manager Basics The Main Screen..........................116 The Compact View .........................116 Expanded View ..........................119 Screen Docked Views........................120 Call Manager Main Menu........................120 Shortcuts ............................121 KeyTips ............................121 TOSHIBA IPedge UG 01/13...
- Page 9 Add Tab ............................154 Update Tab .............................154 Delete Tab ............................156 Revert .............................156 Chapter 13 –Buttons Programmable Buttons ........................157 User Programmable Keys ......................... 158 To Initialize Key ..........................158 To Swap Keys..........................158 To Copy This Key ...........................159 Change Key ............................159 TOSHIBA IPedge UG 01/13...
- Page 10 Create Personal Call Handler Rules ....................204 The Final PCH Rules ........................204 Chapter 17 –Using Companion Applications Contacts ............................205 Sorting Entries ..........................205 Searching Entries ...........................205 Directory ............................206 Personal / Speed Dial Directory......................207 Presence Viewer..........................207 History ............................... 209 ACD Viewer............................213 TOSHIBA IPedge UG 01/13...
- Page 11 To Send a Broadcast Message ......................273 Chat Feature Operation ........................275 Response Buttons ..........................276 Personal Groups ..........................277 Whiteboard Operation........................278 Whiteboards Setup .........................279 Configuring Chat ..........................280 Interfacing with Other Programs .....................284 Format of the DDE Command Interface ..................285 Dialer..............................290 TOSHIBA IPedge UG 01/13...
- Page 12 CF Direct Line Calls ........................311 To set up Station Call Forward .......................311 Speed Dial............................314 System Speed Dial .........................314 System Info ............................314 Display Advisory Messages ......................314 Voice Mail............................315 Account Code............................ 315 Preferences............................316 Meeting ............................. 316 TOSHIBA IPedge UG 01/13...
-
Page 13: Organization
Introduction This guide describes the Toshiba IP5000-series telephones and various other user operations for applications that are integrated with the IPedge system. Organization This guide is divided as follows: is an overview of the telephones supported • Chapter 1 – The Grand Tour by the IPedge system. -
Page 14: Conventions
(Library CD-ROM), cross- references appear in blue hypertext Some documents listed below may appear in different versions on the Toshiba Related FYI site or in print. To find the most current version, check the version/date in the Documents/Media Publication Information on the back of the document’s title page. -
Page 15: Chapter 1 - The Grand Tour
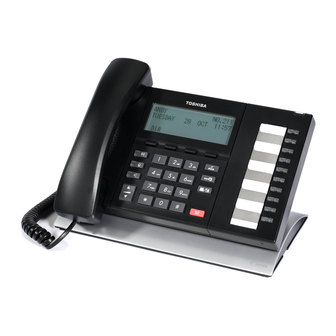
However, the IP5022-SD, IP5522-SD and IP5531-SDL telephones do not have the backlight. To change the backlight settings, refer to Chapter – Feature Operations. Table 1 IP5000 Series Telephones Description Image 10 Button IP Telephone: • 4 line LCD with back light option •... - Page 16 IPedge The Grand Tour (continued) Table 1 IP5000 Series Telephones Description Image 20 Button with Electronic LCD Labels: • 9 line LCD with back light • Full duplex Speakerphone • Headset I/F • Ringing LED The IP5000-series telephone upgrade options include:...
-
Page 17: Ip5000-Series Telephone Overview
Hold Button D. Programmable Feature Buttons J. Microphone E. Message Waiting LED Button K. Tilt stand F. Microphone LED Button The fixed buttons on the dial pad help perform standard functions quickly and Fixed Buttons easily. TOSHIBA IPedge UG 01/13... - Page 18 Microphone (Mic/Mute) button toggles between Mic and Mute. When Mic key is lit, Mute is disabled. When Mic is pressed again and light is off, Mute is enabled on the microphone in the telephone and the micro- phone in the handset. TOSHIBA IPedge UG 01/13...
- Page 19 (twice) to place an internal or external call on Exclu- sive hold. If your telephone is programmed for Automatic Hold, existing calls are automatically placed on hold when you answer a call or make another call. TOSHIBA IPedge UG 01/13...
-
Page 20: Programmable Feature Buttons
Note: This feature applies to the IP5131-SDL telephone. Browser Toshiba’s IP5131-SDL with it’s large display screen also supports an HTML browser to allow navigation on the World Wide Web or a company’s intranet. The phone can have a home page setup that allows navigation to begin just like a home page in your internet browser. -
Page 21: Line Lcd Display
A plus sign + on the LCD indicates there is more data to display. Press NEXT to advance through the information. Line 4 will display the soft keys available in idle state. Press DSPLY to switch from the Call Forward display to the User Name display. TOSHIBA IPedge UG 01/13... -
Page 22: Soft Keys
Soft Keys dynamically change their functions and label depending on the state of the telephone. The dynamic feature associated with the Soft Key is displayed on the bottom line of the LCD display directly above each Soft Key button. TOSHIBA IPedge UG 01/13... -
Page 23: Chapter 2 - The Basics
Call Announce simultaneously. To adjust handset Beep Tone 1. With the handset off-hook, dial the Beep Tone Adjustment Code #6101 (default code). A beep will be heard 2. Press Vol or Vol to reach the desired level TOSHIBA IPedge UG 01/13... -
Page 24: Lcd Contrast
1. Press 3+6+9+Hold (simultaneously) Others 2. Press the soft key BL Bright 3. Press the soft key 4. Enter a value of 0~3 using the keypad. (0 = dim; 3 = brightest) 5. Press the soft key twice TOSHIBA IPedge UG 01/13... -
Page 25: Backlight On/Off
IP5000-series telephone. The Adjustment default is normal sensitivity. 1. Press 3+6+9+Hold (simultaneously) 2. Press 0 3. Press Hold 4. Press Programmable Feature Button 3 (FB3) to toggle On/Off 5. FB3, LED On: Lower sensitivity TOSHIBA IPedge UG 01/13... -
Page 26: Telephone Terminology
LED, and turns on the Spkr and Mic LED's. When Hot Dialing is not turned on the handset should be lifted or Spkr should be pressed in order to make a call. TOSHIBA IPedge UG 01/13... -
Page 27: Making A Call
EXTR = System Speed Dial 4 Line LCD Display Names INTR = Directory Number Names Dial = Cancel directory, get dial tone. 2. Choose the directory you wish to access and use the dial pad to enter the name. TOSHIBA IPedge UG 01/13... - Page 28 BOB LAWVER BRAD FISHER BILL THOMAS BRIAN SMITH ONE TOUCH ONE TOUCH PICKUP ONE TOUCH CFAC ONE TOUCH ONE TOUCH Ext. 4227 ONE TOUCH NEXT BACK CNCL 9 Line LCD Display - Dial by Name Screen TOSHIBA IPedge UG 01/13...
-
Page 29: Answering A Call
Perform the same steps you normally would to answer a call: press the Spkr button, the flashing DN button or lift the handset. Handsfree MIC setting needs to be enabled by your System Administrator. • TOSHIBA IPedge UG 01/13... -
Page 30: On A Call
LED flashes. 1. While on a call, press Cnf/Trn. The call goes on hold. Consultation Hold 2. Dial another line. 3. Transfer the call or return to the held call by pressing its Line button. TOSHIBA IPedge UG 01/13... -
Page 31: Message Waiting
Spkr or hang up to release your telephone. Your LCD shows the extension and “MW CANCEL.” ...or dial the extension that you set the Message LED on, then Spkr press . Then press or hang up to release your telephone. TOSHIBA IPedge UG 01/13... -
Page 32: Led Indicator Details
3/4 second on, 1/8 outside call transferred to your Busy Station On/Off second Off busy station from a designated Transfer station or: 10 pulses/second 2 pulses/second After disconnecting first call 10 pulses/second steady Conference call Conference TOSHIBA IPedge UG 01/13... -
Page 33: Softipt Icons
The special buttons relating to the SoftIPT screen are described below. SoftIPT Icons Table 6: SoftIPT Button Definitions Button Definitions SoftIPT Directory – Clicking this icon enables you to access the directory you create using MS Outlook. Refer to “Using the Directory” on page TOSHIBA IPedge UG 01/13... -
Page 34: Fixed Buttons
There are two types of LCD button functions: LCD Control Buttons and Soft LCD Control Buttons Keys. When the Soft Key prompts appear on the LCD, the LCD Control Button just below the prompt offers access to that feature. TOSHIBA IPedge UG 01/13... -
Page 35: Configuring Softipt
When a call is made using the SoftIPT directory, SoftIPT automatically attaches the outgoing prefix for local calls, or long- distance prefix for long-distance calls, respectively. See “Using the Long distance prefix Directory” on page 35 for details. TOSHIBA IPedge UG 01/13... - Page 36 SoftIPT, through Windows, of receiving a reply message after sending a broadcast message. Therefore, Toshiba recommends using Manual mode if SoftIPT cannot find the IPedge by Broadcast. Network If there are multiple network adapters, select the one for SoftIPT.
- Page 37 1. Go to Start > Control Panel > Mail 2. Double-click the Mail icon 3. Click the Show Profiles... button 4. Here are all the profiles setup on your PC (see Figure Page -34) Figure 2 Mail Setup - Outlook TOSHIBA IPedge UG 01/13...
-
Page 38: Basic Softipt Functions
(asterisk key, pound key) from PC keyboard, or use the key pad on the USB handset, if available. 3. To end the call, go on-hook (put down the receiver or press the hook switch button). TOSHIBA IPedge UG 01/13... -
Page 39: Answering A Call
4. Type in the contact information, click Save and Close. Add as many entries as desired. To edit an entry, double click on the name to open. 5. Start Soft Phone. 6. Click Directory icon. The directory displays (see below). 7. Click on the name. The SoftIPT calls the contact. TOSHIBA IPedge UG 01/13... -
Page 40: Using Echo Canceller
To use Echo Canceller, click the Audio Setting of SoftIPT and check the Using Echo Canceller box as shown below. Enabling Echo Canceller TOSHIBA IPedge UG 01/13... -
Page 41: Chapter 4 - Feature Operations
_______ _______ Voluntary Account Codes are optional. They can be entered during a call and are Voluntary Account used for tracking selected calls using Station Message Detail Report (SMDR) call Codes (Verified/Non- detail recording option. Verified) TOSHIBA IPedge UG 01/13... -
Page 42: Voluntary Account Codes
Message numbers 5~9 can be defined by your System Administrator. Advisory Message Default Code Table Msg No. Characters Displayed Additional Digits OUT TO LUNCH IN A MEETING CALL _____________ Directory Number (e.g.,220) BACK AT __________ Time (e.g., 1030) TOSHIBA IPedge UG 01/13... -
Page 43: Alarm Notification
When the Alarm Notification button displays Call your System Administrator. • This button stops displaying when the alarm clears or when you press the flashing button. If the alarm has not been cleared the Alarm Notification Button flashes every 10 minutes. TOSHIBA IPedge UG 01/13... -
Page 44: Automatic Callback
IPedge Net system: the first source is Quiet Tone, all others can be music or recorded information. If media resources are exhausted, the user will temporarily be unable to hear BGM. TOSHIBA IPedge UG 01/13... -
Page 45: Call Forward
Call Forward features they choose. These are normally the extensions dialed most frequently, or an external number. Call Forward features may also be programmed using IPedge Enterprise Manager. Note that Call Forward settings must be assigned prior to receiving any call. TOSHIBA IPedge UG 01/13... -
Page 46: Station Call Forward Procedures
Programmable Feature Button (FB) on the base Procedures station. To use the Call Forward button sequence: Follow the instructions in “Example: Call Forward to extension” Page • -43. Some features may require additional input: TOSHIBA IPedge UG 01/13... -
Page 47: Program Call Forward Via Enterprise Manager
Extension button + #6042 + YYYY + 1111 + # + 9 + (1-949-555-0000) + # + 08 1. Press your extension button 20. Enter access code #6042 21. Other telephone’s extension number YYYY TOSHIBA IPedge UG 01/13... -
Page 48: Call History
(consultation-hold). If you were on an extension during the call, and you have line button on your telephone, the line LED will flash until the call is picked up (depending on programming). 2. Specify the Park Orbit using one of the following: TOSHIBA IPedge UG 01/13... -
Page 49: Call Pickup
#5#32 + Group No. Group Ext. No. A call ringing this Ext. No. only. Other lines ring- #5#22 + Ext. No. ing on the same phone are unaffected. Outside Calls Any incoming outside line call. #5#9 TOSHIBA IPedge UG 01/13... -
Page 50: Call Transfer
While the LED is flashing, you can press the Line button to return to the call. If the receiving party answers the call, the LED turns solid red and you cannot reconnect to the original caller. TOSHIBA IPedge UG 01/13... -
Page 51: Call Waiting
The caller’s number and name can be displayed on the IPT or attendant console’s Caller Information LCD. The caller information is stored in the system, retrieved at relevant extension stations, recorded on SMDR, and sent to an external server and client through CTI link, if necessary. TOSHIBA IPedge UG 01/13... -
Page 52: Conference Call
Caller ID is displayed when a call is first answered and displays for Note: the first 15 seconds of the telephone call. Conference calling using an IP5000 Series telephone allows up to eight Conference Call parties to join together on a conference call. The party initiating the conference call is known as the “conference master”. - Page 53 Cnf/Trn and dialing another extension.) Now, all parties in the conference may listen to or record a message to this voice mailbox. Only the Master may control the VM with Soft Keys. TOSHIBA IPedge UG 01/13...
- Page 54 NEXT that you want to Split out of the conference. 3. Return your extension and the other Split party back into the conference by pressing JOIN TOSHIBA IPedge UG 01/13...
-
Page 55: Direct Station Selection (Dss)
Press the desired extension appearance and Do Not Disturb or #6091 Activate DND on a • (hear Success Tone). The LED lights steady red and DND mode is activated non-Primary for that extension on your telephone. extension TOSHIBA IPedge UG 01/13... -
Page 56: Emergency Call
Each station is programmed with its specific emergency ringdown destination. A station number or a group pilot number can be specified as an emergency ringdown destination. In a private network, the station or pilot number must be in the same network node. TOSHIBA IPedge UG 01/13... -
Page 57: Message Waiting
4. Press Spkr. Your Msg LED turns Off. The Msg LED on the called telephone flashes until the called party presses the flashing Msg button which calls you back. 5. Turn off the Message LED. The two ways to turn Off a Message LED are: Method 1 TOSHIBA IPedge UG 01/13... -
Page 58: Microphone Cut-Off
2. To turn off your microphone speaker to the second party, you can press Mic or Microphn Cut-off; the Mic LED turns Off. You will no longer be talking to the second caller, although the caller can still speak through your speaker. TOSHIBA IPedge UG 01/13... -
Page 59: Override
Your LCD displays DND OVR DENY if the station you called denies DND Override. Executive Override enables you to enter an established conversation. Your Executive Override telephone can also be programmed to block Executive Override from other telephones. TOSHIBA IPedge UG 01/13... -
Page 60: Paging
Privacy Override. Station users may make page announcements to telephones. Check with Paging your system administrator to find out the zone numbers for various paging TOSHIBA IPedge UG 01/13... - Page 61 To originate a page, enter the paging access code. Certain SIP terminals may accept a paged call if the phone supports paging, and Set SIP Station for the feature is enabled. IPTs belonging to the same group will also hear the paging Paging call. TOSHIBA IPedge UG 01/13...
-
Page 62: Privacy
Press Privacy on Line to set privacy. The LED lights steady red. Set/Cancel Privacy • Others are blocked from entering your outside line calls when they press a common Line. Press Privacy on Line again to cancel the feature. The LED turns Off. • TOSHIBA IPedge UG 01/13... -
Page 63: Redial
= 200~999 System SD numbers a. Stations must be assigned/enabled Speed Dial capabilities in system programming. b. If your telephone does not have a Spdial button, press the * button, then dial the three digit Speed Dial bin number (nnn). TOSHIBA IPedge UG 01/13... -
Page 64: Time And Date Setting (Local)
IP Telephone to the local time zone in which the telephone is located. To change the Date From the IP telephone, dial #653 and enter YYMMDD# • Example: To set the date to March 12, 2008. YY = Year, example 08 TOSHIBA IPedge UG 01/13... -
Page 65: Tone First / Voice First Signalling
Signaling is being used. The ability to switch between the two is setup by the System Administrator. To change the signalling method while placing the call 1. Enter the extension number 2. Press 1 to turn on Tone First Signaling. 3. Press 2 to turn on Voice First Signaling. TOSHIBA IPedge UG 01/13... -
Page 66: Uniform Call Distribution
The call will be delivered to the first agent that becomes igle. • If the call cannot be answered within the preconfigured time, the call is routed to an overflow destination. • If no overflow destination is programmed the call will remain in queue. TOSHIBA IPedge UG 01/13... -
Page 67: Login/Logout
Login - from Agent Station #6062 Logout - from Agent Station #6161 Login - Agent Station (DN) from another station #6162 Logout – Agent Station (DN) from another sta- tion where DN = the Directory number of the agent station. TOSHIBA IPedge UG 01/13... - Page 68 This page is intentionally left blank.
-
Page 69: Chapter 5 - Messaging Features
Once you have completed this set up process, the system notifies you there are any new messages in your mailbox. To access the New User Setup at any time in the future, press 7 from the main system options menu. TOSHIBA IPedge UG 01/13... -
Page 70: Check New Messages
(in increments of five seconds or as programmed by the system administrator). You can also press 5 to pause the message and 5 again to resume it (it automatically resumes after 60 seconds or as programmed by the administrator). TOSHIBA IPedge UG 01/13... -
Page 71: Volume /Speed Control
This option will ring their phone rather than send a message to their mailbox. 1. Press 7 while listening to a message or after the message has finished playing. 2. You now have a few options: To call the number and delete the message, press 3 • TOSHIBA IPedge UG 01/13... -
Page 72: Redirect A Message
To check how many messages you haves: The system can tell you how many new and saved voicemail messages you have. If you have fax and email capabilities, the system will also inform you how many fax and email messages you have. TOSHIBA IPedge UG 01/13... -
Page 73: Send A Message Directly To A Subscriber's Mailbox
3. The system will then ask you to address your message. When sending a message as confidential, the system will also provide you with the option to send the message with return receipt and/or schedule it for future TOSHIBA IPedge UG 01/13... -
Page 74: To Mark A Message As Priority
1. Call the voice messaging system and press 2 from the subscriber’s menu to record a message. Press any key when you are done recording. 2. Press 0 6 to send your message with return receipt. TOSHIBA IPedge UG 01/13... -
Page 75: To Schedule A Message For Future Delivery
2. Press # to send to a Private Distribution list or # # to send to a global Distribution list. 3. Enter the group number. 4. Press 1 to confirm or 2 to change your destination. 5. Press 1 to send. TOSHIBA IPedge UG 01/13... -
Page 76: Delete A Message After Sending
2. Enter in the mailbox number you wish to check and the system will play the first unheard message you left for the recipient. 3. To delete the message press 3, to replay the message press 1, to hear the next message press 2. TOSHIBA IPedge UG 01/13... -
Page 77: Chapter 6 - Greetings
Greeting 1. Call the voice messaging system and select 3 2 2 from the subscriber’s menu to access your extended absence greeting. The system will advise you whether your Extended Absence Greeting is activated or deactivated. TOSHIBA IPedge UG 01/13... -
Page 78: Deactivate Your Extended Absence Greeting
2. To listen to your name before saving, press 1. 3. To record your name, press 2. 4. To delete your name, press 3. 5. To save your recorded name simply hang up or press to exit. TOSHIBA IPedge UG 01/13... -
Page 79: Chapter 7 - Other Messaging Applications
2. Enter the list number you wish to make changes to, followed by # 3. To add a new member, press 2 and the new mailbox number. The system will confirm the addition. 4. Continue entering any additional members. Press when finished. TOSHIBA IPedge UG 01/13... -
Page 80: Delete Members From A Private Group Distribution List
1. Call the voice messaging system and record a new message or forward a received message. 2. When you address the message for delivery, you have the option of inputting a mailbox number or selecting # # for a public distribution list. TOSHIBA IPedge UG 01/13... -
Page 81: Personal Options
2. If it is not already activated, press 1. You may also activate or deactivate individual schedule lines. You will need to know the notification schedule each schedule line refers to. TOSHIBA IPedge UG 01/13... -
Page 82: Set A Wake Up Call
1. Call the voice messaging system and select 3 4 2 2. The system will ask you to press # to confirm deletion If you delete your mailbox password your mailbox will not be Important! password-protected. TOSHIBA IPedge UG 01/13... -
Page 83: Personal Assistant
The button has the LED to show the status of the Follow Me feature as shown below. Button LED Description Follow Me feature is not activated. The call should ring the default station (usually the user’s desktop phone). TOSHIBA IPedge UG 01/13... -
Page 84: Setting Up Follow Me
3. To activate this call-out number, press 1 or to enter a new call-out number, press 2. Once the call-out number is activated, all calls stop ringing at your office phone and will automatically be forwarded to your call-out number. TOSHIBA IPedge UG 01/13... -
Page 85: Accepting Or Rejecting Calls At A Call-Out
You can have calls sent directly to your voicemail when you do not want your Setting up “Do not office phone to ring. Disturb” 1. Call the voice messaging system and select 4 1 2. To deactivate and have calls transferred back to your phone, press 1 again. TOSHIBA IPedge UG 01/13... -
Page 86: Setting Up A Personal Schedule
Each time you receive a Voicemails through voicemail an email will be sent to your inbox with an attachment that includes Email a recording of the voicemail. You can open this attachment with any audio TOSHIBA IPedge UG 01/13... - Page 87 Click the “Link to message” to play your message using the telephone. The following options display. Click on the appropriate button. TOSHIBA IPedge UG 01/13...
- Page 88 This page is intentionally left blank.
-
Page 89: Chapter 8 - Ipmobility Application
After a destination number is dialed, IPMobility sends a data signal to the IPedge system over the Internet. IPedge then calls the mobile device and asks the user to press 1 or # to accept the call. After confirmation the system will connect both TOSHIBA IPedge UG 01/13... -
Page 90: Before You Begin
The IPMobility application may be downloaded from Google Play or the iTunes™ App Store. For Android: https://play.google.com/store/apps For iPhone: http://www.apple.com/itunes/ Android Users Before you begin, enable the “Unknown Sources” feature in Application Settings. To do this: TOSHIBA IPedge UG 01/13... -
Page 91: First-Time Setup
86. Follow the steps outlined below to set up your device for the first time: Enter the following information on the login screen: • Voicemail IP Address • Mailbox Number (normally your extension number) • Voicemail Password TOSHIBA IPedge UG 01/13... - Page 92 3. Once you are logged in to IPMobility, tap the My Info tab on the lower right. 4. Scroll down and tap Settings. 5. On the Settings screen, enter your mobile Phone Number and the Direct Inward Dialing (DID) number in the fields highlighted in red. TOSHIBA IPedge UG 01/13...
- Page 93 2. Verify that the IPedge Caller ID or DID is displayed (not the mobile phone number.) The setup wizard will guide the user through the voice mailbox setup process. Mailbox Setup Wizard 1. Tap My Info. TOSHIBA IPedge UG 01/13...
- Page 94 3. To create or change your voice mailbox password, enter in either field. 4. Tap Save when complete. If Save button is not visible, click anywhere on the screen Note: background. 5. Tap the right arrow to advance. TOSHIBA IPedge UG 01/13...
- Page 95 6. Tap Record; press Stop when complete (The Record button will toggle between functions.) 7. Tap Play to preview the message; tap Record to re-record your full name. 8. When complete, tap the right arrow to advance. Record a personal greeting for your voice mailbox. TOSHIBA IPedge UG 01/13...
-
Page 96: Mailbox Setup Wizard
1. To change your voice mailbox password, enter in the field and confirm in the second field. If the Tap Save when complete. If Save button is not visible, click anywhere on the screen background. Note: 2. Tap the right arrow to advance. TOSHIBA IPedge UG 01/13... - Page 97 4. Tap Play to preview the message; tap Record to re-record your full name. 5. When complete, tap the right arrow to advance. Record a personal greeting for your voice mailbox. 6. Tap Record; press Stop when complete. (The Record button will toggle between functions.) TOSHIBA IPedge UG 01/13...
-
Page 98: Using Ipmobility
From this screen, you may also record a new message and send it to another mailbox, as well as view any future delivery messages. If a new message is waiting, the app displays a message notification. Tap Inbox Inbox to view messages. TOSHIBA IPedge UG 01/13... -
Page 99: Message Menu
Page -98 A message may be deleted, saved, replied to, or forwarded by either voice mail or Message Menu email from any of the four mailbox screens. Tap and hold the message to access this menu. TOSHIBA IPedge UG 01/13... - Page 100 1. If forwarding via email, enter the email address of the recipient. Change the subject header, or the email client will send the message with the subject heading “FW: Voicemail”. The user will receive the file in WAV format. TOSHIBA IPedge UG 01/13...
- Page 101 3. Tap Message Options. 4. A forwarded message may be tagged as priority, confidential, return receipt, no receipt notification, or future delivery. For no receipt notification and future delivery, users are asked to input a date and time. Reply TOSHIBA IPedge UG 01/13...
- Page 102 1. Tap and hold the message to display the message delivery options window. 2. Select Future Delivery from the menu. 3. Select a date from the calendar wheel. TOSHIBA IPedge UG 01/13...
-
Page 103: Call Tab
The system will also allow users to record, playback, and save these state-based greetings. Additionally, users will have the option to select settings for each of these features. Click on the links above for Greeting Management feature TOSHIBA IPedge UG 01/13... -
Page 104: Record Greetings
Follow-me allows users to setup their voice mailbox to automatically forward a call to a different number prior to sending call to voice mail. These may be internal extensions or external phone numbers and may be entered on the Default Locations screen. TOSHIBA IPedge UG 01/13... - Page 105 Absence greeting - tap the button to activate/deactivate. Once enabled, users are Deactivated notified that the extended absence greeting is playing every time they log into their mailbox. This serves as an ongoing reminder to change the outgoing message to return to default. TOSHIBA IPedge UG 01/13...
- Page 106 IPMobility why the call is being forwarded (user is busy). Busy destination numbers may be set to call all destination numbers (follow-me) at the same time, or to direct the call immediately to voice TOSHIBA IPedge UG 01/13...
- Page 107 Logout of the IPMobility Application. Logout This allows first-time system users to establish a new mailbox via IPMobility. Setup Wizard Follow the system prompts to setup password, recorded name, and default TOSHIBA IPedge UG 01/13...
-
Page 108: Call Settings
Do not use IPMobility dialing. to call (Android ONLY) Select this option if you wish to have the IPMobility Application display a Ask Every Call notification that it should be used for every call. (Android ONLY) TOSHIBA IPedge UG 01/13... -
Page 109: Incoming Calls
“Simultaneous voice and data” refers to the ability to access the internet while talking on the mobile device. Some carriers do not support this service; contact your system administrator to confirm if your phone supports notification or pop-up notification. TOSHIBA IPedge UG 01/13... - Page 110 Transfer to Desk Transfer the call to your office desk. (See Transfer) Record/Stop Record Start/stop recording of the conversation. Send to Voicemail Send the call directly to your voice mailbox. Disconnect This will disconnect the current call. TOSHIBA IPedge UG 01/13...
- Page 111 2. Enter a destination number on the call screen or select a number from your address book and press dial. The following call flow example assumes that “Ask Every Call” was set. 1. A popup screen is presented asking whether to use IPMobility or the phone for out dial TOSHIBA IPedge UG 01/13...
- Page 112 CDMA carrier-based plans (such as Verizon and Sprint) may not support Note: the Call Transfer feature Android: While on a call, tap the status bar iPhone: While on a call, switch to or open the IPMobility App and the screen will display automatically. TOSHIBA IPedge UG 01/13...
-
Page 113: Chapter 9 - Fax Capabilities
3. Select File > Print from the program’s menu bar, and from the printer dialog box select the MessagingFax option from the Printer Name drop- down. 4. The Fax dialog screen (web-based) will open. Complete the following fax sending information. TOSHIBA IPedge UG 01/13... -
Page 114: My Info
This information will be used in the fax cover letter if you choose to send one. This section will also show you the size (in kilobytes/KB) of your fax. • TOSHIBA IPedge UG 01/13... -
Page 115: Options
To set up the internal address book you must have access to Internal address book Web Access. 1. Log into Web Access 2. Select Mailboxes > Fax > Fax Contacts from the drop down menu. 3. From this screen you can input new contacts TOSHIBA IPedge UG 01/13... -
Page 116: Fax Options
Accept Incoming Faxes Y/N – This option allows you to select whether Incoming Faxes • to receive or deny faxes. If you select not to receive faxes, this mailbox TOSHIBA IPedge UG 01/13... -
Page 117: Cover Information
Displays any faxes currently being processed. Fax Queue Cover page Information (entered when printing a fax). You can use this page Cover Information to maintain cover page information that is used when sending a fax from your desktop. TOSHIBA IPedge UG 01/13... -
Page 118: Redirect Fax Messages
#. 4. Press 1 to send to the fax machine; press 2 to enter a different number. TOSHIBA IPedge UG 01/13... -
Page 119: Chapter 10 -Call Manager Basics
It can easily interface with many popular programs (like Microsoft • Outlook, Goldmine, ACT, etc.). This allows you to dial from and “screen- pop” into these programs or the Internet / Intranet. TOSHIBA IPedge UG 01/13... -
Page 120: The Main Screen
Hides Call Manager into the system tray. Double- click on the Call Manager icon (shown right) in the system tray to return the Call Manager to the screen. Minimize Button Used to change the phone to/from its “Compact” view and its “Expanded” view. TOSHIBA IPedge UG 01/13... - Page 121 Call Forward Key and Displays the current “PBX call forwarding” status for your Indicator phone. Hover the mouse over this area to see the entire FWD status. Click to change your PBX forwarding status and destination. TOSHIBA IPedge UG 01/13...
- Page 122 Call Manager. The list of Shortcut keys can be found using the menu selection Setup>Shortcut Keys. Note: The F1 key is the HELP key a can be pressed at any time to access the Help document. TOSHIBA IPedge UG 01/13...
-
Page 123: Expanded View
Programmable Buttons – A number of keys can be easily configured by the • user as “Feature” keys, “Speed Dial” keys, “Call” keys, “User Action” keys, etc. TOSHIBA IPedge UG 01/13... -
Page 124: Screen Docked Views
The Main menu screen menu item expands into an ability to Change the Login settings, an ability to reset the phone to its default settings, access help, and check the Call Manager version and serial number. TOSHIBA IPedge UG 01/13... -
Page 125: Shortcuts
Preferences > Hot Keys. When a call rings the phone, the alert window pops up, and the user can answer Call Alert the call from the pop up window or the open the Call Manager main window. TOSHIBA IPedge UG 01/13... -
Page 126: The Side Window Screen
25 user-programmable buttons for the user. User Programmable Buttons – A number of keys can be easily configured • by the user as Feature keys, Speed Dial keys, Call keys, User Action keys, ACD keys, etc. TOSHIBA IPedge UG 01/13... -
Page 127: Companion Application Windows
Screen Colors The Call Manager has three color schemes. To change the color of your display, click the Color drop down and select either Blue, Silver or Black. Color icon TOSHIBA IPedge UG 01/13... - Page 128 This page is intentionally left blank.
-
Page 129: Chapter 11 -Using Call Manager Features
1. Pull down the list of numbers in the dial number box and select the number to dial. 2. Click the Make Call button to dial. Using Call Manager keypad 1. Click the keypad button to expose the keypad. TOSHIBA IPedge UG 01/13... -
Page 130: Answering Calls
Double-click on the selected call in the Calls View Window. • To Answer a Call while Talking (Call Waiting) While on an existing conversation, another call may ring. The existing call • can be placed on hold and the ringing call answered. TOSHIBA IPedge UG 01/13... -
Page 131: Hang Up
Calls Window onto a DSS button for immediate transfer to another station. or use the mouse to drag and drop the call from the LCD display window onto a DSS button for immediate transfer to another station. TOSHIBA IPedge UG 01/13... -
Page 132: Call Forwarding
3. Enter a Destination for the forwarded calls. 4. Click Save to compete the setting. To Clear Call Forwarding 1. Click the. button 2. Choose <None> from the pull-down listing. 3. Click Save to remove the previous setting. TOSHIBA IPedge UG 01/13... -
Page 133: Status Messages And Dnd
5. Click the Save button when done. The status message will appear on the DSS keys throughout the system. Turning Off DND or Message Only 1. Click the button to bring up the or Status Message window. 2. Click the Msg Off radio button to remove the Status Message. TOSHIBA IPedge UG 01/13... -
Page 134: Viewing Extra Call Information
ACD queue; the caller could define a Preferred Agent by entering an agent’s ID into the Preferred Agent Information field. When the call is transferred this information is available to be used by the ACD application. TOSHIBA IPedge UG 01/13... -
Page 135: Call Center Features
ACD groups you are a member. To Log Out 1. Highlight the group name(s) in the left-hand box and click the >>Log Out button. 2. Click Done when finished. TOSHIBA IPedge UG 01/13... -
Page 136: Changing Agent Status
1. Click Set Wrap-up button. 2. Click Done. The Set Wrap-up button is NOT available on all installations. Note: To End Wrap-up 1. Click the ACD Status button. 2. Click the End Wrap-up button. 3. Click Done. TOSHIBA IPedge UG 01/13... -
Page 137: Chapter 12 -Preferences
To access Preferences click on Preferences tab. The settings in Preferences are divided between four tabs each defined below. Depending on your configuration you may not be able to change the Note: Preferences, in which case you should check with your System Administrator. TOSHIBA IPedge UG 01/13... -
Page 138: General
• Intercom Only, or Outside Only calls. Sound File – Enter the path to the .WAV file to be played. Use the Browse • button when needed to search for the path to the sound file. TOSHIBA IPedge UG 01/13... - Page 139 Static Information Fields – These fields will have a fixed area within the Call • Notes window for the information to be displayed. You have the ability to Add, Change an existing or Remove any field. TOSHIBA IPedge UG 01/13...
- Page 140 If you're not using Outlook, then this should be disabled. Home Area Code – Enter your home area code. This is used for dialing • local calls when the area code needs to be stripped from the dialing. TOSHIBA IPedge UG 01/13...
- Page 141 Outlook Phone Link – With the Outlook Link application installed, click the • Setup button to access the Setup Configuration for Outlook Link. For details on setting up Outlook Link see the Application Note “Screen Pop Outlook”. TOSHIBA IPedge UG 01/13...
-
Page 142: Dialing Tab
# is assumed and automatically inserted for the first digit. Home Area Code – Your local area code should be defined here. This is • used only when you choose to use the Local Dial Plan. TOSHIBA IPedge UG 01/13... - Page 143 Optionally, the label can be changed to meet your needs. Call Results – Enable the Action button and select the Action to be performed • when the button is pressed. Optionally, the label can be changed to meet your needs. TOSHIBA IPedge UG 01/13...
- Page 144 If you chose to use the Local Dialing Plan, you need to create a dialing plan. If you chose SERVER Dial Plan, then you should check with your System Administrator if you have questions. TOSHIBA IPedge UG 01/13...
- Page 145 Add+1 – Check the box if you need to dial a leading 1 before the number for • calls within your Home Area Code. Dial Area Code Plus the Number – Check the box when the home area code • is also to be dialed. TOSHIBA IPedge UG 01/13...
- Page 146 Dialing plans can become complex. Use these boxes to enter different Test a Phone Number telephone numbers and check to see the number that will be dialed. The dialed number should be identical to what you need to dial when using your phone. TOSHIBA IPedge UG 01/13...
-
Page 147: Docking Tab
Once you’ve changed the screen-docking settings, the new settings will Note: not be used until the Call Manager is ‘undocked’ (if it’s already screen- docked) and then re-docked. Docked profile – Regular provides the original docking mode. Slim provides • one-line docking mode. TOSHIBA IPedge UG 01/13... -
Page 148: Advanced Tab
Technical Support for debugging problems encountered. The TAPI Service Provider should not be changed unless your System Administrator has instructed you to update the settings for finding Net Server for your application. TOSHIBA IPedge UG 01/13... - Page 149 Clicking this button enables the Debug utility and have it show on the Main Menu Diagnostic Logging/ under Settings as well as provide an easy utility for sending all the important Uplink information about Call Manager to assist Technical Support to help diagnose any problems when necessary. TOSHIBA IPedge UG 01/13...
- Page 150 Options – Clicking the Options button opens a screen to provide options • for how the files are to be sent. Uncheck “Send Directly to Toshiba Support Site”, and the files can be zipped into smaller files, saved on your PC in your Local Settings folder, typically C:\Documents and Settings\<user name>\Local Settings\Application...
-
Page 151: Setting Up Hot Key Dialing & Popup
Answer – Answer the ringing call. • • Hold – Place the active call on hold. • Hang Up – Disconnect the active call. • Expand / Contact – Toggle Call Manager between the compact mode and regular mode. TOSHIBA IPedge UG 01/13... - Page 152 Many applications use various “hot keys” or keyboard shortcuts. Note: These keys are defined in advanced settings that your administrator can change if you encounter a conflict with another application. See “Call Manager System Administration Manual” for details. TOSHIBA IPedge UG 01/13...
-
Page 153: Skin Editor
PNG, BMP, JPEG, GIF. Application Menu – change the application menu logo to another image file. It • supports similar file formats as those of Title Bar. Bold Font – select to change the menu font to Bold. • TOSHIBA IPedge UG 01/13... -
Page 154: Skins Files
With the Skin loaded to be deleted, click the Delete icon. Click Yes in the To Delete a Skin dialog box to confirm the action. The system should have at least one skin; deleting the last skin will be rejected. TOSHIBA IPedge UG 01/13... -
Page 155: The Skin Editor
Preferences tab > General > Extra Call Information. Right-click on the LCD area to bring up the menu options: Change background color • Change Top Line Text color • Change High Priority Text Color • Change Medium Priority Text Color • TOSHIBA IPedge UG 01/13... -
Page 156: Insert Your Logo Into The Skin
Reset: Click this button to reset to the default colors for the specific ACD • status. Click Hide Colors when done.Finish by Saving your Design • Use the Save or Save As commands to save your design before exiting. • See above for details. TOSHIBA IPedge UG 01/13... -
Page 157: Email Skins
To send the skin using email, click on the email skin Email skins button (shown right). A Microsoft Outlook message dialog box displays (shown below). Enter the appropriate address/addresses to send the skin. Email skins Microsoft Outlook is required when using this function. TOSHIBA IPedge UG 01/13... -
Page 158: Tab Settings
Update Tab tooltip of each tab in your tab view. The 'Name' or 'Tooltip' can be changed by clicking in the cell and typing.Use the Up and Down buttons to move the tabs appropriately, then click OK. TOSHIBA IPedge UG 01/13... - Page 159 IPedge Preferences TOSHIBA IPedge UG 01/13...
-
Page 160: Delete Tab
Browser tab the browsing history may be lost, since deleting a web browser tab and adding a new one always starts on a new blank page. Click the revert button (highlighted in red) to bring all the companion Revert applications back to the main window as tabs. TOSHIBA IPedge UG 01/13... -
Page 161: Chapter 13 -Buttons
You can create tabs of more buttons. There are 8 banks with a total of up to 64 buttons each. Each Buttons application can be assigned to one of these 8 banks, which means the buttons in that TOSHIBA IPedge UG 01/13... -
Page 162: User Programmable Keys
Swap Keys option, then click on another button. Notice that the button has now been swapped. To do this, hold the Control key down while using the left mouse button to drag a key to another location. Or select TOSHIBA IPedge UG 01/13... -
Page 163: To Copy This Key
Default Colors – Pressing this button will reset the colors of the key and text to • the default for the skin used. Action – Choose an action to be performed. This selection will open additional • settings corresponding to that action. See the settings below for the different possible actions. TOSHIBA IPedge UG 01/13... - Page 164 LCD of the pager (e.g. “5551234x4969040#”), or (3) dialing a long distance access code (e.g. “8884083279 x17135551234”). Note: You can use more than one “X” in the phone number and it will wait after each “X” (e.g. “4969040 x8 x*1009,1234”). TOSHIBA IPedge UG 01/13...
- Page 165 CD – Call Pickup * TRANSFER Set Work Units “Value” SETWORKUNITS “Value” Set Work Units “Value” ACD_CALLPICKUP ACD – Call Pickup ACD_AGENTHELP ACD – Agent Help * An enhanced feature is available in User Defined Actions TOSHIBA IPedge UG 01/13...
- Page 166 Select the appropriate action or button to add, copy, edit, test, or delete action. The appropriate action screen displays. Click Save and then click Done. Refer to Chapter 14 – Actions for more information on editing actions. TOSHIBA IPedge UG 01/13...
- Page 167 Show/Set your Agent status. Other ACD functions may be available in the User- Defined Actions depending upon the PBX used with Call Manager. The color of ACD Keys cannot be changed as the colors are determined Note: by the ACD State for the key. TOSHIBA IPedge UG 01/13...
- Page 168 This sets the key to run a specific application or load a specific document. For Run Program Keys example you could create a “Calculator” key to run the windows calculator by setting the “Program filename” to CALC.EXE. Alternatively you could create a TOSHIBA IPedge UG 01/13...
- Page 169 Speed Dial, Redial, Conference/Transfer, Hold, and SHIFT key. Please note that Shift key must be disabled for the phone. IPT Soft Key Four soft keys on the phone can be mapped to a button. The label shows the soft key function when it is available. TOSHIBA IPedge UG 01/13...
- Page 170 Drag a Contact from Microsoft Outlook to a key to create a Speed Dial • button Drag a call from the Call History to create a Speed Dial button • Drag an entry from the Contacts application to create a Speed Dial button • TOSHIBA IPedge UG 01/13...
-
Page 171: Creating Actions
The Creating of Actions can be done by going to the Actions menu. Creating Actions The left column shows a listing of currently defined actions that you can Add, Copy, Edit/Test or Delete using the menu. When an action is selected, its TOSHIBA IPedge UG 01/13... -
Page 172: Attach Account Code
(typically the 'Main Listed Phone #') before they press SAVE to export the information to the centralized database. Path & Filename – Enter the complete path name for writing the exported • file or browse to find the path. TOSHIBA IPedge UG 01/13... -
Page 173: Log Info To File
12/02/04 16:28 In 1027 949-853-3351 Katz Yamag Yes This action will lookup the phone number in Microsoft Outlook and then selectively Lookup in Outlook opens a contact, creates a new contact, or adds a journal entry. TOSHIBA IPedge UG 01/13... -
Page 174: Minimize Phone Screen
Name – Enter a name for the caller to be used as the Caller ID name. • This replaces an existing name or adds a name, if blank. Account # – Enter an account code for the call. This replaces an existing • number or adds a number, if blank. TOSHIBA IPedge UG 01/13... -
Page 175: Play Wav File
This action will play a specified WAV file on the PC sound card. Play WAV File Path & Filename – Enter the complete path name for the WAV file to be • played or browse to find the path of the file. TOSHIBA IPedge UG 01/13... -
Page 176: Pop External Web Browser
Another use may be to have several “Personal Directories” where the 8 button limit may not allow access to more directories. Assigning a programmable button can allow opening these personal directories using one-click access. TOSHIBA IPedge UG 01/13... -
Page 177: Popup Call Info Screen
Extra Call Information window Popup Info Screen Type – Choose either Standard Info or Extra Info. When • Extra Info is selected, choose when the popup will occur: Always, Any Info Attached, or Any Priority Info. TOSHIBA IPedge UG 01/13... -
Page 178: Popup Phone Screen
Parameters – Enter any additional parameters that may be accepted as • part of the command line to startup the program. The example above uses Outlook to pop open a “sticky note” with data and time recorded. TOSHIBA IPedge UG 01/13... -
Page 179: Send Dde Msg
Run Program and Program EXE – If the target program is NOT found to be • running, you can have the action attempt to automatically start the program. TOSHIBA IPedge UG 01/13... -
Page 180: Send Keystrokes To A Program
2. Key Strokes: To restore Notepad (Alt+Space+R): Key Strokes:= %%{ }R and to move to the end of the file (Control+End): append to Key Strokes: ^{END} 3. In Program EXE: Enter program name and file name to open “Notepad.exe /calls.txt”. TOSHIBA IPedge UG 01/13... - Page 181 {F7} Help {HELP} {F8} Home {HOME} {F9} {INS} {F10} Left Arrow {LEFT} {F11} Num Lock {NUMLOCK} {F12} Page Down {PGDN} {F13} Page Up {PGUP} {F14} Right Arrow {RIGHT} {F15} Scroll Lock {SCROLLLOCK} {F16} Spacebar Control Shift TOSHIBA IPedge UG 01/13...
-
Page 182: Set Phone Status Message
Custom 2nd Line – Optionally enter a second line to display on the lower • line of the phone’s display message. Action Variables may be used including the time variable plus ‘x’ Note: minutes to set a current time plus 60 minutes in the example above. TOSHIBA IPedge UG 01/13... -
Page 183: Set Phone Forwarding
(Immediate, Busy, No Answer, Busy/No Answer, or Off) and the destination. Choose Forwarding – Select from the drop down list the forwarding action to • use. Destination – Define the number for the destination of the forwarding. This is • left blank when using Forwarding Off. TOSHIBA IPedge UG 01/13... -
Page 184: System/Pbx Command
Recommend using Transfer Call action. Recording Option When Recording is active on Call Manager. RECORD RECORDBKMAKR Substitute your bookmark text for “Text” “Text RECORDSTOP ACD Option When ACD is available on some PBXs. ACD HELP ACD PU SET WORKUNITS TOSHIBA IPedge UG 01/13... -
Page 185: Transfer Call
Voice mailbox, or to an outside phone number (e.g. 9,4969040). Transfer To – Enter an extension number or outside number to be called. • Transfer Mbox – Enter a mailbox number if going to a Voice Mail number. • TOSHIBA IPedge UG 01/13... -
Page 186: Action Variables
Action Variables replaces the variable token code with the appropriate value when the action executes. For example, %P becomes ‘4804969040’ when you receive a call from Toshiba. Refer to the table below for call variables and their values. Call Variables... - Page 187 ‘x’ or left-most characters. Insert –x to restrict the variable value to the last ‘x’ or right-most characters. For example, to pass the first 8 characters of the Calling Party Name, enter: %+8N. To send the last 4 digits of the Calling Phone Number, enter: %-4P. TOSHIBA IPedge UG 01/13...
-
Page 188: System Variables
LUNCH message and a second line of UNTIL &U+’30’. If this action is used at 11:55 AM, then the resulting message on Call Manager is OUT TO LUNCH UNTIL 12:25 PM. Examples for Text Reader/ Announcer: Speak Reminder: SPEAK,"Reminder,%OR("SUBJ"),Starting %OR("DIFF")",&V1,&V2 Speak Appointment: SPEAK,"Appointment,%OC("SUBJ"),Starting Now",&V1,&V2 Announce Call: CA,%T,&F,"%N",%H,&V1,&V2 TOSHIBA IPedge UG 01/13... -
Page 189: Exporting Actions
This file is exported into the user’s application data folder (typically, “C:\Documents and Settings\<user name>\Local Settings\Application Data\Toshiba\Strata Call Manager”). In order to identify the file more easily you may want to user Explorer to rename that file to something more appropriate (e.g. -
Page 190: Testing Actions
Handler you may want to open the Main Menu Icon > Setup > Advanced > Show Events screen (see your System Administrator if you do not have the Advance menu item) to see what is actually occurring when that action is being used. TOSHIBA IPedge UG 01/13... -
Page 191: Chapter 15 -Personal Call Handler
Then you can create a Personal Call Handling Rule and choose which event will trigger the action(s) and then refine this by setting the conditions for when the trigger will occur. TOSHIBA IPedge UG 01/13... -
Page 192: Creating Personal Call Handling Rules
1. Click the Personal Call Handler icon > Personal Call Handler tab. The following screen displays. To Delete a Rule Highlight the rule to delete and click Delete. • To Add or Change a Call Handling Rule 1. Click the Add button TOSHIBA IPedge UG 01/13... - Page 193 Account Code – Select the account code type to be used. For the last two options, enter a specific number in the box including wildcard characters when needed. See Like Matches and Unlike Matches for use of wildcards. TOSHIBA IPedge UG 01/13...
- Page 194 Account Code – Select the account code type to be used. For the last two options, enter a specific number in the box including wildcard characters when needed. See Like Matches and Unlike Matches for use of wildcards. TOSHIBA IPedge UG 01/13...
- Page 195 Phone Software Startup – Happens whenever the Call Manager software • starts up and is in full operation with the PBX. Phone Software Shutdown – Happens whenever Call Manager software is • shutdown (using a normal Exit). TOSHIBA IPedge UG 01/13...
- Page 196 Account Code – Select the account code type to be used. For the last two options, enter a specific number in the box including wildcard characters when needed. See Like Matches and Unlike Matches for use of wildcards. TOSHIBA IPedge UG 01/13...
- Page 197 Account Code – Select the account code type to be used. For the last two options, enter a specific number in the box including wildcard characters when needed. See Like Matches and Unlike Matches for use of wildcards. TOSHIBA IPedge UG 01/13...
- Page 198 • Do Not Disturb Change – Select the DND Status change to cause the trigger. For the item with a message to match, enter the TOSHIBA IPedge UG 01/13...
- Page 199 See Like Matches and Unlike Matches for use of wildcards. Outlook Calendar may also send a ‘Tentative’ status setting which is Note: treated using the ‘Any’ setting. TOSHIBA IPedge UG 01/13...
-
Page 200: Like Matches
Example 2: To trigger on any caller from your local office code 496: Set the Specific Number on Caller ID Number to: 602496? Example 3: To trigger on any caller with a caller ID name starting with C: Set the Specific Name on Caller ID name to: C*. TOSHIBA IPedge UG 01/13... -
Page 201: Unlike Matches
To Export Call Handler Rule – Click the Export Rule to create a.RUI file in the PC user’s “C:Document and Settings\Application Data\Toshiba\Strata Call Manager” folder. Each rule created can be saved as a file for backup purposes and copying to another PC to allow the same rule to be used by other users. -
Page 202: Export Rules
(e.g. 2.ACI). The file is exported into the user’s application data folder (typically, “C:\Documents and Settings\<user name>\Application Data\Toshiba\Strata Call Manager”). In order to identify the file more easily you may then want to user Explorer to rename that file to something more appropriate (e.g. -
Page 203: Chapter 16 -Using Microsoft Outlook
Options instead of the Open Contact or Add Contact or Add Journal options. Now, when a call is ringing on your phone, a small “User Options” window will pop up showing the Contacts that match the TOSHIBA IPedge UG 01/13... -
Page 204: Integrating With Outlook Calendar
Appointment as part of the message. On the DSS key, the first line and DSS Message second line are appended to each other, thus the preset Status Message can be modified to become something very simple to allow for the Subject to become the predominant part of the message. TOSHIBA IPedge UG 01/13... - Page 205 IPedge Using Microsoft Outlook The second Action will clear the message when the appointment ending time is reached. TOSHIBA IPedge UG 01/13...
-
Page 206: Create Personal Call Handler Rules
Calendar Status including ‘Free’ and the clear command would be followed by a command to set the message, thus the message would never clear. The final set of PCH rules should be in the order of items 3 and 4 in the PCH Rules screen. TOSHIBA IPedge UG 01/13... -
Page 207: Chapter 17 -Using Companion Applications
The default search method is “Starts with”, where only entries starting with the same letters as the search criteria will be shown. Other search methods are available, and can be accessed with the button to the left of the search area. Search criteria button Search criteria TOSHIBA IPedge UG 01/13... - Page 208 Enable the Hide Names option • to enable the filter. To Add a Filter Entry – Place • the cursor in the text box. Type in the characters to be filtered and press Enter or click the Add button. TOSHIBA IPedge UG 01/13...
-
Page 209: Personal / Speed Dial Directory
Groups” is personal and you can create their own. “System Groups” applies to all and only a user with “Admin” right can create and change the group entry. To manage the Presence Viewer 1. Click the Group tab assigned for the Presence Viewer. TOSHIBA IPedge UG 01/13... - Page 210 2. Right click on an entry for options to either call, chat, broadcast, edit or delete group. 3. When you select Edit group, the following dialog box displays. Use the double arrow buttons to add or remove users from the group (shown right). To use view Presence Status TOSHIBA IPedge UG 01/13...
-
Page 211: History
(Green = answered, pink = not answered). • Year Day Time – Shows the date and time that the call completed (not started). This column also includes the day-of-week for the first call of each day. TOSHIBA IPedge UG 01/13... - Page 212 Additional Options – Right-click on the entry to access a menu of other • functions: • Call Now – Dial the phone number using Call Manager. • View Info – Provides a read-only view of all of the information about the call, including the “Notes.” TOSHIBA IPedge UG 01/13...
- Page 213 Lookup in Outlook – Look up the telephone number in Microsoft Outlook and open any matching Contact. • Listen to Call – When the Tracer Integration is provided, this button provides a link to Replay to allow the recording to be played back. TOSHIBA IPedge UG 01/13...
- Page 214 Account Codes – Choose “All” for calls with any or no account code. Use the “Starting with” option to limit the search to calls matching or starting with a specific account code. For example, ‘123’ returns calls with account codes 123 and 123xxx. TOSHIBA IPedge UG 01/13...
-
Page 215: Acd Viewer
Plus you can broadcast a chat notification to all agents and supervisors in the group. ACD Viewer appears by default as a companion application tab. TOSHIBA IPedge UG 01/13... - Page 216 The ACD actions can be used to Log In / Log Out to/from ACD groups. Going temporarily unavailable and an ability to end wrap times can be part of the features available. Additional Call Center features are possible using User Programmable buttons. TOSHIBA IPedge UG 01/13...
- Page 217 1. Right click My Status once you have expanded the views in the ACD Viewer pane. The following ACD Agent Status window will appear: To Make Agent Unavailable 1. Use pull-down list and choose a reason. 2. Click the Make Unavailable button. 3. Click Done. TOSHIBA IPedge UG 01/13...
- Page 218 The ACD View has many configuration options that allow you to customize it to your needs. When the ACD Viewer is operating and visible you can configure it’s settings by clicking on the wheel icon in the upper left hand corner and selecting the Setup menu. TOSHIBA IPedge UG 01/13...
-
Page 219: Acd Group Status
ACD Group Status button will turn Yellow. The available conditions are: Calls Waiting > ’x’ calls Longest Waiting Call > ’x’ Secs Waiting Calls / Agent > ’x’ % TOSHIBA IPedge UG 01/13... -
Page 220: Notifications
Show the ACD Viewer if it is hidden on your screen when a Status is met. This will bring the Call Manager and the ACD Viewer to the forefront of your screen. Click Save to save all changes. TOSHIBA IPedge UG 01/13... -
Page 221: Cm Lcd
% % – Percent Sign %Q – # of Waiting Calls %Z – Calls per agent %Y – # of Agents Available %C – Total Calls %X – Total Agents %G Urgent Message %Q Waiting Calls: Longest Waiting Call: %L TOSHIBA IPedge UG 01/13... -
Page 222: Miscellaneous
Yellow (Warning) = Default: one call waiting and at least one agent logged in. But this threshold is configurable. Red (Urgent) = Default: Two or more calls waiting OR no agents logged-in and available. But this threshold is configurable. TOSHIBA IPedge UG 01/13... - Page 223 3. The last line in the expanded view is the “My Status” line. This not only shows your personal status in this ACD group but allows you to change your status and perform functions using right-click menus as described in the following section. TOSHIBA IPedge UG 01/13...
- Page 224 Request Help Call to Supervisor – while you are on an ACD call, you can • use this to initiate a request for a help call to a supervisor in the ACD group. This is further explained below. TOSHIBA IPedge UG 01/13...
- Page 225 Chat can also be used to send a broadcast message to an individual or to an entire group. A broadcast message is a one-time message that will appear on the recipient’s Chat window. TOSHIBA IPedge UG 01/13...
- Page 226 Using Chat Messaging communicate with that person, how to answer an incoming Chat communication, and how to send Broadcast messages. To Access Chat – Click the Chat tab on Call Manager. The following • screen will display. TOSHIBA IPedge UG 01/13...
- Page 227 2. You must respond within 30 seconds to this message or the caller will get a message “User did not respond. However, the 30 seconds setting is configurable. 3. Ongoing conversations follow those described in To Send a Text Message Options During a Chat Conversation. TOSHIBA IPedge UG 01/13...
- Page 228 From the Edit menu, click either Copy or Copy All to copy the highlighted or all of the conversation to the Windows Clipboard for pasting into another application. To End the Conversation • Press the Close button to end the conversation. TOSHIBA IPedge UG 01/13...
- Page 229 1. To initiate a broadcast message, double click on any group name in the Chat Window and click on the Broadcast icon or Right click on any group name or select Broadcast. 2. Enter a message into the Message box. TOSHIBA IPedge UG 01/13...
- Page 230 NoteBe aware that when using the "Chat Back" option sending to a group of people, all recipients will have the Chat back option and if everyone responds, it could result in a large number of simultaneous chat calls back to you. 5. Click Send. TOSHIBA IPedge UG 01/13...
-
Page 231: Chat Feature Operation
Available” along with any return message they provided. If they didn’t setup a return message, the text “Do Not Disturb” will be shown. To Clear Do Not Disturb To Clear the DND Status – Clear the DND Check box. • TOSHIBA IPedge UG 01/13... -
Page 232: Response Buttons
Send Text Message Immediately – Check the box if you are sending text and you would like to send it immediately, without clicking on the Send button. • Click OK to save the changes you have made to your Response Button. TOSHIBA IPedge UG 01/13... -
Page 233: Personal Groups
To Delete A Personal Group To delete a group, right-click the group in the Chat List and choose the Delete Group option. A confirmation box will appear and needs to be affirmed before the group is actually deleted. TOSHIBA IPedge UG 01/13... - Page 234 Print - prints the whiteboard • Exit. • Similar to the above, you can use the Edit menu to cut, copy, edit, paste, delete, clear and clear highlighting. The View menu contains Chat Box, Canned Replies, and Whiteboard. TOSHIBA IPedge UG 01/13...
-
Page 235: Whiteboards Setup
The screen opens to a “Save” window to allow you to choose the file name and Save As... location for the file to be saved. The default location is under your “...Documents and Settings/<user name>/Local Settings/Application Data/Toshiba/Strata Call Manager”. The Chat application Setup menu provides access to the Whiteboards... -
Page 236: Configuring Chat
Chat beep each time a new line arrives into the conversation. Click Test to verify operation. • Timestamp Each Line – Check the box to show a time stamp Message Box each time a new message is received. TOSHIBA IPedge UG 01/13... - Page 237 Send button. Once a communication channel is established, you just click the Response Button with the message you want to send. • Define the Number of rows to create response buttons. TOSHIBA IPedge UG 01/13...
- Page 238 •Send Text Message Immediately – Check the box if you are sending text and you would like to send it immediately, without clicking on the Send button. Click OK to save the changes you have made to your Response Button. • TOSHIBA IPedge UG 01/13...
- Page 239 Save As Local Machine Data – Click to enable this option if the settings are to apply to all users of this PC. • Save As Current User Data – Click to enable this option if the settings are unique for each user of this PC. TOSHIBA IPedge UG 01/13...
-
Page 240: Interfacing With Other Programs
DND of Chat. Or you may need to periodically send a broadcast message to a group of people based upon a trigger such as a meeting reminder. These types of operations are supported by a DDE TOSHIBA IPedge UG 01/13... -
Page 241: Format Of The Dde Command Interface
2. Choose a key on Call Manager, right-click and select Change Key. Name the key, choose the colors, and select a type as User Defined Actions. Select “Visitor Waiting” from the list of actions and Save. TOSHIBA IPedge UG 01/13... - Page 242 2. Choose a key on Call Manager, right-click and select Change Key. Name the key, choose the colors, and select a type as User Defined Actions. Select “Notify Jan – Abusive Call” from the list of actions and Save. TOSHIBA IPedge UG 01/13...
- Page 243 In DDE Message enter: DND,ON,”In Meeting Until &U+’60”” We are using the same time parameter used for setting Call Managers Note: DND which uses another User Defined Action that also includes &U=’60’ to set the time to 60 minutes from now. TOSHIBA IPedge UG 01/13...
- Page 244 1. In Chat a Personal Group is created containing the members of <Tech Support>. 2. In Call Manager create a User Defined Action using the type Send DDE Msg and name it appropriately. In App Name | Topic enter: MSGPOP|SYSTEM TOSHIBA IPedge UG 01/13...
-
Page 245: Dialer
The Dialer tab displays all calls yet to be placed as well as calls that have recently been completed, plus as the status of the dialers and the phone. This information is shown on the main screen similar to the following: TOSHIBA IPedge UG 01/13... -
Page 246: Main Screen
• Due Now – The time has arrived for this call to be placed. • Overdue – This call has not yet been placed and it is overdue. • Done – This call has been completed. TOSHIBA IPedge UG 01/13... -
Page 247: Dialer Operation
Click the same column header again and it will switch the sort from ascending to descending (or vice versa). Thus if you want to sort-by-name click the “Name” column header, to sort by phone number click the “Phone” column header, and so forth. Dialer Operation TOSHIBA IPedge UG 01/13... - Page 248 Okay will place the call back into the list. As was done in the Ready to Dial screen, an optional “User-defined” button can be provided with an action to be performed at the end of the call. This TOSHIBA IPedge UG 01/13...
-
Page 249: Adding Calls To The Dialer
Any time can be entered or any elapsed time frame can be entered. The pull down list shows some common elapsed times for placing the call. The call record will need to be enabled to be dialed at the appointed time. TOSHIBA IPedge UG 01/13... - Page 250 Drag-and-Drop MS Excel file In Microsoft Excel it is quite easy to create and keep a list of desired contacts and add them into the power dialer. In MS Excel simple create a spreadsheet TOSHIBA IPedge UG 01/13...
- Page 251 Note: Alternatively, if you save this file from MS Excel directly into the “..\PDimport” sub- folder of Call Manager the entries will be automatically imported into the power dialer . TOSHIBA IPedge UG 01/13...
-
Page 252: Configuration Settings
For example the user may want to set his phone into “Do-Not- Disturb” mode to stop all incoming calls but still continue using the power dialer to place outgoing calls. Note: On some phone systems the Call TOSHIBA IPedge UG 01/13... -
Page 253: Adding Action Buttons To Ready To Dial And Results Screens
“Results” screens in Dialer. To setup these buttons, go to the Call Manager main Ready to Dial menu select Setup then Preferences, go into the Dialing Tab. Under the Dialer, and Results enable either or both of the “Action” buttons and select the Action to be performed Screens TOSHIBA IPedge UG 01/13... -
Page 254: Advanced Topics
The Dialer will automatically import any file in the above-described format if Automatic Imports the file is (1) named with ".TXT" suffix and (2) saved into the “\PDimport” sub-folder in the Call Manager folder. Once the file is imported, it will immediately be deleted. TOSHIBA IPedge UG 01/13... -
Page 255: Buttons
The web page might also allow the agent to enter answers from the caller into HTML forms and submit the results to a company web server. TOSHIBA IPedge UG 01/13... - Page 256 The Call Manager Web Window is based on Microsoft Internet Explorer. You must have Internet Explorer 6.0 or higher installed on the PC. Click the setup icon to set Home URL and the tools to display in the toolbar (home, stop, refresh, go back, go forward, URL). TOSHIBA IPedge UG 01/13...
- Page 257 The user can click keys on the softphone and it behaves the same as the IP telephone. The telephone must be configured as the 10 button large display telephone in IPedge, and the SHIFT button must be disabled. TOSHIBA IPedge UG 01/13...
-
Page 258: History
Call History logs the current Account Code when the call leaves the Call Manager extension. TOSHIBA IPedge UG 01/13... - Page 259 Lookup in Outlook – Look up the telephone number in Microsoft Outlook and open any matching Contact. • Listen to Call – When the Tracer Integration is provided, this button provides a link to Replay to allow the recording to be played back. TOSHIBA IPedge UG 01/13...
- Page 260 Account Codes – Choose “All” for calls with any or no account code. Use the “Starting with” option to limit the search to calls matching or starting with a specific account code. For example, ‘123’ returns calls with account codes 123 and 123xxx. TOSHIBA IPedge UG 01/13...
- Page 261 Clear Filters Button – Resets all filters to ‘Off”. Press Search to re-load all Call • History record. Or, select new filter settings and start a new Filter search. Cancel Button – Closes the filters screen with no update to the “Calls • Display”. TOSHIBA IPedge UG 01/13...
-
Page 262: Acd Viewer
The ACD actions can be used to Log In / Log Out to/from ACD groups. Going temporarily unavailable and an ability to end wrap times can be part of the features available. Additional Call Center features are possible using User Programmable buttons. TOSHIBA IPedge UG 01/13... - Page 263 1. Right click My Status once you have expanded the views in the ACD Viewer pane. The following ACD Agent Status window will appear: To Make Agent Unavailable 1. Use pull-down list and choose a reason. 2. Click the Make Unavailable button. 3. Click Done. TOSHIBA IPedge UG 01/13...
- Page 264 The ACD View has many configuration options that allow you to customize it to your needs. When the ACD Viewer is operating and visible you can configure it’s settings by clicking on the wheel icon in the upper left hand corner and selecting the Setup menu. TOSHIBA IPedge UG 01/13...
- Page 265 ACD Group Status button will turn Yellow. The available conditions are: Calls Waiting > ’x’ calls Longest Waiting Call > ’x’ Secs Waiting Calls / Agent > ’x’ % TOSHIBA IPedge UG 01/13...
-
Page 266: Notifications
Show the ACD Viewer if it is hidden on your screen when a Status is met. This will bring the Call Manager and the ACD Viewer to the forefront of your screen. Click Save to save all changes. TOSHIBA IPedge UG 01/13... -
Page 267: Cm Lcd
% % – Percent Sign %Q – # of Waiting Calls %Z – Calls per agent %Y – # of Agents Available %C – Total Calls %X – Total Agents %G Urgent Message %Q Waiting Calls: Longest Waiting Call: %L TOSHIBA IPedge UG 01/13... -
Page 268: Miscellaneous
Yellow (Warning) = Default: one call waiting and at least one agent logged in. But this threshold is configurable. Red (Urgent) = Default: Two or more calls waiting OR no agents logged-in and available. But this threshold is configurable. TOSHIBA IPedge UG 01/13... - Page 269 3. The last line in the expanded view is the “My Status” line. This not only shows your personal status in this ACD group but allows you to change your status and perform functions using right-click menus as described in the following section. TOSHIBA IPedge UG 01/13...
- Page 270 Request Help Call to Supervisor – while you are on an ACD call, you can • use this to initiate a request for a help call to a supervisor in the ACD group. This is further explained below. TOSHIBA IPedge UG 01/13...
- Page 271 If the supervisor accepts your request for help you will receive notification. If the supervisor denies your request you will receive a rejection notification. If a supervisor or supervisors do not respond to your request you will see the following: TOSHIBA IPedge UG 01/13...
-
Page 272: Chat
Using Chat Messaging communicate with that person, how to answer an incoming Chat communication, and how to send Broadcast messages. To Access Chat – Click the Chat tab on Call Manager. The following • screen will display. TOSHIBA IPedge UG 01/13... - Page 273 2. You must respond within 30 seconds to this message or the caller will get a message “User did not respond. However, the 30 seconds setting is configurable. 3. Ongoing conversations follow those described in To Send a Text Messageand Options During a Chat Conversation. TOSHIBA IPedge UG 01/13...
- Page 274 From the Edit menu, click either Copy or Copy All to copy the highlighted or all of the conversation to the Windows Clipboard for pasting into another application. To End the Conversation • Press the Close button to end the conversation. TOSHIBA IPedge UG 01/13...
- Page 275 1. To initiate a broadcast message, double click on any group name in the Chat Window and click on the Broadcast icon or Right click on any group name or select Broadcast. 2. Enter a message into the Message box. TOSHIBA IPedge UG 01/13...
- Page 276 NoteBe aware that when using the “Chat Back” option sending to a group of people, all recipients will have the Chat back option and if everyone responds, it could result in a large number of simultaneous chat calls back to you. 5. Click Send. TOSHIBA IPedge UG 01/13...
-
Page 277: Chat Feature Operation
Available” along with any return message they provided. If they didn’t setup a return message, the text “Do Not Disturb” will be shown. To Clear Do Not Disturb To Clear the DND Status – Clear the DND Check box... • TOSHIBA IPedge UG 01/13... -
Page 278: Response Buttons
Send Text Message Immediately – Check the box if you are sending text and you would like to send it immediately, without clicking on the Send button. • Click OK to save the changes you have made to your Response Button. TOSHIBA IPedge UG 01/13... -
Page 279: Personal Groups
To Delete A Personal Group To delete a group, right-click the group in the Chat List and choose the Delete Group option. A confirmation box will appear and needs to be affirmed before the group is actually deleted. TOSHIBA IPedge UG 01/13... - Page 280 Print - prints the whiteboard • Exit. • Similar to the above, you can use the Edit menu to cut, copy, edit, paste, delete, clear and clear highlighting. The View menu contains Chat Box, Canned Replies, and Whiteboard. TOSHIBA IPedge UG 01/13...
-
Page 281: Whiteboards Setup
The screen opens to a “Save” window to allow you to choose the file name and Save As... location for the file to be saved. The default location is under your “...Documents and Settings/<user name>/Local Settings/Application Data/Toshiba/Strata Call Manager”. The Chat application Setup menu provides access to the Whiteboards... -
Page 282: Configuring Chat
Chat beep each time a new line arrives into the conversation. Click Test to verify operation. • Timestamp Each Line – Check the box to show a time stamp Message Box each time a new message is received. TOSHIBA IPedge UG 01/13... - Page 283 Send button. Once a communication channel is established, you just click the Response Button with the message you want to send. • Define the Number of rows to create response buttons. TOSHIBA IPedge UG 01/13...
- Page 284 •Send Text Message Immediately – Check the box if you are sending text and you would like to send it immediately, without clicking on the Send button. Click OK to save the changes you have made to your Response Button. • TOSHIBA IPedge UG 01/13...
- Page 285 Save As Local Machine Data – Click to enable this option if the settings are to apply to all users of this PC. • Save As Current User Data – Click to enable this option if the settings are unique for each user of this PC. TOSHIBA IPedge UG 01/13...
-
Page 286: Interfacing With Other Programs
DND of Chat. Or you may need to periodically send a broadcast message to a group of people based upon a trigger such as a meeting reminder. These types of operations are supported by a DDE TOSHIBA IPedge UG 01/13... -
Page 287: Format Of The Dde Command Interface
2. Choose a key on Call Manager, right-click and select Change Key. Name the key, choose the colors, and select a type as User Defined Actions. Select “Visitor Waiting” from the list of actions and Save. TOSHIBA IPedge UG 01/13... - Page 288 2. Choose a key on Call Manager, right-click and select Change Key. Name the key, choose the colors, and select a type as User Defined Actions. Select “Notify Jan – Abusive Call” from the list of actions and Save. TOSHIBA IPedge UG 01/13...
- Page 289 In DDE Message enter: DND,ON,”In Meeting Until &U+’60”” We are using the same time parameter used for setting Call Managers Note: DND which uses another User Defined Action that also includes &U=’60’ to set the time to 60 minutes from now. TOSHIBA IPedge UG 01/13...
- Page 290 1. In Chat a Personal Group is created containing the members of <Tech Support>. 2. In Call Manager create a User Defined Action using the type Send DDE Msg and name it appropriately. In App Name | Topic enter: MSGPOP|SYSTEM TOSHIBA IPedge UG 01/13...
- Page 291 Calendar Reminder event occurs and the Subject matches Group Meeting. This trigger will result in the action Group Meeting Broadcast to be taken. The assumption is the Outlook meeting reminder is provided 15 minutes prior to the scheduled meeting. TOSHIBA IPedge UG 01/13...
-
Page 292: Main Screen
Using your mouse, you can resize and reposition these headers to customize your viewing area. This area shows each call that is either (1) yet to be placed or (2) that has Calls Display Area already been completed. The available columns include: TOSHIBA IPedge UG 01/13... - Page 293 Lookup in Outlook – lookup this number in Microsoft Outlook and open the • matching contact. Print Listing – print a listing of all entries shown in the calls window. The • position and width of the columns can be changed to format the printout as desired. TOSHIBA IPedge UG 01/13...
-
Page 294: Sorting Entries
Okay will place the call back into the list. As was done in the Ready to Dial screen, an optional “User-defined” button can be provided with an action to be performed at the end of the call. This TOSHIBA IPedge UG 01/13... -
Page 295: Adding Calls To The Dialer
Any time can be entered or any elapsed time frame can be entered. The pull down list shows some common elapsed times for placing the call. The call record will need to be enabled to be dialed at the appointed time. TOSHIBA IPedge UG 01/13... - Page 296 Drag-and-Drop MS Excel file In Microsoft Excel it is quite easy to create and keep a list of desired contacts and add them into the power dialer. In MS Excel simple create a spreadsheet TOSHIBA IPedge UG 01/13...
- Page 297 Note: Alternatively, if you save this file from MS Excel directly into the “...\PDimport” sub- folder of Call Manager the entries will be automatically imported into the power dialer. TOSHIBA IPedge UG 01/13...
-
Page 298: Configuration Settings
For example the user may want to set his phone into “Do-Not- Disturb” mode to stop all incoming calls but still continue using the power dialer to place outgoing calls. Note: On some phone systems the Call TOSHIBA IPedge UG 01/13... - Page 299 “Results” screens in Dialer. To setup these buttons, go to the Call Manager main Ready to Dial menu select Setup then Preferences, go into the Dialing Tab. Under the Dialer, and Results enable either or both of the “Action” buttons and select the Action to be performed Screens TOSHIBA IPedge UG 01/13...
-
Page 300: Advanced Topics
The Dialer will automatically import any file in the above-described format if Automatic Imports the file is (1) named with “.TXT” suffix and (2) saved into the “\PDimport” sub-folder in the Call Manager folder. Once the file is imported, it will immediately be deleted. TOSHIBA IPedge UG 01/13... -
Page 301: Buttons
Feature Code • Speed Dial • System/PBS Commands • User Defined Actions • ACD keys • DSS Extension Key • Web Key • Run Program • For more information, refer to Chapter 13 – Buttons. TOSHIBA IPedge UG 01/13... -
Page 302: Web Browser
The Call Manager Web Window is based on Microsoft Internet Explorer. You must have Internet Explorer 6.0 or higher installed on the PC. Click the setup icon to set Home URL and the tools to display in the toolbar (home, stop, refresh, go back, go forward, URL). TOSHIBA IPedge UG 01/13... - Page 303 The user can click keys on the softphone and it behaves the same as the IP telephone. The telephone must be configured as the 10 button large display telephone in IPedge, and the SHIFT button must be disabled. TOSHIBA IPedge UG 01/13...
- Page 304 IPedge Using Companion Applications TOSHIBA IPedge UG 01/13...
-
Page 305: Chapter 18 -Ipedge Enterprise Manager
IPedge Enterprise Manager This chapter familiarizes you with the Toshiba IPedge® Enterprise Manager, a web-based system administration tool which allows users to manage communication devices using a web browser. The user may access the IPedge system to personalize telephone settings, retrieve information and remotely activate/deactivate phone features. -
Page 306: Log In
2. Check “Change Password”. Password 3. Enter a password in the New Login Password field confirm it. 4. Click the Save icon Click on the Logout tab on the upper right of the screen. Log Out TOSHIBA IPedge UG 01/13... -
Page 307: Home
List your name in the directory • Turn Do Not Disturb (DND) on or off • Activate/Deactivate Follow Me • To set up Follow Me button, right click the button, then select Voice Mail > Follow Me. TOSHIBA IPedge UG 01/13... -
Page 308: Keystrip Labels
Assign and Submit a button as a One Touch button. Once the One Touch button is created, double click the button to enter the programming dialog box. Blank – Clear button assignment. • TOSHIBA IPedge UG 01/13... -
Page 309: Dnd Activating
3. Enter the digits or special buttons for the function to be dialed. You can include the following in the dial string: Dial pad digits 0~9.To program special characters, see • Table 10 on Page 308. • A maximum of 32 characters. TOSHIBA IPedge UG 01/13... - Page 310 – gets new dial tone on the PDN – code for All Call Page which allows the user to page the location of the orbited call. On your telephone, press the labeled One Touch button. To Use a One Touch Button TOSHIBA IPedge UG 01/13...
-
Page 311: Ring Tones
1300/1780 Hz 1 sec. On, 3 sec. Off, repeat 1300/1780 Hz 1 sec. On, 1 sec. Off, repeat 860/1180 Hz 0.5 sec. On, 1300/1780 Hz 3 sec. Off, repeat 860/1180 Hz 0.5 sec. On, 1300/1780 Hz 1 sec. Off, repeat TOSHIBA IPedge UG 01/13... -
Page 312: Settings
1. After you have entered the settings in the parameters. 2. Click the Save icon. Hover over the bubbles located above the parameters to read the Note: flyover text for information to be entered in each field. TOSHIBA IPedge UG 01/13... -
Page 313: Call Forward
To set up Station Call Forward 2. Enter the appropriate fields. Hover over the bubbles located above the parameters to read the flyover Note: text for information to be entered in each field. 3. Click the Save button. TOSHIBA IPedge UG 01/13... - Page 314 Note: If Direct Line Call Forward is activated on you telephone, calls to your direct line telephone number will not forward to this destination; they will forward to the direct line CF destination - if activated. TOSHIBA IPedge UG 01/13...
- Page 315 “Internal Call and Line Call” destinations. 2. Your telephone may forward even if you do not activate Call Forward; this is because your system administrator has activated System Call Forward on your telephone. TOSHIBA IPedge UG 01/13...
-
Page 316: Speed Dial
This is a view only screen. System Info Advisory messaging enables you to store an informative message for LCD Display Advisory Messages telephones that call your telephone. This is view only under System Info. TOSHIBA IPedge UG 01/13... -
Page 317: Voice Mail
1f 1~16 is set, the DRL of the station will change to the DRL selected here when the station dials the account code - in this case the DRL set for the station in Prg 200/260 etc.will be overridden to the call. TOSHIBA IPedge UG 01/13... -
Page 318: Preferences
1. Log into EMPA as a user. 2. Select Applications > Meeting. You have access to all Meeting functions. Refer to the IPedge Meeting Audio and Web Conferencing User Guide or Help for procedures on using the Meeting application. TOSHIBA IPedge UG 01/13... - Page 319 Index flexible, Hold, account code, navigation, account codes, one touch, forced, programmable, verified/non-verified, Redial, account number, shift, ACD, speed dial, ACD call ringing, user programmable, ACD key view, buttons mode, ACD Keys, ACT, action keys, calendar, action variables, Call actions info, creating actions, Window,...
- Page 320 Index D ~ K creating, door lock, delete, drag and drop, 126, call hold, drop, call info DSS, export, DSS message, call pickup, 45, call waiting, calling, emergency calling from SoftIPT, 34, page, calls enable sound, answering, exclusive hold, hold, executive override, outgoing, exporting actions,...
- Page 321 Index L ~ P copy, DSS extension, name, initialize, names label, storing speed dial, PBX command, navigation key, run program, Net Phone speed dial, expanded view, swap, main menu, system, main screen, web, shutdown, keys startup, combination, streamlined view, creating keys, special, keystrokes, OAISYS...
- Page 322 Index R ~ W privacy advanced, override, dialing, programmable keys, docking, general, TAPI service provider, ready to dial, TASKE Contact, re-dial, testing actions, redial, 15, tone signaling, ringing transfer, 161, distinctive settings, trunk access code, line preference, two (tandem) CO line connection, ringing line preference, run program, URL, 172,...