Table of Contents
Advertisement
Please read the following owner's manual before using this air conditioner. Keep this
manual along with your proof of purchase in a safe place for future reference.
OWNER'S MANUAL
CANADIAN STANDARDS
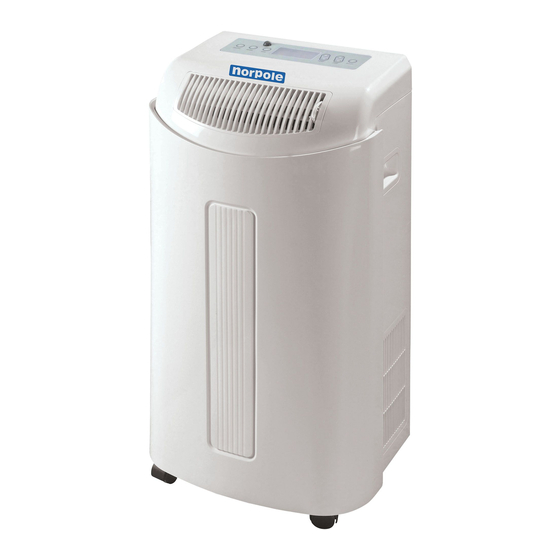
3-IN-1 MOBILE
AIR CONDITIONER
MODEL : 13-04582
© Copyright, Sunrise Tradex Corp., 2006
00223-27/12/06
Advertisement
Table of Contents

Related Manuals for Gree 13-04582


Summary of Contents for Gree 13-04582
-
Page 1: Air Conditioner
Please read the following owner’s manual before using this air conditioner. Keep this manual along with your proof of purchase in a safe place for future reference. OWNER’S MANUAL CANADIAN STANDARDS 3-IN-1 MOBILE AIR CONDITIONER MODEL : 13-04582 © Copyright, Sunrise Tradex Corp., 2006 00223-27/12/06... -
Page 2: Table Of Contents
TABLE OF CONTENTS USE ................3 SAFETY NOTES ............3 UNIT DIAGRAM Front ................4 Back ................4 Installation Kit ............4 INSTALLATION Electrical requirements ..........5 Preparing the air conditioner ........5 Choosing the location ..........6 Fixing the exhaust hose ..........6 Wall installation ............6 Installation by window type ........ -
Page 3: Use
WARNING Before using this air conditioner, please read this owner’s manual carefully. This manual is not a contract and should be used as a reference guide only. We reserve the right to make technical changes at all times without prior notice. Thank you for purchasing this 3-in-1 mobile air conditioner. -
Page 4: Unit Diagram
UNIT DIAGRAM Front control panel upper air outlet handle lower air inlet grille Back upper air inlet grille electric cord hot air outlet lower air inlet grille water drain hole INSTALLATION KIT exhaust hose square hose adaptor to unit oval hose adaptor to window window adjustable slider kit... -
Page 5: Installation
INSTALLATION • Electrical ratings of the air conditioner are detailed on the rating plate on the back of the unit. • Basic electrical requirements are listed hereafter. Please make sure to check the following before installing and connecting your unit. ELECTRICAL REQUIREMENTS 1. -
Page 6: Choosing The Location
INSTALLATION Note : model may differ from illustration. 50 cm 50 cm 50 cm CHOOSING THE LOCATION Place the unit on a level surface in a cleared out area where the air outlets cannot be obstructed. For a maximum efficiency, keep 840 mm (20”) front a clearance of at least 50 cm... -
Page 7: Installation By Window Type
INSTALLATION INSTALLATION BY WINDOW TYPE Casement window 1. It is recommended to replace the screen with a clear plexiglass panel (1/4'') fitted to the size of your window screen. 2. Cut a hole to the same size as the window oval adaptor of the HUNG SLIDING CASEMENT... -
Page 8: Control Panel And Lcd Display
CONTROL PANEL AND LCD DISPLAY CONTROL PANEL Press this button to turn the unit on or off. Press this button to select one of the following modes : COOL, FAN, DRY or AUTO. In COOL, FAN or AUTO mode, press this button to select the fan speeds (LOW - MEDIUM - HIGH). -
Page 9: Unit Operation
UNIT OPERATION • Plug the power cord into a properly rated grounded outlet. Do not connect the unit to an outlet that is being used by other electrical appliances. • Then press the ON/OFF button to begin operation. • When starting the air conditioner, always set the unit to COOL and the temperature to the coolest degree - 16 C (61 F). -
Page 10: Auto Mode
UNIT OPERATION AUTO MODE The unit built-in microcomputer analyses the temperature and humidity level in the room ; the air conditioner controls and automatically adjusts the cooling system (compressor on or off) and the fan speed. This self-adjustment feature allows you to maintain room comfort by controlling the temperature and air dehumidification in the room. - Page 11 REMOTE CONTROL You can control your air conditioner from a distance with the remote control provided with your unit. The remote can control the same functions than those operated directly from the unit on the control panel. Before using the remote, do not forget to insert 2 AAA 1.5V batteries (included).
-
Page 12: Remote Control
REMOTE CONTROL LCD DISPLAY SEND : initiate all operations of the air conditioner FAN : to set fan speeds MODE : to set the air conditioner in AUTO, COOL or FAN mode SLEEP : to set the air conditioner in SLEEP TIMER : to set the timer or mode the clock (time) -
Page 13: Remote Control 11
REMOTE CONTROL DEHUMIDIFYING MODE : • Press on DRY to set the air conditioner in dehymidifying mode - will show on the remote control LCD display ; press on SEND. • To cancel this mode, simply press on DRY again. •... -
Page 14: Water Drainage
WATER DRAINAGE When the unit is in cooling mode, the air humidity is converted in water used to cool down the unit. 80% of the water is condensated and evaporated outdoor through the exhaust hose. When the unit is used in extremely humid environment, exceeding water will be drained into a pan located at the bottom of the unit. -
Page 15: Maintenance
MAINTENANCE Always turn off and unplug the unit before cleaning to avoid electrical shock. CLEANING THE HOUSING • Wipe the surface of the unit with a soft damp cloth. Cleaning the unit with gasoline, paint thinner, chemical products or abrasive detergent could damage it. Use mild soap. •... -
Page 16: Troubleshooting Chart
TROUBLE-SHOOTING Before asking for service, please check the following troubleshooting chart. PROBLEM CAUSE SOLUTION The air conditioner does not Power supply : 1. Plug in correctly work. 1. Unit is not plugged in. 2. Change the plug or 2. The plug or receptacle is receptacle. -
Page 17: Technical Specifications
TECHNICAL SPECIFICATIONS Specifications listed hereafter are for references only. Please see technical data on your air conditioner unit rating plate. CUSTOMER SERVICE Contact SUNRISE TRADEX CORP. Customer Service for: • Replacement parts • Technical support • Warranty claims • Customer service. -
Page 18: Warranty
WARRANTY LIMITED WARRANTY This air conditioner is covered by a warranty against defects in materials and workmanship, if used for the applications specified in this owner’s manual, for a period of TWO (2) years from the date of original purchase in Canada. Note : The internal compressor is covered by a 5-year limited warranty.
Need help?
Do you have a question about the 13-04582 and is the answer not in the manual?
Questions and answers
Quelle est le prix