Table of Contents
Advertisement
by
Please read the following owner's manual before using this air conditioner. Keep this
manual along with your proof of purchase in a safe place for future reference.
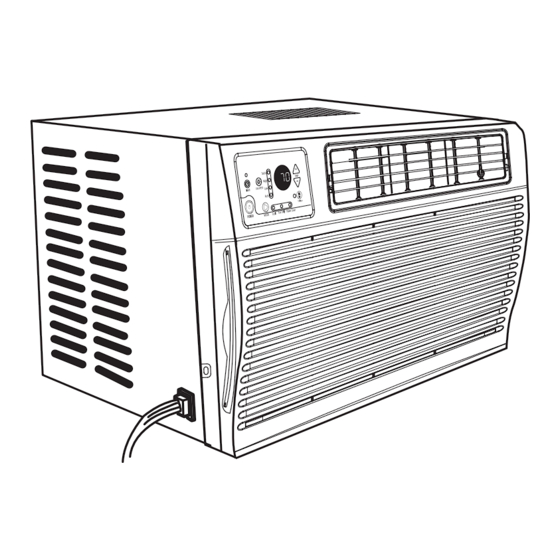
OWNER'S MANUAL
WINDOW AIR CONDITIONER
MODELS
13-04588/13-04590/13-04591/13-04592/13-04593
© Copyright, Sunrise Tradex Corp., 2006
00217-07/12/06
Advertisement
Table of Contents

Related Manuals for Gree ForestAir 13-04588


Summary of Contents for Gree ForestAir 13-04588
- Page 1 Please read the following owner’s manual before using this air conditioner. Keep this manual along with your proof of purchase in a safe place for future reference. OWNER’S MANUAL WINDOW AIR CONDITIONER MODELS 13-04588/13-04590/13-04591/13-04592/13-04593 © Copyright, Sunrise Tradex Corp., 2006 00217-07/12/06...
-
Page 2: Table Of Contents
TABLE OF CONTENTS USE ..............3 SAFETY NOTES ............3 INSTALLATION Accessories and hardware......4 Tools needed..........4 Unpacking the air conditioner ......5 Electrical requirements ........5 Recommendations ........5 Window requirements ........6 Preparation of air conditioner ....6-7 Completing the installation ......7 UNIT OPERATION Electronic control models LCD display control panel ...... -
Page 3: Use
Do not start or stop the unit by plugging in or pulling out the power cord. Always check the power cord for signs of damage before use. If the power cord is damaged, contact SUNRISE TRADEX Customer Service. Do not install or use the unit in the following places: •... -
Page 4: Installation
INSTALLATION ACCESSORIES PRODUCTS MAY DIFFER FROM THE DIAGRAMS Before beginning to install, make sure to have close at hand all the tools you will need (listed below) and that all accessories and hardware parts provided with your air conditioner (as shown) are all included. Top mounting rail Right Window foam gasket... -
Page 5: Unpacking The Air Conditioner
INSTALLATION IMPORTANT NOTICE : Do not pierce the bottom of the air conditioner. Excess water is accumulated to cool down the temperature of the capacitor (outdoor unit). It is normal to hear the capacitor’s blade hit water accumulated in the bottom of the unit. Not respecting this notice will automatically void the warranty of the unit. -
Page 6: Window Requirements
INSTALLATION WINDOW REQUIREMENTS 1. These instructions and installation parts are for a standard double-hung window. It can be installed with our without the expandable panels. Make sure the opening is large enough for the size of unit (figure A). 2. The unit must be installed within 122 cm (48”) of a wall grounded outlet. -
Page 7: Completing The Installation
INSTALLATION 4. Cut foam adhesive sealer and fix it to the bottom of the panel bottom rail (Figure E). Figure E 5. Fix the balance of the foam adhesive sealer to the underside of the window sash (Figure F). Figure F COMPLETING THE INSTALLATION rail Top mounting... -
Page 8: Lcd Display Control Panel
LCD DISPLAY CONTROL PANEL To turn the air conditioner on or off. When the unit is on, the LCD display currently shows the room temperature. Press this button to choose one of the following modes : COOL ; FAN ONLY ; POWER SAVER. -
Page 9: Cooling
UNIT OPERATION IMPORTANT NOTICE : Do not pierce the bottom of the air conditioner. Excess water is accumulated to cool down the temperature of the capacitor (outdoor unit). It is normal to hear the capacitor’s blade hit water accumulated in the bottom of the unit. Not respecting this notice will automatically void the warranty of the unit. -
Page 10: Power Saver Mode
UNIT OPERATION POWER SAVER MODE Based on set temperature, the fan cycles on and off along with the compressor. This mode will result in large variations of room temperature and humidity. It is recommended to use this mode when the room is unoccupied. 1. -
Page 11: Remote Control
REMOTE CONTROL Your remote control may differ from diagram. FAN SPEED : sets fan speed COOL : sets the unit in Cooling mode FAN : sets in Fan only mode POWER SAVER : sets unit AUTO : sets fan speeds in in Power Saver mode self-adjusting mode TIMER : turns timer... -
Page 12: Mechanical Control Models
MECHANICAL CONTROLS EXHAUST CONTROL : EXHAUST • For maximum continuous cooling, CONTROL set the exhaust control to CLOSED - it circulates the air in the room. • To draw stale or smoky air out of the room, set the exhaust control to OPEN - it exhausts the air in the room outdoor. -
Page 13: Maintenance
MAINTENANCE Always turn off and unplug the unit before cleaning to avoid electrical shock. CLEANING THE FILTER The air filter is removable for easy cleaning. A clean filter helps to remove dust, lint and other particles from the air. A clean filter is also essential to maximize the cooling and operating efficiency of the air conditioner. -
Page 14: Troubleshooting
Refer to the unit rating plate and properly rated? modify power source according. The unit starts and stops The internal evaporator and Call SUNRISE TRADEX frequently, or frequently outside condenser coils look dirty or Customer Service. obstructed by debris. blows fuses or trips the Make sure that there is no other circuit breaker. -
Page 15: Room Cooling Chart
51 - 65 m² 550 - 700 ft² 12,500 65 - 93 m² 700 - 1 000 ft² 15,000 CUSTOMER SERVICE Contact SUNRISE TRADEX Customer Service for : • Replacement parts • Technical support • Warranty claims • Customer service... -
Page 16: Warranty
Note : The internal compressor is covered by a 5-year limited warranty. During the warranty period, if this air conditioner fails under normal use, SUNRISE TRADEX CORP. will, at its option, either repair the unit or replace it, free of charge, within a reasonable period of time after the air conditioner is returned.
Need help?
Do you have a question about the ForestAir 13-04588 and is the answer not in the manual?
Questions and answers