Advertisement
Quick Links
Advertisement

Related Manuals for First Degree Fitness Fluid E-316


Summary of Contents for First Degree Fitness Fluid E-316
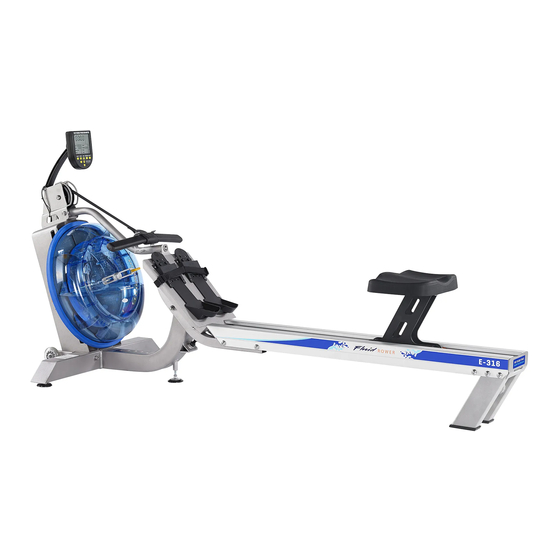
- Page 1 Owners Manual E-316...
-
Page 2: Table Of Contents
3. For further details regarding rowing technique, please visit our international website at www.firstdegreefitness.com CAUTION 1. The E-316 can stand vertically for storage. When doing so, please follow the instructions given on the basic operation section of this manual. CAUTION 2. - Page 3 E-316 Box Contents Upper Frame and Footplate Tank Lower Mainframe Rear Leg S-bend Left Seat Rail Transport Assembly X2 Right Seat Rail Rower Seat Siphon Owners Manual M8x35mm Wheel Bracket Bolt M10x3x32m M10x15mm m S-bend S-bend Bolt Washer...
-
Page 4: E-316 Assembly Instructions
E-316 Assembly Instructions See steps 2 and 3 to attach Lower and Upper Frame Upper Frame Lower Frame Step 1. Remove contents from box, and lay Upper Frame (tank assembly) on its back. Tilt slightly to one side and allow transport wheels to drop into position. - Page 5 E-316 Assembly Instructions Note: Once Footplate is secured, the assembly can be continued from this Step 4. Attach the position for added stability. Footplate to the Main- frame (M10x180mm bolt, M10 Nylock nut Footplate and 2 washers). Caution: The Foot-...
-
Page 6: Assembly Instructions
Assembly Instructions Note: Once Seat Rails are attached, complete steps 6-7 from this position before lowering the E-316 to the normal operating position. Step 6. Install the Rower Seat with seat indentation facing rearward. Caution: The Seat Rower is heavy. Use care when guiding down the Seat Rail. - Page 7 Assembly Instructions Carefully lower the rower to its normal operating position to complete assem- bly with S-bend installation and frame tensioning bolt. Step 8. Install rear of S-Bend onto the Upper Frame using M10x70mm bolt, M10 Nylock Nut and 2x M10 washers. Step 9.
-
Page 8: Tank Filling And Water Treatment
Tank Filling and Water Treatment Fill tank as shown left. Use the right plug only for filling. Fill with adjuster handle at level 16 only. Once filling is complete, use a coin or large blade screwdriver to tighten tank plug into place. Warning: Do not for any reason insert fingers into the tank! Siphon valve... -
Page 9: How To Row
How to Row? 1. Begin the stroke comfortably forward and push strongly back with your legs while keeping your arms and back straight. 2. Begin to pull your arms back as they pass over your knees and continue the stroke through to completion rocking slightly back over your pelvis. -
Page 10: Long Term Water Treatment And Basic Operation
Heel Support Adjuster: The E-316 has a unique and easy to use Heel Support Adjuster. Simply slide the Adjuster up or down to the required position. This should place the ball of your foot directly under the horizon- tal Foot Straps. -
Page 11: Maintenance Chart
Maintenance chart. Item Timeframe Instructions Notes Seat and Seat Weekly. Wipe Seat Rails with lint free Rails. cloth. Spray seat rails with a light coat of silicone spray. Frame. Weekly. Wipe down with lint free cloth. Tank and Water 12 months to 2 years. Follow instructions as speci- Treatment. -
Page 12: Troubleshooting Guide
Note: Light fraying is normal. The E-316 computer Batteries installed incor- Reinstall batteries in correct position and does not illuminate after rectly or need replacing. - Page 13 E-316 Rower Ergometer. Quick start provides instant workout information. Just start training to activate. You can choose to change UNITS displayed. UNITS displays WATTS, SPM, HR, 500/m Reset Level Adjustable Clears data. from 1-16 Program Clears current exercise program. Set Changes Time, Distance parameters.
- Page 14 Using the (optional) First Degree Fitness USB Interface Description: The USB connectivity now built in to all new models of FDF Console and IPM allow you to en- hance your exercise experience by connecting to your home PC or Laptop. Using FDF's own sample applications you can exercise while enjoying your favorite movies.
- Page 15 Replacing the E-316 Bungee Shock Cord Step 1. Remove the Perspex Step 2. Move the rowing handle Step 3. Unwrap the cover from rear of upper frame. from the S-Bend handle catch to a Bungee Cord from all point where it is resting on top of the of the Bungee Pulleys.
- Page 16 Replacing the E-316 Bungee Shock Cord Step 5. After removing the magnetic ring, the Bungee Cord will be accessible. Pull through the Rope/Bungee Pulley and remove. Note that the rower handle should be resting on top of the tank (as shown in step 2) for the bungee hole to line up. Thread new Bungee Cord through and pull until knotted end is held securely in the slot.
- Page 17 Replacing the E-316 Bungee Shock Cord Bungee wrapping in order: 1. Rope/Bungee Pulley to upper rear right Bungee Pulley. 2. Upper rear right to lower rear right and rear left Pulleys. 3. Lower rear left to upper rear left Pulley.
- Page 18 73019 10115 10041 83903 A070 73600 10175 11101 70315 10121 73004 20150 10082 10176 80200 80700 60806 71036 60149 71031 20007 60121 74109 10079 10601 10080 73008 10140 80803 80804 10701 Description Description 10041 Nut M10 Nylock 60149 Spring Washer M10 5x7x2 Plastic Spacer 15*6*2.5t for Heel Ad- 10042 Nut M12 Nylock...
- Page 20 FLUID ROWER (model FR-E316) INTERNATIONAL WARRANTY – FULL COMMERCIAL USE This product is designed and constructed for use in any Health Club / Fitness Studio application. First Degree Fitness Limited warrants that the Fluid Rower (model FR-E316), purchased from an authorised agent and in its undamaged original packaging, is free from defects in materials and workmanship.
Need help?
Do you have a question about the Fluid E-316 and is the answer not in the manual?
Questions and answers