Panasonic Lumix DMC-TZ60 Basic Operating Instructions Manual
18mp digital camera
Hide thumbs
Also See for Lumix DMC-TZ60:
- Basic operating instructions manual (369 pages) ,
- Quick manual (2 pages) ,
- Operating instructions manual (329 pages)
Table of Contents
Advertisement
Quick Links
Basic Operating Instructions
Please read these instructions carefully before using this product, and
save this manual for future use.
More detailed instructions on the operation of this camera
are contained in "Operating Instructions for advanced
features (PDF format)" in the supplied CD-ROM. Install it on
your PC to read it.
Model number suffix "EB" denotes UK model.
EB
Model No.
Web Site: http://www.panasonic.com
Digital Camera
DMC-TZ60
DMC-TZ61
VQT5E64
M0114KZ0
Advertisement
Table of Contents

Related Manuals for Panasonic Lumix DMC-TZ60


Summary of Contents for Panasonic Lumix DMC-TZ60
-
Page 1: Basic Operating Instructions
More detailed instructions on the operation of this camera are contained in “Operating Instructions for advanced features (PDF format)” in the supplied CD-ROM. Install it on your PC to read it. Web Site: http://www.panasonic.com Model number suffix “EB” denotes UK model. VQT5E64 M0114KZ0... -
Page 2: Information For Your Safety
Dear Customer, We would like to take this opportunity to thank you for purchasing this Panasonic Digital Camera. Please read these Operating Instructions carefully and keep them handy for future reference. Please note that the actual controls and components, menu items, etc. of your Digital Camera may look somewhat different from those shown in the illustrations in these Operating Instructions. - Page 3 ■ About the battery pack CAUTION • Danger of explosion if battery is incorrectly replaced. Replace only with the type recommended by the manufacturer. • When disposing the batteries, please contact your local authorities or dealer and ask for the correct method of disposal. •...
-
Page 4: Cautions For Use
• Do not use any other USB connection cables except the supplied one or a genuine Panasonic USB connection cable (DMW-USBC1: optional). • Always use a genuine Panasonic AV cable (DMW-AVC1: optional). • Use a “High Speed HDMI micro cable” with the HDMI logo. Cables that do not comply with the HDMI standards will not work. - Page 5 Declaration of Conformity (DoC) Hereby, “Panasonic Corporation” declares that this product is in compliance with the essential requirements and other relevant provisions of Directive 1999/5/EC. Customers can download a copy of the original DoC to our R&TTE products from our DoC server: http://www.doc.panasonic.de...
-
Page 6: Table Of Contents
Contents Information for Your Safety ..2 Registering preferred Before use ........ 7 functions to the Standard accessories ..... 8 [Fn] button ......26 Names and Functions of Taking pictures with the Main Parts ......10 composition determined Inserting and removing the [Composition Guide] ..... -
Page 7: Before Use
Before use ■ Camera handling ● Keep the camera away from excessive vibration, force, or pressure. ● The camera is not dust resistant, splash resistant, or waterproof. Avoid using the camera in places with excessive dust or sand, or where water can come into contact with the camera. -
Page 8: Standard Accessories
• Compatible memory cards (optional) The following SD standard-based cards (Panasonic brand recommended) can be used. SD Memory Card (8 MB to 2 GB) / SDHC Memory Card (4 GB to 32 GB) / SDXC Memory Card (48 GB, 64 GB) •... - Page 9 • Monday - Friday 9:00am - 5:00pm (Excluding public holidays). • For further support on your product, please visit our website: www.panasonic.co.uk Direct Sales at Panasonic U.K. • Order accessory and consumable items for your product with ease and confidence by phoning our Customer Communications Centre Monday - Friday 9:00am - 5:00pm (Excluding public holidays).
-
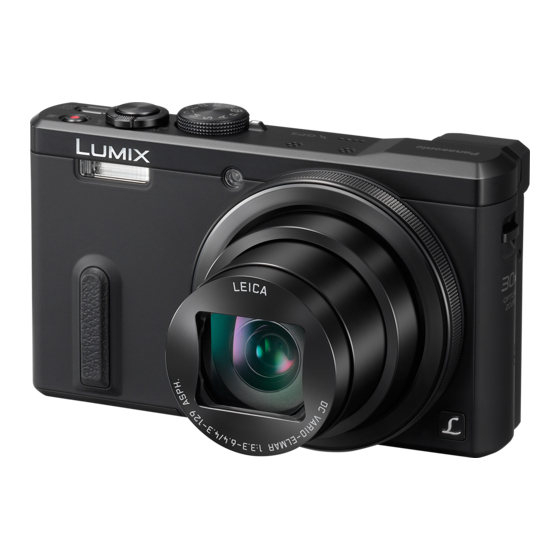
Page 10: Names And Functions Of Main Parts
Names and Functions of Main Parts (Top) 16 17 (Bottom) 22 23 VQT5E64 (ENG) - Page 11 1 Flash 19 Motion picture button 2 Self-timer indicator/ 20 Camera [ON/OFF] button AF Assist Lamp 21 Tripod mount 3 Control ring • Do not attach to a tripod with a 5.5 mm (0.22 inch) or longer screw. 4 Lens barrel Doing so may damage this unit.
-
Page 12: Menu/Set/Cursor Button
Names and Functions of Main Parts [MENU/SET] button / Cursor button [MENU/SET] button • Use this button to display the menus, enter the settings, etc. Cursor button • This button is used to move the cursor on the menu screens and for other functions. -
Page 13: Inserting And Removing The Battery Or Sd Memory Card (Optional)
Lever Press Pull out ● Always use genuine Panasonic batteries (DMW-BCM13E). ● If you use other batteries, we cannot guarantee the quality of this product. ● Keep the Memory Card out of reach of children to prevent swallowing. -
Page 14: Charging The Battery
Charging the battery • The battery that can be used with this unit is DMW-BCM13E. • The battery is not charged when the camera is shipped. Charge the battery before use. Make sure that the camera is turned off. Insert the battery to this unit, and then connect this unit to the AC adaptor (supplied) ( ) or a PC ( ) To the electrical outlet USB connection cable... - Page 15 When using the AC adaptor (supplied), observe the following points as improper connections may cause malfunctions. ● Do not use any other USB connection cables except the supplied one or a genuine Panasonic USB connection cable (DMW-USBC1: optional). ● Do not use any other AC adaptors except the supplied one. ●...
-
Page 16: Setting The Clock
Setting the clock The clock is not set when the camera is shipped. Disconnect the unit from the AC adaptor (supplied). Press the Camera [ON/OFF] button ( ) Press [MENU/SET] ( ) Press to select the items (year, month, day, hour, minute, display order or time display format), and press to set •... - Page 17 Press to set your home area and press [MENU/SET] Current time City or area name Difference from GMT (Greenwich Mean Time) • If the time zone of your current location is different from that of [Home], [World Time] is set to [Destination]. ([ ] will be displayed next to the time and date on the screen) ■...
-
Page 18: Setting The Menu
Setting the menu Refer to the following procedures to operate the menus. Example: Setting [AF Mode] from [ ] to [ ] in the [Program AE] Mode Press [MENU/SET] to display the menu Press or turn the control dial to select the [Rec] menu, and press [MENU/SET] Press or turn the control dial to... -
Page 19: Taking Pictures With Automatic Settings [Intelligent Auto] Mode
Taking pictures with automatic settings [Intelligent Auto] Mode This mode is recommended for those who want to point and shoot or beginners as the camera optimises settings to match the subject and recording environment. Set mode dial to [ ] ([Intelligent Auto] Mode) Align the mode dial correctly to the mode that you want to use. -
Page 20: Recording Modes
Taking pictures with automatic settings [Intelligent Auto] Mode ■ Recording modes [Intelligent Auto] Mode Take pictures with automatic settings. You can switch to the [Intelligent Auto Plus] Mode on the menu to adjust the brightness and colour settings to your liking. [Program AE] Mode Take pictures with automatic shutter speed and aperture value settings. - Page 21 ■ Zoom types You can adjust the area of a picture to be taken using zoom. Capture a wider area Enlarge the subject (wide-angle) (telephoto) • Optical Zoom Zooming in up to 30x is possible if pictures without [ ] have been selected by [Picture Size] on the [Rec] menu.
-
Page 22: Recording Motion Pictures
Recording motion pictures You can record motion pictures with audio (stereo). • You can record motion pictures fitting each recording mode. • Motion pictures cannot be recorded in the built-in memory. Press the motion picture button ( ) to start recording ●... - Page 23 ■ About the recording format for recording motion pictures This unit can record motion pictures in either AVCHD or MP4 formats. The recording format for motion pictures can be changed in [Rec Format] of the [Motion Picture] menu. ■ About the recording quality setting The recording quality for motion pictures can be changed in [Rec Quality] of the [Motion Picture] menu.
-
Page 24: Using The Control Ring/Control Dial
Using the control ring/control dial You can use the control ring/control dial to perform frequently used operations and settings directly. Control ring Control dial Items that can be set by the control ring/control dial vary depending on recording modes. Following are the pre-assigned settings. Setting Recording mode ∗... - Page 25 ■ To change the settings assigned to the control ring/control dial Changes the settings assigned to the control ring/control dial. Press [MENU/SET] Press to select [Setup] menu and press [MENU/SET] Press to select [Ring/Dial Set] and press [MENU/SET] Press to select [ ] (control ring) or [ ] (control dial), and then press [MENU/SET]...
-
Page 26: Registering Preferred Functions To The [Fn] Button
Registering preferred functions to the [Fn] button It is set to [Composition Guide] at the time of purchase. Press [MENU/SET] Press to select [Setup] menu and press [MENU/SET] Press to select [Fn Button Set] and press [MENU/SET] Press to select the function to register and press [MENU/SET] Taking pictures with the composition determined [Composition Guide]... -
Page 27: Viewing Your Pictures
Viewing your pictures Press the Playback button ( ) • By holding down the Playback button while the camera is off, you can turn the camera on in playback mode. Press or turn the control dial to select the picture to be displayed Folder/File number Picture number/... -
Page 28: What You Can Do With The Wi-Fi Function
■ Using a smartphone/tablet as a camera remote control By installing the “Panasonic Image App” on your smartphone/tablet, you can operate the camera remotely and use the smartphone/tablet to record and play back. In addition, you can copy pictures in the camera to the smartphone/ tablet. - Page 29 WEB services. For details, refer to the “LUMIX CLUB” site. http://lumixclub.panasonic.net/eng/c/ Please refer to “Operating Instructions for advanced features (PDF format)” for details. • When sending images on a mobile network, high packet communication fees may be incurred depending on the details of your contract.
-
Page 30: Using Gps Function To Execute Positioning
GPS functions Before using the camera, be sure to read “User Licence Agreement for Location Name Data” (Operating Instructions for advanced features). This camera can record the location information of a place where a picture was taken on the pictures. The camera can also automatically adjust the time. Using the GPS function to execute positioning Press [MENU/SET] Press... -
Page 31: Reading The Operating Instructions (Pdf Format)
Reading the Operating Instructions (PDF format) More detailed instructions on the operation of this camera are contained in “Operating Instructions for advanced features (PDF format)” in the supplied CD-ROM. Install it on your PC to read it. ■ For Windows Turn the PC on and insert the CD-ROM containing the Operating Instructions (supplied) Click the [Operating Instructions]... -
Page 32: Supplied Software
Supplied software The supplied CD-ROM contains the following software. Install the software on your computer to use. For details about operating environment and usage, please read “Operating Instructions for advanced features” (PDF format) or the manuals for each software. • PHOTOfunSTUDIO / LoiLoScope are not compatible with Mac. Pictures can be captured to a PC, and can be viewed, organised, PHOTOfunSTUDIO printed, etc. -
Page 33: Copying Still Pictures And Motion Pictures
Turn on the camera and the PC, and connect them using the USB connection cable (supplied) • Do not use any other USB connection cables except the supplied one or a genuine Panasonic USB connection cable (DMW-USBC1: optional). Using cables other than the above may cause a malfunction. Press... -
Page 34: Troubleshooting
Troubleshooting First, try out the following procedures. If the problem persists, performing [Reset] in the [Setup] menu may resolve the issue. The charging lamp blinks. ● Charging is being performed in a place with extremely high or low temperature. → Reconnect the USB connection cable (supplied) and retry charging in a place where ambient temperature is 10 °C to 30 °C (50 °F to 86 °F) (temperature conditions also apply to the battery itself). - Page 35 The Wi-Fi connection is not recognising my PC. ● By default, the Wi-Fi connection uses the default workgroup name of “WORKGROUP”. If the name of the workgroup has been changed, it will not be recognised. Select [PC Connection] then [Change Workgroup Name] in the [Wi-Fi Setup] menu to change the workgroup name to match that of your PC.
-
Page 36: Specifications
Specifications Digital Camera: Information for your safety Power Source DC 5 V Power 1.7 W (When recording with LCD Monitor) Consumption 1.1 W (When playing back with LCD Monitor) Camera effective 18,100,000 pixels pixels Image sensor 1/2.3″ MOS sensor, total pixel number 18,900,000 pixels Primary colour filter Lens Optical 30x zoom... - Page 37 Exposure (AE) Programme AE (P) / Aperture-priority AE (A) / Shutter-priority AE (S) / Manual exposure (M) Metering Mode [Multi Metering] / [Center Weighted] / [Spot] LCD monitor 3.0″ TFT LCD (3:2) (Approx. 921,600 dots) Viewfinder Colour LCD Viewfinder (Approx. 200,000 dots) (with diopter adjustment -4 to +4 diopter) Microphones Stereo...
- Page 38 Access method Infrastructure mode Compliance ISO / IEC 18092 NFC-F (Passive Mode) standard AC adaptor (Panasonic VSK0775): Information for your safety Input ~ 110 V to 240 V, 50/60 Hz, 0.2 A Output 5 V, 800 mA Battery pack (lithium-ion)
- Page 39 HDMI Licensing LLC in the United States and other countries. • HDAVI Control™ is a trademark of Panasonic Corporation. • “AVCHD”, “AVCHD Progressive” and the “AVCHD Progressive” logo are trademarks of Panasonic Corporation and Sony Corporation.
- Page 40 Manufactured by: Panasonic Corporation Kadoma, Osaka, Japan Importer for Europe: Panasonic Marketing Europe GmbH Panasonic Testing Centre Winsbergring 15, 22525 Hamburg, Germany Web Site: http://panasonic.net © Panasonic Corporation 2014...
Need help?
Do you have a question about the Lumix DMC-TZ60 and is the answer not in the manual?
Questions and answers