Eurotherm 3216 User Manual
Pid temperature controller
Hide thumbs
Also See for 3216:
- User manual (6 pages) ,
- Operating instructions manual (9 pages) ,
- User manual (4 pages)
Table of Contents
Advertisement
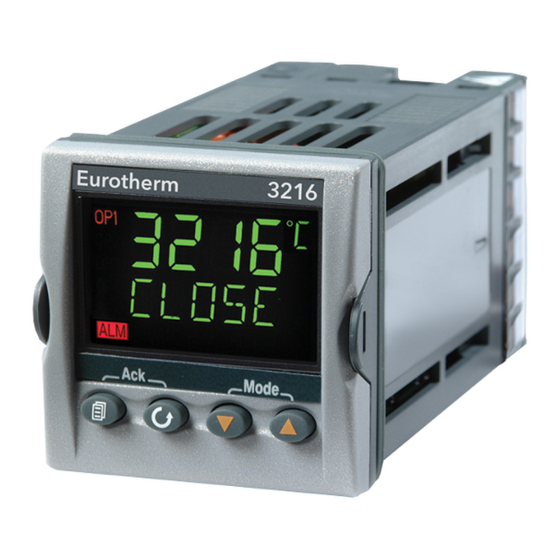
3216
PID Temperature Controller
Installation and Basic Operation
1.
WHAT INSTRUMENT DO I HAVE?
Thank you for choosing the 3216 Temperature Controller.
This User Guide takes you through step by step instructions to help you to install,
wire, configure and use the controller. For features not covered in this User
Guide, a detailed Engineering Manual, Part No HA027986, and other related
handbooks can be downloaded from www.eurotherm.co.uk
Depending on how it was ordered, the controller may need to be configured when
it is first switched on.
The ordering code is shown on a label fixed to the side of the controller. The
hardware installed and the way in which it has been configured may be checked
against the ordering code at the bottom of this page.
1.1.
Dimensions
90mm (3.54in)
Latching ears
Panel retaining clips
Label showing
IP65 Sealing Gasket
Order Code
Serial Number including date of
manufacture
3216 User Guide
Part No. HA027985
1.2.
Step 1: Installation
This instrument is intended for permanent installation, for indoor use only, and
enclosed in an electrical panel
Select a location which is subject to minimum vibrations and the ambient
temperature is within 0 and 55
The instrument can be mounted on a panel up to 15mm thick
To ensure IP65 and NEMA 4 front protection, mount on a non-textured surface.
Please read the safety information in section 4 before proceeding and refer to the
EMC Booklet part number HA025464 for further installation information.
1.2.1.
Panel Mounting the Controller
1.
Prepare a square cut-out in the mounting panel to the size shown
2.
Fit the IP65 sealing gasket, if required, behind
the front bezel of the controller
3.
Insert the controller through the cut-out
4.
Spring the panel retaining clips into place.
Secure the controller in position by holding it
level and pushing both retaining clips forward.
5.
Peel off the protective cover from the display
48mm (1.89in)
Recommended minimum spacing of
controllers
48mm
(1.89in)
1.2.2.
To Remove the Controller from its Sleeve
The controller can be unplugged from its sleeve by easing the latching ears
outwards and pulling it forward out of the sleeve. When plugging it back into its
sleeve, ensure that the latching ears click back into place to maintain the IP65
sealing.
2.
ORDER CODE
3216
CC
Power Supply
ENG
20 – 29V
110 –240V
Issue 1.0
June-03
o
o
C (32 - 122
F)
45 mm - 0.0 + 0.6
1.77 in
-0.00, +0.02
38mm
10mm
(1.5 in)
(0.4 in)
(Not to
scale)
Power
Input/output 1 & output 2
X Output AA
supply
Input/output 1 & Output 2
VL
OP1
OP2
VH
L
X
Logic I/O
L
L
Logic I/O + logic OP
L
R
Logic I/O + relay
R
R
Relay + relay
X
X
Not fitted
3.
STEP 2: WIRING
3.1.
Terminal Layout
!
Ensure that you have the correct supply for your controller
Check order code of the controller supplied
Input/Output 1
1A
1B
2A
Output 2
2B
Line Supply
L
85 - 264Vac 50/60Hz
N
OR
Low Voltage Supply
24
24Vac/dc
24
Input/Output 1 Relay or Logic Output or Digital Input
AA
Output AA
Changeover Relay
AB
AC
PV Input
Thermocouple, PRT, mA or mV
Digital Communications
RS232 Connect directly to comms port of PC
RS485 Daisy chain to further controllers/comms converter
Comms, CT & Digital input
Fascia colour
Output AA
Communications, CT & Digital input
Relay (Form C)
R
X
X
X
Not fitted
Not fitted
X
4
X
L
RS485 comms & dig in
2
X
L
RS232 comms & dig in
4
C
L
RS485 comms CT & dig in
2
C
L
RS232 comms CT & dig in
X
X
L
Digital input
X
C
L
CT and digital input
Warning
CT
AA
CT in
Output AA
AB
C
Dig in
AC
LA
B
HD
VI
Digital
Comms
PV Input
V+
HE
V-
HF
+
1A
1B
-
+
Output 2
2A
Relay or Logic
2B
-
mV
mA
PRT
T/C
VI
+
+
+
V+
2.49Ω
V-
-
-
-
Com
HD
A+(Rx)
HE
B-(Tx)
HF
Language
Quick start code
Language
English
E
Fascia colour
Green
G
Silver
S
Quick Start Code
See Switch On
section
Advertisement
Table of Contents

Related Manuals for Eurotherm 3216


Summary of Contents for Eurotherm 3216
-
Page 1: Wiring
Check order code of the controller supplied The instrument can be mounted on a panel up to 15mm thick Thank you for choosing the 3216 Temperature Controller. To ensure IP65 and NEMA 4 front protection, mount on a non-textured surface. -
Page 2: Digital Communications (Optional)
(typically 0.6mA at 110Vac and 1.2mA at 240Vac). It is TE10) For general guidance refer to Eurotherm Controls EMC Installation Guide, HA025464. Cooling or the responsibility of the installer to ensure that this current does not hold on the... -
Page 3: Step 3: Switch On
STEP 3: SWITCH ON A brief start up sequence consists of a self test in which all bars of the display are illuminated and the software version is shown. What happens next depends on whether the instrument is new or has been switched on before. For a new controller go to section 5.1. -
Page 4: Operator Levels
OPERATOR LEVELS DERIVATIVE TIME determines how strongly the controller will react to the rate of change in the process value. It is used to TI.CFG TIMER CONFIGURATION configures the timer type - Dwell, Operator level 1 is designed for day to day operation of the controller and is not prevent overshoot and undershoot and to restore the PV rapidly Delay, Soft Start or none (only when in Reset) protected by a security code. -
Page 5: Timer Operation
TIMER OPERATION 7.1. Dwell Timer When the timer status = reset, the control output is controlling at SP1 A timer can be configured to operate in three different modes. These can be A dwell timer (TI.CFG = DWELL) is used to control a process at a fixed Temperature selected in Level 2. -
Page 6: To Run A Timer
Do This The Display You Should See Additional Notes When the timer is running it cannot be reset using the Ack button(s) since 3216 User Guide Part No. HA027985 Issue 1.0E May 03 pressing these will return the display to the HOME display...
Need help?
Do you have a question about the 3216 and is the answer not in the manual?
Questions and answers
We have been using an Eurotherm 3216 temperature PID controller for our lab oven. Couple of days back suddenly it stopped working. We checked the thermocouple and heating coil and found okay. Please look at the attached pic where at the left-top corner "OP1" is not appearing. Do you have any idea about the fault?
If the "OP1" indicator is not appearing on the Eurotherm 3216 temperature PID controller, possible faults could include:
1. Output Not Activated – The controller may not be in a state that requires heating (OP1 typically indicates heating).
2. Incorrect Configuration – The controller settings may not be correctly configured for the intended operation.
3. Sensor Issues – A faulty or disconnected thermocouple could prevent the controller from detecting temperature changes.
4. Fault Code Present – The controller may be displaying a fault code that needs to be diagnosed using the fault code diagnostic table.
5. Wiring Problems – Loose or incorrect wiring connections could prevent OP1 from functioning.
6. Manual Mode – If the controller is set to manual mode, the output might not activate automatically.
7. Control Mode – The controller might not be in temperature control mode, affecting output activation.
Checking these factors and referring to the fault code diagnostic table in the manual can help identify and resolve the issue.
This answer is automatically generated