
Related Manuals for Eurotherm 2408i


Summary of Contents for Eurotherm 2408i
- Page 1 2408i Series Process Indicators User Manual Part No: HA027240_5 Date: February 2015...
-
Page 3: Table Of Contents
2.1.1 To View The Display Units ................................. 6 2.1.2 Home Display Options................................6 Alarms ........................................ 7 2.2.1 Types of Alarm Used In The 2408i ............................7 2.2.2 Alarm Relay Output ..................................7 2.2.3 Alarm Indication ..................................8 2.2.4 Alarm Messages ..................................8 2.2.5... - Page 4 Sensor Input Configuration List ............................. 39 4.5.3 Alarm Configuration ................................41 4.5.4 Alarm Inhibit ..................................... 42 4.5.5 2408i Indicator With Alarm Inhibit Timer ..........................43 4.5.6 Digital inputs 1 and 2 Configuration ............................ 44 4.5.7 Peak Hold and Sample and Hold ............................45 4.5.8 Relay Output 1 Configuration ..............................
-
Page 5: Installing And Operating Instructions
A 2.49Ω resistor used as the load resistor for a mA input Amps Two panel retaining clips Panel sealing gasket Dimensions and Installation Sealing gasket Panel retaining clips 96 mm (3.78 in) 2408I 88888 48 mm (1.89 in) ACK/ RESET 150mm (5.9in) Latching ears (top & bottom) 1.2.1... -
Page 6: New Sleeve Design Mkiii
An existing instrument can be fitted into a new sleeve but IP65 sealing will not be maintained It is, however, possible to achieve IP65 sealing for 3 and 4 above. A gasket kit is available from Eurotherm by quoting Part No SUB24/GAS2408. -
Page 7: Electrical Connections
2408 Indicator Engineering Manual Electrical Connections Configurable Plug-in Module Connections Be sure to check the Module 3 Module 2 Module 1 correct supply voltage PDS Input Module Comms Module before applying power Plug-in Communications Module Connections Sensor inputs Connections common Power Supply Connections to all indicators Relay Output 1... -
Page 8: Operation
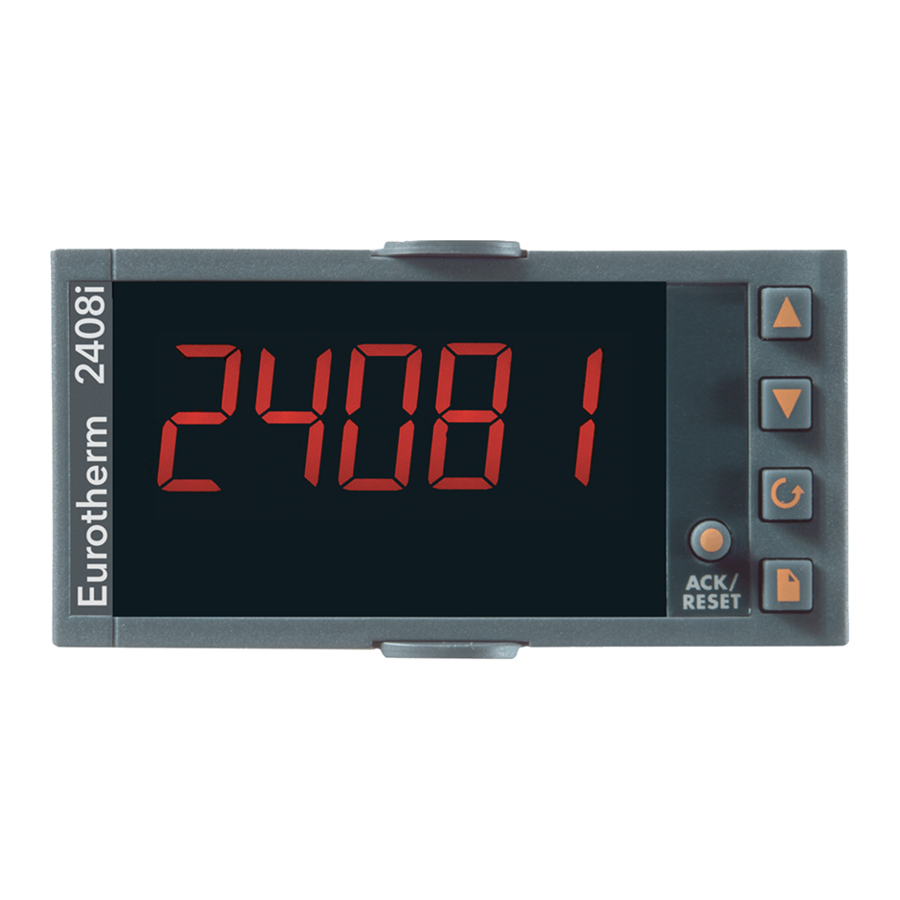
Engineering Manual 2408 Indicator 2 Operation Switch on the indicator. After a 3 second self-test sequence, you will see the display shown below. This is called the ‘HOME’ display. Operator Buttons Increase parameter value The default is Process Value (PV). Decrease parameter value (See section 2.1.2 for Select parameter... -
Page 9: Alarms
(relay) in the same way as an alarm. 2.2.1 Types of Alarm Used In The 2408i This section shows graphically the operation of different types of alarm used in the indicator. The graphs show changes in PV plotted against time. The PV may be derived from input 1, input 2 or the main PV which is derived from input 1 &... -
Page 10: Alarm Indication
Engineering Manual 2408 Indicator 2.2.3 Alarm Indication An alarm occurs when the process conditions exceed a pre-set level (setpoint). It will be displayed on the indicator as follows:- The relevant alarm beacon will begin to flash A four character alarm message will be shown as a double repeating flash in the main display. This message specifies the alarm number (first character) and the type of alarm that has occurred (next three characters). -
Page 11: Diagnostic Alarms
2408 Indicator Engineering Manual 2.2.5 Diagnostic Alarms In addition to the process alarms given in the previous column the following diagnostic alarms may also appear. These warn that a fault exists in either the indicator or the connected devices. Alarm What it means What to do about it Electrically Erasable Memory Error:... -
Page 12: To Change The Alarm Setpoints (Trip Levels)
Engineering Manual 2408 Indicator 2.2.8 To Change The Alarm Setpoints (trip levels) Parameters are grouped in ‘lists’ according to their function. Each list has a heading. button steps through the parameter list headings (see section 2.4.1.) The first list is the alarm setpoints list AL Do This This Is The Display You Should See Additional Notes... -
Page 13: Auto-Tare (Display Zero)
2408 Indicator Engineering Manual Auto-Tare (Display Zero) The auto-tare function is used, for example, when it is required to weigh the contents of a container but not the container itself. Alternatively, it can be used to set a fixed offset on an initial measured value. 2.3.1 To Use Auto Tare Place the empty container on the weigh-bridge. -
Page 14: To Access And Change Parameter Values
Engineering Manual 2408 Indicator To Access and Change Parameter Values Parameters are settings within the indicator, which determine how it will operate. Examples are Alarm Setpoints and Tare Values already mentioned. They are organised into different lists. Each list has a named heading which <... -
Page 15: Parameter Tables
2408 Indicator Engineering Manual Parameter tables The parameter tables provide a full list of parameters, an explanation of their use and where to find them. Use these lists to adjust:- • • • The alarm setpoints The User calibration The communications address •... -
Page 16: Input List
Engineering Manual 2408 Indicator 2.5.4 Input List Setpoint list Adjustable Range Default int.t Input filter integrating time constant OFF to 999.9 seconds Set to a value which reduces the effect of any input noise to an acceptable level. The higher the value the more sluggish the response 2.5.5 User Calibration Lists –... -
Page 17: Password Protected Levels Of Operation
2408 Indicator Engineering Manual Password Protected Levels of Operation Access levels Parameters are protected under different levels of access for which numerical password codes can be set up. The levels are:- Access Level What you can do Default Code OPer To view and adjust a limited set of parameters within limits set in higher levels FuLL To view and adjust all parameters which are required to operate the indicator... -
Page 18: Navigation Diagram (Full And Edit Levels)
Engineering Manual 2408 Indicator Navigation Diagram (full and edit levels) Use the following lists to adjust: • The alarm setpoints • The alarm setpoint limits • The input filter time constant • The User calibration • The communications address The diagram below shows the complete list of possible parameters which may be shown in Full and Edit access levels. - Page 19 2408 Indicator Engineering Manual Summary A. Press to step across the list headings. Press to step down the parameters within a particular list. You will eventually return to the list heading. C. Press to view the value of a selected parameter. Keep pressing to decrease the value. D.
-
Page 20: Parameter Tables
Engineering Manual 2408 Indicator Parameter Tables 3.3.1 HOME List Meaning Adjustable Range Default Customer Mnem setting setting -onic dSP.F HOME display front See ‘HOME display options’ dSP.b HOME display back section 2.1.2. None C.id Customer defined identity number 0 to 9999 3.3.2 Alarm List Meaning... -
Page 21: Input List
2408 Indicator Engineering Manual 3.3.4 Input List Meaning Adjustable Range Default Customer Mnem- setting setting onic FiLt Input 1 Filter Type For explanation of filter action No input filter see section 3.3.4.2. Integrating Step StEP Int.t Input 1 filter time Appears if Filter Type = OFF to 999.9 seconds constant... -
Page 22: User Calibration Lists
Engineering Manual 2408 Indicator 3.3.4.2 Filter Type There are three settings for the filter type Filter Type = Off. The display will respond immediately to any change in the PV input. If, however, there is any input noise this will result in fluctuations of the reading Filter Type = Integrating action. - Page 23 2408 Indicator Engineering Manual 3.3.5.2 Calibration Type = Load Cell < > < > tYPE Ld.C See also section 3.6.3. CAL1 CAL2 Meaning Adjustable Range Default Customer Mnem- setting setting onic Performs automatic ‘Tare’ correction tArE = Off See ’User Calibration’ section for further = Start correction description busy = Calculating value...
- Page 24 Engineering Manual 2408 Indicator 3.3.5.3 Calibration Type = Comparison < > < > tYPE Cm.P See also section 3.6.5. CAL1 CAL2 Meaning Adjustable Range Default Customer Mnem- setting setting onic Performs automatic ‘Tare’ correction. tArE = Off See ’USER CALIBRATION’ section for further = Start correction description busy = Calculating value...
-
Page 25: Custom Linearisation List 1 Or 2
2408 Indicator Engineering Manual 3.3.6 Custom Linearisation List 1 or 2 CAL1 CAL2 Meaning Adjustable Range Default Customer Mnem- setting setting onic in L Adjust low input value min input VAL.L Adjust displayed value corresponding min display to input low in H Adjust high input value Max input... -
Page 26: Digital Communications List
Engineering Manual 2408 Indicator 3.3.7 Digital Communications List Meaning Adjustable Range Default Customer Mnem- setting setting onic Indicator communications address Addr 1 to 99 EI Bisynch 1 to 254 Modbus This list only appears if digital communications has been configured. 3.3.8 Information List inFo... -
Page 27: To Hide, Reveal And Promote Parameters
2408 Indicator Engineering Manual To Hide, Reveal and Promote Parameters In Edit level you can choose customise the operator level display by choosing which parameters can be made available. The choices are:- ALtr The parameter will be alterable < > HidE The parameter will be hidden <... -
Page 28: Calibration
Engineering Manual 2408 Indicator Calibration The indicator is calibrated in three ways. These are:- 1. Factory Calibration. The controller is calibrated to very high accuracy during manufacture and the calibration values are permanently stored within the controller. Factory calibration is not available to the user 2. -
Page 29: Transducer Calibration
2408 Indicator Engineering Manual Transducer Calibration This indicator supports a number of different two and four wire transducer types. Each type is explained in this section. 3.6.1 Shunt Calibration Shunt calibration is so called since it refers to switching a calibration resistor across one arm of the four wire measurement bridge in a strain gauge transducer. - Page 30 Engineering Manual 2408 Indicator First - Enter The Calibration Password Do This This Is The Display You Should See Additional Notes From any display press CAL1 many times as necessary to < > < > CaL1 access the List’ header <...
-
Page 31: Load Cell Calibration
2408 Indicator Engineering Manual 3.6.3 Load Cell Calibration A load cell with V, mV or mA output may be connected to Input 1 or Input 2. Indicator under Calibration This diagram shows connections to input 1/main input 3D 3C 2B 2A Reference Weight Transducer If Input 2 is used in module position 3, the... -
Page 32: Comparison Calibration
Engineering Manual 2408 Indicator 3.6.5 Comparison Calibration Comparison calibration is most appropriate when calibrating the indicator against a second reference instrument. Indicator under Calibration Reference Measurement Device 3D 3C 2B 2A This diagram shows connections to Input 1/main input Transducer If Input 2 is used in module position 3, the transducer supply 1 output can be connected to terminals 3C (+) and 3D (-) -
Page 33: Manual Calibration
This feature is available in Configuration level in the 2408i indicator by configuring the ‘type of calibration’ (tYPE) in the Input List (iP) to Manual mAn (section 4.5.2). This two point offset applies a straight line fit between the low offset point and the high offset point as shown in the graph below. -
Page 34: Auto-Tare Or Display Zero
Engineering Manual 2408 Indicator 3.6.8 Auto-Tare or Display Zero The auto-tare (display zero) function is used, for example, when it is required to weigh the contents of a container but not the container itself. The procedure is to place the empty container on the weigh bridge and ‘zero’ the controller. Since it is likely that following containers may have different tare weights the auto-tare feature is always available in the indicator at Operator access level. -
Page 35: Custom Linearisation
2408 Indicator Engineering Manual Custom Linearisation The linearisation uses a 15 point straight line fit. Figure 3-7 shows an example of a curve to be linearised and is used to illustrate the terminology used in the parameter list Notes: Displayed value 1. -
Page 36: Configuration Level
Engineering Manual 2408 Indicator CONFIGURATION LEVEL The 2408 indicator is supplied configured in accordance with the ordering code (see section 5). The configuration of the indicator, as defined by columns 11 to 16 of the order code, can be changed on site, if necessary, to meet the requirements of the installation. -
Page 37: Software Configuration
2408 Indicator Engineering Manual Software configuration Configuration level allows you to set up parameters in the indicator which defines how it will operate. Examples are:- • The configuration of the alarms • The digital input functions • The relay output configuration •... -
Page 38: Location Of Parameters - From Indicator Block Diagram
Engineering Manual 2408 Indicator Location of Parameters – From Indicator Block Diagram The indicator consists of a number of internal function blocks connected together. Each function block has a number of parameters found in lists to which the user has access. The block diagram shows location of these parameters within the indicator. -
Page 39: Navigation Diagram (Configuration Level)
2408 Indicator Engineering Manual Navigation diagram (configuration level) The navigation diagram shows the location of configuration parameters. Press to step across the list headings. This is a continuous list. Press to step down the parameters within a particular list. You will eventually return to the list heading. Press to view the value of a selected parameter. -
Page 40: Configuration Parameter Tables - All Indicators
Engineering Manual 2408 Indicator Configuration Parameter Tables - All indicators The tables in this section list the parameters available for the fixed functionality of the indicator. 4.5.1 Instrument configuration list inSt inst Instrument list Option Meaning Default setting Customer setting unit To select display units Celsius... -
Page 41: Sensor Input Configuration List
2408 Indicator Engineering Manual 4.5.2 Sensor Input Configuration List Sensor Input Option Meaning Default setting Customer setting inPt To configure input type j.tc J thermocouple Defined by the ordering code, See also example 4.4.2.1. k.tc K thermocouple otherwise ktc NOTE: L.tc L thermocouple After selecting an input... - Page 42 Engineering Manual 2408 Indicator 4.5.2.1 Example: To Select a Different Thermocouple Type Do This This Is The Display You Should See Additional Notes Enter configuration level as described in section 4.2.1. until the ‘Input List’ Press header is shown < >...
-
Page 43: Alarm Configuration
2408 Indicator Engineering Manual 4.5.3 Alarm Configuration Alarms are used to alert an operator when the process value has exceeded a pre-set level or when some other fault condition has occurred. They normally switch an output - usually relay - to provide an interlock on a machine/process or audio/visual indication to an operator. -
Page 44: Alarm Inhibit
Engineering Manual 2408 Indicator Example: To Configure Alarm 2 to Operate When Input 2 Exceeds A Set Value Do This This Is The Display You Should See Additional Notes Enter configuration level as described in section 4.2.1. Press until the ‘Alarm List’ header is shown <... -
Page 45: 2408I Indicator With Alarm Inhibit Timer
4.5.5 2408i Indicator With Alarm Inhibit Timer 2408i indicators fitted with software versions 3 and greater contain an alarm inhibit timer which is used to inhibit alarms for a set period after power-up and when a digital input is closed. -
Page 46: Digital Inputs 1 And 2 Configuration
Engineering Manual 2408 Indicator 4.5.6 Digital inputs 1 and 2 Configuration Digital input 1 Option Meaning Default setting Customer setting Digital input 2 Identity of input Logic input Read only LoG.i LoG.i Func Function nonE Function not configured none Remote setpoint select Ac.AL Alarm acknowledge Accs... -
Page 47: Peak Hold And Sample And Hold
2408 Indicator Engineering Manual 4.5.7 Peak Hold and Sample and Hold Peak Hold logs the maximum and minimum values that the indicator reads during a particular process. The peak hold value can be displayed as the main front or back display parameter, as described in section 2.1.2. Sample and Hold logs the reading at the moment that the digital input becomes true. -
Page 48: Relay Output 1 Configuration
Engineering Manual 2408 Indicator 4.5.8 Relay Output 1 Configuration The controller can be supplied so that Relay 1 will operate when a particular alarm occurs. This will be defined in the order code, see section 5. This list defines which of the internal ‘soft’ alarms are attached to relay output 1. It is possible to attach more than one alarm to operate this relay. - Page 49 2408 Indicator Engineering Manual 4.5.8.1 Example 1: To Attach Alarm 1 to Relay Output AA Indicator supply Alarm indication supply It is recommended that an external device is connected so that an alarm condition is indicated when the relay is de-energised.
-
Page 50: Configuration Parameter Tables - Plug In Modules
Engineering Manual 2408 Indicator Configuration Parameter Tables – plug in modules 4.6.1 Communications Module The 2408 indicator can be fitted with the following digital communications modules:- Protocol Module Fitted Order Code ModBus 2-wire RS485 4-wire RS422 RS232 EI-Bisynch 2-wire RS485 4-wire RS422 RS232 DeviceNet... - Page 51 2408 Indicator Engineering Manual 4.6.3.1 Example: To configure Function, Baud Rate, Resolution and Node Address:- Do This This Is The Display You Should See Additional Notes 1. Press as many times as This is the position in which a digital necessary to select ‘HA’.
-
Page 52: Devicenet Communications
The EDS (Electronic Data Sheet) file for the 2408 is named 2400.EDS and is available from your supplier, or electronically by going to Web site (www.eurotherm.com). The EDS file is designed to automate the DeviceNet network configuration process by precisely defining vendor-specific and required device parameter information. -
Page 53: Module 1, 2 And 3 Configuration Lists
2408 Indicator Engineering Manual 4.6.5 Module 1, 2 and 3 Configuration Lists The identity of a module fitted in slots 1, 2 or 3 is shown by the first parameter in the module lists. < > • If the module is a single output only channel is shown <... -
Page 54: Triple Logic Input Or Triple Contact Closure Input Module
Engineering Manual 2408 Indicator 4.6.8 Triple Logic Input or Triple Contact Closure Input Module The triple logic input module allows further digital inputs in addition to those in the basic instrument. The list of parameters is the same as the fixed digital inputs 1 & 2, section 4.5.6. as follows:- Customer settings in each channel Identity of LoG.i... -
Page 55: Dc Input Module
2408 Indicator Engineering Manual 4.6.9 DC input Module The DC Input module can only be fitted in slot 3. The following parameters appear:- Module Parameters Option Meaning Customer settings 3B Identity of DC input Read only dC.iP module Func Function nonE No function. - Page 56 Engineering Manual 2408 Indicator Do This This Is The Display You Should See Additional Notes A. Configure the DC Input Module fitted in slot 3 for transition function < > Press until the List header is shown 2 secs < >...
-
Page 57: 4.6.10 Dc Retransmission Module
2408 Indicator Engineering Manual 4.6.10 DC Retransmission Module The following parameters appear. Module Parameters Option Meaning Customer settings Identity of module dc.rE DC retransmission Func Function nonE None configured Process value retransmission Setpoint retransmission Error from setpoint retrans. IP.1 Input 1 retransmission Ip.2 Input 2 retransmission If Func = nonE no further parameters are shown... -
Page 58: Indicator Calibration
Engineering Manual 2408 Indicator Indicator calibration This section explains how to calibrate PV inputs 1 and 2, and retransmission outputs. It should not be confused with User Calibration described in section 3.6 which allows the user to add offsets to compensate for external measurement inaccuracies. -
Page 59: To Calibrate Retransmission Output
2408 Indicator Engineering Manual 4.7.2 To Calibrate Retransmission Output Connect the retransmission output to a multi-meter set to volts or mV as appropriate. Calibrated voltmeter or 2400 Indicator ammeter Module output terminals Figure 4-11: Retransmission output calibration Do This This Is The Display You Should See Additional Notes <... -
Page 60: Calibration Parameters
Engineering Manual 2408 Indicator 4.7.4 Calibration Parameters Basic Indicator Calibration Selected parameter Selected re-calibration Idle state - no calibration performed rCAL nonE parameter PV.1 Main process value input selected PV.2 Second analogue input selected (this will always be in module position 3) 1A.Hi Module 1 DC retransmission high output (if installed) -
Page 61: Ordering Code
Module 3 Relay Comms Manual number colour voltage Output 1 Module Module 2408i Function Modules 1, 2 and 3 Relay Output 1 Comms module Indicator/Alarm unit Module not fitted Not fitted Module not fitted Profibus Indicator Alarm Relay output (change-over) -
Page 62: Safety And Emc Information
Engineering Manual 2408 Indicator 6 Safety and EMC Information Caution: Live sensors The alarm acknowledge/keylock input is Safety electrically connected to the sensor input (e.g. This indicator complies with the European Low Voltage thermocouple). In some installations the temperature Directive 73/23/EEC, amended by 93/68/EEC, by the sensor may become live. -
Page 63: Technical Specification
2408 Indicator Engineering Manual 7 Technical Specification Main process value input and second DC input Transmitter supply Low level range -100 to +100mV Rating 20mA, 24Vdc Strain gauge bridge supply High level range 0-20mA or 0-10Vdc Sample rate Bridge voltage Software selectable, 5 or 10Vdc Resolution <2µV for low level inputs... -
Page 64: Part Number Ha027240 Issue 5.0 Feb
Engineering Manual 2408I Indicator Part Number HA027240 Issue 5.0 Feb 2015... - Page 66 All rights are strictly reserved. No part of this document may be reproduced, modified or transmitted in any form by any means, neither may it be stored in a retrieval system other than for the purpose to act as an aid in operating the equipment to which the document relates, without the prior written permission of Invensys Eurotherm Limited.
Need help?
Do you have a question about the 2408i and is the answer not in the manual?
Questions and answers