Table of Contents
Advertisement
Quick Links
Advertisement
Table of Contents

Related Manuals for iSmartAlarm Home Security System


Summary of Contents for iSmartAlarm Home Security System
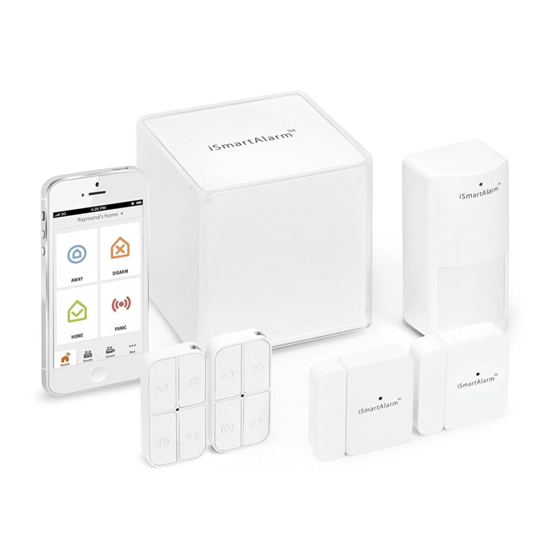
- Page 1 Home Security System OWNER’S MANUAL...
-
Page 2: Table Of Contents
Home Security System OWNER’S MANUAL Table of Contents INTRODUCTION PACKAGE CONTENTS INTENDED USE IMPORTANT NOTES FOR USERS CONTRAINDICATION PARTS, BATTERY AND LED INDICATOR SOUND CONFIRMATIONS BASIC FUNCTIONALITY SETUP REQUIREMENTS SETUP PROCEDURES OPERATING SETUP INSTRUCTIONS ADDING ADDITIONAL DEVICES AFTER THE INSTALLATION... -
Page 3: Owner's Manual
INTRODUCTION Thank you for purchasing the iSmartAlarm Home Security System. The iSmartAlarm™ allows you complete control over your home's security utilizing your smartphone.This manual will guide you through the set up procedures and highlight the Security System’s key features. Please keep it handy for future reference. -
Page 4: Important Notes For Users
ISP, limited service such as text message, push notification provided by smartphone maker(s). • The iSmartAlarm system, like any electrical system, is subject to component failures. • Phone alert notification coverage currently includes continental US, Hawaii, and Canada provinces excluding area code 907 (Alaska) and 867 (Canada Northeast and Yukon). -
Page 5: Contraindication
should wait at least ten seconds before plugging the CubeOne back in/powering on. This will allow the residual power charge to cycle through. CONTRAINDICATION Use with appropriate caution if you use this product in combination with medical electronic devices such as: (1) Medical electronic implants such as pacemakers. - Page 6 1. 10/100 BASE-T Ethernet: for connecting to router 2. USB: a port for future function expansion (not for connecting to computer directly) 3. Power: for connecting to power adaptor LED statuses of CubeOne™ 1. Booting: LED stays solid red. 2. Normal working status: LED flashes white, “breathing” when siren is off;...
- Page 7 2. Replace the three AA batteries as below. 3. LED flashes red once when batteries are installed. NOTE: Whenever removing and/or replacing batteries, you should wait at least ten seconds before placing new batteries in the device. This will allow the device residual power charge to cycle through. Remote tag: How to change battery: 1.
- Page 8 2. Replace the button battery with same type - CR2032. 3. LED flashes red once when the battery is installed. NOTE: Whenever removing and/or replacing batteries, you should wait at least ten seconds before placing new batteries in the device. This will allow the device residual power charge to cycle through.
-
Page 9: Sound Confirmations
2. Replace the button battery with same type - CR2032. 3. LED flashes red once when the battery is installed. NOTE: Whenever removing and/or replacing batteries, you should wait at least ten seconds before placing new batteries in the device. This will allow the device residual power charge to cycle through. -
Page 10: Basic Functionality
App. After the "Arm" is pushed, by default the system takes 180 seconds to allow user(s) to walk out of the premises before the iSmartAlarm system take effect. You can change the alarm arming delay in Alarm Settings. Disarm: All devices are disarmed by either Remote Tags or through the App. - Page 11 After the "Home" is enabled (turned on), by default the system take 180 seconds to allow user to walk out of the premise before the iSmartAlarm system takes effect. You can change the alarm arming delay in Alarm Settings.
- Page 12 •The Superuser receives a snapshot taken by an iCamera from the preset angle through the iSmartAlarm App (Only applicable if iCamera is part of system). •The Superuser is given the option to call an emergency agent or ignore the alarm (Only applicable if iCamera is part of system).
-
Page 13: Setup Requirements
(if iCamera is part of system). The Panic is set off: • Siren, located in CubeOne™, is set off. SETUP REQUIREMENTS The iSmartAlarm Home Security System is designed to be used with the following iPhone models: iPhone 5S iPhone 5C... -
Page 14: Operating Setup Instructions
Home Security System is ready to use! PREPARING FOR SET UP Make sure: • Your smart phone is compatible with the iSmartAlarm App. • During the registration, make sure the smart phone, iCamera™ optional are on the same local network as CubeOne™. - Page 15 • Ensure all devices are registered and appear in the App’s Device Settings. STEP 3: • Place each of the devices in the appropriate locations (see examples below). Your iSmartAlarm Home Security System is now ready to use! 2 cm inch ) (max) contact sensor Approx. 2 m ft.)
-
Page 16: Adding Additional Devices After The Installation
ADDING ADDITIONAL DEVICES AFTER THE INSTALLATION 1. Remove the insulation tags from new devices. 2. Launch iSmartAlarm app and go to the Monitor page. 3. Select the Safety Monitor tab. 4. Pull the Safety Monitor page down to view the “Add Devices ”... - Page 17 2. Login to the iSmartAlarm App using the credentials you established during the sign up process. 3. Follow the prompts to register CubeOne and other devices you may have.
-
Page 18: App Screen Legend
APP SCREEN LEGEND 1. This is your primary page for control of your iSmartAlarm. You can arm or disarm the system, set the system to “Home” setting (all devices on except motion detectors), or set off the Panic... - Page 19 2. Here, you can view all members added to your home security group along with their status (home or away). 3. You can view the status of all devices.
- Page 20 – pan, tilt, and take snapshots. Snapshots are automatically saved to the iSmartAlarm album. 5. View and make changes to your profile, your family settings, device settings, alarm settings, App settings, and learn more about your iSmartAlarm through the Help Center.
-
Page 21: Specifications
For more detailed operating instructions, please visit www.iSmartAlarm.com or the FAQ section of the iSmartAlarm Home Security System App on your smart phone. SPECIFICATIONS CubeOne™ 1. Model: iPU3 iPU3G 2. Classification: External power 3. Device dimensions: 100mm*100mm*105mm 4. Weight: 370g 5. - Page 22 Motion Sensor 1. Model: PIR3 PIR3G 2. Classification: Internally-powered 3. Device dimensions: 100mm*69mm*50mm 4. Weight: 80.1g 5. Power: 3*1.5V(AA) 6. Maximum working distance: 100m (300 feet) in open space 7. Operating temperature: -10℃ 50℃ (14°F 122°F) 8. Operating humidity: 30℃±2 ≤85%±5 9.
-
Page 23: General Safety And Precautions
8. Operating humidity: 30℃±2 ≤85%±5 9. Storage and transport temperature: -40℃ 55℃ (-40°F 131°F) 10. Storage and transport humidity: 40℃≤90% Contact Sensor 1. Model: DWS3 DWS3G 2. Classification: Internally-powered 3. Device dimensions: 50mm*50mm*13mm 4. Weight: 27.4g 5. Power: 1*3V (CR2032) 6. - Page 24 It may not be safe for people with pacemakers to use the security system. Contact sensors include parts with strong magnetic force. 9. Avoid using the iSmartAlarm™ near strong magnetic fields, such as microwave ovens, etc. 10. The Products may not perform accurately if stored or used outside the specified temperature and humidity ranges cited under...
- Page 25 —Connect the equipment into an outlet on a circuit different from that to which the receiver is connected. —Consult the dealer or an experienced radio/TV technician for help. This device complies with Part 15 of the FCC Rules. Operation is subject to the following two conditions: (1) this device may not cause harmful interference, and (2) this device must accept any interference received, including interference that may cause...
-
Page 26: Troubleshooting
TROUBLESHOOTING 1. Sign up failed • Ensure that you have selected the correct country during registration. • Ensure that the phone number that you are registering can receive text messages. • Ensure that the phone number you entered follows the 10-digit credentials. - Page 27 • Observe the LED on each device during power up. The red LED should flash once. If not, replace the old battery and try the above process again. • Launch the iSmartAlarm App and go to the Monitor page. • Select the Safety Monitor tab.
- Page 28 907 (Alaska) and 867 (Canada Northeast and Yukon). Additional areas will be added in the future. Please contact customerservice@ismartalarm.com for more details. • Ensure that you have not reached the monthly call limit. Monthly call limit is set to 30 calls per CubeOne per month.
-
Page 29: Care And Maintenance
• Ensure that the internet connection such as Wi-Fi, 3G/4G for your smartphone is good. • Make sure your router’s UPnP has turned on. • Ensure that port 17941 is open. Refer to iSmartAlarm.com for instruction on how to do port forwarding. 11. Motion sensor falls off the wall over time •... -
Page 30: Warranty Information
The manufacturer or distributor of iSmart Alarm, Inc. are not responsible for any legal liability caused by the negligence or incorrect installation of the iSmartAlarm system by the owner/buyer. Our products come with a 1-year warranty in general in all countries, or a 2-year warranty where is required by your local Consumer Law. - Page 31 Europe SARL 3 Rue Tronchet, 75008, Paris, France Tel: +33 1 44 94 04 81 E-mail: support@ihealthlabs.eu iSmartAlarm™, CubeOne™ , iCamera™ are trademarks of iSmart Alarm, Inc. iPhone is a trademark of Apple Inc, Registered in the U.S. and other countries.
Need help?
Do you have a question about the Home Security System and is the answer not in the manual?
Questions and answers