
Related Manuals for Whirlpool R-94


Summary of Contents for Whirlpool R-94
- Page 1 CONSUMER SERVICES TECHNICAL R-94 EDUCATION GROUP PRESENTS “P” MODEL AIR CONDITIONER JOB AID Part No. 8178039...
- Page 2 FORWARD This Whirlpool Job Aid, “P” Model Air Conditioner (Part No. 8178039), provides the technician with information on the installation and service of the “P” Model Air Conditioner. It is to be used as a training Job Aid and Service Manual. For specific information on the model being serviced, refer to the “Use and Care Guide,”...
-
Page 3: Table Of Contents
Electrical Power Supply & Grounding Requirements ........... 1-1 Weight Handling Requirements ..................1-2 Electrostatic Discharge (ESD) Sensitive Electronics ............ 1-2 Whirlpool Model & Serial Number Designations ..............1-3 Model & Serial Number Label Location ................1-4 Specifications ........................1-5 Whirlpool Air Conditioner Warranty ................... 1-6 INSTALLATION INFORMATION ................... - Page 4 — NOTES — - iv -...
-
Page 5: General
GENERAL SAFETY FIRST Your safety and the safety of others is very important. We have provided many important safety messages in this Job Aid and on the appliance. Always read and obey all safety messages. This is the safety alert symbol. This symbol alerts you to hazards that can kill or hurt you and others. -
Page 6: Weight Handling Requirements
ELECTROSTATIC DISCHARGE (ESD) SENSITIVE ELECTRONICS ESD problems are present everywhere. ESD may damage or weaken the electronic control assembly. The new control assembly may ap- pear to work well after repair is finished, but failure may occur at a later date due to ESD Electrical Shock Hazard stress. -
Page 7: Whirlpool Model & Serial Number Designations
WHIRLPOOL MODEL & SERIAL NUMBER DESIGNATIONS MODEL NUMBER MODEL NUMBER Q 05 2 P K 0 PRODUCT GROUP: A = AIR CONDITIONER PRODUCT IDENTIFICATION: C = WARRANTY D = DEHUMIDIFIER O = ROOM A/C CABINETS MODEL TYPE: C = CASEMENT... -
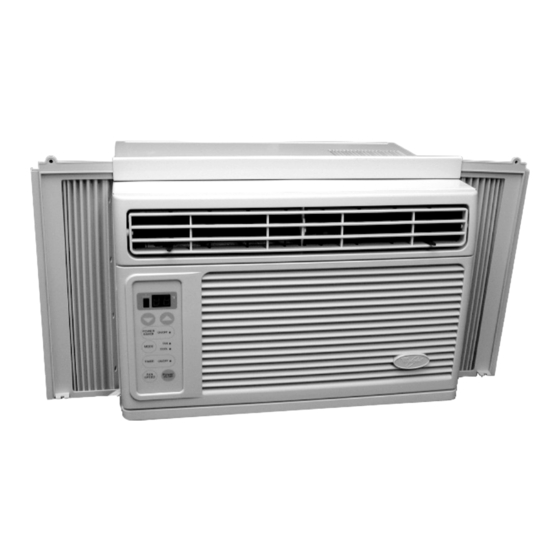
Page 8: Model & Serial Number Label Location
MODEL & SERIAL NUMBER LABEL LOCATION The Model/Serial Number label location is shown below. Model & Serial Number Location... -
Page 9: Specifications
SPECIFICATIONS Model Number ACD052PK ACM062PK ACQ052PK ACQ062PK Ratings BTU - Cool 5000 6000 5200 6000 Energy Efficiency Rating # Air Features Air Flow on Turbo (CFM) Air Flow on Low (CFM) Features Cooling Speed Selections Timer-Clock (On/Off) Power Saver Fan Only Yes-1 Speed Yes-1 Speed Yes-3 Speed... -
Page 10: Whirlpool Air Conditioner Warranty
“Troublesooting,” additional help can be found by checking the “Requesting Assistance Or Service” section, or by calling the Whirlpool Consumer Assistance Center telephone number, 1- 800-253-1301, from anywhere in the U.S.A. For service in Canada, see “If You Need Assistance... -
Page 11: Installation Information
INSTALLATION INFORMATION Open the window and mark the centerline IMPORTANT NOTES: of the inner sill. • Make sure that you maintain a good grip on the air conditioner so that it does not fall out of the window opening during the installation. - Page 12 REMOVING THE AIR CONDITIONER Close the guide panels. FROM THE WINDOW Raise the window sash and carefully tilt the air conditioner backward to drain any condensate water in the base. Lift the air conditioner from the window Excessive Weight Hazard and remove the sash seal from between Use two or more people to move and the windows.
-
Page 13: Component Access
COMPONENT ACCESS This section instructs you on how to service each component inside the air conditioner. The components and their locations are shown below. COMPONENT LOCATIONS Overload Protector Compressor Main PCB Condenser Capacitor Control Panel & Display PCB Fan Motor Thermistor Evaporator... -
Page 14: Removing The Front Grille Assembly & Cabinet
REMOVING THE FRONT GRILLE ASSEMBLY & CABINET b) Remove the screw from the grille as- sembly. Electrical Shock Hazard Disconnect power before servicing. Replace all panels before operating. Failure to do so can result in death or electrical shock. NOTE: Sharp edges may be present. Unplug the air conditioner or disconnect the power. - Page 15 e) Pull the bottom of the grille assembly c) Remove the five side screws and the out, unhook it at the top, and remove four rear screws. the assembly. Unhook 4 Screws 2 Screws (3 On Other Pull Out Side) To remove the cabinet: d) Lift the cabinet off the unit.
-
Page 16: Removing The Control Panel & Display Pcb
REMOVING THE CONTROL PANEL & DISPLAY PCB Push down on the top two clips of the con- trol panel and unhook them from the chas- sis slots, then lift the panel assembly off the unit, and remove it. Electrical Shock Hazard Disconnect power before servicing. -
Page 17: Removing The Power Cord
REMOVING THE POWER CORD Remove the top and bottom screws from the control panel brackets. Screw Control Panel Electrical Shock Hazard Disconnect power before servicing. Replace all panels before operating. Failure to do so can result in death or electrical shock. Screw Remove the screw from the power cord NOTE: Sharp edges may be present. -
Page 18: Removing The Thermistor, The Capacitor, & The Main Pcb
REMOVING THE THERMISTOR, THE CAPACITOR, & THE MAIN PCB b) Disconnect the 4-wire connector from the main PCB at CN-TH1. NOTE: You may have to move some of the wire bundles out of the way to access the connector. Electrical Shock Hazard Disconnect power before servicing. - Page 19 To remove the capacitor: e) Disconnect the wires from the following capacitor terminals: a) Remove the two screws from the top • Yellow wire to 2-lug terminal (FAN). and bottom of the control panel assem- bly. • Red wire to 3-lug terminal (HERM). •...
-
Page 20: Removing The Fan Motor
REMOVING THE FAN MOTOR Remove the two screws from the top air guide cover and remove the cover. Screw Electrical Shock Hazard Disconnect power before servicing. Replace all panels before operating. Failure to do so can result in death or Top Air electrical shock. - Page 21 Unhook the right side of the front air guide 10. Remove the screw from the left side of the cover from the front air guide, then lift the rear air guide, and unhook the two tabs cover out of the guides on both sides, push from the condenser slots on the right side.
- Page 22 13. Carefully push on the center hub and slide 15. Disconnect the fan motor connector from the fan off the rear shaft of the fan motor, the capacitor wire connector. then remove the fan and the rear air duct Capacitor (the duct is removed in the photo below).
- Page 23 FAN MOTOR REINSTALLATION NOTES: Note that the fan hub hole has a “key” inside it. Position this key over the flat of the motor shaft, and slide the fan onto the shaft until the end is approximately 1/4˝ from the outside of the fan hub hole. Squeeze the tabs on the ring clip and slide the clip over the fan hub.
-
Page 24: Removing The Overload Protector And The Compressor
REMOVING THE OVERLOAD PROTECTOR AND THE COMPRESSOR b) Disconnect the brown wire from the compressor terminal, and the blue wire from the overload protector terminal. Brown Wire Blue Wire Electrical Shock Hazard Disconnect power before servicing. Replace all panels before operating. Failure to do so can result in death or electrical shock. - Page 25 d) Braze on an access valve and dis- g) Lift the compressor off the three rubber charge the sealed system refrigerant shock mounts. into a refrigerant recovery bag. e) Disconnect the high side line from the compressor, and the suction line from the accumulator.
-
Page 26: Removing The Evaporator
REMOVING THE EVAPORATOR Pull the mounting clip off the evaporator tubing and reinstall it on the new evapora- tor at the same location. Electrical Shock Hazard Remove Clip Disconnect power before servicing. Replace all panels before operating. Failure to do so can result in death or electrical shock. - Page 27 Measure the new evaporator inlet and outlet tubes, and cut the existing lines to the proper length. Lift the evaporator out of the front air duct. NOTE: Make sure that when you install the new evaporator the small tabs seat Evaporator properly in the air duct guides on both sides.
-
Page 28: Removing The Condenser
REMOVING THE CONDENSER Measure the new condenser inlet and outlet tubes, and cut the existing lines to the proper length. Remove the screw from the left side of the rear air guide, and unhook the two tabs from the condenser slots on the right side. Electrical Shock Hazard Rear Air Guide Disconnect power before servicing. -
Page 29: Component Testing
COMPONENT TESTING THERMISTOR Before testing any of the components, perform the following checks: • The most common cause for control failure is corrosion on connectors. Therefore, discon- necting and reconnecting wires will be nec- essary throughout test procedures. • All tests/checks should be made with a VOM or DVM having a sensitivity of 20,000 ohms- Thermistor Connector per-volt DC, or greater. -
Page 30: Line Fuse
Electrical Shock Hazard Disconnect power before servicing. Replace all panels before operating. Failure to do so can result in death or electrical shock. LINE FUSE CAPACITOR Main PCB Line Fuse Refer to page 3-6 for the procedure for servic- Refer to page 3-6 for the procedure for servic- ing the main PCB. -
Page 31: Fan Motor
Electrical Shock Hazard Disconnect power before servicing. Replace all panels before operating. Failure to do so can result in death or electrical shock. Set the ohmmeter to the R x 100 scale. FAN MOTOR Clip one of the ohmmeter test leads to the orange wire terminal and leave it there. -
Page 32: Overload Protector
Electrical Shock Hazard Disconnect power before servicing. Replace all panels before operating. Failure to do so can result in death or electrical shock. COMPRESSOR OVERLOAD PROTECTOR Compressor Terminals Refer to page 3-12 for the procedure for servic- Black ing the overload protector. Unplug the air conditioner or disconnect the power. -
Page 33: Wiring Diagrams
WIRING DIAGRAMS WIRING DIAGRAM (MODELS ACD052PK & ACM062PK) POWER INPUT WH (BU) BK (BR) (RIBBED) (SMOOTH) GND (GN/YL) ROTARY SWITCH MOTOR OR (BR) CAPACITOR OR (BR) COMP. OVERLOAD PROTECTOR THERMOSTAT... -
Page 34: Wiring Diagram (Models Acq052Pk & Acq062Pk)
WIRING DIAGRAM (MODELS ACQ052PK & ACQ062PK) POWER INPUT WH (BL) BK (BR) (RIBBED) (SMOOTH) GND (GN/YL) THERMISTOR CN-TH1 CN-RD MOTOR OR (BR) OR (BR) CAPACITOR ZNR01J RY-COMP COMPRESS TRANSFORMER LINE FUSE, 125V, 2A OVERLOAD PROTECTOR... -
Page 35: Product Specifications
PRODUCT SPECIFICATIONS WARRANTY INFORMATION SOURCES IN THE UNITED STATES: FOR PRODUCT SPECIFICATIONS AND WARRANTY INFORMATION CALL: FOR WHIRLPOOL PRODUCTS: 1-800-253-1301 FOR KITCHENAID PRODUCTS: 1-800-422-1230 FOR ROPER PRODUCTS: 1-800-447-6737 FOR TECHNICAL ASSISTANCE WHILE AT THE CUSTOMER’S HOME CALL: THE TECHNICAL ASSISTANCE LINE: 1-800-253-2870... - Page 36 CORPORATION...