Table of Contents
Advertisement
Use and Installation Instructions
This appliance must be installed in accordance with the regulations in force and
Read these instructions before installing or using the appliance and retain
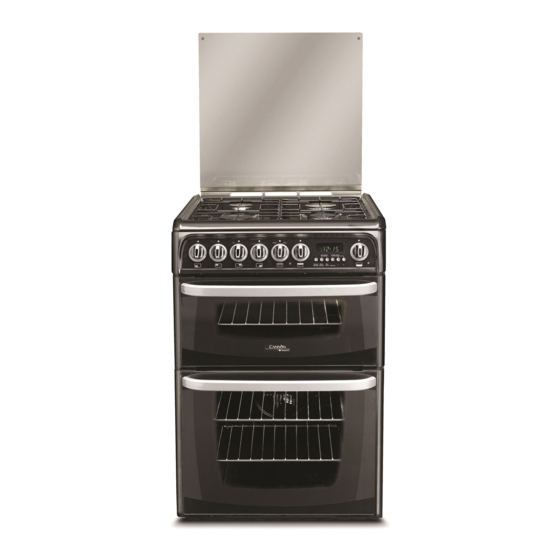
CH60GCIK
CH60GCIK
CH60GCIS
CH60GCIS
CH60GCIW
CH60GCIW
only used in a well ventilated space.
them for future reference.
Advertisement
Table of Contents

Related Manuals for Hotpoint CH60GCIK


Summary of Contents for Hotpoint CH60GCIK
- Page 1 Use and Installation Instructions CH60GCIK CH60GCIK CH60GCIS CH60GCIS CH60GCIW CH60GCIW This appliance must be installed in accordance with the regulations in force and only used in a well ventilated space. Read these instructions before installing or using the appliance and retain...
-
Page 2: Table Of Contents
CONTENTS PAGE Introduction For Your Safety Installation Instructions Features Control Panel Automatic Cooking Oven Timer Operation Hotplate Grill Main Oven Main Oven Cooking Chart The “Slow Cook” Setting Top Oven Top Oven Cooking Chart Care and Cleaning Something wrong with your Cooker?/ Disposal Guarantee Information Service Information PLEASE PHONE US TO REGISTER YOUR APPLIANCE AND ACTIVATE YOUR PARTS GUARANTEE ON 08448 24 24 24... -
Page 3: Introduction
INTRODUCTION To help you make the best use of your cooker, PLEASE READ THIS BOOKLET CAREFULLY. Your new cooker is guaranteed and will give lasting service. The guarantee is only applicable if the cooker has been installed in accordance with the Installation Instructions. The cooker is designed specifically for domestic use and responsibility will not be accepted for use in any other installation. -
Page 4: For Your Safety
FOR YOUR SAFETY Please read the precautions below before using your cooker. ALWAYS . . . ALWAYS make sure you understand the controls before using the cooker. ALWAYS check that all controls on the cooker are turned off after use. ALWAYS stand back when opening an oven door to allow heat to disperse. - Page 5 FOR YOUR SAFETY NEVER . . . NEVER leave children unsupervised where the cooker is installed as all surfaces will get hot during and after use. NEVER allow anyone to sit or stand on any part ! ATTENTION ! ATTENTION ! ATTENTION ! VERY HOT SURFACES ! VERY HOT SURFACES...
-
Page 6: Installation Instructions
MODEL NUMBERS CH60GCIK; CH60GCIS; CH60GCIW Category II2H3+ (GB) These models are set to burn NATURAL GAS (G20) at 20 mbar but can be converted for use on BUTANE (G30) at 28-30mbar or PROPANE (G31) at 37mbar with the use of the LPG conversion kit that can be obtained free of charge, if you contact our Genuine Parts and Accessories department (see Key Contacts, back page). -
Page 7: Technical Data
INSTALLATION INSTRUCTIONS TECHNICAL DATA Gas connection Rp ½ (½” BSP female) Pressure test point Front left hotplate injector Gas rate adjustment None Aeration adjustment None Electrical connection Flexible cord fitted with a 3 pin 13 amp plug 230/240V a.c. 50Hz. 13A fuse. G30 at 28-30mbar G20 at 20mbar G31 at 37mbar... - Page 8 INSTALLATION INSTRUCTIONS SPACE FOR FIXING The cooker can be close fitted below hotplate level. This requires a minimum distance of 600mm between cupboard units of hotplate height. When installing next to a tall cupboard, partition or wall, for a minimum distance of 400mm above hotplate level, allow a side clearance of at least 65mm.
- Page 9 INSTALLATION INSTRUCTIONS UNPACKING THE COOKER Unpack the components from inside the grill and oven. Check that the following parts are present: Grill pan and grid Top oven/grill shelf heat shield Baking dish Pan supports Main oven shelves (2) Enamelled burner caps (4) Top oven/grill shelf (1) Literature Aluminium burner bodies (4)
-
Page 10: Stability Chain
INSTALLATION INSTRUCTIONS STABILITY CHAIN A hole in the gas inlet valve bracket can be used to engage a stability chain. CONNECTING TO GAS SUPPLY Connection to the cooker should be made with an approved appliance flexible connection to BS 669. A length of 0.9 to 1.25m is recommended. -
Page 11: Electrical Connection
ELECTRICAL CONNECTION WARNING - THIS APPLIANCE MUST BE EARTHED. CONNECT TO A 230-240V A.C. SUPPLY ONLY. Connection to the electricity supply should be made via a properly earthed, readily accessible wall socket which is adjacent to but not directly above, and not more than 1.25m away from the appliance and capable of electrical isolation. - Page 12 INSTALLATION INSTRUCTIONS INSTALLATION AND OPERATIONAL CHECKS After installation, check for gas soundness. The supply pressure can be checked at the front left hotplate burner injector. Fit the hotplate burner bodies and caps, pan supports and shelf shield(s). Referring to the instructions for use where necessary, 1.
-
Page 13: Features
Features 2000W 3000W 2000W 3000W Timer Control panel Model number & Grill Serial number label Grill pan and food support 'Stay Clean' liners Top oven/grill Top Oven door rod shelf Main Oven door Oven light Oven fan Door Switch 'Stay Clean' liners Main oven rod shelves Inner door glass... -
Page 14: Control Panel
Control Panel ELECTRONIC INIECTION BUTTON* MAIN OVEN TIMER TOP OVEN/GRILL BURNER CONTROLS CONTROL CONTROL Control Knobs for the gas burners • The position of the gas burner controlled by each one of the knobs is shown by a solid ring . -
Page 15: Automatic Cooking
AUTOMATIC COOKING The oven timer offers you the following features: 1. Time of Day 2. Automatic Cooking 3. Minute Minder AUTOMATIC COOKING The main oven can be controlled automatically. GUIDANCE ON AUTOMATIC COOKING 1. Select foods which will take the same time to cook. 2. -
Page 16: Oven Timer Operation
OVEN TIMER OPERATION CLOCKFACE The timer incorporates a 24 hour clock. 0 0 0 Ensure the correct time of day is always set, before using your cooker. SYMBOLS A ‚bell’ symbol will light up when you select a Minute Minder Period and will remain lit for the 0 0 0 period set. -
Page 17: Setting The Time Of Day
OVEN TIMER OPERATION SETTING THE TIME OF DAY Step 1 Make sure all oven controls are turned Off. 0 0 0 Step 2 Check the electricity supply to the cooker is turned on. Step 3 When switched on the display will show 0.00 and the Auto symbol, flashing intermittently. - Page 18 OVEN TIMER OPERATION AUTO COOKING PROGRAMMES There are two Auto Cooking programmes that can be selected using your timer:- (a) To set the timer to switch the oven(s) On and Off Automatically (b) To set timer to switch on immediately and OFF automatically after a set cook period. a) TO SET THE TIMER TO SWITCH THE OVEN(S) ON AND OFF AUTOMATICALLY This allows you to cook at a specified time for a chosen period before the oven switches off Automatically.
- Page 19 OVEN TIMER OPERATION Note 1 When cooking automatically the Cook Period can be checked at any time by simply pressing the Cook Period button. Note 2 When cooking automatically the End Time can be checked at any time by simply pressing the End Time button.
- Page 20 OVEN TIMER OPERATION TO CANCEL AN AUTO COOKING PROGRAMME BEFORE THE COOK PERIOD HAS FINISHED. Turn the oven control to the OFF position. Step 1 Press the Manual button to return the oven to „Manual” operation. The ‚Auto’ Step 2 symbol will go out.
-
Page 21: Hotplate
HOTPLATE The hotplate lid is fitted with a safety device which cuts off the gas supply to the hotplate burners unless the lid is fully open. Do not use the safety device as a means of controlling the hotplate burners. The hotplate has two high speed burners and two simmering burners which will accommodate pans between 100mm (4”) and 240mm (9 ½”) diameter. - Page 22 HOTPLATE SAFETY REQUIREMENTS FOR DEEP FAT FRYING 1. Never fill chip pans more than one third full with oil or fat. 2. Never leave oil or fat unattended during the heating or cooling period. 3. Never heat fat or fry with a lid on the pan. 4.
-
Page 23: Grill
GRILL WARNING – DO NOT USE THE GRILL WITHOUT AN ELECTRICAL SUPPLY TO THE COOKER CAUTION - ACCESSIBLE PARTS MAY BECOME HOT WHEN THE GRILL IS USED. YOUNG CHILDREN SHOULD BE KEPT AWAY. The grill is fitted with a safety device that will cut off the gas supply to the burner if the flame is extinguished for any reason. - Page 24 TO USE THE GRILL 1. Open the top oven/grill door and remove the grill pan. 2. Remove the heat shield from the rear of the shelf for maximum grilling area and place shelf in appropriate position. 3. Push in and turn the control knob clockwise to the large flame symbol. Continue to push in the control knob for a further 3 seconds after the gas has lit, to allow time for the safety device to operate.
-
Page 25: Main Oven
MAIN OVEN WARNING – DO NOT USE THE MAIN OVEN WITHOUT AN ELECTRICAL SUPPLY TO THE COOKER The main oven is fitted with a safety device that re-lights the burner if the flame has been extinguished for any reason and another safety device that reduces the gas flow to a safe level if, for any reason, the burner fails to light. The oven has different heat zones - the thermostat settings refer to the temperature on the middle shelf position;... - Page 26 MAIN OVEN COLD START COOKING Anything requiring long slow cooking such as casseroles and rich fruit cakes can be put into a cold oven. Satisfactory results can also be obtained with creamed mixture, rich pastries or yeast mixtures, but for perfection we recommend preheating the oven for about 15 minutes at the gas mark you require for cooking.
-
Page 27: Main Oven Cooking Chart
MAIN OVEN COOKING CHART The following times and setting are for guidance only. You may wish to alter the setting to give a result more to your satisfaction. When a different setting to that shown below is given in a recipe, the recipe instructions should be followed. - Page 28 MAIN OVEN COOKING CHART Shelf Food Approx. Cooking Time and Comments Mark Positions CAKES, PASTRIES AND BISCUITS Small cakes - 2 trays 1 & 3 17 - 25 mins 2 or 3 - 1 tray " only Victoria sandwich 2x8" (205mm) 1 &...
-
Page 29: The "Slow Cook" Setting
THE ‘SLOW COOK’ SETTING The ‚Slow Cook’ setting on the main oven thermostat is used for slow cooking, keeping food warm and warming plates for short periods. USING THE ‚SLOW COOK’ SETTING FOR SLOW COOKING 1. All dishes cooked by the ‚Slow Cook’ setting should be cooked for a minimum 6 hours. They will ‚hold’ at this setting for a further hour but marked deterioration in appearance will be noticed in some cases. -
Page 30: Top Oven
TOP OVEN The top oven can be used to cook small quantities of food or used in conjunction with the main oven to provide additional cooking space. The top oven is fitted with a safety device that will cut off the gas supply to the burner if the flame is extinguished for any reason. -
Page 31: Top Oven Cooking Chart
TOP OVEN COOKING CHART The following times and setting are for guidance only. You may wish to alter the setting to give a result more to your satisfaction. When a different setting to that shown below is given in a recipe, the recipe instructions should be followed. - Page 32 TOP OVEN COOKING CHART Shelf Food Approx. Cooking Time and Comments Mark Positions CAKES, PASTRIES AND BISCUITS Small Cakes (16 per tray) 20 - 25 mins Victoria sandwich (2x180mm / 7 ") 25 - 30 mins. Swiss Roll (3 egg quantity) 10 - 12 mins.
-
Page 33: Care And Cleaning
CARE AND CLEANING ! Never use steam cleaners or pressure cleaners on the appliance. Clean the glass part of the oven door using a sponge and a non-abrasive cleaning product, then dry thoroughly with a soft cloth. Do not use rough abrasive material or sharp metal scrapers as these could scratch the surface and cause the glass to crack. - Page 34 CARE AND CLEANING COOKER FINISH CLEANING METHOD Cloth wrung out in warm soapy water. Stubborn stains can be Vitreous Enamel removed with a cream paste, liquid cleaner or by rubbing with Door inner panels, pan supports, burner caps, fine steel wool soap pads. roasting dish, grill pan, main oven base, inside Check that the cleaning agent is approved by the Vitreous of grill compartment.
-
Page 35: Something Wrong With Your Cooker?/ Disposal
Care and Cleaning BURNER MAINTANANCE INSTRUCTIONS Before cleaning the burners ensure the appliance is WARNING! switch off and isolated from the electriacl supply and Brush the burner in the directions indicated the appliance is cold. below. MAIN OVEN DO NOT re-ignite the burner with the detergent residue. - Page 36 SOMETHING WRONG WITH YOUR COOKER Before contacting your nearest Service Centre/Installer, check the problem guide below; there may be nothing wrong with your cooker. PROBLEM CHECK Burner will not light: If all burners fail to ignite: Check that sparks appear at the burners; a clicking noise should be heard.
- Page 37 SOMETHING WRONG WITH YOUR COOKER PROBLEM CHECK This is normal and should cease after a short period. Slight odour or small amount of smoke when grill / oven used first time. Check that the oven temperature and shelf positions are as Oven cooks too fast or too slow.
- Page 38 PLEASE PHONE US TO REGISTER YOUR APPLIANCE AND ACTIVATE YOUR PARTS GUARANTEE ON 08448 24 24 24...
-
Page 39: Guarantee Information
90 days of ownership. Simply call our Hotpoint Service Hotline on 08448 224 224 (ROI 0818 313 413) for telephone assistance, or, where necessary, to arrange for an engineer to call. -
Page 40: Service Information
12/2013- 195088180.03 XEROX FABRIANO After Sales Service No one is better placed to care for your Hotpoint appliance during the course of its working life than us - the manufacturer. Essential Contact Information Hotpoint Service We are the largest service team in the country offering you access to 400 skilled telephone advisors and 1100 fully qualified engineers on call to ensure you receive fast, reliable, local service.
Need help?
Do you have a question about the CH60GCIK and is the answer not in the manual?
Questions and answers