Saeco Talea Ring Plus Operation And Maintenance Manual
Hide thumbs
Also See for Talea Ring Plus:
- Service manual (99 pages) ,
- Operation and maintenance manual (88 pages) ,
- Operating and maintenance manual (76 pages)
Table of Contents
Advertisement
Quick Links
Advertisement
Table of Contents

Related Manuals for Saeco Talea Ring Plus


Summary of Contents for Saeco Talea Ring Plus
- Page 1 Operation and maintenance manual Before using the machine, please read the attached operating instructions. Carefully read the safety rules Mode d'emploi Veuillez lire attentivement le mode d'emploi (notamment les consignes de sécurité) avant d'utiliser l'appareil. FOR HOUSEHOLD USE ONLY...
-
Page 2: Important Safeguards
IMPORTANT SAFEGUARDS When using electrical appliances, basic safety precautions should always be followed to reduce the risk of fire, electric shock, and/or injury to persons, including the following: 1 Read all instructions and information in this instruction book and any other literature included in this carton referring to this product before operating or using this appliance. - Page 3 CAUTION This appliance is for household use only. Any servicing, other than cleaning and user maintenance, should be performed by an authorized service centre. Do not immerse machine in water. To reduce the risk of fire or electric shock, do not disassemble the machine. There are no user serviceable parts inside the machine serviceable by the user.
-
Page 4: Table Of Contents
CONTENTS GENERAL INFORMATION ........................3 APPLIANCE ............................4 ..............................4 ACCESSORIES INSTALLATION ............................ 5 ............................5 STARTING THE MACHINE ............................6 SETTING THE LANGUAGE “ ” ........................... 7 AQUA PRIMA WATER FILTER DISPLAY .............................. 8 ....................8 OPTI DOSE INDICATES THE GROUND COFFEE QUANTITY ADJUSTMENTS ........................... -
Page 5: General Information
GENERAL INFORMATION The coffee machine is suitable for preparing espresso coffee using coffee beans, and it is equipped with a device to dispense steam and hot water. The machine is designed for domestic use only, and is not suitable for heavy or professional use. Warning: no liability is assumed for any damage caused by: •... -
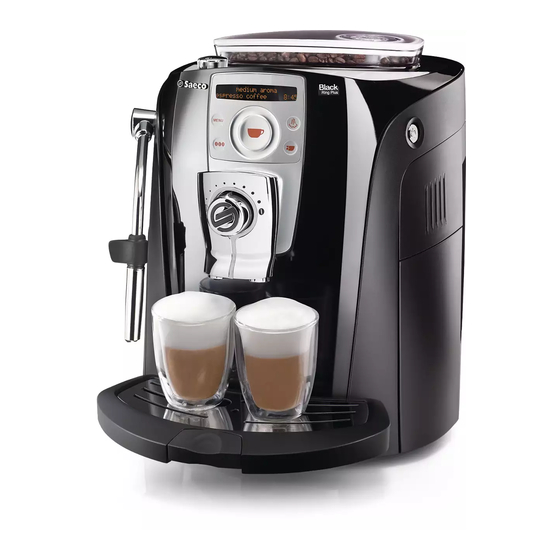
Page 6: Appliance
APPLIANCE Coffee bean hopper Coffee bean hopper cover Cup warming surface Compartment for pre- ground coffee Control panel Power button SBS knob Service door Dispensing head Dregs drawer Hot water / steam knob Button for raising/lowering the drip tray Hot water / steam spout Water tank Brew Group... -
Page 7: Installation
INSTALLATION STARTING THE MACHINE Make sure that the main power button is not pressed in the “ON” position. Remove the coffee bean hopper Close the cover pushing it down Remove the water tank. We cover. completely. recommend installing the “Aqua Fill the hopper with coffee beans. -
Page 8: Setting The Language
INSTALLATION SETTING THE LANGUAGE These settings allow you to regulate the machine’s parameters to dispense coffee according to the typical parameters of the country where it is used. For this reason, the languages are also differentiated by location. beverage settings machine settings machine settings Press... -
Page 9: Aqua Prima" Water Filter
“AQUA PRIMA” WATER FILTER To improve the quality of the water you use, and guarantee longer machine life at the same time, it is Remove the “Aqua Prima” water Fill the tank with fresh drinking date of the current month. until it clicks into place. -
Page 10: Display
DISPLAY strong aroma Accessing the Steam button espresso coffee 08:33 programming menu Click wheel Select the coffee bean Hot water button dose or the quantity of pre-ground coffee • Press the button twice to make 2 cups. Press twice selected selected espresso coffee double espresso... -
Page 11: Adjustments
The SBS system has been carefully designed to give your coffee the intense taste you desire. Simply turn the dial and you will notice that the coffee goes from mild intensity to strong intensity. MEDIUM SBS – SAECO BREWING SYSTEM COFFEE SBS adjusts the intensity of the brewed coffee. -
Page 12: Beverage Dispensing
BEVERAGE DISPENSING COFFEE BREWING CAN BE STOPPED AT ANY TIME BY PRESSING THE BUTTON AGAIN. THE STEAM SPOUT MAY REACH HIGH TEMPERATURES: DANGER OF SCALDING. DO NOT TOUCH IT WITH BARE HANDS. Check that all the containers are clean. To carry out this operation, follow the instructions in the “Cleaning and Maintenance”... -
Page 13: Dispensing Beverages With Ground Coffee
DISPENSING BEVERAGES WITH GROUND COFFEE The machine allows you to use pre-ground and decaffeinated coffee. Pre-ground coffee must be poured into the appropriate compartment positioned next to the coffee bean hopper. Only use coffee ground for espresso machines and never coffee beans or instant coffee. WARNING: ONLY PUT PRE-GROUND COFFEE INTO THE COMPARTMENT WHEN YOU WISH TO DISPENSE THIS TYPE OF BEVERAGE. -
Page 14: Hot Water Dispensing
BEVERAGE DISPENSING HOT WATER DISPENSING DISPENSING MAY BE PRECEDED BY SHORT SPURTS OF HOT WATER AND SCALDING IS POSSIBLE. THE HOT WATER/STEAM SPOUT MAY REACH HIGH TEMPERATURES: DO NOT TOUCH IT WITH BARE HANDS. USE THE APPROPRIATE HANDLE ONLY. selected hot water Place a container beneath the Press the... -
Page 15: Dispensing Steam
DISPENSING STEAM DISPENSING MAY BE PRECEDED BY SHORT SPURTS OF HOT WATER AND SCALDING IS POSSIBLE. THE HOT WATER/STEAM SPOUT MAY REACH HIGH TEMPERATURES: DO NOT TOUCH IT WITH BARE HANDS. USE THE APPROPRIATE HANDLE ONLY. selected steam Place a container with the Turn the knob to the Press the button. -
Page 16: Making Cappuccino
BEVERAGE DISPENSING MAKING CAPPUCCINO DISPENSING MAY BE PRECEDED BY SHORT SPURTS OF HOT WATER AND SCALDING IS POSSIBLE. THE HOT WATER/STEAM SPOUT MAY REACH HIGH TEMPERATURES: DO NOT TOUCH IT WITH BARE HANDS. USE THE APPROPRIATE HANDLE ONLY. selected steam Fill 1/3 of the cup with cold milk. -
Page 17: Milk Island
MILK ISLAND (OPTIONAL) This device, which may be purchased separately, enables you to easily and comfortably prepare delicious cappuccinos. Warning: before using the Milk Island, read the manual and all precautions carefully for correct use. Important note: the quantity of milk in the carafe must never be below the “MIN” minimum level nor exceed the “MAX”... -
Page 18: Beverage Programming
BEVERAGE PROGRAMMING Every beverage can be programmed according to your individual tastes. 1. PROGRAMMING FOR SELF-LEARNING You can program the quantity of coffee and/or milk you wish to be dispensed into the cups when you press the button for any beverage. Select the type of beverage you want to program, then press and hold the button until the display shows (for example):... - Page 19 strong aroma beverage settings espresso coffee 08:33 Check that the water and coffee bean Press the button. Select “beverage settings”. Press container are full; place the cup under the dispensing head. espresso coffee medium aroma When the settings are espresso coffee changed, the message on the When the changes are stored Select the beverage to program.
-
Page 20: Programming The Machine
PROGRAMMING THE MACHINE Some of the machine’s functions can be programmed to customize operations according to your individual preferences. beverage settings Press the button to: - save the new settings. 1 Press the button. select the functions change the function settings. energy saving beverage settings Beverage setting... -
Page 21: Machine Settings
MACHINE SETTINGS To change the machine’s operation settings, press the button, select “machine settings” and press language rinsing English set the coffee circuit rinse cycle. set the menu language. water hardness cup-warming surface activate/deactivate the operation of set the water hardness. the cup warming surface acoustic alarm clock setting... -
Page 22: Water Hardness" Menu
PROGRAMMING THE MACHINE “WATER HARDNESS” MENU > machine settings > water hardness With the “Water hardness” function you can adapt your machine to the degree of hardness of the water you use, so that the machine will request descaling at the right moment. Hardness is expressed on a scale from 1 to 4. -
Page 23: Filter Alarm" Menu
“FILTER ALARM” MENU > machine settings > filter alert machine settings filter alert Select by navigating the click It is possible to set: - on - off Press the button to save. “RINSE” MENU > machine settings > rinsing The rinse setting the internal circuits in order to guarantee that the beverages are only made with fresh water. The function is enabled as default by the manufacturer. -
Page 24: Clock Setting" Menu
PROGRAMMING THE MACHINE “CLOCK SETTING” MENU > machine settings > clock setting To set the current time, date and hour format to display. In this menu you can set: machine settings clock setting - the current time (hour and minutes) - the hour format (24 hours - AM/PM) - the current date (day - month - year - day of the week) -
Page 25: Time Format
Time format > machine settings > clock setting > time format To set the time view mode. This setting adjusts all clock functions to either “am/pm” or “24 hour” formats. clock setting 2.7.2 time format 2.7.2 time format 2.7.2 time format The machine also allows displaying the time in the American format (am/pm). - Page 26 PROGRAMMING THE MACHINE 2.7.3 date setting 2.7.3 date setting tuesday 18/04/06 tuesday 18/04/06 The day of the week is automatically set according to the set date. Select the month and press the Select the year and press the Date format >...
-
Page 27: Maintenance
MAINTENANCE MAINTENANCE To access the machine’s maintenance programs, press the button, select “maintenance” and press water filter group wash wash the Brew Group. descaling management menu. “WATER FILTER” MENU > maintenance > water filter In this menu you can: maintenance water filter - check the number of litres before replacement;... - Page 28 MAINTENANCE Filter state > maintenance > water filter > filter status maintenance water filter 3.1.2 filter status Select by navigating the click It is possible to set: - on - off Press the button to save. Load filter > maintenance > water filter > activate filter maintenance water filter 3.1.3...
-
Page 29: Descaling" Menu
WARNING! NEVER USE VINEGAR AS A DESCALER. Saeco descaler is recommended; however, you can use any non-toxic and/or non-harmful descaling beverage for coffee machines, commonly available in the shops. The used solution is to be disposed of according to the manufacturer’s... - Page 30 MAINTENANCE Note: before beginning the descaling cycle make sure that: 1. a large enough container is positioned under the water spout; 2. THE “AQUA PRIMA” FILTER HAS BEEN REMOVED. maintenance descaling 3.2.2 descaling execute now Descaling is carried out at a controlled temperature. If the machine is cold, you must wait until it has reached the right temperature;...
- Page 31 following message appears on the display: descaling cycle passage fill the please wait [ 2/15] water tank The machine begins to dispense The intervals are displayed in such Remove the water tank, rinse the descaling solution through the a way as to check the state of with fresh drinking water to hot water spout.
-
Page 32: Brew Group Washing
To clean the machine’s internal circuits used for brewing coffee. To wash the Brew Group, simply clean with water as shown on page 35. This wash completes maintenance of the Brew Group. We recommend using Saeco tablets, which can be purchased separately. -
Page 33: Programming The Machine
PROGRAMMING THE MACHINE ENERGY SAVING To adjust the energy saving parameters, press the button, select “energy saving” and press the turn-off delay monday Set the machine’s turn on/off times (one Set the time which must pass after the last setting for each day of the week) product dispensing before the machine enters the energy saving mode. -
Page 34: Monday" Timer Setting
“MONDAY” TIMER SETTING > energy saving > monday This and the following menus are used to set the turn on/off times for each day of the week. The procedure described below shows how to set the turn on/off times for the day of the week “Monday”. To set the turn on/off times for the other days of the week, follow the same procedure after selecting the desired day. -
Page 35: Special Functions
SPECIAL FUNCTIONS This menu allows you to access special functions present on the machine. Press the button to access and select “special function” and press the button. Navigate the reset settings execute now restore the basic machine operating parameters. RESTORE SETTINGS >... -
Page 36: Cleaning And Maintenance
CLEANING AND MAINTENANCE GENERAL MACHINE CLEANING The cleaning described below must be performed once a week. Note: if water remains in the tank for several days, do not use it. WARNING! Never immerse the machine in water. If you remove grounds with the machine off or when not signaled on the display, the count of the grounds emptied into the drawer is not reset. -
Page 37: Cleaning The Brew Group
CLEANING THE BREW GROUP. The Brew Group must be cleaned at least once a week. Wash the Brew Group with warm water. WARNING! Do not wash the Brew Group with detergents that can compromise its correct operation. Do not wash in the dishwasher. Open the service door and remove Press the PUSH button to remove the dregs drawer. -
Page 38: Error Codes
ERROR CODES GUIDE MESSAGE THAT APPEARS HOW TO REMOVE THE MESSAGE out of service (xx) restart to fix… seconds turn the machine on again to restore normal operation.If the problem persists, call the service centre and give the code (xx) shown on the display. close coffee bean lid Close the coffee bean hopper cover to be able to make a beverage. -
Page 39: Troubleshooting
TROUBLESHOOTING ROBLEMS AUSES OLUTIONS The machine does not turn on. The machine is not connected to the Connect the machine to the power source. power source. The plug has not been plugged into the Insert the plug into the machine’s power back of the machine. -
Page 40: Safety Rules
SAFETY RULES IN CASE OF EMERGENCY IMMEDIATELY UNPLUG THE CORD FROM THE OUTLET. ONLY USE THE APPLIANCE • Indoors. • For preparing coffee, hot water and for frothing milk. • For domestic use. • By adults in non altered psycho-physical conditions. PRECAUTIONS FOR THE USE OF THE MACHINE •... -
Page 41: Replacement Parts
DANGERS • The appliance must not be used by children and persons who have not been informed of its operation. • The appliance is dangerous to children. When left unattended, unplug from the electrical outlet. • Keep the coffee machine packaging out of the reach of children. •... -
Page 42: Technical Data
TECHNICAL DATA TECHNICAL DATA See label on the appliance Nominal voltage See label on the appliance Power rating See label on the appliance Power supply ABS - Thermoplastic Shell material 320 x 370 x 400 mm - 12.60” x 14.57” x 15.75” Size (w x h x d) 9 Kg - 19.8 lbs Weight...
Need help?
Do you have a question about the Talea Ring Plus and is the answer not in the manual?
Questions and answers