Sherwood RX-4109 Operating Instructions Manual
Am/fm stereo receiver
Hide thumbs
Also See for RX-4109:
- Operating instructions manual (18 pages) ,
- Service manual (28 pages) ,
- Operating instructions manual (112 pages)
Table of Contents
Advertisement
Quick Links
Advertisement
Table of Contents

Related Manuals for Sherwood RX-4109


Summary of Contents for Sherwood RX-4109
- Page 2 RX-4109 AM/FM STEREO RECEIVER...
-
Page 3: Introduction
Introduction READ THIS BEFORE OPERATING YOUR UNIT This symbol is intended to alert the user to the presence of uninsulated "dangerous voltage" within the product's enclosure that may be of sufficient magnitude to constitute a risk of electric shock to persons. CAUTION : TO REDUCE THE RISK OF ELECTRIC SHOCK, DO This symbol is intended to alert the user to the presence... -
Page 4: Table Of Contents
CONTENTS Introduction READ THIS BEFORE OPERATING YOUR UNIT..................2 System Connections ............................4 Front Panel & Remote Controls ........................7 REMOTE CONTROL OPERATION RANGE ....................9 LOADING BATTERIES ..........................9 Operations LISTENING TO A PROGRAM SOURCE ....................10 LISTENING TO RADIO BROADCASTS ....................13 LISTENING TO RDS BROADCASTS (FM ONLY) .................. -
Page 5: System Connections
System Connections • Do not plug the AC input cord into the wall AC outlet until all connections are completed. • Be sure to connect the white RCA pin cords to the L (left) and the red RCA pin cords to the R (right) jacks when making audio connections. -
Page 6: Connecting Audio Components
• The AUX jacks may also be connected to an additional component such as MD recorder, tape deck, etc. CONNECTING DIGI-LINK • Connect this jack to the DIGI-LINK jack of the external Sherwood component that uses the DIGI-LINK II or III remote control system. -
Page 7: Connecting Speakers
CONNECTING SPEAKERS • Usally SPEAKER A terminals are used for only a pair of speakers. When you have another pair of speakers, SPEAKER B terminals can be used. • Never short-circuit the + and - speaker cords. • Be sure to connect speakers firmly and correctly according to the channel (left and right) and the polarity (+ and -). -
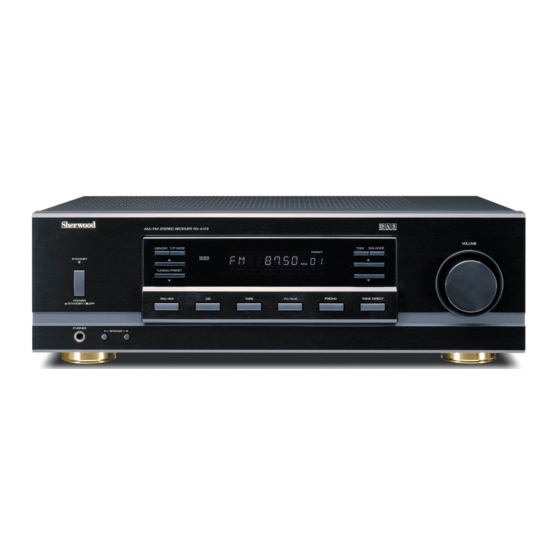
Page 8: Front Panel & Remote Controls
Front Panel & Remote Controls FRONT PANEL REMOTE CONTROLS FLUORESCENT DISPLAY... - Page 9 1. POWER SWITCH 12. MEMORY BUTTON Press this button to store preset stations. Push this switch to enter the standby mode. To switch the power off, push again this switch. 13. TUNING/PRESET MODE BUTTON 2. POWER ON BUTTON Press this button to select the tuning mode or the In the standby mode, press this button, then this unit preset mode.
-
Page 10: Remote Control Operation Range
REMOTE CONTROL OPERATION RANGE Use the remote control unit within a range of about 7 meters (23 feet) and angles of up to 30 degrees aiming at the remote sensor. LOADING BATTERIES Remove the cover. Load two batteries matching the polarity. Remove the batteries when they are not used for a long time. -
Page 11: Operations
Operations LISTENING TO A PROGRAM SOURCE Before operation Push the POWER switch. • This unit enters the standby mode and the STANDBY indicator lights up. This means that the receiver is not disconnected from the AC mains and a small amount of current is retained to support the memorized contents and operation readiness. - Page 12 Select the desired input source. Each time the FM/AM button is pressed, the band is changed to AM or FM. Operate the selected component for playback. Adjust the volume to a comfortable listening level. To mute the sound. “MUTE” flickers. To resume the previous sound level, press this button again.
- Page 13 Adjusting the tone (bass and treble) Enter the tone mode. Each time this button is pressed, the corresponding tone mode is selected and shown for 3 seconds as follows: BASS TRBL Note: When the tone direct function is activated, the tone mode cannot be entered and “TON DIR”...
-
Page 14: Listening To Radio Broadcasts
LISTENING TO RADIO BROADCASTS Auto tuning Select the tuner and then the desired band. • Each time this button is pressed, the band is changed to FM or AM. Select the tuning mode. • Each time this button is pressed, the mode changes as follows: Tuning mode : “PRESET”... - Page 15 Presetting radio stations • You can store up to 30 preferred stations in the memory. Tune in the desired station with auto or manual tuning. Press the MEMORY button. • “MEM” is flickering for 5 seconds. Select the desired preset number (1~30) and press the MEMORY button. •...
- Page 16 Tuning to preset stations After selecting the tuner as an input source, select the preset mode. • Then “PRESET” lights up. Select the desired preset number. • When using the NUMERIC buttons on the remote control. Examples) For “3” For “15” : For “30”...
-
Page 17: Listening To Rds Broadcasts (Fm Only)
RDS Tuner (Regional Option for some countries in Europe, etc.) LISTENING TO RDS BROADCASTS (FM ONLY) RDS (Radio Data System) is a method for sending information signals together with the transmitter signals. Your tuner is capable of translating these signals and putting the information on the display. These codes contain the following informations. - Page 18 TP Search • Use this function to automatically search and receive the stations broadcasting the traffic program. In the FM mode, press the SEARCH MODE button twice. • “TP SRCH” is displayed. When "TP SRCH" is displayed, press the TUNING/PRESET UP( / ) or DOWN ( ) button to search the station.
- Page 19 When "PTY SRCH" is displayed, press the PTY SELECT button to select the desired program type. • Each time this button is pressed, one of 32 different types of programs is selected. (NEWS, AFFAIRS, INFO, SPORT, EDUCATE, DRAMA, CULTURE, SCIENCE, VARIED, POP M, ROCK M, EASY M, LIGHT M, CLASSICS, OTHER M, WEATHER, FINANCE, CHILDREN, SOCIAL, RELIGION, PHONE IN, TRAVEL, LEISURE, JAZZ,...
-
Page 20: Recording
RECORDING The volume, tone(bass, treble) and balance settings have no effect on the recording signals. When you select tuner, CD or PHONO as a recording source, recording may be made on TAPE or AUX, or both simultaneously. Recording with TAPE Select the desired input as a recording source except for TAPE. -
Page 21: Other Functions
While operating the sleep timer, “ ” lights up. When the sleep time is selected, all display panels of Sherwood components connected by the DIGI- LINK III are dimly lit. Adjusting the brightness of the fluorescent displays Each time this button is pressed, the brightness of... -
Page 22: Troubleshooting Guide
Troubleshooting Guide If a fault occurs, run through the table below before taking your receiver for repair. If the fault persists, attempt to solve it by switching the receiver off and on again. If this fails to resolve the situation, consult with your dealer. -
Page 23: Specifications
Specifications AMPLIFIER SECTION Power output, stereo mode, 8 Ω, THD 0.08 %, 20 Hz~20 kHz ............... 2X100 W Total harmonic distortion, 8 Ω, 100 W, 20 Hz~20 kHz ................0.04 % Intermodulation distortion 60 Hz : 7 kHz= 4 : 1 SMPTE, 8 Ω, 100 W ....................0.02 % Input sensitivity, 47 kΩ...
Need help?
Do you have a question about the RX-4109 and is the answer not in the manual?
Questions and answers