Table of Contents
Advertisement
WARNING: If the information in this manual is not followed exactly, a fire or explosion may result
causing property damage, personal injury or loss of life.
-
Do not store or use gasoline or other flammable vapors and liquids in the vicinity of this or any
other appliance.
-
An LP cylinder not connected for use shall not be stored in the vicinity of this or any other
appliance.
-
Installation and service must be performed by a qualified installer, service agency or the gas supplier
WHAT TO DO IF YOU SMELL GAS
• Do not try to light any appliance.
• Do not touch any electrical switch; do not use any phone in your building.
• Immediately call gas supplier from a neighbor's phone. Follow the gas supplier's instructions.
• If you cannot reach your gas supplier, call the fire department.
WARNING:
Improper installation, adjustment, alteration, service or maintenance can cause injury
or property damage. Read this manual thoroughly before installing or servicing this
equipment. For assistance or additional information consult a qualified installer,
service agency, or the gas supplier.
Installer:
After installation give this manual to the homeowner and
explain operation of this appliance.
© Copyright 2008, T.I.
$10.00
WARNING: For Outdoor Use Only
Part # 100-01203_000
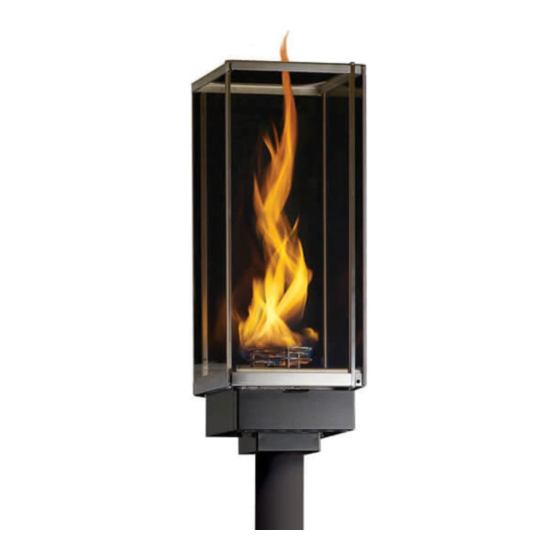
Tempest Torch
Owner's Manual
• Gas Fired Torch
• Natural Gas (sku 94900743)
• Propane (sku 94900753)
Tested and Listed by
OMNI-Test Laboratories, Inc.
Portland, Oregon
Report # 028-F-83-5
Advertisement
Table of Contents

Related Manuals for Travis Industries Tempest Torch


Summary of Contents for Travis Industries Tempest Torch
- Page 1 Tempest Torch Owner’s Manual • Gas Fired Torch • Natural Gas (sku 94900743) • Propane (sku 94900753) WARNING: For Outdoor Use Only Tested and Listed by OMNI-Test Laboratories, Inc. Portland, Oregon Report # 028-F-83-5 WARNING: If the information in this manual is not followed exactly, a fire or explosion may result causing property damage, personal injury or loss of life.
-
Page 2: Overview
Installation.” A copy of the safety label is shown below. Important Registration and Service Information No other Tempest torch has the same serial number as yours. The serial number is on the safety label attached by a chain near the control panel. This serial number will be needed in case you require service of any type. -
Page 3: Table Of Contents
Gas Line Connection .......... 8 Post Mount and Control Cover Installation ..9 Torch Assembly ..........10 Optional Rain Cap ..........11 Wall Mount Kit ............. 12 Post or Pier Mounted Torch ........ 13 © Travis Industries, Inc. 100-01203_000 4050608... -
Page 4: Safety Precautions
Always follow the instructions in this manual. • Travis Industries, Inc. grants no warranty, implied or stated, for the installation or maintenance of your torch, and assumes no responsibility of any consequential damage(s). -
Page 5: Features & Specifications
25 Holes 49 Holes Manifold Pressure 7" wc 11" wc Max. Inlet Pressure 7" wc 11" wc Dimensions: 8-7/8” 8-7/8” 19-1/2” 9-1/2” 9-1/2” 2-1/2” NOTE: All Clearances are measured from the glass (and glass frame). © Travis Industries, Inc. 100-01203_000 4050608... -
Page 6: Installation
This appliance is designed to operate on natural gas, or propane (LP). Notify your insurance company before hooking up this appliance. All relevant information on the Tempest Torch is located on page 2, Important Information. You can fax them page 2. -
Page 7: Placement Requirements
Lesser clearances shall be permitted to be used only where acceptable to the authority having jurisdiction. • Keep combustibles away from the shaded heat zone of the torch (see illustration below). © Travis Industries, Inc. 100-01203_000 4050608... -
Page 8: Gas Line Requirements
A manual shutoff valve is required on the gas supply to the torch. It should be placed upstream of the flex line. A shut-off valve is included with the optional wall-mount kit. NOTE: This version of the tempest torch may not be connected to a portable LP cylinder. © Travis Industries, Inc. -
Page 9: Post Mount And Control Cover Installation
(d) Attach the torch to the post using the included ¼-20 screws. (e) Attach the control cover to the torch with the two thumb screws. ! The safety label slides into place between the control cover and the torch body. © Travis Industries, Inc. 100-01203_000 4050608... -
Page 10: Torch Assembly
! Tighten the bolt only enough to hold the glass in place – over- tightening may break the glass. Repeat steps “d” and “e” for the other three pieces of glass. © Travis Industries, Inc. 100-01203_000 4050608... -
Page 11: Optional Rain Cap
Place the rain cap on top of the torch so the four studs insert through the top plate. With one or two pieces of glass removed, secure the rain cap using the included nuts (shipped pre-attached to the rain cap). © Travis Industries, Inc. 100-01203_000... -
Page 12: Wall Mount Kit
(for qualified installers only) Wall Mount Kit An optional wall mount kit is available for mounting the tempest torch to a wall (or other horizontal structure). See the the wall mount kit for full set of assembly and installation instructions. -
Page 13: Post Or Pier Mounted Torch
Post or Pier Mounted Torch The tempest torch may be mounted to a 3” diameter post using the included post mount. This post may be surface mounted on a deck or similar platform with the optional post base kit. If the post is placed in a remote location, it may be sunk into the ground using concrete or other suitable means. -
Page 14: Operation
3. Push and hold valve control in. Torch must light within 5 seconds. After torch lights continue to hold valve control in for 15 seconds. Note – if torch does not light use a wand lighter in the wet weather lighter opening and perform step #3 to light. © Travis Industries, Inc. 100-01203_000 4050608... - Page 15 Turning the Torch Off 1. Push valve control in and turn clockwise to the OFF position. Note – if excessive wind or rain extinguishes the flame the safety control automatically turns gas off. © Travis Industries, Inc. 100-01203_000 4050608...
-
Page 16: Maintenance
• Have the appliance inspected by a qualified service technician annually. • The stainless steel burner top will discolor – this is normal. Your Tempest torch is designed to be cleaned and maintained easily. The most common maintenance that your torch will require is glass cleaning. This is done by loosening the glass retaining screws. -
Page 17: Replacement Parts
250-00409 ORIFICE, BURNER - No. 55 250-00753 ORIFICE, BURNER - No. 50 93006523 PILOT ELECTRODE, S.I.T. PILOT# 93006518 THERMO-COUPLE - S.I.T. # Replacement parts can be obtained from your Tempest torch retailer (see www.tempesttorch.com). © Travis Industries, Inc. 100-01203_000 4050608... -
Page 18: Troubleshooting Table
Torch makes Clicking Glass is moving inside the glass frame and the THIS IS NORMAL stainless steel parts are expanding and Sounds contracting with heat © Travis Industries, Inc. 100-01203_000 4050608... -
Page 19: Warranty
TRAVIS INDUSTRIES, INC. TRAVIS INDUSTRIES, INC., at its option, will repair or replace, free of charge, your TRAVIS appliance if it is found to be defective in material or workmanship within the time frame stated within this 1 year warranty. TRAVIS INDUSTRIES, INC. will return your appliance, freight charges prepaid by TRAVIS INDUSTRIES, INC., to your regional distributor, or dealership. -
Page 20: Index
Post or Pier Mounted Torch ..............13 Replacement Parts ................17 Safety Precautions ................4 Specifications ..................5 Torch Assembly .................. 9 Troubleshooting Table ................ 18 Wall Mount Kit ..................12 Warranty ..................... 19 Winterizing The Torch ................. 16 © Travis Industries, Inc. 100-01203_000 4050608...
Need help?
Do you have a question about the Tempest Torch and is the answer not in the manual?
Questions and answers