
Related Manuals for Haier 3000 Series


Summary of Contents for Haier 3000 Series
-
Page 1: Range Hood
Range Hood Extractor de Aire Hotte de Cuisiniere User Manual Model 3000/4000 Series Guide de l’Utilisateur 3000/4000 Series Manual del Usuario Modelo 3000/4000 Series... -
Page 2: Safety Precautions
American Society for Heating, Refrigeration and Air Conditioning Engineers (ASHRAE), and local code authorities. 8. When replacing an existing range hood with your new Haier Range Hood, turn OFF the electrical power to the existing unit before removal. 9. Before servicing or cleaning the unit, turn the power OFF at the service panel and if possible, lock the service panel to prevent power from being switched on accidentally. - Page 3 4. Please read specification label on product for further information and requirements. SAVE THESE INSTRUCTIONS for Future Use Thank you for using our Haier product. This easy-to-use manual will guide you Model number in getting the best performance from your Haier Range Hood.
-
Page 4: Table Of Contents
1 User Manual 4 Range Hood Wood Screws 4 Washers * LHV4330 models come with HEPA filters. 3000 series models come with Charcoal filters Check to make sure that all parts and accessories are present and in good condition. If you find that they are not in good condition or are missing, please contact our customer service department for assistance. -
Page 5: Installation Preparation
3. If you have a 4000 series model, install two (2) 8-watt, 8W-PAR20 LED lights. If you have 3000 series model, install two (2) 50-watt, halogen lights. 4. Remove the 2 aluminum filters from the hood. Place them somewhere safe so they will not be damaged 5. -
Page 6: Cabinet Preparation For Hoods Support
English Cabinet Preparation for Hood Support Mount the hood so that the bottom of the hood is between 24”-30” above the cooktop. Warning! When cutting or drilling into wall or cabinet, be careful not to cut existing electrical wiring. 1. If the bottom of the cabinet is recessed above the bottom of the cabinet door, then it is necessary to install wood strips on each side of the recessed area on the bottom of the cabinet where the range hood will be mounted. -
Page 7: Selecting Venting Direction
Check with your local retailer or dealer for replacements. Ductless Note: This filter is not dishwasher safe! *HEPA filtration is not available on all models. Please contact Haier at 1-877-337-3639 for information on where to purchase replacement filters. -
Page 8: Preparing Electrical Connections
English If you are using a ductless configuration, skip this step. In “Vertical Discharge” or “Horizontal Discharge” mode, please reinsert baffle into air chute (as shown) Preparation of Electrical Connections Note: If replacing an existing hood, the electrical cable may need to be re-routed to the desired position. -
Page 9: Blower Installation
Allow the bottom edge of the 7” duct to be inserted into the collar. Installing Ductwork Your new Haier range hood will operate at the highest efficiency if the number of elbows and the length of the duct are kept to a minimum. Also, ensure the back draft damper flap is attached to the damper frame assembly, which is supplied with the hood, does not impede airflow significantly. -
Page 10: Hood Installation
English Hood Installation 1. Lift the hood into position and guide the electrical cable through the electrical cable clamp on the hood. 2. Insert the 4 wood screws from the bottom and securely fasten. 3. Secure the electrical cable in the cable clamp while allowing sufficient length in the hood to connect the field wires to the hood wires. -
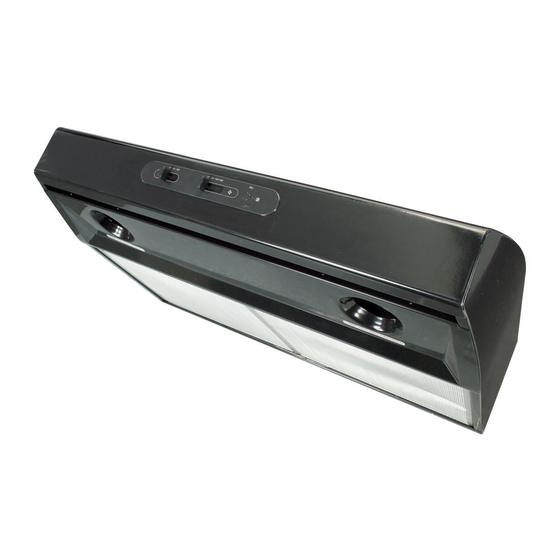
Page 11: Operating The Range Hood
Press the “on/off” button a second time will turn off lights. Fan Speed Settings Your new Haier range hood comes equipped with 3 different fan speeds: “low”, “med”, or “high”. To turn on the fan, simply press the button corresponding to the desired fan speed. Each fan speed button has a light above the button that will illuminate to indicate the fan speed that has been selected. -
Page 12: Heat Sensor
English English Heat Sensor This unit is equipped with a Heat Sensor that automatically turns off the fan if a certain temperature is reached from cooktop heat. The fan will go up to high speed until the temperature comes back down to a normal temperature level. - Page 13 To turn off the light, move slider back to the “off” position. Fan Speed Settings Your new Haier range hood comes equipped with 3 different fan speeds: “low”, “med”, or “high”. To turn on the fan, simply position the slider below the desired fan speed.
-
Page 14: Use And Care
Warning! Disconnect range hood from the electrical power supply before servicing. All parts may be obtained from service centers authorized by Haier, or may be ordered directly from Haier. When ordering parts, please specify the range hood model number on the rating label, which is located on the inside of the range... -
Page 15: Troubleshooting
English Troubleshooting Fan does not turn on, but lights turn on. This is probably due to either a defective fan switch or a burned-out fan motor. Please call a qualified service professional. Fan only runs at one speed. Please see instructions above for troubleshooting when your fan does not turn on, but lights turn on. -
Page 16: Warranty Information
What will be done? and for installation of a replacement part, beyond the initial 12-month period. Haier will repair or replace, in your home, any mechanical or electrical part which proves THIS LIMITED WARRANTY IS GIVEN IN LIEU defective in normal household use for a period OF ALL OTHER WARRANTIES, EXPRESSED of 12 months. - Page 17 NECESITA UNA PRUEBA DE COMPRA FECHADA PARA EL SERVICIO DE LA GARANTIA 115V, 60 Hz Made in China Fabriqué en Chine Hecho en China Haier New York, NY 10018 Printed in China LHV4330/LHV3330/HHV3330 2011 Haier America Trading, LLC. All Rights Reserved. ©...