Table of Contents
Advertisement
Quick Links
Advertisement
Table of Contents

Related Manuals for Ipevo Ziggi-HD


Summary of Contents for Ipevo Ziggi-HD
- Page 1 Ziggi-HD USB Document Camera User Manual www.ipevo.com...
-
Page 2: Table Of Contents
About the Packaging Getting Help Version Information System Requirements Highest Resolutions Requirements 8 Installation Getting to Know Ziggi-HD (Key Features) IPEVO Presenter Software Introduction Switching between software modes Basics of the Presenter Software Camera mode Full Screen mode Basics of the Presenter Software (cont'd) Review mode Getting a Great Image –... - Page 3 Photo name format Keep camera mode settings Advanced Settings (cont'd) Image adjustment customizations About IPEVO Presenter Setting a language Starting Ziggi-HD when computer starts Using Ziggi-HD in other ways With Skype As a web/conferencing camera Built-in Microphone Anti-Glare Shield Closing and Exiting the Presenter Software...
-
Page 4: Introduction
Additionally, Ziggi-HD features a powerful zoom (up to 6x magnification) as well as a Macro mode which allows for sharp focus on very close subjects up to 2 inches (5 cm) away. For these reasons, Ziggi-HD is ideal for capturing minute details of documents and pictures. High resolution capture is also appropriate for large-screen projections. -
Page 5: Contents
IPEVO has a longstanding commitment to green business practices, and this extends to our product packaging. We like our products to do the talking, not fancy packaging! Your Ziggi-HD has been shipped with a minimum of packaging materials, particularly a minimum of plastic. The plain craft paper box (which does not contain high-resolution graphics or wasteful multi-color printing) is recyclable, as are the cardboard cut-outs keeping the Ziggi-HD in place. -
Page 6: Getting Help
Getting Help Getting Help We want to help you enjoy your Ziggi-HD, and we are always available to answer any questions or offer technical and troubleshooting assistance. Consider using one or more of these resources: • IPEVO.com – The latest versions of the Ziggi-HD software, user manual, FAQ, and other downloads are available at this link: http://support.ipevo.com/#Ziggi-HD... -
Page 7: Version Information
Viewing Your Software's Version Viewing Your Software’s Version We recommend periodically checking IPEVO.com for the latest version of the Presenter software. To determine the software version you are currently running, do one of the following: Windows – Right-click the Ziggi-HD icon in the system taskbar, and click About. -
Page 8: System Requirements
• Insert the CD-ROM into your computer's drive. Follow the prompts to complete the installation of the Presenter software. A Green and White Ziggi-HD icon will appear in your taskbar, which can be used to open or close the software. Note: If the installation program does not automatically appear, you may navigate to the CD-ROM drive through Windows Explorer (often the D drive), open the Ziggi CD-ROM, and double-click “setup.exe”... -
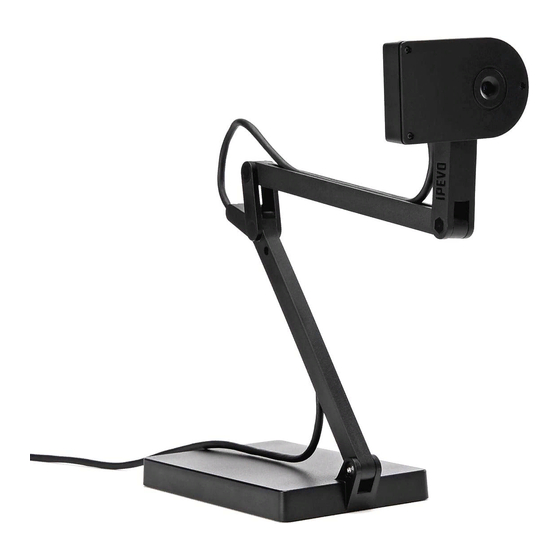
Page 9: Getting To Know Ziggi-Hd (Key Features)
Ziggi-HD features a 5.0 Megapixel lens for detailed and vibrant images, allowing for a maximum resolution of 2592 x 1944. Ziggi-HD has an automatic Macro mode for maintaining sharp focus on objects as close as 2 inches (5 cm) away. - Page 10 The LED gives you an easy way to know whether Ziggi-HD is operating: white for operating, off for not. When you start the Ziggi-HD software, the LED will light up. The LED has been positioned on the top of the camera so it will not reflect on any digital screens you might be capturing.
-
Page 11: Ipevo Presenter Software Introduction
• Camera mode – This is the default mode upon software startup. This mode shows the current video capture coming from the Ziggi-HD camera. In this mode, you are also able to change aspects of the image such as exposure, mirroring, and resolution. -
Page 12: Basics Of The Presenter Software
Basics of the Presenter Software Basics of the Presenter Software Please review the basic elements of the four modes of the Presenter software: A – Mode Tab One of four modes can be selected by clicking on the appropriate button in the Mode Tab. B –... -
Page 13: Basics Of The Presenter Software (Cont'd)
Basics of the Presenter Software (cont'd) To review snapshots you've taken, enter Review mode by clicking on the “review” tab on the left-hand side of the software. A – Image Pane This shows the currently selected snapshot. B – Menu This gives you some basic tools to manipulate the selected snapshot. -
Page 14: Getting A Great Image - Five Considerations
Getting a Great Image – Five Considerations Getting a Great Image – Five Considerations When configuring the camera for your desired image, you will be chiefly concerned with the following five elements: • Image size - How large or small the subject appears in the frame (i.e. the window of the Ziggi- HD software). -
Page 15: Image Size
When capturing a document, you will likely position it on the tabletop, on the same plane as your Ziggi-HD base. When capturing close-up details or text passages from a document, you may find it handy to shift the document as you move from detail to detail, essentially scrolling through the text as necessary. -
Page 16: Image Size (Cont'd)
Note that while the Ziggi-HD has ample resolution to capture larger A3-sized paper, Ziggi-HD would need to be placed on something (such as a stack of books) to make the camera high enough to completely capture an A3 document. -
Page 17: Image Orientation
Illustration of Landscape versus Portrait Camera Lens Orientation The top of the Ziggi-HD camera lens is located 90° counterclockwise from the square top of the camera body. With the camera head in its fully-extended position, documents will need to be placed perpendicular to the camera stand (as opposed to parallel) for text to be rendered “right side up”... -
Page 18: Changing Orientation
Ziggi-HD's camera head is expressly designed to give you an easy way to alter orientation. From its fully-extended position, Ziggi-HD can be swiveled 180° clockwise and 90° counterclockwise. Find the position that works best for yourself and your subject. For example, if you are giving a presentation and need access to the subject for a hands-on demonstration or to frequently change its position, you might consider moving the stand to one side of the subject—and changing... -
Page 19: Exposure
Consider the following methods to achieve optimal exposure for your image: • Change the exposure in the room : This could include using a desk lamp near the Ziggi-HD to shine additional light on the subject, turning on room lights, opening or closing curtains, etc. -
Page 20: Exposure (Cont'd)
• To Turn on Auto Exposure: Click the Auto tab in the Presenter software, and select “On.” The sun icon next to Auto will turn green. Ziggi-HD will now constantly determine the optimal exposure for your image, and may adjust exposure at any time. -
Page 21: Focus
Ziggi-HD in Continuous mode will ensure your image is always in sharp focus. Single (S) mode: In Single mode, Ziggi-HD will stay at a single focal length, and will not try to constantly adjust itself. This mode is ideal for manual control of focus. If you are capturing a text document laid on the table which is not moving, single mode will be sufficient for sharp focus. -
Page 22: Resolution
(and therefore more detail), and also consume more computing power. Low resolutions communicate less detail but are also less demanding of computer resources. Resolution is measured in pixels, the smallest part of a picture element. Ziggi-HD is capable of several high-definition resolutions. Changing Resolution To change resolution, click on the Resolution tab in Camera mode. -
Page 23: Snapshots
The Timer provides a delay (in seconds) between the time you press the Snapshot button and the time when Ziggi-HD actually takes the snapshot. You might find this delay necessary to avoid any shake in the camera body that could result in a blurry image. Using the Timer eliminates this possibility. -
Page 24: Evernote
Evernote home page where you may sign up for an account. After successful account creation or login, you will be asked if you wish to allow IPEVO access to your Evernote account. Click the Authorize button. -
Page 25: Evernote (Cont'd)
Evernote (cont'd) Using Ziggi-HD for Evernote The Presenter software allows you to capture snapshots and then upload them (along with other files) to a notebook on your Evernote account. To do so: 1. Take a snapshot – Hit the "Take a Snapshot" button. You'll be taken to a window where you can take a snapshot that will save as a .jpg file to your hard drive. -
Page 26: Projecting Your Image
Projecting Your Image Ziggi-HD's image quality and high resolution are perfect for large-screen projections in the classroom or conference room. In general, you'll need Ziggi-HD, your PC or Mac, and a separate projector device (not included, sold separately). In most cases, Full Screen mode is preferred for projection. To enter Full Screen mode, click on the “full screen”... -
Page 27: Preparing Your Setup For Projection
Preparing for Projection Preparing for Projection You'll need to mirror the content on your desktop (that is, the full screen of Ziggi-HD's video capture) and redirect it to your projector device. Please refer to your projector documentation for information specific to your projector. -
Page 28: Advanced Settings
In the upper right-hand corner of the Presenter software screen, along with the usual minimize and exit functions, there is a Help link (the question mark), which leads to the IPEVO.com website, and a settings link (the wrench), which leads to advanced settings. -
Page 29: Advanced Settings (Cont'd)
• About Presenter – This section displays the software version currently in use. A “Check for updates” link is available, which will take you to the IPEVO website in order to check for the latest version. • Language – Switch between English, Traditional Chinese, Japanese and French. -
Page 30: Using Ziggi-Hd In Other Ways
Using Ziggi-HD in Other Ways Using Ziggi-HD in Other Ways While Ziggi-HD is designed as a document camera, it can also be used as a web camera/conferencing camera with Skype and many other applications. Ziggi-HD's top section can be rotated up, such that the camera is pointing horizontally rather than down. -
Page 31: Anti-Glare Shield
You may experience undesirable glare in your image from reflected light. Possible sources of reflected light include overhead lights or a desk lamp directed at the subject. To reduce or eliminate this glare, Ziggi-HD comes with an Anti-Glare Shield. Mounting the Anti-Glare Shield To mount the Anti-Glare Shield, align the grooves on the underside of the shield with the sides of the camera head. -
Page 32: Closing And Exiting The Presenter Software
Closing the software does not exit it entirely. To exit the Presenter application: Windows – Right-click the Ziggi-HD taskbar icon, and select Close. Macintosh – Select Ziggi-HD > Quit Ziggi-HD, or press the Command + Q quit shortcut. Keyboard Shortcuts... -
Page 33: Troubleshooting And Faq
Troubleshooting and FAQ Ziggi-HD will not turn on. Ensure Ziggi-HD is plugged in to your computer with the USB cord.Ensure the Presenter software from the CD-ROM is installed and running.Unplug the camera, exit the software, restart the software, and replug in the camera. -
Page 34: Safety Information
• “Mac” and “Macintosh” are registered trademarks of Apple Computer, Inc., registered in the US and other countries. © 2012 IPEVO Inc. All rights reserved. IPEVO, IPEVO Presenter,Ziggi-HD,the IPEVO logo,and other IPEVO marks are owned by IPEVO Inc. and may be registered. All other trademarks are the property of their respective owners.
Need help?
Do you have a question about the Ziggi-HD and is the answer not in the manual?
Questions and answers