DeLonghi EC820 Instructions For Use Manual
Hide thumbs
Also See for EC820:
- Instructions for use manual (123 pages) ,
- Manual (122 pages) ,
- Instructions for use manual (20 pages)

Related Manuals for DeLonghi EC820


Summary of Contents for DeLonghi EC820
- Page 1 De’Longhi Appliances via Seitz, 47 31100 Treviso Italia 5713215721/ 03.11...
- Page 2 EC820 COFFEE MAKER Instructions for use...
-
Page 3: Table Of Contents
Description of accessories Crema filter 1 coffee Crema filter Power supply Measuring spoon / 2 coffee cable (removable) tamper" Filter-holder Crema filter ESE pods Reactive strip to detect water hardness (Total hardness test) Water softener filter (*not included, may be purchased in authorised Descaler assistance centres) Contents... -
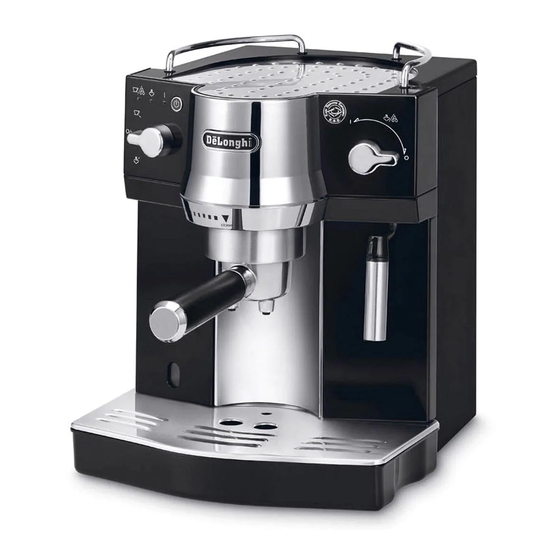
Page 4: Product View And Control Panel
Description of the appliance and control panel General switch Cup shelf ON/OFF Power supply cable connector Control panel (see description below) Boiler outlet/ Infusion assembly Steam/ hot water selector Water tank seat Hot water/ Water tank lid Cappuccino steam nozzle nozzle Cup tray Indicator for... -
Page 5: Operating Lights
Operating lights Lights Function Selector (A4) Meaning of lights selector (B8) Every time the device is turned on, a self-test is automatically activated by pressing the general switch into I position. The three lights will flash in succession for a few seconds, until the self-test is complete The device is heating up to distribute coffee or hot water. -
Page 6: Total Hardness Test
Total hardness test 1 m i n TOTAL HARDNESS TEST MONTHS NUMBER OF WATER TANKS (L) x 240 L x 180 L x 120 L x 70 L x 40 L To determine descaling frequency, refer to the table (months of use or number of used tanks). -
Page 7: First Use
First use O = O F F I = O N... - Page 8 First use (fig. 4-6)
-
Page 9: Espresso
Espresso 1 Espresso 2 Espressos (fig. 8-9) Espresso Ready! See advice in “Tips” par. on page 14. -
Page 10: Cappuccino
Cappuccino 5°C M a k e an es p r e s s ( p ag e 8 ) max 1/3 60s Max. Cappuccino Ready! C l e anin g (page 12) Temperature optimisation (page 10) After every cappuccino, clean the cappuccino maker. -
Page 11: Hot Water
Hot water 60s Max. Temperature optimisation Espresso? (fig. 20-21) (fig. 8-9) -
Page 12: Energy Saving
Energy Saving 7 5 m i n . To enable or desable the low power function Lo w p o w e Low power When LOW power is enabled, the device will automatically activate LOW POWER after 15 minutes and subsequently go into standby mode. Espresso? Page 8 Cappuccino? -
Page 13: Cleaning
Cleaning CAUTION HOT! (fig. 7-9) x200... -
Page 14: Descaling And Rinse
Descaling and Rinse Total hardness test (fig. 4) (page 7) IRRITANTE - IRRITANT REIZEND - IRRITEREND (fig. 6) Descaling Descaling Repeat 3 5 s 3 5 s 5 min Rinse Rinse (fig. 4-6) Repeat R i n s e (fig. 4-6) -
Page 15: Tips
Tips 0,5 L Filter... -
Page 16: Troubleshooting
Troubleshooting Problem Possible causes Solution The device will not switch on The power supply cable is not inserted Check that the power supply cable correctly connector is fully inserted in the appropriate seat on the back of the device; then, check that the plug is correctly connected to the power outlet The device is switched on, but it does not The selectors are not in the correct... - Page 17 Troubleshooting Problem Possible causes Solution The coffee crema is dark (the coffee flows The ground coffee is too tightly pressed Decrease the amount of ground coffee slowly from the spout) Too much ground coffee Reduce the quantity of ground coffee The espresso boiler outlet is blocked Clean as indicated in “Cleaning the filter”...
-
Page 18: Safety
Safety Symbols used in these instructions Attention: The important recommendations have these symbols. These The appliance is not intended for use by persons (including recommendations must be followed. children) with reduced physical, sensory or mental capabilities, or lack of experience and knowledge, unless they have been Danger! given supervision or instruction concerning use of the appliance Failure to comply can be or is the cause of injury due to life-... -
Page 19: Techcnical Data - Disposal
Techcnical data - Disposal Check after transport Electrical connection (UK ONLY) Before using this appliance ensure that the voltage indicated on the After the packaging has been removed, check the integrity of product corresponds with the main voltage in your home, if you are the appliance and the presence of all accessories.
Need help?
Do you have a question about the EC820 and is the answer not in the manual?
Questions and answers