Honeywell Galaxy Dimension User Manual
Microprocessor controlled alarm system
Hide thumbs
Also See for Galaxy Dimension:
- Quick user manual (25 pages) ,
- Installation manual (2 pages) ,
- Manual (80 pages)
Table of Contents
Advertisement
Quick Links
Advertisement
Table of Contents

Related Manuals for Honeywell Galaxy Dimension


Summary of Contents for Honeywell Galaxy Dimension
-
Page 1: User Guide
Galaxy Dimension User Guide Honeywell Security... -
Page 3: Table Of Contents
Table of Contents Introduction ..................vii Compliance and Approvals ............. vii KEYPAD INFORMATION ..............1 General ........................ 1 Mk7 LCD Keypad ....................1 Number Keys (0 – 9) ..................... 1 View Keys (A and B) .................... 1 Enter Key (ent) ..................... 2 Escape Key (esc) .................... - Page 4 Straying From the Entry Route ................8 Slow Entry ......................8 Cancelling Alarms ....................8 Manager Reset ..................... 8 Engineer Reset ....................8 Unsetting with Proximity Cards ................8 Recording of Events ................9 Fault and Tamper Conditions ............9 Resetting Fault and Tamper Conditions ...........
- Page 5 Viewing Each Event ...................... 15 Additional Information ....................16 Printing ......................... 16 Print (User Type 2.4 and Above) ............... 16 Purpose ........................16 Selecting Print ......................16 Codes ........................... 16 Zones ........................... 16 Log ..........................16 All ..........................16 Help Message ......................16 Walk Test (User Type 2.5 and Above) ...............
- Page 6 AVOIDING FALSE ALARMS.............. 35 ZONE REFERENCE TABLES ............36 ALARM AND HELP MESSAGES ............37 Alarm In Progress ....................37 Pa Reset Required .................... 37 Manager Reset Required .................. 37 Engineer Reset Required .................. 37 Alarm Cause Code .................... 37 No Entries ......................
-
Page 7: Introduction
The Galaxy Dimension alarm system is a microprocessor controlled system which has been designed using the latest software and hardware technology. First and foremost, the Galaxy Dimension meets all your security needs. The engineer will program and commission the system to your own exacting requirements. -
Page 9: Keypad Information
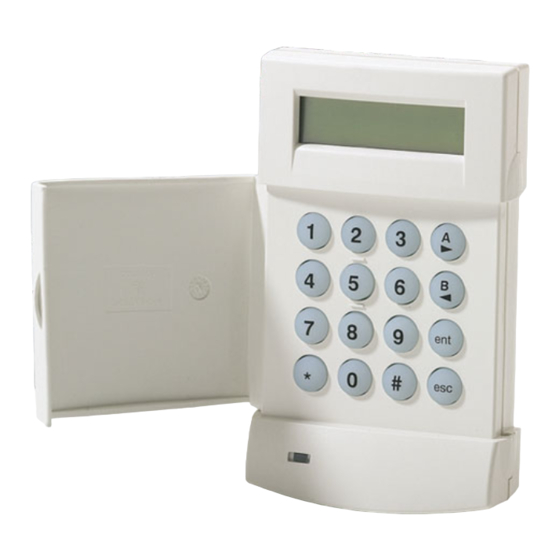
KEYPAD INFORMATION General The Galaxy Alarm system is controlled by the Galaxy Mk7 Full Alpha Liquid Crystal Display (LCD) keypad or the TouchCenter Graphics keypad. Mk7 LCD Keypad GALAXY 520 V5.00 LCD Display 08:58 TUE 22 NOV Number Keys View keys Enter Key Star Key Escape Key... -
Page 10: Enter Key (Ent)
Enter Key (ent) The ent key accepts and processes entered data. Valid actions are performed and the next option is accessed. Escape Key (esc) The esc key aborts the current option to return to the previous option level. Any option modification made prior to the option being aborted is erased. -
Page 11: Touchcenter
TouchCenter EMERGENCY Mk7 Keypad button Interface button The TouchCenter is a touch-screen interface keypad with easy to learn on-screen instructions for use. The following features are available: • Clear, easy to navigate menus. • Clear text/icon based explanation of system events. •... -
Page 12: Access Control
ACCESS CONTROL Access Control Card An access control card is a prox tag that can be presented to a proximity reader to: • Allow access to access controlled doors • Cancel alarms, faults or tampers • To set or unset the system. To assign a user an access control card: •... -
Page 13: Setting The System
SETTING THE SYSTEM Before Setting Before setting the system ensure all doors and windows are secured Code + A Code + ent and areas protected by movement detectors are free from obstruction. TIMED SET Entering A Pin - User Type 2.1 - 2.2 As each digit is entered the keypad responds with a bleep and displays a *. -
Page 14: Sounder
Sounder During the setting period the sounder emits a continuous tone if all of the zones are closed. If a zone is opened during the setting period, the sounder begins to pulse. The sounder also pulses during the last 25% of the setting time to indicate time running short. -
Page 15: Max Setting Options
MAX SETTING OPTIONS Setting with User Cards/Tags/Fobs Proximity user cards/tags/fobs can be used to set the system. This is done by assigning a user with one of the setting options. When the card is held against a MAX module or keyprox for five seconds, the card-held function assigned to the card user is activated. -
Page 16: Unsetting The System
UNSETTING THE SYSTEM Normal Entry Unsetting starts immediately when the FINAL door is opened or an PIN + ent ENTRY zone is activated. The sounder pulses slowly and the user must go directly to the keyprox and present a valid keytag or card to the prox Galaxy 520 V5.00 reader to unset the system. -
Page 17: Recording Of Events
Recording of Events During any given set period, there is no limit to the number of signals sent from individual activations. However, no more than three events from any single source will be recorded in the event log. Fault and Tamper Conditions When a fault or tamper condition occurs in the unset state, an alert condition is activated. -
Page 18: Menu Options
MENU OPTIONS The Galaxy Dimension provides various menu options for modifying the functional perform- ance of the system. There are two menu structures: Full Menu Only accessed by authorised users including the master manager code and by the engineer. Quick Menu A selection of options from the full menu. -
Page 19: Accessing The Menu
Accessing The Menu To access the menu enter a valid code and press the ent key. If there are any outstanding system faults, these will be displayed first. Where there is more than one fault a > symbol will be displayed and the scroll keys can be used to view them. Pressing the ent key again takes the display into the menu. -
Page 20: Omit Zones (User Type 2.3 And Above)
Omit Zones (User Type 2.3 and Above) Purpose This option allows the user to omit zones before setting the system. Zones must be eligible for omission otherwise they will not be displayed. PIN + ent Note: Zones remain omitted for one set period only. 0 = OMIT ZONES Selecting Omit Zones [ent] to select... -
Page 21: Atm 1/2/3/4 Zones
Atm 1/2/3/4 Zones ATM PIN + ent ATM zones are omitted by entering one of the ten ATM codes (last 10 [ent] to Select users). To select this option enter an ATM code followed by the ent 1=ATM-1 key. Use the A> key to scroll through the four ATM zone options >A (ATM1 to ATM4) and select by pressing the ent key. -
Page 22: Chime (User Type 2.3 And Above)
Chime (User Type 2.3 and Above) Purpose PIN + ent The Chime mode is switched on and off by this option. When the Chime mode is on, any zones that have been programmed by the 0 = OMIT ZONES engineer for chime will activate momentarily when opened. [ent] to Select Note: Your system may not require any zones of this type. -
Page 23: Status
Status The current status of the zone is displayed as circuit information, e.g. Open or Closed. This information alternates with function information. Description The zone description, if programmed, is displayed on the bottom line of the display. The descriptor is assembled from alpha-numeric text and describes the zone in detail, e.g. -
Page 24: Additional Information
Additional Information release <B The # key can be used to reveal additional information on some types of events. This information is displayed on the bottom line. The 16:31 SUN 20 NOV information includes details such as zone descriptors, user types and FULL SET USR 98 which keypad was used. -
Page 25: Walk Test (User Type 2.5 And Above)
Walk Test (User Type 2.5 and Above) Purpose PIN + ent The Walk Test option provides a method of testing the zones to 0 = OMIT ZONES ensure that they are operating correctly. There are two options [ent] to Select available: 1. -
Page 26: Time/Date (User Type 3.6)
Time/Date (User Type 3.6) Purpose PIN + ent The Time/Date option allows the user to modify both the time (hours/ minutes) and the date (day/month/year). 0 = OMIT ZONES [ent] to Select Selecting Time/Date Enter the QUICK MENU. Press key 7 followed by the ent key. Once the Time/Date option has been selected, the time or date can be se- 7 = TIME/DATE lected by pressing the A>... -
Page 27: Codes (User Type 2.1 And Above)
Codes (User Type 2.1 and Above) Each PIN user has access to modify their own PIN. Users do not have access to user codes other than their own. The only exception to this is the manager code. Purpose PIN + ent The Codes menu option enables the managers, (user type 3.6), to assign, 0 = OMIT ZONES modify and delete the codes that allow users to operate and access the... -
Page 28: Selecting Codes
Selecting Codes PIN + ent Enter the QUICK MENU. Press key 8 followed by the ent key. 0 = OMIT ZONES [ent] to Select User Codes When the Codes option has been selected, press key 1 to access User Codes. Display each of the user numbers using key A>. Each user 8 = CODES number offers options for PIN, level, name and where applicable time [ent] to Select... -
Page 29: Modify Type
Modify Type PIN + ent Each user is assigned an access type which determines the menu options available to the user (see Table 1. Menu Options). On selecting 0 = OMIT ZONES this option, enter the type to be assigned to the user and press the ent [ent] to Select key to accept the programming and return to the previous menu level. -
Page 30: Modify Name
• Quick Menu All user codes default to the quick menu. This menu is made up of a selection of ten options (0 – 9) from the menu options 11 – 49. The user code type controls access to the quick menu. Any user can be upgraded from the quick menu to the full menu by assigning a * to the user while the Modify Level option is accessed. -
Page 31: Temporary Codes
Temporary Codes PIN + ent Temporary Codes allow a PIN to be temporarily allocated to a user. On selecting this option, enter the number of days (0 – 99) that the 0 = OMIT ZONES [ent] to Select code is to remain active. The default setting of 0 indicates that the code is permanent. -
Page 32: Modify Groups
Modify Groups PIN + ent This option determines the system groups that the user has access to and operational control over. The Modify Groups option is only 0 = OMIT ZONES [ent] to Select available when the Group Mode has been enabled by the engineer. The system defaults to groups disabled. -
Page 33: Card Number
• Group Choice Users can be allocated to more than one group, but also have the choice of which of the allocated groups to view, set or unset. Groups B 1_______ Pressing * key while assigning groups to the user assigns the >B 23_____ Ú... -
Page 34: Max Function
Max Function PIN + ent The MAX card can be assigned to a single menu option. The user must 0 = OMIT ZONES be authorised to access the menu option, either by the user level assigned [ent] to Select or by having the menu option access type changed by the engineer. The default option is Not Used. -
Page 35: Pin Warning
Pin Warning PIN + ent This option determines the number of days notification before the expiry 0 = OMIT ZONES date of any user codes programmed as PIN Change. During the [ent] to Select notification period, the user is prompted to enter a new code on entry of the expiring PIN. -
Page 36: Trace (User Type 3.6)
Trace (User Type 3.6) This option provides a record of the most recent alarm activation. The PIN + ent Trace option records the details of the setting and unsetting of the sys- 44 = TRACE tem immediately before and after the alarm activation and the first 5 [ent] Select events occurring during the alarm activation. - Page 37 2=Holidays PIN + ent This function allows up to 32 holiday periods to be allocated. A Start 45 = TIMER CONTROL and End date is entered for each holiday period using the 1=Modify [ent] Select Dates option. On selecting this option, the Start and End dates for holi- day period 01are displayed.
- Page 38 3=Early Open If the Early Open option (45.3.2) is enabled, the Lockout OFF time for PIN + ent the following day is brought forward by the number of minutes (0 – 240) 45 = TIMER CONTROL programmed by the engineer. This allows the system to be manually [ent] Select unset earlier than normal.
- Page 39 5=Late Work The Late Work option authorises an Autoset Extension in advance of the prewarning period. 6=Weekend Work The Weekend Work option unsets the system at the weekend. If the PIN + ent Weekend Day is programmed other than 0 = OFF (default), on the 45 = TIMER CONTROL next occurrence of the programmed Weekend Day, the Timers adopt [ent]...
-
Page 40: Group Omit (User Type 3.6)
Group Omit (User Type 3.6) This option allows a type 3.6 type code to block omit all the omittable zones that are open at the end of the confirm time in a group or multiple groups. All zones in the required groups that have the omit attribute enabled are omitted when this option is selected. -
Page 41: Remote Access (User Type 3.6)
Remote Access (User Type 3.6) This menu option allows control of remote servicing connections. Re- mote servicing is a procedure which allows the installer to service the alarm system remotely via a phone line or similar connection. The 1=Service option enables the user to control the access mode of PIN + ent the remote servicing package. -
Page 42: Access Authorization (User Type 3.6)
Access Authorization (User Type 3.6) To allow the engineer to gain access to the system, the engineer’s code must be authorised using this menu. When menu 48.1.1 is set to 1 = enabled, the engineer’s code will be activated. The manager’s code should be enabled at all times via menu 48.1.2. -
Page 43: Avoiding False Alarms
AVOIDING FALSE ALARMS False alarms are inconvenient and may be costly. Police can withhold response from consistent offenders. Here are nine points to help avoid false alarms. 1. Be sure you fully understand how to operate the alarm system. In your absence someone thoroughly instructed, should be available to operate the system. -
Page 44: Zone Reference Tables
ZONE REFERENCE TABLES i t c i r c i t p t r a i t c i r c i t p t r a... -
Page 45: Alarm And Help Messages
ALARM AND HELP MESSAGES Alarm In Progress ALARM IN The system is currently in alarm condition and must be cancelled by a valid PIN or PROGRESS keyswitch operation. Pa Reset Required After a PA (Personal Attack) zone has been activated, the system has to be reset by a RESET REQUIRED high level code (such as a manager or engineer depending on the reset level setting). -
Page 46: Installer Details
INSTALLER DETAILS Name: ----------------------------------------------------------------------------------- Address: --------------------------------------------------------------------------------- ------------------------------------------------------------------------------------------- ------------------------------------------------------------------------------------------- ------------------------------------------------------------------------------------------- Telephone: ------------------------------------------------------------------------------ Office Hours: --------------------------------------------------------------------------- Other Times: --------------------------------------------------------------------------- Account No.: ---------------------------------------------------------------------------... - Page 48 © Copyright Honeywell Security IU1-0063 Rev 1.0...
Need help?
Do you have a question about the Galaxy Dimension and is the answer not in the manual?
Questions and answers