
Related Manuals for Samsung SDE-120N


Summary of Contents for Samsung SDE-120N
-
Page 1: Channel Dvr
4 CHANNEL DVR User Manual SDE-120N/SDE-3000N/SDE-3001N SDE-3170P/SDE-3002/SDE-3002P Lo-Call 1890 866 900 www.cctvireland.ie... -
Page 2: Overview
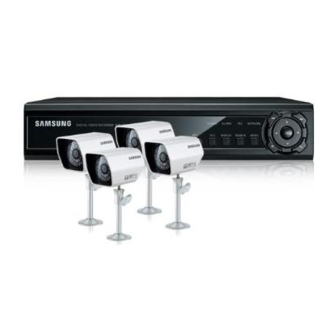
overview FEATURES This product enables you to record 4 channels of camera image and voice source simultaneously. This feature provides an excellent picture quality for both real time monitoring and search. • You can also monitor remote videos or search for your previous recordings and change the menu settings of the DVR via the network. -
Page 3: Important Safety Instructions
IMPORTANT SAFETY INSTRUCTIONS Read these operating instructions carefully before using the unit. Follow all the safety instructions listed below. Keep these operating instructions handy for future reference. Read these instructions. Keep these instructions. Heed all warnings. Follow all instructions. Do not use this apparatus near water. Clean only with dry cloth. - Page 4 If this product fails to operate normally, contact the nearest service center. Never disassemble or modify this product in any way. (SAMSUNG is not liable for problems caused by unauthorized modifications or attempted repair.) When cleaning, do not spray water directly onto parts of the product. Doing so may cause fire or electric shock.
- Page 5 CAUTION Do not drop objects on the product or apply strong blows to it. Keep away from a location subject to excessive vibration or magnetic interference. Do not install in a location subject to high temperature (over 50°C), low temperature (below -10°F), or high humidity.
-
Page 6: Before Start
SAMSUNG retains the copyright on this manual. • This manual cannot be copied without SAMSUNG’s prior written approval. • We are not liable for any or all losses to the product incurred by your use of non-standard product or violation of instructions mentioned in this manual. -
Page 7: Standards Approvals
Adaptor / Power Cable SMT-1712SE P* VGA Cable Power Cable MONITOR Quick Guide* / Camera SOC-A100(P)* SOC-A101(P)* SMT-1712SE P* Network Setup Guide* Bracket* SDE-120N SOC-A100* 2EA SOC-A101* 2EA SDE-3000N SOC-A100* 4EA – SDE-3001N SOC-A100* 4EA – SDE-3002 SOC-A100* 1EA SOC-A101* 1EA... -
Page 8: Table Of Contents
overview CONTENTS OVERVIEW Features Important Safety Instructions Before Start Part Names and Functions (Front) Part Names and Functions (Rear) Remote Control DIY Camera Camera Bracket CONNECTING WITH OTHER DEVICE Connecting the Camera, Audio, Speaker, Mouse, and Power Cable Connecting the Alarm I/O Network Connection GETTING STARTED Starting the System... - Page 9 WEB VIEWER Live Viewer Search Viewer Search by Time Search by Event Setup Information Using the iPhone Camera Specification APPENDIX Product Specification (SDE-120N/SDE-3000N/SDE-3001N) Product Specification (SDE-3170P/SDE-3002P/SDE-3002) Open Source License Report on the Product English _9 Lo-Call 1890 866 900 www.cctvireland.ie...
-
Page 10: Part Names And Functions (Front)
overview PART NAMES AND FUNCTIONS (FRONT) POWER ALARM NETWORK DIGITAL VIDEO RECORDER DISPLAY SEARCH MENU 2 3 4 Part Names Functions Power Used to turn on or off the system. Each time you press in Live mode, the screen will be switched in the sequence of 4-split, Single DISPLAY and Auto Sequence in order. -
Page 11: Part Names And Functions (Rear)
PART NAMES AND FUNCTIONS (REAR) Part Names Functions DC Input (DC12V) Power connection port for 12V/4A adaptor NETWORK RJ-45 port for network connection. Supports USB 2.0 protocol that enables you to back up the video signal stored in the HDD using an external memory device and to connect USB memory. -
Page 12: Remote Control
overview REMOTE CONTROL Available after switching to DVR mode by pressing the [DVR] button on the remote control. SEARCH BACKUP Switches to search mode for video search. Switches to backup mode. At the moment, you should select an authorized user and enter the password. -
Page 13: Diy Camera
Changing Remote Control ID In a multi-DVR system using a single remote control, you can control only the DVR that matches the ID that you have set using the ID button. Press the [ID] button to check the ID of each of "REMOCON ID" and "SYSTEM ID". ... -
Page 14: Camera Bracket
overview Mini Din Cable SHIELD VIDEO Installing the camera The camera can be installed on the wall, ceiling, shelf or a desired position using the provided bracket. Select a position where you want to install the camera. Make sure the selected position can sustain the weight of the camera. Use the screw bolts (M4 ×... - Page 15 Adjusting the Camera Bracket Choose an installation site that can sufficiently support the weight of the equipments to be installed. Attach the camera bracket to the wall using the supplied screws (M4 × L15). 4×15 sized screws wall or ceiling. Adjust the camera to target the video location and tighten the camera bracket handle on the camera bracket.
-
Page 16: Connecting With Other Device
connecting with other device CONNECTING THE CAMERA, AUDIO, SPEAKER, MOUSE, AND POWER CABLE Network CONNECTING THE ALARM I/O Connecting the alarm Input signal Connection port for the alarm input signal. Connect one strand of the sensor signal line (two strands) to the alarm input port and connect the other to the [G] port. -
Page 17: Network Connection
NETWORK CONNECTION Local System Confi guration Use the router or hub in the same local network to connect to the DVR and local PC where you can control the remote DVR or check the recording data in the DVR. IP Router or HUB POWER ALARM NETWORK... - Page 18 connecting with other device Total System Confi guration You can use the 10/100 Mbps Ethernet connector on the product to connect to the network. Connecting to the network enables you to perform various functions including remote monitoring, remote search and remote control. IP Router or HUB Cable/ADSL Modem INTERNET...
-
Page 19: Getting Started
getting started STARTING THE SYSTEM Connect the power cable of the DVR to the wall outlet. You will see the initialization screen. LOG ON To make use of the DVR, you must log on after the system started. You must log on before you can use the features of the DVR. Select a user account that you want to log on with. -
Page 20: Log In
getting started LOG IN To access menu items of Logout, System Setup, Record Setup, Backup and Search, you must have logged in. If you try to access restricted menus, the login dialog pops up. Select a user account, enter the password and press the LOG IN USER ID admin... -
Page 21: Live 21 Live Screen Configuration
live LIVE SCREEN CONFIGURATION Icons on the Live Screen MENU BACKUP SEARCH DISP Name Description Camera Name Displays the name of the camera. : Indicates continuous recording. : Indicates alarm recording. Recording Modes : Indicates motion detection recording. : Indicates instant recording. Launcher Menu Displays the current time, menu and status. -
Page 22: View The Launcher Menu
live VIEW THE LAUNCHER MENU You can use the Launcher menu appearing on the bottom of the live screen to access it. On the Live screen, move the cursor or press the [MENU] button on the remote control to display the Launcher menu. Use the direction buttons or the cursor to select a desired menu. -
Page 23: Display
DISPLAY You can select a screen split mode or perform the auto sequence function. Switching the screen mode You select a screen mode from single and 4-split. Press the <DISP> button from the Launcher menu. Select a split mode in the split option menu. Press the [MODE] button on the front panel or the remote control to switch the mode in the sequence of the launcher menu items. -
Page 24: Playback
live PLAYBACK In Live screen, you can immediately play any of the previous recordings in the selected channel. To playback by time option Select a channel to play, and right-click it to display the context menu where you select <PLAYBACK>. Select a desired start time of playback. -
Page 25: Dvr Setup
DVR setup BEFORE STARTING SETTING UP You can configure the DVR settings to your preference. How to use remote control and mouse You can use either the remote control or the cursor to select or change the setting of each menu item. To change the setting using the remote control Use the four direction (▲▼◄►) buttons to move to a desired item and press the [ENTER] button. -
Page 26: System
DVR setup SYSTEM You can configure the settings of DATE/TIME, SYSTEM MANAGEMENT and REMOTE CONTROLLER. See the previous section to repeat steps 1~3. (Page 25) DATE/TIME You can specify the display time. Using the mouse may help easy setup. Use the direction buttons to move to the upper <SYSTEM>... -
Page 27: System Management
SYSTEM MANAGEMENT You can check, update and initialize the system information. Using the mouse may help easy setup. Use the direction buttons to move to <SYSTEM MANAGEMENT> in the left corner of the SYSTEM setup SYSTEM menu and press the [ENTER] button. DATE / TIME SYSTEM INFORMATION INFO... -
Page 28: Remote Controller
DVR setup To update the firmware Connect the device storing the update files to the USB port. SYSTEM Press <USB> button in system management menu. DATE / TIME FIRMWARE UPDATE SYSTEM INFORMATION INFO SELECT DEVICE SYSTEM NAME SYSTEM ID SYSTEM USB MEMORY FIRMWARE UPDATE NETWORK... -
Page 29: Camera
CAMERA You can configure the settings of each connected CAMERA, COLOR and MOTION SENSOR. CAMERA You can configure the camera settings of TITLE, COVERT and AUDIO to your preference. Using the mouse may help easy setup. Use the direction buttons to move to the upper <CAMERA>... -
Page 30: Audio Connection
DVR setup Covert Select a camera channel to covert. Use the up/down (▲▼) buttons in the right corner to select either <ON> or <OFF> and press the [ENTER] button. If set to <ON>, no information of the corresponding channel will be displayed. However, it continues recording. -
Page 31: Motion Sensor
MOTION SENSOR You can set the event recording so that the DVR can detect the event and specify the recording area. Using the mouse may help easy setup. Use the direction buttons to move to <MOTION SENSOR> in the left corner of the CAMERA setup menu and press the CAMERA [ENTER] button. -
Page 32: Display
DVR setup DISPLAY You can configure the settings of OSD, MONITOR and SEQUENCE. See the previous section to repeat steps 1~3. (Page 25) You can specify the color and language for the time, title, border and motion displayed on the screen. Using the mouse may help easy setup. - Page 33 Use direction buttons (▲▼◄►) to move to a desired item, and press the [ENTER] button to set the value. • SEQUENCE DWELL: Specify the auto sequence dwell time. • DE-INTERLACE MODE: Set to correct option of the screen trembling during playing in 4CIF size. •...
- Page 34 DVR setup When the ADD SEQUENCE window appears, press the <ADD> button. CLOSE When the SEQUENCE SETUP window appears, Use direction buttons (▲▼◄►) to move to a desired item, and press the [ENTER] button to set the value. SEQUENCE SETUP CONFIGURE •...
-
Page 35: Sound
SOUND You can configure the settings of AUDIO and BUZZER. See the previous section to repeat steps 1~3. (Page 25) AUDIO You can select to input the live audio source and select an audio channel. Using the mouse may help easy setup. Use the direction buttons to move to the upper <SOUND>... -
Page 36: User
DVR setup USER You can configure the settings of USER MANAGEMENT, USER AUTHORITY and LOGOUT. See the previous section to repeat steps 1~3. (Page 25) USER MANAGEMENT Add a user account whose information you can edit later. Using the mouse may help easy setup. Use the direction buttons to move to the upper <USER>... -
Page 37: User Authority
To change the user information Select a user account that you want to change in the user list. USER The “EDIT” window appears. USER MANAGEMENT USER ID GROUP E-MAIL EDIT admin admin USER Make necessary changes and press the <OK> button. AUTHORITY USER ID PASSWORD... -
Page 38: Network
DVR setup NETWORK You can configure the settings of IP SETUP, DDNS and E-MAIL. See the previous section to repeat steps 1~3. (Page 25) IP SETUP You can specify the IP of the DVR according to the network connection. Using the mouse may help easy setup. Use the direction buttons to move to the upper <NETWORK>... - Page 39 To view the HELP You can view the explanation of each item of the IP SETUP menu. Press the <HELP> button in the lower corner of the IP SETUP menu. NETWORK NETWORK DHCP : When enabled, the DVR will obtain an IP address automatically if connected to a DHCP server or router. Read through the help and press the <CLOSE>...
-
Page 40: Network Connection And Settings
DVR setup E-MAIL You can send an email notice to DVR registered users at a certain interval or when an event occurs. Using the mouse may help easy setup. Use the direction buttons to move to <E-MAIL> in the left corner of the NETWORK setup menu and press the NETWORK [ENTER] button. - Page 41 If not using a router for network connection Static IP Setup Mode • Internet Connection: Use ADSL or the dedicated line for the static IP, or connect between DVR and remote users in the NETWORK LAN environment. IP SETUP DHCP •...
-
Page 42: Event / Sensor
DVR setup DVR Connection Use the direction buttons to move to the upper <NETWORK> icon in the SYSTEM SETUP menu screen and press the [ENTER] button. The IP SETUP screen appears. Deselect the <DHCP> checkbox. Locate the local PC in connection with the same router and check information of gateway, subnet mask 1st DNS and 2nd DNS server. -
Page 43: Alarm Input
Use direction buttons (▲▼◄►) to move to a desired item, and press the [ENTER] button to set the value. EVENT / SENSOR • SMART ALARM: Specify the availability of the alarm HDD EVENT SMART ALARM DISK FULL EVENT if the HDD has a problem. ALARM INPUT •... -
Page 44: Alarm Output
DVR setup ALARM OUTPUT You can specify the alarming conditions and the operating time. Using the mouse may help easy setup. Use the direction buttons to move to <ALARM OUTPUT> in the left corner of the EVENT/SENSOR setup EVENT / SENSOR screen and press the [ENTER] button. - Page 45 When your settings are completed, press the <APPLY> button on the bottom. Your settings will be applied. Press the <CLOSE> button to display the confirmation dialog and return to the previous menu. E-MAIL NOTIFICATION You can specify the conditions so that you can send an email notice to DVR registered users at a certain interval or when an event occurs.
-
Page 46: Disk Management
DVR setup DISK MANAGEMENT You can specify the recording auto deletion and overwrite options and format the HDD recording data. See the previous section to repeat steps 1~3. (Page 25) Use the direction buttons to move to the upper <DISK MANAGEMENT>... -
Page 47: Record Setup
RECORD SETUP You can configure the settings of record-related options such as RECORDING OPERATIONS, CONTINUOUS/ MOTION RECORDING, ALARM RECORDING, INSTANT RECORDING. To start the RECORD SETUP Press the [MENU] button on the remote control or click <MENU> button on the launcher menu. The SETUP menu screen appears. - Page 48 DVR setup CONTINUOUS/MOTION RECORDING You can specify the continuous recording time, the recording size and the quality. Using the mouse may help easy setup. Use the direction buttons to move to <CONTINUOUS/ MOTION RECORDING> in the left corner of the RECORD RECORD setup screen and press the [ENTER] button.
-
Page 49: Alarm Recording
Select a desired event recording mode. • NONE: Does not perform recording. • CONTINUOUS: Performs the recording continuously. • MOTION: Performs the recording only if a motion is detected. To record a motion, set both <SENSITIVITY> and <AREA SETUP> in "CAMERA > MOTION SENSOR". -
Page 50: Instant Recording
DVR setup To specify the alarm recording time You can specify the alarm recording time for each channel. From the ALARM RECORDING menu screen, select <ACTIVATION>. RECORD Your change to the recording size will be applied to the time bar. ACTIVATION RECORDING SIZE/FPS/QUALITY... -
Page 51: Backup
backup You can check the backup data size and perform backup of a desired channel or at a desired time. BACKUP Press the [MENU] button on the remote control or select <BACKUP> button on the launcher menu. The login dialog appears. Select a user account and enter the password. -
Page 52: Reserved Data Management
backup Press the <RESERVE> or <WRITE> button on the bottom. BACKUP • RESERVE: The selected data will be backup to the FROM 2010/01/01 08:29:59 WRITING BACKUP DEVICE NO DEVICE 2010/01/01 08:30:59 TAG NAME DATA3 RESERVED HDD, which you can check in <RESERVED DATA CODEC RELEASE QUERY... -
Page 53: Search & Play
search & play You can perform the search for recorded data by the time or by the search criteria such as an event. SEARCH Press the [SEARCH] button on the remote control or press the <SEARCH> button on the launcher menu. The login dialog appears. - Page 54 search & play SEARCH BY EVENT You can search for events and play data for a specific channel. Using the mouse may help easy setup. Use the direction buttons to move to <SEARCH BY EVENT> in the left corner of the SEARCH screen and SEARCH press the [ENTER] button.
-
Page 55: Web Viewer
web viewer INTRODUCTION What is web viewer? Web Viewer a user friendly software program that enables you to connect to the DVR in a remote area and control the live or existing video data. System Requirements The following lists the minimum suggested hardware and operating system requirements needed to run the Web Viewer. - Page 56 web viewer To connect to the Web Viewer Open the browser and provide the IP address of the DVR, or URL in the address bar. You must have specified the IP address in “NETWORK > IP SETUP”. The initial URL of the DVR is the last 6 digits of the MAC address, which you can check in “SYSTEM >...
- Page 57 Click <Next> when IMM4 Codec Setup Wizard appears. Click <Install>. Click <Finish> to exit setup. The installation is completed. You will see the main screen of the Live Viewer. English _57 Lo-Call 1890 866 900 www.cctvireland.ie...
-
Page 58: Live Viewer
web viewer LIVE VIEWER Live Viewer At a Glance Name Description Viewer Selection Consists of 4 tabs: <Live>, <Search>, <Setup> and <Information>. Area Live Viewer Screen Displays the Live screen of the currently connected DVR. Split Screen Switches the screen mode to Single, 4-split mode. Status Indicates the status of each channel. - Page 59 When you can’t save the image, check if the following is applied in your Internet Explorer. “Tools > Internet Option > Security” Tab Uncheck “Enable Protected Mode(requires restarting Internet Explorer)” and restart Internet Explorer, please! Switching between split modes Click the mode switch buttons to switch the screen mode as follows.
-
Page 60: Screen Capture
web viewer Screen Capture Click < >. The current screen of the selected channel will be saved in the default saving path of the PC. Click <ActiveX Setting> to display the Settings menu where you can change the default path. ActiveX Setting Click <... -
Page 61: Search Viewer
SEARCH VIEWER Click the <Search> tab to display the remote play screen of the DVR. Search Viewer At a Glance Name Description Viewer Selection Consists of 4 tabs: <Live>, <Search>, <Setup> and <Information>. Area Search Screen Displays the playback screen of the recorded video. Play Bar Buttons used to control the playback screen. -
Page 62: Search By Time
web viewer Name Description Refresh Refreshes the screen ActiveX Setting Specify the saving path of the recorded or captured screen. Capture Image Captures the current screen. Print Prints out the current screen. Channel Selection Select a channel of the camera that is connected to the DVR. ... -
Page 63: Setup
SETUP Click the <Setup> tab to display the DVR remote setup screen. Setup Viewer At a Glance Name Description Viewer Selection Consists of 4 tabs: <Live>, <Search>, <Setup> and <Information>. Area Menu Tree Select a desired menu item. Details Detailed information of the selected menu item. Ok/Cancel Saves or cancels your settings. -
Page 64: Color Setting
web viewer Color setting You can adjust all settings from 0 to 100 for each channel in fine tune mode, and the default is 50. From the left menu tree, select <Camera>. Click <Color>. Make your changes as necessary in details. ... - Page 65 Monitor setting You can adjust the position of the displayed items. From the left menu tree, select <Display>. Click <Monitor>. Make your changes as necessary in details. For more information, refer to “MONITOR”. (Page 32) Click <Ok>. Your changes will be saved. Audio/Buzzer setting You can configure the audio and buzzer related settings.
-
Page 66: Control Device Setting
web viewer Control Device Setting From the left menu tree, select <System>. Click <Remote Controller>. Make your changes as necessary in details. For more information, refer to “REMOTE CONTROLLER”. (Page 28) Click <Ok>. Your changes will be saved. Recording Operation Setting From the left menu tree, select <Record>. - Page 67 Instant Recording Setting From the left menu tree, select <Record>. Click <Instant>. Make your changes as necessary in details. For more information, refer to “INSTANT RECORDING”. (Page 50) Click <Ok>. Your changes will be saved. User Management Setting From the left menu tree, select <User>. Click <Management>.
- Page 68 web viewer IP Setup Setting From the left menu tree, select <Network>. Click <Network>. Check the network connection status and make your changes as necessary in details. For more information, refer to “IP SETUP”. (Page 38) Click <Ok>. Your changes will be saved. E-mail Setting From the left menu tree, select <Network>.
-
Page 69: Information
Alarm output setting From the left menu tree, select <Sensor>. Click <Alarm Output>. Make your changes as necessary in details. For more information, refer to “ALARM OUTPUT”. (Page 44) Click <Ok>. Your changes will be saved. Buzzer out setting From the left menu tree, select <Sensor>. -
Page 70: Using The Iphone
web viewer USING THE iPhone Select the Safari browser. Enter the IP address or URL to connect. And touch the <Go> button. http:// set IP Address: Port No(Default 8080) Ex)http://f05bb96.websamsung.net:8080 Enter the User name and Password then user can see the Image. -
Page 71: Appendix
appendix CAMERA SPECIFICATION Item Details Model SOC-A100 SOC-A101 SOC-A100P SOC-A101P Day/Night Power Source Voltage DC 12V Broadcasting NTSC Image Device Effective Pixels 380K 430K Line Frequency Horizontal: 15,734Hz / Vertical: 59.94Hz Horizental: 15,625Hz / Vertical: 50Hz Weather Resist IP66 Synchronization Resolution 600TVL S/N Ratio... -
Page 72: Product Specification (Sde-120N/Sde-3000N/Sde-3001N)
PRODUCT SPECIFICATION (SDE-120N/SDE-3000N/SDE-3001N) Item Details Model SDE-120N SDE-3000N SDE-3001N System Format NTSC / PAL General Remote Control Operation System Embedded Linux Input 4CH BNC, 4CH MINI DIN (CH1~4 Common) Video Output BNC 1 CH(CVBS) Input 4CH(1Vp-p) Audio Output RCA Type : 1CH... - Page 73 Item Details Model SDE-120N SDE-3000N SDE-3001N Client PC SPEC • MS Explorer 5.5 up (32 bit only) Support OS Windows XP, Windows Vista, Windows 7 • Live / Backup / Search • Support multi language Web Viewer Function NTSC : ENGLISH/FRANÇAIS/ESPAÑOL PAL : ENGLISH/FRANÇAIS/DEUTSCH/ESPAÑOL/ITALIANO/TÜRK/...
-
Page 74: Product Specification
appendix PRODUCT SPECIFICATION (SDE-3170P/SDE-3002P/SDE-3002) Item Details Model SDE-3170P SDE-3002P SDE-3002 System Format NTSC General Remote Control Operation System Embedded Linux Input 4CH BNC, 4CH MINI DIN (CH1~4 Common) Video Output BNC 1 CH(CVBS) Input 4CH(1Vp-p) Audio Output RCA Type : 1CH Live Display Mode 1/4/Sequence... - Page 75 Item Details Model SDE-3170P SDE-3002P SDE-3002 Client PC SPEC • MS Explorer 5.5 up (32 bit only) Support OS Windows XP, Windows Vista, Windows 7 • Live / Backup / Search • Support multi language Web Viewer Function NTSC : ENGLISH/FRANÇAIS/ESPAÑOL PAL : ENGLISH/FRANÇAIS/DEUTSCH/ESPAÑOL/ITALIANO/TÜRK/ Web Viewer РУССКИЙ/SVENSKA/ČESKÝ...
-
Page 76: Open Source License Report On The Product
Corresponding Source code from us for a period of three years after our last shipment of this product by sending email to help.cctv@samsung.com If you want to obtain the complete Corresponding Source code in the physical medium such as CD-ROM, the cost of physically performing source distribution might be charged. - Page 77 of the Program a copy of this License along with the Accompany it with a written offer, valid for at least Program. three years, to give any third party, for a charge no more than your cost of physically performing You may charge a fee for the physical act of transferring source distribution, a complete machine-readable a copy, and you may at your option offer warranty...
- Page 78 7. If, as a consequence of a court judgment or 10. If you wish to incorporate parts of the Program into allegation of patent infringement or for any other reason other free programs whose distribution conditions are (not limited to patent issues), conditions are imposed on different, write to the author to ask for permission.
-
Page 79: Gnu General Public License
GNU Lesser General Public License instead of this How to Apply These Terms to Your License. New Programs GNU GENERAL PUBLIC LICENSE If you develop a new program, and you want it to be of the greatest possible use to the public, the best way to Version 3, 29 June 2007 achieve this is to make it free software which everyone Copyright ©... -
Page 80: Terms And Conditions
install or run modified versions of the software inside enables other parties to make or receive copies. Mere them, although the manufacturer can do so. This is interaction with a user through a computer network, fundamentally incompatible with the aim of protecting with no transfer of a copy, is not conveying. - Page 81 The Corresponding Source for a work in source code You may charge any price or no price for each copy form is that same work. that you convey, and you may offer support or warranty protection for a fee. 2. Basic Permissions. 5.
- Page 82 offer spare parts or customer support for that “Installation Information” for a User Product means any product model, to give anyone who possesses methods, procedures, authorization keys, or other the object code either (1) a copy of the information required to install and execute modified Corresponding Source for all the software in the versions of a covered work in that User Product from a product that is covered by this License, on a...
- Page 83 Notwithstanding any other provision of this License, for However, if you cease all violation of this License, then material you add to a covered work, you may (if your license from a particular copyright holder is authorized by the copyright holders of that material) reinstated (a) provisionally, unless and until the copyright supplement the terms of this License with terms: holder explicitly and finally terminates your license, and...
- Page 84 litigation (including a cross-claim or counterclaim in a A patent license is “discriminatory” if it does not include lawsuit) alleging that any patent claim is infringed by within the scope of its coverage, prohibits the exercise making, using, selling, offering for sale, or importing the of, or is conditioned on the non-exercise of one or more Program or any portion of it.
- Page 85 and conditions either of that numbered version or of any END OF TERMS AND CONDITIONS later version published by the Free Software GNU LESSER GENERAL PUBLIC Foundation. If the Program does not specify a version number of the GNU General Public License, you may LICENSE choose any version ever published by the Free Software Foundation.
- Page 86 To protect each distributor, we want to make it very The precise terms and conditions for copying, clear that there is no warranty for the free library. Also, if distribution and modification follow. Pay close attention the library is modified by someone else and passed on, to the difference between a “work based on the library”...
- Page 87 2. You may modify your copy or copies of the Library or Once this change is made in a given copy, it is any portion of it, thus forming a work based on the irreversible for that copy, so the ordinary GNU General Library, and copy and distribute such modifications or Public License applies to all subsequent copies and work under the terms of Section 1 above, provided that...
- Page 88 the work for the customer’s own use and reverse 7. You may place library facilities that are a work based engineering for debugging such modifications. on the Library side-by-side in a single library together with other library facilities not covered by this License, You must give prominent notice with each copy of the and distribute such a combined library, provided that work that the Library is used in it and that the Library...
- Page 89 If any portion of this section is held invalid or unenforceable EXPRESSED OR IMPLIED, INCLUDING, BUT NOT under any particular circumstance, the balance of the LIMITED TO, THE IMPLIED WARRANTIES OF section is intended to apply, and the section as a whole is MERCHANTABILITY AND FITNESS FOR A intended to apply in other circumstances.
-
Page 90: Openssl License
write to the Free Software Foundation, Inc., 51 Franklin TORT (INCLUDING NEGLIGENCE OR OTHERWISE) Street, Fifth Floor, Boston, MA 02110-1301 USA Also ARISING IN ANY WAY OUT OF THE USE OF THIS add information on how to contact you by electronic SOFTWARE, EVEN IF ADVISED OF THE POSSIBILITY and paper mail. - Page 91 PROFITS; OR BUSINESS INTERRUPTION) HOWEVER CAUSED AND ON ANY THEORY OF LIABILITY, WHETHER IN CONTRACT, STRICT LIABILITY, OR TORT (INCLUDING NEGLIGENCE OR OTHERWISE) ARISING IN ANY WAY OUT OF THE USE OF THIS SOFTWARE, EVEN IF ADVISED OF THE POSSIBILITY OF SUCH DAMAGE.The licence and distribution terms for any publically available version or derivative of this code cannot be changed.
- Page 92 Correct Disposal of This Product (Waste Electrical & Electronic Equipment) (Applicable in the European Union and other European countries with separate collection systems) This marking on the product, accessories or literature indicates that the product and its electronic accessories (e.g. charger, headset, USB cable) should not be disposed of with other household waste at the end of their working life.
- Page 93 Samsung Techwin. Disclaimer Samsung Techwin makes the best to verify the integrity and correctness of the contents in this document, but no formal guarantee shall be provided. Use of this document and the subsequent results shall be entirely on the user’s own responsibility. Samsung Techwin reserves the right to change the contents of this document without prior notice.
- Page 94 TEL : +82-70-7147-8740~60 FAX : +82-31-8018-3745 SAMSUNG TECHWIN AMERICA Inc. SAMSUNG TECHWIN EUROPE LTD. 1480 Charles Willard St, Carson, CA 90746, UNITED STATES Samsung House, 1000 Hillswood Drive, Hillswood Business Park Tol Free : +1-877-213-1222 FAX : +1-310-632-2195 Chertsey, Surrey, UNITED KINGDOM KT16 OPS www.samsungcctvusa.com TEL : +44-1932-45-5300 FAX : +44-1932-45-5325 www.samsungtechwin.com...
Need help?
Do you have a question about the SDE-120N and is the answer not in the manual?
Questions and answers
I forgot my password. Can it be reset
The document does not mention a method for resetting the password for the Samsung SDE-120N. It only states that the default user is "admin" with the password "4321." If the password is forgotten, the document does not provide instructions for resetting it.
This answer is automatically generated