
Related Manuals for Prima ABM30


Summary of Contents for Prima ABM30
- Page 1 2LB BREADMAKER Instruction and Recipe Book Model: ABM30 Visit our website www.buyprima.com...
-
Page 2: Table Of Contents
TABLE OF CONTENTS IMPORTANT SAFEGUARDS ..................2 PARTS & CONTROL PANEL..................4 CHOICE OF BREADS ..........................6 USING THE BREAD MAKER..................7 OPERATION TIPS ......................8 OPERATING PROCEDURE FOR MAKING DOUGH & BAKING BREAD .....9 USING THE TIMER .....................13 INGREDIENTS......................14 TIPS FOR BEST RESULT ...................15 CLEANING INSTRUCTION ..................16 TROUBLE-SHOOTING ....................17 RECIPES ........................22... -
Page 3: Important Safeguards
IMPORTANT SAFEGUARDS When using the Automatic Bread Maker, basic safety precautions should always be followed including the following: Read all instructions before use. 1. Do not touch hot surface. Use handles or knobs. Always use oven mitts when handling hot materials and allow metal parts to cool before cleaning. - Page 4 Delay Setting Rating voltage Model Power Tube power Power Time ABM30 220~240Vac/50Hz 600~720W 550W 16hours IMPORTANT WARNING: You should not dispose of this device with your household waste. A selective collection system for this type of product is implemented by your local authorities.
-
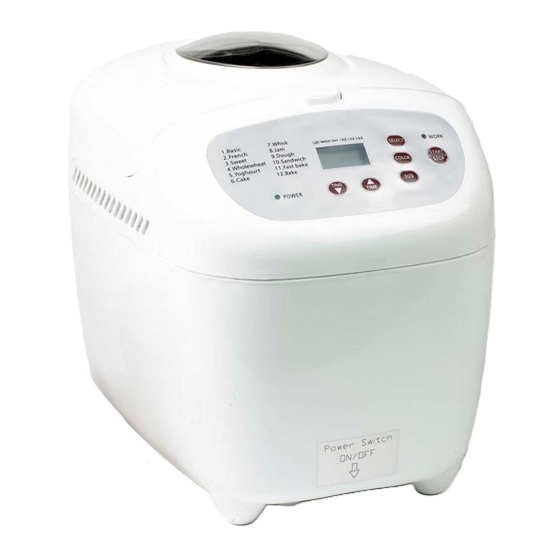
Page 5: Parts & Control Panel
PARTS 1, Lid System 2, Big Measuring Spoon 3, Small Measuring Spoon 4, Bread Paddle 5, Bread Pan 6, Measuring Cup 7, Hook 8, Control Panel Control Panel A. DISPLAY WINDOW Shows your selection and time setting. B. LIST OF MENUS (Bread Type) CODE NO. - Page 6 C. SELECT Press this button to select the baking cycle you want. Press this button until your choice is indicated ie: 1, 2, 3 – see table above. D. BREAD COLOUR Press this button to select LIGHT, MEDIUM or DARK bread color. The indictor line ‘^’ will move between Light, Medium and Dark to show selected function.
-
Page 7: Choice Of Breads
Choice of Breads BASIC BREAD This is the program shown when the machine is first switched on. This is a good, general-purpose program for white or brown bread. Most of the recipes use this program. Results in golden brown crust and tender interior. The unit automatically kneads ingredients, kneads the dough, raises it and bakes it at a normal speed. -
Page 8: Using The Bread Maker
SANDWICH BREAD The machine Kneads, rises and bakes a light texture bread with a thinner crust. You can also set the delay timer. FAST BAKE BREAD This mode is similar to the quick program in that the steps are shorter for a faster process time Loaf size and bread color cannot be altered in this mode;... -
Page 9: Operation Tips
burning. After you remove the loaf by turning the Bread Pan upside down and shaking gently, check to see that the Kneading Paddle is removed from the loaf. If it is stuck in your bread, use a non-metal utensil to gently remove it, taking care not to scratch the Kneading Paddle. Operation Tips •... -
Page 10: Operating Procedure For Making Dough & Baking Bread
Operating Procedure Here's how to bake bread with your BREAD MAKER: (Please note illustrations are for reference only and may show a bread maker shape different to the one you have purchased) Step 1: Step 2: Open the Lid and remove the Position the Kneading Paddle Bread Pan. - Page 11 Step 3: Step 4: Add ingredients into the bread Make a small indentation on pan. For best results, add all top of the dry ingredients (not liquid ingredients first. Then, so deep it reaches the wet add all dry ingredients layer) and add the yeast in the EXCEPT yeast and (if indentation.
- Page 12 Step 5: Step 6: Insert the Bread Pan in the Press the SELECT button to BREAD MAKER, sit the bread choose the cycle you want. pan in place. Close the Lid. Press BREAD COLOUR to Select the colour of the bread and if you want to delay the programming press TIMER.
- Page 13 Step 7: Step 8: When the baking phase is Turn over the Bread Pan a few completed, the BREAD inches from the countertop MAKER will beep 12 times. and gently shake out the loaf. This indicates the bread is done. Press the STOP button Place the loaf on a wire rack or (hold down for 3 seconds).
-
Page 14: Using The Timer
Using the Timer To enjoy fresh, warm bread after waking up in the morning, set the Timer in the evening before going to bed. The Timer can be preset up to 16 hours. Note: • Don’t use the timer if your recipe includes eggs, fresh milk or other ingredients that may spoil. •... -
Page 15: Ingredients
Ingredients Use only fresh ingredients. Check the expiration date on the packing. Expired yeast and flour are harmful to health and will also produce poor bread. BASIC INGREDIENTS: FLOUR It is best to use strong bread flour to make bread. We can also use whole wheat bread flour to make whole wheat bread. -
Page 16: Tips For Best Result
Other Ingredients EGGS Eggs can improve the flavor and aroma of the bread. However, water content of the egg must be accounted for in the formula, because an average size egg contains about 73% water. FRUITS Sugar and water contents in fruits must be considered in the recipes. Total weight of fruits used should not exceed 13% of the flour weight. -
Page 17: Cleaning Instruction
Cleaning • The Bread Pan and Kneading Paddle have non-stick surfaces that make cleaning easy. 1. After baking, unplug the BREAD MAKER and allow the main body to cool down before cleaning. 2. Remove the Bread Pan from the BREAD MAKER Oven and the Kneading Paddle from the Bread Pan. -
Page 18: Trouble-Shooting
Trouble Shooting Number Problem Reason Settlement The central section of the bread It has been kept on the keep As soon as the cycle has finished is sinking; the bottom crust of warm function for too long and remove the pan from the machine the bread is too thick. - Page 19 Add correct amount of salt per recipe The main problem we are contacted about at Prima are the top of the bread loaf sinking and the bread loaf not rising enough. These problems relate to the ingredients – not the bread maker. The Prima Range of bread makers are excellent machines but what they do is essentially very simple.
- Page 20 months. Although all our recipes have been formulated to make good bread with water straight from the tap we recommend that you allow the water to stand at room temperature for at least an hour during the cooled times of the year.
- Page 21 U.K. PLUG WIRING INSTRUCTIONS The wires in the mains lead are coloured in accordance with the following code: BROWN - LIVE (L) BLUE - NEUTRAL (N) GREEN/YELLOW - EARTH (E) As the colours of the wires in the mains lead of this appliance may not correspond with the coloured markings identifying the terminals in your plug, proceed as follows: •...
- Page 22 WHEN THE UNIT WAS DELIVERED. NAME__________________________________________________________________ ADDRESS______________________________________________________________ _______________________________________________________________________ PURCHASED FROM__________________________________________________________ DATE OF PURCHASE _________________________MODEL________________________ Prima House, Unit 15 (2) D, Springfield Commercial Centre, Bagley Lane, Leeds LS28 5LY. Tel: 0844 581 5000 www.buyprima.com © Copyright 2006 Nu-World UK Ltd. All rights reserved.
-
Page 23: Recipes
RECIPES Please follow the advice below: 1) Please place all ingredients into the bread pan in the following order: 2) When you have added all ingredients, in the correct order, select your chosen program, crust selection and the loaf size. Press the ‘Start’ button to start the bread machine straight away or press the ‘TIMER’... - Page 24 Prima do not have any other recipes other than these listed here but there are many good books for breadmaker machines around. After you have got used to your machine you will be able to adapt the recipes given here to your own...
- Page 25 4, whole wheat: Weight 450g(1.0LB) 680g(1.5LB) 900g(2.0LB) Ingredients; Water 140ml (140g) 240ml (237g) 300ml (294g) Salt /3small sp (2g) /2small sp (3g) 1small sp (6g) Sugar /2big sp (21g) 2big sp (28g) /2big sp (35g) Butter /2big sp (24g) 2big sp (32g) /2big sp (40g) Whole wheat flour 2cu (296g)
- Page 26 6, cake: Weight 450g(1.0LB) 680g(1.5LB) 900g(2.0LB) Ingredients; Water 30ml (29.5g) 30ml (29.5g) 60ml (58.7g) Carbonate soda powder 1small sp(3g) 1small sp (3g) 1small sp (3g) Sugar /8cup (48g) /8cup (48g) /4cup (90g) Butter 1/8cup (50g) 1/3cup (124g) 1/2cup (150g) Strong white flour /3cup (197g) /4cup (269.5g) /2cup (385g)
- Page 27 10, Sandwich: Weight 450g(1.0LB) 680g(1.5LB) 900g(2.0LB) Ingredients; Water 90ml (90g) 200ml (198g) 280ml (77g) Salt /2small sp (3g) /3 small sp (4g) 1small sp (6g) Sugar /3small sp (2g) /2small sp (3g) /2small sp (3g) Butter /2big sp (21g) 2 big sp (28g) /2big sp (35g) Strong white flour /2big sp (24g)
Need help?
Do you have a question about the ABM30 and is the answer not in the manual?
Questions and answers