Table of Contents
Advertisement
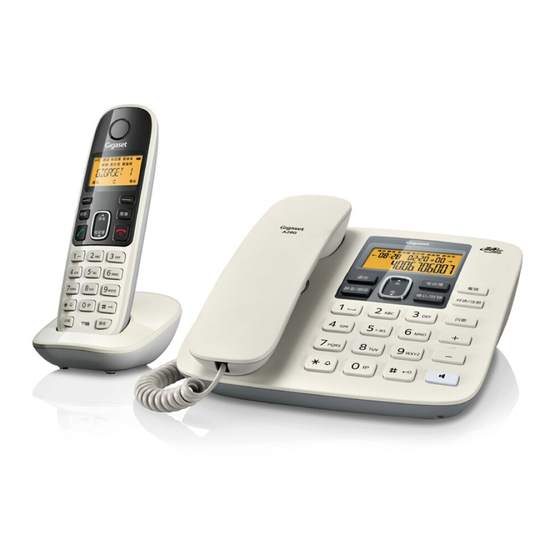
Gigaset A280
The handset at a glance
Ò
Gigaset
1
2
3
4
5
6
7
Display icons
Ò
Radio signal
Steady:
Handset is linked with base
Flashing: Handset is out of range or not
U
registered
Battery icon
Steady:
Full, more than1 hour talking time
=
Flashing: Charging
Steady:
Less than 1 hour talking time
¼
Flashing: Almost flat
Alarm clock is activated
Ú
Ringer is deactivated
Ø
Keypad lock is activated
U
1
8
9
10
11
12
13
1
1 Display in idle mode
2 Back key
When editing text: backspace
In menu: go back to previous level
3 Internal communication key (
4 Talk key / Redial list* (
s
5 Control key
In idle mode:
open phone book,
list.
In menu, phone book and lists: Scrolling up/down
6 Star key / Ringer on/off *
7 Recall key
Consultation call (flash)
Insert pause*
¢
8 OK key
9 Menu key (
page 10)
10 End call key / Power on/off *
¢
11 Hash (#) key / Keypad lock on/off * (
12 IP dialling key * (
13 Mute key (microphone off) (
* To activate a function marked with an asterisk (*)
press and hold the corresponding key.
Display in idle mode
¤
Press and hold the
name/number and date/time display.
Ò
U
Gigaset
1
ª
Talk icon
Steady:
Ongoing call
Flashing: Incoming call received
Phone book is opened
Y
Calls list icon
Steady:
Already inspected calls in calls list
Flashing: New calls in calls list
Off:
No entry in calls list
{
In editing mode: Backspace. Press
delete one character at a time
In menu: Press
|
or exit menu.
Confirm menu function or save entry with
V
W
In menu and lists: Scroll up/down with
In talk mode: Adjust volume with
¢
¢
page 16)
page 13)
t
open calls
¢
page 9)
¢
page 11)
page 11)
A
key to toggle between
Ò
U
10/31
12-30
A
A
to go back to previous level
p
.
to
B
.
p
.
Advertisement
Table of Contents

Related Manuals for Gigaset Gigaset A280


Summary of Contents for Gigaset Gigaset A280
-
Page 1: Gigaset A280
Gigaset A280 The handset at a glance 1 Display in idle mode 2 Back key When editing text: backspace ¢ In menu: go back to previous level 3 Internal communication key ( ¢ page 16) 4 Talk key / Redial list* (... -
Page 2: The Base At A Glance
The base at a glance 1 Display in idle mode 2 Back key ¢ 3 Phone book ( page 15) Show first entry / Add new entry* ¢ 4 Redial key ( page 13) 5 OK key / Clock key * ¢... -
Page 3: Table Of Contents
Adjusting the talking volume ..12 Gigaset A280 ..... 1 Adjusting the loudspeaker volume ..12 The handset at a glance . -
Page 4: Safety Precautions
Safety precautions Read this user guide and the safety precautions carefully before use. Explain their contents and the potential hazards associated with using the telephone to your children. Only use the mains unit supplied. ¢ Fit only the recommended, rechargeable batteries ( page 20), i.e. -
Page 5: First Steps
First steps Check the pack contents ◆ one Gigaset A280 base station ◆ one mains adapter for base station ◆ one corded handset with cable ◆ one cordless Gigaset A18H handset ◆ one handset charging cradle with mains adapter ◆... -
Page 6: Connecting The Handset Charging Cradle
Connecting the handset charging cradle ¤ Plug the mains adapter into the plug socket. Setting up the handset for use The display is protected by a plastic film. ¤ Remove the protective film! Inserting the batteries and closing the battery cover Warning ¢... - Page 7 Placing the handset in the charging cradle and charging the batteries Before you can use the handset, you must first charge the batteries. ¤ Place the handset with the display facing up in the charging cradle. Ò The idle screen is displayed. The handset name and the internal handset number are displayed.
-
Page 8: Setting The Date And Time
Activating/deactivating the handset ¤ Press and hold the key to activate or deactivate the handset. If you place a deactivated handset in the base station or charging cradle, it will automatically activate. Handset out of range Ò If the handset is out of range of the base station the antenna icon will flash on the display. -
Page 9: Using The Phone
Using the phone Control key The keypad lock is deactivated automatically if some- one calls you or if paging is activated. It is reactivated when the call is finished. Handset In idle mode Please note Open the calls list. When the base keypad is locked, the following advanced settings are not available. -
Page 10: Menu Tree
Menu tree ¢ PHONEBOOK NEW ENTRY page 13 ¢ LIST ENTRY page 14 ¢ EDIT ENTRY page 14 ¢ DELETE ENTRY page 14 ¢ DELETE ALL page 15 ¢ IP DIALING page 15 ¢ SPEED DIAL KEY 1 page 15 KEY 2 ¢... -
Page 11: Making Calls (Handset)
The current setting is shown on the display. Your Gigaset A280 will automatically pick the line and add the IP code stored in the phone book as a prefix to the IDD phone number. -
Page 12: Making Calls (Base)
(pick up receiver) or press ing of the and the icon on the display. Your Gigaset A280 will automatically pick the line and ª To accept an incoming call: add the IP code stored in the phone book as a prefix (pick up receiver) or to the IDD phone number. -
Page 13: Calls List
Calls list Using the calls list on the base station The calls list stores incoming calls: name, number, When you get a call, the time stamp (max. 20 calls). caller's number and the Precondition: CLI is available. 12:30 31-10 #02 time stamp will be dis- icon appears on the display when there played. -
Page 14: Phone Book (Handset)
Dialling from the redial list Using the phone book ª (scroll to the desired redial list entry) Storing a number into the phone book On the base: (pick up receiver) or press ¢ ¢ On the handset: press ¢ ¢ (open menu) PHONEBOOK ¢... -
Page 15: Storing Numbers For Speed Dialling
Storing numbers for speed dialling Deleting the complete phone book On the handset you can use the keys This action will delete all entries in the handset’s speed dialling. phone book including speed dialling numbers. IP dialling numbers are not deleted. ¢... -
Page 16: Using Several Handsets
Using several handsets Locating a handset ("paging") Registering handsets You can locate the handsets using the base station. Precondition: base station is in idle mode. Ë ¤ Before you can use your handset, you must register it Briefly press the paging key on the base sta- to the base station. -
Page 17: Making Internal Calls (Base)
Transferring a call to another handset Transferring an external call to a handset Ë You can transfer an external call to another handset. You can transfer an external call to a handset. Press and hold ¢ (put external call on hold) (put external call on hold) (enter internal number of participant) All handsets will be called. -
Page 18: Settings (Base)
Changing the handset name Setting date and time ¢ ¢ ¢ ¢ You can change the default name of the handset CLOCK/ALARM ¢ ¢ ¢ ¢ (default: Gigaset). Maximum characters: 10. DATE & TIME ¢ ¢ ¢ ¢ PERSONAL SET (enter date: MM/DD) (enter time: HH:MM, 24hrs format) HANDSET NAME... -
Page 19: Changing The Pin
Connecting to PABX Changing the ringer volume There are 4 levels of ringer volume (default: ). You Your phone is preset at the factory for operation on can adjust the ringer volume. the main connection. For operation on a PABX, you Precondition: Base station is in idle mode. -
Page 20: Appendix
Appendix General Specifications Writing and editing text Technical Data WDCT standard supported The following rules apply when writing text: ◆ Control the cursor with Number of channels 80 cuplex cahnnels ◆ Characters are inserted on the left of the cursor. Radio frequency range 2400-2483.5 MHz ◆... - Page 22 D-46395 Bocholt Manufactured by Gigaset Communications GmbH under trademark license of Siemens AG. As of 1 Oct. 2011 Gigaset products bearing the trademark "Siemens" will exclusively use the trademark "Gigaset". © Gigaset Communications GmbH 2010 All rights reserved. Subject to availability.
Need help?
Do you have a question about the Gigaset A280 and is the answer not in the manual?
Questions and answers