
Related Manuals for Evolis Dualys


Summary of Contents for Evolis Dualys
- Page 1 User’s Guide Plastic Card Printer Dualys User’s Guide. Part Number: A5305. Rev. A July 2003 © Evolis Card Printer...
-
Page 2: Copyright Information
All information contained in this document is subject to changes without prior notification. Evolis Card Printer cannot be held responsible for possible errors contained in this manual, nor incidental or consequential damage connected with the supply or use of this manual. -
Page 3: Electromagnetic Compatibility
DECLARATION OF CONFORMITY CONCERNING SAFETY AND ELECTROMAGNETIC COMPATIBILITY Name of the manufacturer: Evolis Card Printer Address: 29, avenue de la Fontaine Z.I. Angers Beaucouzé 49070 Beaucouzé France Material designation: Dualys printer I, the undersigned, Mr. Serge Olivier, Technical Manager Declare that I have rec eived the assumption of the above material, used... -
Page 4: Table Of Contents
......Chapter VI • Evolis Guarantee ........ -
Page 5: Introduction
Introduction We congratulate you for choosing a Dualys printer! The Dualys printer is the ideal solution for printing your plastic cards in areas such as employee badges, students card, access control badges, membership cards, service bureaus and all other applications required dual-sided card printing …... -
Page 6: Setting Out
Setting out Choice of a location The Dualys printer must be set up on a level surface, in a dust free environment. It is essential to be able to access the printer from all sides for installation and use. WARNING ! The printer weighs 13,5 kg (29.76lbs) without the consumables installed. -
Page 7: Description Of The Printer And Its Functions
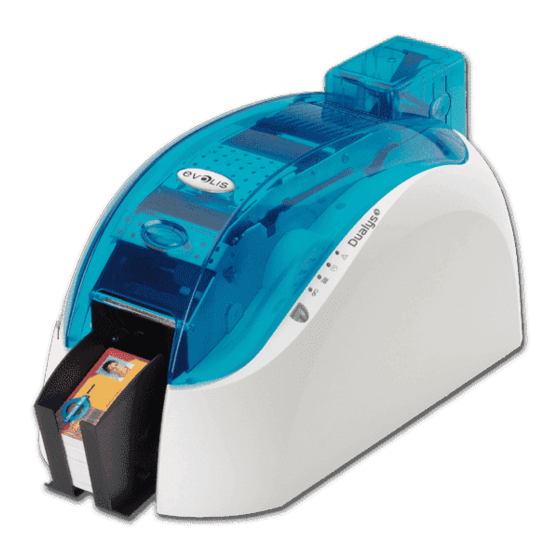
Description of the printer and its functions We invite you to see the different components of your printer marked on the following drawings, which we refer to in this manual. Card Output Hopper Collects the cards ejected from printer Cover lever Allows the printer cover to be opened and closed Card Feeder Holds the cards before printing... -
Page 8: Installation Of The Interface And The Supply Cable
Installation of the interface and supply cables WARNING ! Make sure that the printer switch is at 0 (OFF). 1. Connect the interface cable supplied with your printer as shown above. 2. Connect the other end of the cable to the corresponding port of your computer. 3. -
Page 9: Installation Of The Ribbon
IMPORTANT ! The ribbon must be correctly installed for the printer to work. Only use Evolis ribbons. Evolis declines all responsibility if the printer or the print head is damaged through the use of an unapproved ribbon. The ribbon is set automatically when the cover is closed. -
Page 10: Card Feeder
Loading the cards Card feeder The Dualys is equipped with a card feeder that contains up to 100 cards (0.76mm – 30mil). 1. Remove the feeder from the printer as shown. max. max. max. 2. Press the spring system down inside the feeder and insert the cards as shown. -
Page 11: Card Thickness Adjustment
Then, push on the upper part of the feeder until you hear a “click”. Card output hopper The Dualys printer is equipped with an output hopper with a capacity of 100 cards (0.76 mm – 30mil) devoted to receiving the printed cards. 1. Locate the door of 2. -
Page 12: Reject Card Box
Other stages of installation You have now completed the installation (material) of your Dualys printer. For the moment, we strongly advise you to continue to read this manual and we will inform you that there are still two extra... -
Page 13: Printing
Installation of the printer driver Before using your Dualys printer, you must install its driver. Remember: the driver and Dualys printer operate under Windows 2000, NT 4.0 and Xp. NOTE ! The CD provided with the printer includes a utility which automates the installation of the printer driver. -
Page 14: Configuration Of The Printing Parameters
5. Click on OK to close this window. The configuration is complete. Configuring the printing parameters Before using your Dualys printer, it is recommeded to check / modify the default parameters of the driver. Furthermore, if you have options installed, you must declare them in the driver. - Page 15 Definition of the properties of the Dualys printer Different dialog boxes enable you to: Make adjustment such as the card orientation and the printing quality. Manage the different printing modes and the use of the right ribbons. Select the printer port.
-
Page 16: Printing
“Tools” dialog box This dialog box offers first level maintenance for your Dualys printer. If your Dualys printer has an option with a magne- tic encoder, configure it now with the “Encoding Settings” button. For further information on this printing option, consult Annexe A of this manual. - Page 17 It should be noted that this example is not intended to initiate the operator in the working of the Word application, it is only intended to establish a relationship between the drawing of a card and the Dualys management parameters necessary for the printing.
- Page 18 1. In the menu bar, point on File and select “Print” 2. The dialog box indicates that the Evolis printer has been selected. Click on Properties. The dialog box of the Evolis Dualys driver opens. The printing parameters for this graphic example are: 1.
-
Page 19: Cleaning
Preserve the validity of your guarantee ! Not observing the cleaning procedures contained in this chapter may cause the guarantee on your printer and print head to be annulled. The company Evolis declines all responsibility if the printer is used in unapproved cleaning conditions. - Page 20 WARNING ! If the cleaning cycle is not performed before the 1200th card is printed, the print head warranty is void. This simple cleaning system requires the use of pre-saturated cleaning cards specially conceived for the printer. A cleaning kit including card samples is delivered with your package. The repeated passes of the card inside the printer clean the card transport rollers, the cleaning rollers and the print head.
-
Page 21: Cleaning Of The Print Head
NOTE! Although the cleaning signal has been activated, the printer will continue to work. It is also possible to start a cleaning sequence without waiting for the cleaning signal of the printer. This action is carried out by pressing the push button from the Control Panel for few seconds. -
Page 22: Maintenance Of The Cleaning Roller
Cleaning cycle: each time you load a new ribbon Use: cleaning cloths Your Dualys printer has two cleaning rollers. Their adhesive surface holds the dust when the cards are passed. Although these rollers are maintained with the automatic cleaning of the printer, it is never- theless advisable, for the perfect cleaning of the surface of the cards, to clean them regularly and sim- ply with a cloth supplied in the cleaning set. -
Page 23: Assistance
Chap. 4 Assistance To satisfy the needs of its customers as far as possible, Evolis provides a full range of technical assistance available in this manual and on the internet site www.evolis.com. This section gives information concerning the first level repairs of the Dualys printer. - Page 24 Consult the following conditions of the control panel to determine the activity of the Dualys printer or the nature of the problem: Status of the LED’s Interpretation Solution or explanation PRINTER READY The printer is ready to receive data PROCESSING...
- Page 25 A mechanical part is faulty in the printer. Press the push button for one second. If the problem persists, call your Evolis Reseller for assistance. MAGNETIC ENCODING The orientation of the magnetic track in the...
-
Page 26: Printing And Interpreting A Test Card
Printing and interpretation of a test card The printing of a test card enables certain technical information to be collected on your printer and to validate its good operation. We advise you to print it as soon as your printer is put into service and to keep it close at hand. Printing a test card 1. -
Page 27: Printing Quality Problems
Test with another cable of the same type. 6. Check the printing driver Make sure that the driver of the Dualys printer is present in the Windows settings 7. Check the printing parameters of the computer Make sure that the Dualys printer has been selected as the default printer. - Page 28 3. Elements of the printer might have been damaged. Print a test card. See “Printing and interpretation of a test card” in this section. if the test card fails to print, contact your reseller for a print head replacement. The printing quality is not satisfactory 1.
-
Page 29: Correcting Card Jamming
Correcting card jamming In the printing station: Remove the card as follows: 1. Open the printer cover and remove the ribbon. 2. Remove the card by pushing it manually towards the printer outlet. In the presence of several cards, push the top one first. 3. -
Page 30: Changing A Print Head
Changing a print head The print head of a printer is changed easily and effectively without any need for tools or any special adjustment. WARNING ! Before changing a print head, make sure that the printer has been turned off (position 0). Stage 1 - Removal of the faulty print head 1. -
Page 31: Customer Assistance
Evolis will direct you to your nearest Evolis Reseller. When you call an Evolis Reseller, you must be near your computer and be ready to supply the following information: The type and serial number of your printer... -
Page 32: Technical Specifications
Working temperatures Min / Max: 15°C / 30°C Humidity: from 20% to 65% without condensation Stocking temperatures Min / Max: -5°C / +70°C Stocking humidity: from 20% to 70% without condensation Working ventilation: open air. 1 Clause related to the use of Evolis consumables... -
Page 33: Evolis Guarantee
Evolis. If Evolis is unable to repair the faulty material covered by the guarantee, Evolis will proceed to replace it with a new or second hand product as long as the functions are at least the same as those of the original product it replaces. -
Page 34: Supplies
Chap. 7 Supplies Evolis has a choice of ribbons and a variety of accessories. In the following, you will find the list of supplies available from Evolis Resellers. Monochrome ribbons Ref. R2011 Black Monochrome Ribbon 1000 cards/roll Ref. R2012 Blue Monochrome Ribbon 1000 cards/roll Ref. -
Page 35: Magnetic Encoding
Magnetic encoding Introduction Dualys printers with a magnetic stripe encoder are called Dualys Mag printers. The working of a Dualys Mag printer is identical to that of a Dualys printer. The magnetic encoder encodes tracks ISO 1, 2 and 3 in a single pass and then checks the data. -
Page 36: Cleaning The Magnetic Encoder
Windows Driver Settings When first installing the Windows driver, it is necessary to set the functions of the magnetic encoder. The functions of the magnetic encoder are accessible from the "Tools" dialog box of the printing driver by clicking “Encoding Definition”. “Magnetic Encoder”... -
Page 37: Smart Card Contact Station
Smart Card Contact Station Introduction The Dualys printers with a Smart Card Contact Station are called Dualys Smart printers. The working mode of a Dualys Smart printer is identical to that of a Dualys printer. The Smart Card Contact Station of the Dualys Smart enables the chips to be programmed according to ISO 7816-2 standards. - Page 38 Interface of the Contact Station The Dualys Smart is fitted with a female DB-9 connector on the back of the printer. This connector, directly linked to the contact station inside the printer, is also connected to an external coupling to program the chip.
Need help?
Do you have a question about the Dualys and is the answer not in the manual?
Questions and answers