Table of Contents
Advertisement
Advertisement
Table of Contents

Related Manuals for Grizzly G1019


Summary of Contents for Grizzly G1019
-
Page 1: Instruction Manual
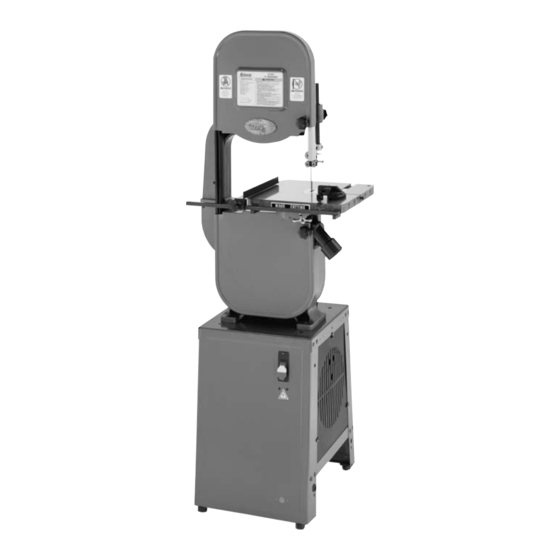
14'' BANDSAW MODEL G1019 INSTRUCTION MANUAL COPYRIGHT © 1991 BY GRIZZLY INDUSTRIAL, INC.. REG.# TX 3 360 514 WARNING: NO PORTION OF THIS MANUAL MAY BE REPRODUCED IN ANY SHAPE OR FORM WITHOUT THE WRITTEN APPROVAL OF GRIZZLY INDUSTRIAL, INC. - Page 2 WARNING Some dust created by power sanding, sawing, grind- ing, drilling, and other construction activities contains chemicals known to the State of California to cause cancer, birth defects or other reproductive harm. Some examples of these chemicals are: • Lead from lead-based paints. •...
-
Page 3: Table Of Contents
CUTTING CURVES...29 CIRCLE CUTTING ATTACHMENT...30 RESAWING ...31 MAINTENANCE ...32 GENERAL ...32 TABLE ...32 BEARINGS ...32 V-BELT ...32 CLOSURE...33 WIRING DIAGRAM ...34 MACHINE DATA ...35 TROUBLESHOOTING ...36 PART BREAKDOWN ...37-39 PART LISTS...40-41 WARRANTY AND RETURNS...42 G1019 14'' Bandsaw Table Of Contents PAGE... -
Page 4: Safety Instructions For Power Tools
G1019 14'' Bandsaw VISITORS... - Page 5 12. SECURE WORK. Use clamps or a vise to hold work when practical. It’s safer than using your hand and frees both hands to operate tool. G1019 14'' Bandsaw 13. NEVER OVERREACH. Keep proper foot- 14. MAINTAIN TOOLS WITH CARE. Keep 15. DISCONNECT TOOLS before servicing 16.
-
Page 6: Additional Safety Instructions For Bandsaws
THIS MACHINE IS NOT DESIGNED TO CUT METAL or other material except wood. BLADE after turning off the saw. Allow it to come to a complete stop before you leave it unattended. AND MAINTENANCE ARE TO BE DONE WITH THE POWER OFF and the plug pulled from the outlet. -
Page 7: Section 2: Circuit Requirements
SECTION 2: CIRCUIT REQUIREMENTS 110V Operation The motor supplied with the Model G1019 is a dual-voltage 110V or 220V motor prewired for 110V. Under 110V use, the motor draws approxi- mately 12 amps. We recommend a 15 amp circuit breaker for 110V. This should be satisfactory for normal use, while providing enough protection against circuit damage caused by power surges. -
Page 8: Extension Cords
This equipment must be grounded. Verify that any existing electrical outlet and circuit you intend to plug into grounded. Under no cir- cumstances should the grounding pin from any three-pronged removed. Serious injury may occur. G1019 14'' Bandsaw actually plug... -
Page 9: Section 3: General Information
SECTION 3: GENERAL INFORMATION Commentary Grizzly Industrial, Inc. is proud to offer the Model G1019 14" Bandsaw. The Model G1019 is part of Grizzly’s growing family of fine woodworking and metalworking machinery. When used according to the guidelines stated in this manual, you can expect years of trouble-free, enjoyable operation. -
Page 10: Unpacking
Unpacking The Model G1019 Bandsaw is shipped from the manufacturer in a carefully packed carton. If you discover the machine is damaged after you’ve signed for delivery, please call Customer Service immediately for advice. Save the containers and all packing materials for possible inspection by the carrier or its agent. -
Page 11: Clean Up
Most commercial or home shop floors should be suffi- cient to carry the weight of the Model G1019. If you question the strength of your floor, you can opt to reinforce it. -
Page 12: Section 4: Assembly
Failure to do so could result in injury. -10- keep The Model G1019 Bandsaw stand is an A-frame, panel-style stand. The front and rear panels are connected with one panel at the top and two cross braces near the bottom. - Page 13 (8) washers and (4) hex nuts. See Figure 5. Motor Support Plate Figure 5. Install motor support plate. G1019 14'' Bandsaw 4. Turn the stand right side up and attach the motor mount plate to the motor mount sup- ⁄ ''-20 x ⁄...
-
Page 14: Stand
Tighten the top two motor bolts down leaving the bottom two finger tight. Set the stand upright at this time. Figure 11. Place drive pulley. G1019 14'' Bandsaw... -
Page 15: Switch
Figure 12. Removing lock-out key from switch. G1019 14'' Bandsaw To connect the switch power to the motor, plug the male end into the female end as shown in Figure 13. -
Page 16: Bandsaw To Stand
V-belt wear. Set a straight edge (or a plumb bob if saw is level) against the upper pulley. If the straightedge touches both pulleys evenly, the pulleys are aligned. If the straightedge does not touch both pul- leys evenly, the pulleys are not aligned. -
Page 17: Stand Guards
2. Insert the black plastic stand panels/covers in place. See Figure 17. Figure 16. Guard case in place. G1019 14'' Bandsaw Figure 17. Panel cover insertion. Never operate machine without the guard case and panel cover in Figures 16 and 17 in place. - Page 18 6. Place the table insert in the table top and slide the tapered pin so it fits snug in the hole on the side of the table. NOTICE The tapered table pin must be in position when operating the bandsaw. G1019 14'' Bandsaw...
-
Page 19: Dust Port
⁄ "-20 x ⁄ washers to secure the dust port to the cover. See Figure 20. Figure 20. Dust port in place. G1019 14'' Bandsaw To mount the fence to the bandsaw table: " hex bolts and ⁄ " Fence 1. -
Page 20: Fence
Safety Information and have read the Adjustment and Operation sections. Do not operate this bandsaw until you have completed the adjustments noted in the next section and have reviewed all safety information. Serious personal injury may result. G1019 14'' Bandsaw... -
Page 21: Section 5: Adjustments
Wear safety glasses dur- ing the entire adjustment process. Failure to com- ply may result in serious personal injury. G1019 14'' Bandsaw Location Of Controls General control and adjustment locations are keep shown in Figure 23 and are described below. -
Page 22: Blade Tension
Proper blade tension can best be achieved by determining the amount of blade deflection: 1. Ensure that the power is off and the saw is unplugged. Raise the upper guide assem- bly all the way and lock in place. -
Page 23: Blade Tracking
The bandsaw blade is dangerously sharp. Use extreme caution when working near the saw blade. Failure to exercise care could result in severe injury. G1019 14'' Bandsaw Blade Guides Whenever changing a blade or adjusting tension and tracking, the upper and lower blade support bearings and guide blocks must be readjusted. -
Page 24: Table Adjustments
2. Position the table to the desired angle. 3. Tighten the trunnion knobs. Adjustment Trunnion Knobs Adjustment table trunnions. See Figure 28 for location. Refer to the angle gauge on the front table support trunnion. Figure 28. Table tilt trunnion knobs. G1019 14'' Bandsaw... - Page 25 Ensure that the bolt does not turn while tightening the locknut. Set the angle pointer to zero for future reference. G1019 14'' Bandsaw Figure 29. Squaring table to blade. The table can be shifted side to side to properly align the miter slot and the blade: 1.
-
Page 26: Fence Adjustments
Miter Slot 1. Find a ⁄ same length as the saw fence and 2" or 3" wide. 2. Draw a line along the wide face and parallel with the edge. 3. Slide the fence out of the way and cut free- hand along the line, stopping at the halfway point. -
Page 27: Blade Lead
Your purpose in doing this is to “trick” your bandsaw into cutting straight. G1019 14'' Bandsaw Test Run Once assembly is complete, adjustments are done to your satisfaction and tools are safely put away, you are ready to test run the machine. -
Page 28: Section 6: Operations
1. Always use a sharp, high-quality blade. 2. Use the right blade for the job. Resawing 3. Allow the saw to cut. Don’t force the work- 4. Maintain your bandsaw in top condition. wear dust Do not force the wood into the blade during cutting. -
Page 29: Blade Information
(7) using a blade with a lumpy or improperly finished weld; and (8), continuously running the bandsaw when not in use. The Grizzly G1019 14" Bandsaw uses 93 blades. G1019 14'' Bandsaw When removing or installing blades, make sure the power is disconnected and moving parts have come to a complete stop. -
Page 30: Ripping
4. Use a fence to guide work. 5. Draw a reference line on the edge of the board. 6. Support ends of the board if necessary. 7. Feed work slowly and evenly. Ripping ⁄ ". G1019 14'' Bandsaw... -
Page 31: Stacked Cuts
5. Cut the stack of pieces as though you were cutting a single piece. Follow your layout line with the blade kerf on the waste side of your line. G1019 14'' Bandsaw Cutting Curves When cutting curves, simultaneously feed and turn the stock carefully so that the blade follows the layout line without being twisted. -
Page 32: Circle Cutting Attachment
Circle Cut Attachment The circle cutting attachment is standard equip- ment with the Model G1019 Bandsaw. The attachment is fully adjustable and is capable of producing circles up to 12" in diameter in 3" thick stock. To mount the circle cutting attachment: Insert the circle cutting attachment into the hole in the bandsaw table. -
Page 33: Resawing
6 ". Although the Model G1019 Bandsaw was not specifically designed for resawing, it is capable of resawing when the saw is set up properly. Use common sense – attempting to resaw a board that is too wide or too dense may put excessive strain on the blade and be unsafe. -
Page 34: Section 7: Maintenance
SECTION 7: MAINTENANCE General Regular periodic maintenance on your Model G1019 Bandsaw will ensure its optimum perfor- mance. Make a habit of inspecting your bandsaw each time you use it. Check for the following con- ditions and repair or replace when necessary. -
Page 35: Section 8: Closure
General Information section. The specifications, drawings, and photographs illustrated in this manual represent the Model G1019 Bandsaw as supplied when this manual was prepared. However, due to Grizzly’s policy of continuous improvement, changes may be made at any time with no obligation on the part of Grizzly to prior customers. -
Page 36: Wiring Diagram
Wiring Diagram -34- G1019 14'' Bandsaw... -
Page 37: Machine Data
Customer Service #: (570) 546-9663 • To Order Call: (800) 523-4777 • Fax #: (800) 438-5901 GRIZZLY MODEL G1019 14" BANDSAW Overall Dimensions: Table ...14" x 14" x 1 Height ...65" Height From Floor to Table ...43" Width of Unit ...24 Depth of Unit ...20... -
Page 38: Troubleshooting
Inspect and replace blade if necessary. Reduce side pressure. Adjust table. Adjust wheels coplanar. Re-install tires. Replace blade. Replace wheels. Feed workpiece straight into the blade. Install a smaller width blade, and/or increase blade tension. G1019 14'' Bandsaw... -
Page 39: Assembly Diagram
G1019 14'' Bandsaw... - Page 40 -38- G1019 14'' Bandsaw...
- Page 41 G1019 14'' Bandsaw -39-...
-
Page 42: Part Lists
PW07 FLAT WASHER PN02 HEX NUT ⁄ ''-18 PCB02 CARR BOLT ⁄ ''-18 X PW07 FLAT WASHER PW07 FLAT WASHER PK21M PB07 HEX BOLT ⁄ ''-18 X G1019 14'' Bandsaw ⁄ ⁄ ⁄ ⁄ ⁄ ⁄ ⁄ ⁄ ⁄ ⁄... - Page 43 KNOB 118 P1019118A GUIDE RAIL 119 P1019119 MOUNT BRACKET 120 PSB01M CAP SCREW M6-1.0X16MM 121 PLW01 LOCK WASHER 122 P1019122 STAND COVER G1019 14'' Bandsaw ⁄ 123 P1019123 128 P1019128 130 P1019130 ⁄ ''-18 133 P1019133 134 PB05 135 PW06...
-
Page 44: Warranty And Returns
WARRANTY AND RETURNS Grizzly Imports, Inc. warrants every product it sells for a period of 1 year to the original purchaser from the date of purchase. This warranty does not apply to defects due directly or indirectly to misuse, abuse, neg- ligence, accidents, repairs or alterations or lack of maintenance. -
Page 45: Warranty Card
Do you think your purchase represents good value? ___Yes Would you recommend Grizzly Industrial to a friend? ___Yes Would you allow us to use your name as a reference for Grizzly customers in your area? Note: We never use names more than three times. ___Yes Comments:_________________________________________________... - Page 46 FOLD ALONG DOTTED LINE FOLD ALONG DOTTED LINE Send a Grizzly Catalog to a friend: Name_______________________________ Street_______________________________ City______________State______Zip______ GRIZZLY INDUSTRIAL, INC. P.O. BOX 2069 BELLINGHAM, WA 98227-2069 TAPE ALONG EDGES--PLEASE DO NOT STAPLE Place Stamp Here...
Need help?
Do you have a question about the G1019 and is the answer not in the manual?
Questions and answers