Table of Contents
Advertisement
Advertisement
Table of Contents

Related Manuals for Grizzly G1019Z


Summary of Contents for Grizzly G1019Z
-
Page 1: Instruction Manual
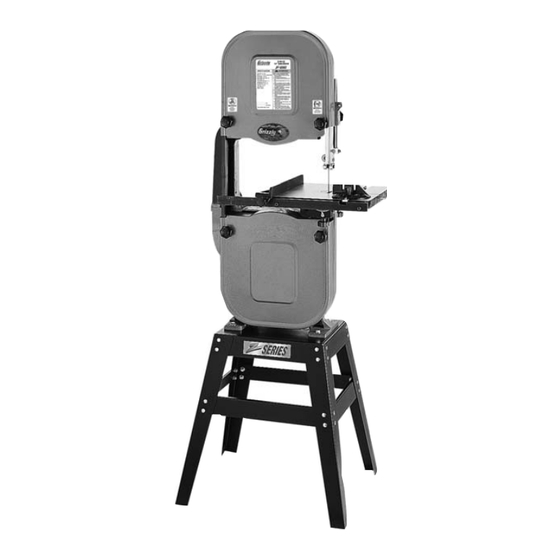
14" Z-SERIES BANDSAW MODEL G1019Z INSTRUCTION MANUAL COPYRIGHT © 1992 BY GRIZZLY INDUSTRIAL, INC. WARNING: NO PORTION OF THIS MANUAL MAY BE REPRODUCED IN ANY SHAPE OR FORM WITHOUT THE WRITTEN APPROVAL OF GRIZZLY INDUSTRIAL, INC. REVISED JULY, 2001 PRINTED IN TAIWAN... - Page 2 WARNING Some dust created by power sanding, sawing, grind- ing, drilling, and other construction activities contains chemicals known to the State of California to cause cancer, birth defects or other reproductive harm. Some examples of these chemicals are: • Lead from lead-based paints. •...
-
Page 3: Table Of Contents
CUTTING CURVES...26 RESAWING ...27 MAINTENANCE GENERAL ...28 TABLE ...28 BEARINGS ...28 V-BELT ...28 WIRING DIAGRAM ...29 CLOSURE ...30 MACHINE DATA ...31 TROUBLESHOOTING ...32 PARTS BREAKDOWN AND PARTS LISTS ...33-37 WARRANTY AND RETURNS...38 Model G1019Z 14" Bandsaw Table Of Contents PAGE... -
Page 4: Section 1: Safety
Model G1019Z 14" Bandsaw VISITORS... - Page 5 12. SECURE WORK. Use clamps or a vise to hold work when practical. It’s safer than using your hand and frees both hands to operate tool. Model G1019Z 14" Bandsaw 13. DON’T OVERREACH. Keep proper foot- 14. MAINTAIN TOOLS WITH CARE. Keep 15. DISCONNECT TOOLS before servicing 16.
-
Page 6: Additional Safety Instructions For Bandsaws
WITH THE POWER OFF and the plug pulled from the outlet. Wait for all moving parts to come to a complete stop. TO BREAK. Develop good habits in your shop and safety will become second nature to you. Model G1019Z 14" Bandsaw... -
Page 7: Circuit Requirements 110V Operation
Figure 1. Typical 110V 3-prong plug and outlet. Model G1019Z 14" Bandsaw 220V Operation The motor supplied with the G1019Z can be oper- ated at either 110V or 220V. The motor comes prewired for 110V. If converting to operate at 220V, a suitable 220V plug must be wired in. -
Page 8: Extension Cords
Bandsaw. These requirements are not nec- essarily comprehensive. You must be sure that your particular electrical configuration plug complies with local and state codes. Ensure compliance by checking with your local municipality or a licensed electrician. Grounding Model G1019Z 14" Bandsaw... -
Page 9: Section 3: Information
We are also pleased to provide this manual with the Model G1019Z. It was written to guide you through assembly, review safety considerations, and cover general operating procedures. It repre- sents our effort to produce the best documenta- tion possible. -
Page 10: Unpacking
Unpacking The Model G1019Z Bandsaw is shipped from the manufacturer in a carefully packed carton. If you discover the machine is damaged after you’ve signed for delivery, please call Customer Service immediately for advice. Save the containers and all packing materials for possible inspection by the carrier or their agent. -
Page 11: Clean Up
Your G1019Z Bandsaw represents a moderately large weight load in a small footprint. Most com- mercial or home shop floors should be sufficient to carry the weight of the G1019Z. If you question the strength of your floor, you can opt to reinforce WORKING CLEARANCES... -
Page 12: Section 4: Assembly
Failure to do so could result in injury. -10- Beginning Assembly Most of your G1019Z Bandsaw has been assem- keep bled at the factory, but some parts must be assembled or installed after delivery. We have organized the assembly process into steps. -
Page 13: Stand
4. Attach each of the four braces to the stand legs with carriage bolts, washers and nuts provided. Do not over tighten. The braces attach to the inside of the legs. See Figure 3. Model G1019Z 14" Bandsaw Figure 3. Completed stand assembly. 5. Press one ⁄... -
Page 14: Bandsaw Unit
Be sure that the pulleys you choose are aligned. Do not try to force the V-belt onto non-aligned grooves. See “Changing Speeds” in the Operations sec- tion to select the proper speed. Cap Screws Figure 5. Cap screws securing motor. Model G1019Z 14" Bandsaw... -
Page 15: Motor
" with moderate finger pressure. 7. Tighten the socket head cap screws securely. Recheck belt tension and pulley alignment. Model G1019Z 14" Bandsaw Switch The switch is premounted on the bandsaw unit and features a lock-out key. To lock-out the switch, move the switch to the off position and then pull out the key. -
Page 16: Table And Table Support Bracket
Do not use excessive force. NOTICE The tapered table pin must be in position in the table when operating the bandsaw. This maintains the table surface flush with no edge for the workpiece to catch on. Model G1019Z 14" Bandsaw... -
Page 17: Fence
3. Insert and tighten the fence locking knob to secure the fence at the desired distance from the blade. Model G1019Z 14" Bandsaw Blades ⁄ " blade is included with the bandsaw and is already installed on the machine. -
Page 18: Section 5: Adjustments
F. This knob is used to control blade tension. Turning counter-clockwise decreases tension. G. This knob controls blade tracking. Note that the knob has a locknut to lock tracking in place. Figure 13. Blade tension and tracking controls. clockwise increases tension; Model G1019Z 14" Bandsaw... -
Page 19: Blade Tension
Proper blade tension can best be achieved by determining the amount of blade deflection: 1. Ensure that the power is off and the saw is unplugged. Raise the upper guide assem- bly all the way and lock in place. -
Page 20: Blade Tracking
See Figure 17. Adjust the shafts in or out so that the upper and lower sup- port bearings are within " of the back edge of the blade. Retighten the thumbscrews. Figure 15. Upper blade guide assembly. Model G1019Z 14" Bandsaw... -
Page 21: Blade Guides
Figure 15A. Eccentric guide post. Figure 16. Lower blade guide assembly. Model G1019Z 14" Bandsaw Guide Blocks For optimum support, the guide block assemblies should be adjusted so they are just behind the gullet line (the hollow points) of the blade. -
Page 22: Table Adjustments
3. Secure the trunnion knobs and lock the pos- itive adjusting bolt by tightening the locknut. Ensure that the bolt does not turn while tightening the locknut. Set the angle pointer to zero for future reference. Figure 20. Squaring table to blade. Model G1019Z 14" Bandsaw... -
Page 23: Blade Lead
Electrical washers are very thin and will allow fine adjust- ment. Model G1019Z 14" Bandsaw Blade Lead Blade lead occurs when you are attempting a straight cut and the blade wanders to one side or the other. -
Page 24: Fence Adjustment
DO NOT attempt to investigate or adjust the machine while it is running. Wait until the machine is turned off, unplugged and all working parts have come to a stop before you do anything! Serious personal injury will result. Model G1019Z 14" Bandsaw... -
Page 25: Section 6: Operations
There are many different jigs that can be built to increase safety, accuracy, and types of cuts. Model G1019Z 14" Bandsaw There are many interrelated adjustment points to keep consider when operating this type of saw. -
Page 26: Blade Information
(7) using a blade with a lumpy or improperly finished weld; and (8), continuously running the bandsaw when not in use. The Grizzly G1019Z 14" Bandsaw uses 98" blades. -24- When removing or installing blades, make sure the power is disconnected and moving parts have come to a complete stop. -
Page 27: Ripping
Use extreme caution when working near the saw blade. Failure to exercise care could result in severe injury. Model G1019Z 14" Bandsaw Ripping is the process of cutting a board into two or more thinner boards, generally in a direction along its length. -
Page 28: Stacked Cuts
Figure 24 lists blade widths and corre- sponding minimum radii each blade will cut. BLADE WIDTH MINIMUM RADII " " " " " " " Figure 24. Minimum circle radius vs. blade size. Model G1019Z 14" Bandsaw " " " " " 4" "... -
Page 29: Resawing
6 ". Although the G1019Z Bandsaw was not specifi- cally designed for resawing, it is capable of resawing, provided the saw is set up properly. Use common sense when resawing; attempting to resaw a board that is too wide or too dense may put excessive strain on the blade and be unsafe. -
Page 30: Section 7: Maintenance
SECTION 7: MAINTENANCE General Regular periodic maintenance on your Model G1019Z Bandsaw will ensure its optimum perfor- mance. Make a habit of inspecting your bandsaw each time you use it. Check for the following con- ditions and repair or replace when necessary. -
Page 31: Wiring Diagram
Wiring Diagram Model G1019Z 14" Bandsaw -29-... -
Page 32: Section 8: Closure
Washington location using the address in the General Information Section. The specifications, drawings, and photographs illustrated in this man- ual represent Model G1019Z as supplied when the manual was prepared. However, due to Grizzy’s policy of continuous improvement, changes may be made at any time with no oblig- ation on the part of Grizzly. -
Page 33: Machine Data
Customer Service #: (570) 546-9663 • To Order Call: (800) 523-4777 • Fax #: (800) 438-5901 GRIZZLY MODEL G1019Z 14" BANDSAW Design Type ...Floor Model Overall Dimensions: Table...13 Overall Height ...65" Height From Floor to Table ...42 Width of Unit ...26"... -
Page 34: Troubleshooting
Inspect and replace blade if necessary. Reduce side pressure. Adjust table. Adjust wheels coplanar. Re-install tires. Replace blade. Replace wheels. Feed workpiece straight into the blade. Install a smaller width blade, and/or increase blade tension. Model G1019Z 14" Bandsaw... -
Page 35: Parts Breakdown And Parts Lists
Model G1019Z 14" Bandsaw -33-... - Page 36 -34- Model G1019Z 14" Bandsaw...
- Page 37 Model G1019Z 14" Bandsaw -35-...
- Page 38 -36- Model G1019Z 14" Bandsaw...
-
Page 39: Parts List
55 P1019Z055 LOWER WHEEL COVER 56 PSS11 SETSCREW 57 P107383A JAM NUT ⁄ 58 P1019Z058 LOWER WHEEL 59A P1019Z059A BELT PULLEY (N/S) Model G1019Z 14" Bandsaw 60A PVM25 61 P1019Z061 ⁄ "-11 x 2 ⁄ " 62 P1019Z062 63 P1019Z063 "... -
Page 40: Warranty And Returns
WARRANTY AND RETURNS Grizzly Industrial, Inc. warrants every product it sells for a period of 1 year to the original purchaser from the date of purchase. This warranty does not apply to defects due directly or indirectly to misuse, abuse, negligence, accidents, repairs or alterations or lack of maintenance. -
Page 41: Warranty Card
Do you think your purchase represents good value? ___Yes Would you recommend Grizzly Industrial to a friend? ___Yes Would you allow us to use your name as a reference for Grizzly customers in your area? Note: We never use names more than three times. ___Yes Comments:_________________________________________________... - Page 42 FOLD ALONG DOTTED LINE FOLD ALONG DOTTED LINE Send a Grizzly Catalog to a friend: Name_______________________________ Street_______________________________ City______________State______Zip______ GRIZZLY INDUSTRIAL, INC. P.O. BOX 2069 BELLINGHAM, WA 98227-2069 TAPE ALONG EDGES--PLEASE DO NOT STAPLE Place Stamp Here...
Need help?
Do you have a question about the G1019Z and is the answer not in the manual?
Questions and answers