Table of Contents
Advertisement
Advertisement
Table of Contents
Troubleshooting

Related Manuals for Samsung SCP-2370RH


Summary of Contents for Samsung SCP-2370RH
-
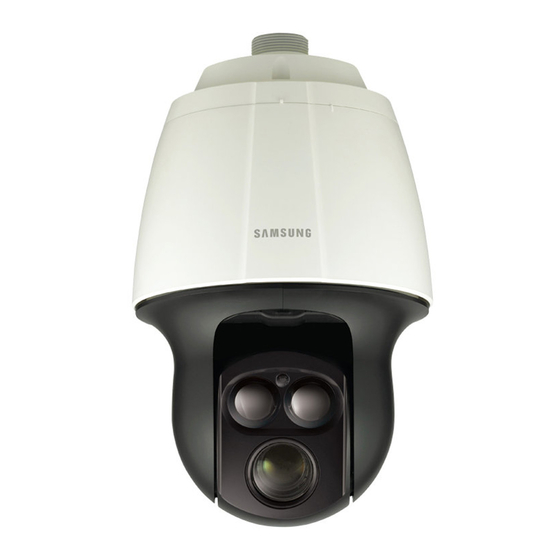
Page 1: Speed Dome Camera
SPEED DOME CAMERA User Manual SCP-2370RH... -
Page 2: User Manual
Samsung Techwin. Disclaimer Samsung Techwin makes the best to verify the integrity and correctness of the contents in this document, but no formal guarantee shall be provided. Use of this document and the subsequent results shall be entirely on the user’s own responsibility. -
Page 3: Safety Information
If this product fails to operate normally, contact the nearest service center. Never disassemble or modify this product in any way. (SAMSUNG is not liable for problems caused by unauthorized modifi cations or attempted repair.) When cleaning, do not spray water directly onto parts of the product. Doing so may cause fi re or electric shock. - Page 4 safety information Keep out of direct sunlight and heat radiation sources. It may cause fi re. Install it in a place with good ventilation. Avoid aiming the camera directly towards extremely bright objects such as sun, as this may damage the CCD image sensor.
-
Page 5: Important Safety Instructions
important safety instructions Read these instructions. Keep these instructions. Heed all warnings. Follow all instructions. Clean only with dry cloth. Do not block any ventilation openings. Install in accordance with the manufacturer’s instructions. Do not install near any heat sources such as radiators, heat registers, or other apparatus (including amplifi... - Page 6 CAUTION These servicing instructions are for use by qualifi ed service personnel only. To reduce the risk of electric shock, do not perform any servicing other than that contained in the operating instructions unless you are qualifi ed to do so. DETAILED WARNINGS AND CAUTIONS Avoid operating the camera for long durations under high temperatures and in high humidity.
- Page 7 The zooming speed of the IR light projector will be deteriorated in a temperature of less than -40 degrees (Celsius). Samsung Techwin cares for the environment at all product manufacturing stages to preserve the environment, and is taking a number of steps to provide customers with more environment-friendly products.The Eco mark represents Samsung Techwin’s...
-
Page 8: Table Of Contents
contents Features INTRODUCTION 10 What’s included 11 Component Names and Functions 12 Camera Wiring Interface Board CONNECTION & 13 Camera and Appliances Wiring Diagram INSTALLATION 15 How to Set Up Protocols and ID DIP Switches 16 Communication Protocol DIP Switch Settings (SW2) 19 Camera ID DIP Switch Settings (SW1) 27 Preparing Adapter and Cables... -
Page 9: Features
Versatile protocols and coaxial communication RS-422/485, Coaxial communication methods are supported. RS-422/485 (10 Protocol) : Auto Detected, SAMSUNG-T, SAMSUNG-E, Pelco (D/P), Panasonic, Vicon, Honeywell, AD, GE, BOSCH Coaxial communication: Pelco Coaxitron (Camera ID DIP switches (SW1) are all positioned to OFF) -
Page 10: What's Included
introduction Preset Position Saving and Loading Up to 255 preset positions can be set. Camera Backup The configuration file of the camera can be saved for later use. This is useful when the camera or its install base are damaged or malfunctions occur. Area Masking If a monitoring location includes a highly private area, the area can be selectively masked on the screen. -
Page 11: Component Names And Functions
COMPONENT NAMES AND FUNCTIONS Front Back ➊ Bottom ➋ ➌ ➊ Safety Wire Holder ➋ SW2: Communication DIP Switch ➌ SW1: ID DIP Switch For the DIP switch settings, please refer to the “Installing Your Camera” on Page 15~19. English - 11... -
Page 12: Connection & Installation
connection & installation CAMERA WIRING INTERFACE BOARD For the camera wiring, please refer to the picture below. (When using coaxial communication, a separate control signal connection is not required.) Alarm/AUX 2.NC 2.NO Alarm/ 2.COM AUX Output 2 2.NC Alarm Input 2.NO 2.COM Alarm/... -
Page 13: Camera And Appliances Wiring Diagram
CAMERA AND APPLIANCES WIRING DIAGRAM Connecting to the Samsung Techwin’s “Stand Alone DVR” RS-485 : RS-422 : Camera Stand Alone DVR Camera Stand Alone DVR T(TXD)+ T(TXD)+ T(TXD)- T(TXD)- R(RXD)+ R(TXD)- English - 13... - Page 14 & installation Connecting to the Samsung Techwin Controller SPC-6000 RS-485 : RS-422 : Camera Camera RXD+ TXD+ RXD- TXD- TXD+ TXD- <Controller> connection & installation...
-
Page 15: How To Set Up Protocols And Id Dip Switches
HOW TO SET UP PROTOCOLS AND ID DIP SWITCHES You can control various settings of the camera system using the Communication and ID DIP switches. Before installing the product, please set up the DIP switches according to the installation environment. Detach the camera frame from the install base, and place the bottom of the frame toward you as shown in the picture below. -
Page 16: Communication Protocol Dip Switch Settings (Sw2)
Transfer Method (RS-485/422) Settings Response Mode Settings 9~10 Backup Mode Settings 11~12 Termination Settings Protocol Settings Select a communication protocol for the camera. Protocol SW2-#1 SW2-#2 SW2-#3 SW2-#4 Auto Detected Samsung-T Samsung-E Pelco-D Pelco-P Panasonic Vicon Honeywell Bosch connection & installation... -
Page 17: Baud Rate Settings
Baud Rate Settings Select the transfer speed of a selected communication protocol. Baud Rate (BPS) SW2-#5 SW2-#6 2,400 4,800 9,600 19,200 Communication Method Settings Select a communication method for the camera. Function SW2- #7 Transfer Mode Switch RS-422 (4Wire) RS-485 (2Wire) Communication Response Settings Select a communication response method for the camera and controller: Response or No Response. -
Page 18: Camera Backup Settings
connection & installation Camera Backup Settings These settings are useful when the camera or its install base are damaged or a malfunction has occurred. When replacing the camera or its install base, you can transfer existing presets and sequence information to the replacement using these settings. Backup Function SW2- #9 SW2- #10... -
Page 19: Camera Id Dip Switch Settings (Sw1)
CAMERA ID DIP SWITCH SETTINGS (SW1) Assign a unique number to each camera to identify itself from the others. In coaxial communication systems, the camera will work normally only if the Camera ID DIP switches (SW1) are all positioned to OFF. The switch is set to “ID: 1”... - Page 20 connection & installation Camera ID Chart SW1-#1 SW1-#2 SW1-#3 SW1-#4 SW1-#5 SW1-#6 SW1-#7 SW1-#8 connection & installation...
- Page 21 SW1-#1 SW1-#2 SW1-#3 SW1-#4 SW1-#5 SW1-#6 SW1-#7 SW1-#8 English - 21...
- Page 22 connection & installation SW1-#1 SW1-#2 SW1-#3 SW1-#4 SW1-#5 SW1-#6 SW1-#7 SW1-#8 connection & installation...
- Page 23 SW1-#1 SW1-#2 SW1-#3 SW1-#4 SW1-#5 SW1-#6 SW1-#7 SW1-#8 English - 23...
- Page 24 connection & installation SW1-#1 SW1-#2 SW1-#3 SW1-#4 SW1-#5 SW1-#6 SW1-#7 SW1-#8 connection & installation...
- Page 25 SW1-#1 SW1-#2 SW1-#3 SW1-#4 SW1-#5 SW1-#6 SW1-#7 SW1-#8 English - 25...
- Page 26 connection & installation SW1-#1 SW1-#2 SW1-#3 SW1-#4 SW1-#5 SW1-#6 SW1-#7 SW1-#8 connection & installation...
-
Page 27: Preparing Adapter And Cables
PREPARING ADAPTER AND CABLES Power Adapter Power adapter has the capacity of AC24V 6A. Video Cable The camera’s video output port is connected to the monitor with a BNC coaxial cable, shown below : If the distance between the camera and the monitor exceeds the recommended maximum, please use an auxiliary video amp. -
Page 28: Product Confi Gurations
connection & installation PRODUCT CONFIGURATIONS ALARM NETWORK BACKUP TELE WIDE VIEW DVD RECORDER OPEN/CLOSE RETURN RS-485 SRD Series ..ALARM NETWORK BACKUP ZOOM FREEZE BACKUP SEARCH TELE WIDE VIEW MODE AUDIO ALRAM MENU DVD RECORDER OPEN/CLOSE RETURN RS-485 SRD Series .. -
Page 29: Preparing & Installing Camera Bracket
PREPARING & INSTALLING CAMERA BRACKET For installation guidelines for brackets and housings, refer to the installation manual that is enclosed with the bracket or housing. ❖ Available Bracket Models Model Item SBP-300WM1 Wall Mount SBP-300WM SBP-300CM Ceiling Mount SBP-300LM Parapet Mount SBP-300KM Corner Mount SBP-300PM... -
Page 30: Optional Accessories For Installation
connection & installation OPTIONAL ACCESSORIES FOR INSTALLATION For your easier installation, you can purchase appropriate optional accessories available. If installing the camera on the wall Wall mount (SBP-300WM1) Wall mount (SBP-300WM) If installing the camera on the ceiling Ceiling Mount (SBP-300CM) connection &... - Page 31 If installing the wall mount (SBP-300WM/SBP-300WM1) on a pole with a diameter of at least 80mm Pole Mount (SBP-300PM) If installing the wall mount (SBP-300WM/SBP-300WM1) on a corner of the wall Corner Mount (SBP-300KM) If installing on a building rooftop Parapet Mount (SBP-300LM) English - 31...
- Page 32 connection & installation Bracket Mounting Wall mount (SBP-300WM1) Wall mount (SBP-300WM) Ceiling Mount (SBP-300CM) Parapet Mount (SBP-300LM) connection & installation...
-
Page 33: Installation
INSTALLATION ❖ Fixing the installation base to the bracket Fix the base with the bracket by turning it clockwise. Hold the bottom latch of the installation base and gently press it down as shown. Please refer to the “Camera Wiring Interface Board” on page 12, Knob connect the wires. - Page 34 connection & installation Assembling the Camera and Installation Base Assemble the installation base and camera by matching the installation direction guides. Attach Camera Turn the camera frame counterclockwise until the protrusions on the camera frame and installation base become matched perfectly. Secure Camera and Installation Base As shown in the picture below, secure the installation base and camera using 3 hexagon...
-
Page 35: Setup
setup INTERFACE SYMBOLS Motion Detection Standby/Operation Display : When in standby mode, the “ ” in the upper right of the screen blinks and then changes to “ ” if motion is detected. Alarm Input Port Status Display : " ① ", " ② ", " ③ ", " ④ ", " ⑤ ", " ⑥ ", " ⑦ ", and " ⑧ " in the upper right of the screen blink. Current Alarm Port Display According to Input Alarm Ports(Priority) : Only one of "... -
Page 36: Using And Setting The Menus
For more detailed information about controls when using a third party controller or a DVR, refer to the user’s manual of that product OSD Commands, Function Chart, and Menu Controls (Applied to Samsung T/Samsung E protocol) This camera can be operated by using two methods: Using hot keys on its dedicated controller, or accessing the OSD (On Screen Display) on the video output. -
Page 37: Osd Menu Chart
OSD Menu Chart You can have an overall view of the menu structure. For more information, refer to the applicable page or section in the manual. Zoom/Focus White Balance Exposure Back Light Camera Setting SSNR SSDR Day & Night Preset Others Swing SEQ Group SEQ... -
Page 38: Camera Setup
setup CAMERA SETUP Zoom and Focus Settings Focus Mode AUTO : Performs continuous auto-focus. MANUAL : Changes the camera mode to Manual Focus. Main Menu ONE SHOT : Auto-focuses the camera once after the Pan, Tilt, or Zoom function is used. Camera Setting Sequence Setting Zoom Tracking... -
Page 39: White Balance
White Balance The White Balance menu adjusts the balance of the screen colors Main Menu under different lighting conditions. Camera Setting ATW : Adjusts the screen color automatically. Sequence Setting (Color Temperature:1800~10500°K) P/T Setting ATW(IN) : Adjusts the screen color to be optimal in an indoor OSD Setting environment. - Page 40 setup Exposure The Exposure settings control the camera’s exposure level. Main Menu Brightness : Adjusts the screen brightness. Camera Setting (Over 50: Brighter, Under 50: Darker) Sequence Setting P/T Setting Iris AUTO : Automatically adjusts the exposure level. OSD Setting MANUAL : Enables manual adjustment of the exposure level.
-
Page 41: Back Light
Back Light The Backlight function is incorporated in the W-V DSP chip, Main Menu developed by Samsung Techwin, which, unlike the old models, provides a sharp image of both object and background against a Camera Setting severe counter-light condition. Sequence Setting... - Page 42 setup HLC Setting The HLC settings selectively eliminates high lights in a limited HLC Setting environment such as the entrance to an apartment parking lot or Level MEDIUM gas station, and is useful to detect a small objects like car license plates.
- Page 43 AGC(Auto Gain Control) AGC (Automatic Gain Control) adjusts the camera’s gain control Main Menu and the screen brightness if the camera has captured an object under low-light conditions. Camera Setting Sequence Setting OFF: P/T Setting AGC does not function. OSD Setting LOW/MEDIUM/HIGH: Alarm Setting As the level increases to HIGH, brighter the captured screen in a...
- Page 44 SSNR(Samsung Super Noise Reduction) SSNR significantly reduces the amount of low luminance noise. Main Menu OFF : Disables the noise reduction function. Camera Setting LOW : Reduces only a small amount of noise, but generates Sequence Setting almost no afterimage.
- Page 45 SSDR(Samsung Super Dynamic Range) SSDR illuminates darker spots of an image while retaining the same Main Menu light level for brighter spots to even out the overall brightness of the image with high contrast between bright and dark spots. Camera Setting...
- Page 46 setup Day & Night The Day & Night function allows the camera to switch between the Main Menu Color and B/W modes. Camera Setting MODE Sequence Setting AUTO : Operates in Color mode most times, and switches P/T Setting to B/W mode if a low light level is detected during OSD Setting nighttime.
- Page 47 Others Sync : Select Internal or Line Lock. Main Menu INTERNAL : Synchronizes the camera’s output timing to the Camera Setting internal crystal. Sequence Setting LINE LOCK : Synchronizes the camera’s output timing to P/T Setting the AC adapter power to synchronize multiple cameras.
-
Page 48: Sequence Setting
setup Sequence Setting Preset This function enables the memorization of a selected location and Main Menu activates the Pan, Tilt, and Zoom functions at that location. Saved Camera Setting locations can be recalled using the Preset Execute command. Sequence Setting Setting Up Preset Numbers : P/T Setting Selecting the Preset Setting menu brings up a screen as shown... - Page 49 PTZF Setting If you open the PTZF setup menu, you will see the following Preset Setting window. You can use the joystick to select a desired number. Preset = 001 (1~255) Select a preset number and press ENTER. You will move to 001 : the setup screen.
- Page 50 setup Preset Name Setting Main Menu Using this function, you can add names to preset locations Camera Setting up to 12 characters. Once a name is entered, use the joystick and the Enter key to Sequence Setting perform the Set command and save the name. P/T Setting OSD Setting Alarm Setting...
- Page 51 Home Position Preset Sets one of the currently configured preset positions as the home Setting position. Edit Home Position Execute Clear Status Execute Preset Recalls a saved preset location. Setting While in the Sequence mode of operation, the actual movement Edit can be slower than specified when moving the camera in the Home Position...
-
Page 52: Swing Seq
setup Swing SEQ The Swing function commands the camera to move between 2 Main Menu selected locations, monitoring the route. Camera Setting Pan Swing : Sequence Setting Activates the Pan function for the Swing operation. P/T Setting OSD Setting Tilt Swing : Alarm Setting Activates the Tilt function for the Swing operation. -
Page 53: Group Seq
Group SEQ Selecting Group SEQ recalls a group of multiple preset locations in a Main Menu consecutive manner. Up to 6 groups can be defined and up to 128 presets can be memorized for each group. Camera Setting During the group operation, the camera settings for each preset will Sequence Setting be retrieved accordingly. -
Page 54: Tour Seq
setup Tour SEQ Selecting Tour SEQ recalls groups of preset locations in a Main Menu consecutive manner. Up to 6 groups can be listed for this function. Camera Setting Setting : Sequence Setting Selecting the Settings menu brings up the following screen. P/T Setting Using the joystick, you can enter desired group numbers to the OSD Setting... -
Page 55: Ptz Trace
Preset Representative Stop saving the Protocol Swing SEQ Model trace Group SEQ PELCO-D/P KDB300A Ack, Iris Open Tour SEQ SAMSUNG-E SSC-5000 OSD ON, Iris Open PTZ Trace PANASONIC WV-CU161C OSD ON Auto Run VICON V1300X-DVC Iris Open Power On Resume... -
Page 56: Auto Run
setup Auto Run If an operator is not controlling the dome at a specific time, the Main Menu sequence operation scheduled by the user will be executed. Camera Setting Mode : Sequence Setting HOME : Auto run Home Position (Refer to the Preset Menu.) P/T Setting PRESET : Auto run a selected preset number. -
Page 57: Power On Resume
Schedule Auto Run Mode SCHEDULE Schedule enables you to set a sequencing action by day and time. Time 30SEC Select Day : At Auto Run, select SCHEDULE to set up each day of the week, as shown on the side picture. Select a day, change to ON, and Schedule Set then press Enter. -
Page 58: P/T Setting
setup P/T Setting Pan/Tilt Limit The moving ranges in the Pan/Tilt directions can be limited. Main Menu Camera Setting Position : Selecting the Position menu brings up the following screen if it is Sequence Setting for the Pan Limit setting. Move the joystick left and right to select P/T Setting a movement range from the starting point to the end. -
Page 59: Area Setting
Area Setting The Area Setting menu enables the selection of certain locations in the Main Menu course of the Pan and Tilt operation, and then display the areas with the OSD (On Screen Display) texts when the camera passes through Camera Setting them. -
Page 60: Area Masking
setup Area Masking If a monitoring location includes a highly private area, the area can be Main Menu selectively excluded from monitoring. Camera Setting Position : Sequence Setting As shown in the picture below, move the joystick to select the upper P/T Setting left corner and lower right corner of an area. - Page 61 Prop. P/T This commands the camera to change the Pan and Tilt speed Main Menu automatically according to the current zoom ratio. Moving the joystick clockwise (Tele) slows down and counterclockwise (Wide) Camera Setting accelerates the Pan and Tilt speed, allowing detailed adjustments. Sequence Setting Turning this “Off”...
-
Page 62: Digital Flip
setup Digital Flip Digital Flip is useful to monitor a moving object or a person passing Main Menu directly under the camera. When the object passes straight under the camera, tilting can be Camera Setting traced up to the opposite tilting area without the need of the pan Sequence Setting operation. - Page 63 Image Holding This will display the preset video in still images until the orientation Main Menu of the camera reaches the preset position at a group or tour movement. Camera Setting This is useful if you want to monitor the video while preventing a Sequence Setting possible visual distraction of the observer.
-
Page 64: Jog Speed
setup Jog Speed The pan/tilt speed changes according to the tilt of the joystick, or Main Menu you can control the operation in a fixed speed. Camera Setting MANUAL : Sequence Setting The pan/tilt speed depends on how much the joystick of the P/T Setting controller is tilted. -
Page 65: Osd Setting
OSD SETTING In this menu, you can configure the OSD (On Screen Display) settings. Main Menu Camera Setting Camera ID : Sequence Setting Displays or hides Camera ID in the upper left of the screen. P/T Setting Camera Name : OSD Setting Add a name to the camera. -
Page 66: Alarm Setting
setup XXX Name When selecting the Camera Name and Preset Name, the screen displays the Left keypad. Names can be up to 12 characters and can be entered via the joystick and the Enter key. Once a name is entered, use the joystick and the Enter key to perform the Set command and save the name. - Page 67 P(Priority) : Set the priority of Alarm Inputs. If more than one alarm is simultaneously activated, the alarm with the highest priority activates before the others. SEQ. : Enables setting up a sequence action for the camera in response to an alarm. You can configure the settings of: HOME/PRESET/SWING/GROUP/TOUR/TRACE/A.PAN/OFF Alarm/AUX Output Main Menu...
- Page 68 setup Connecting the power connector and GND incorrectly to the NC/NO and COM ports may cause a short circuit and fi re, damaging the camera. The maximum power capacity of the built-in relay is 30VDC/2A, 125VAC/0.5A, and 250VAC/0.25A. Operating the camera beyond the capacity may decrease the camera’s lifespan and damage it.
-
Page 69: Ir Illuminator
IR ILLUMINATOR In this menu, you can configure the IR Illuminator settings against a low contrast scene. IR Mode: Specify the use conditions for the IR Illuminator. Off: Does not use the IR Illuminator. Main Menu On: Activates the IR Illuminator. DAY/NIGHT: Synchronizes the IR Illuminator with Day/Night Camera Setting mode of the camera. - Page 70 setup SENSOR: In this mode, the IR mode will be controlled according to the IR Illuminator illumination. The “level” on the top right corner indicates the current illumination. IR Mode SENSOR LED Max.Power MEDIUM LED On Level : Specify the illumination level that activates the IR mode. If the illumination is below the specifi...
-
Page 71: Initialize
INITIALIZE Power On Reset : Main Menu Restarts the camera. Camera Setting Factory Default Set : Sequence Setting Enables resetting the camera to its factory default settings. When the mode is selected, all custom data such as preset locations are P/T Setting deleted from the camera. -
Page 72: Password Setting
CONTROLLER : COAX VER. = V1. 00_110126 Indicates the settings of the current communications mode. PROTOCOL = AUTO DET MODEL NAME : DOME ID = 001 Shows the model name of the product. CONTROLLER = Simplex MODEL NAME = SCP-2370RH setup... -
Page 73: Troubleshooting
troubleshooting TROUBLESHOOTING If the product does not function properly, please see the below for trouble shooting. Problem Cause and Solution Page ► Check if the camera and peripheral devices are properly connected. 12~14 Controller does not work. ► Verify the setups of ID, protocol, and baud rates. 15~26 ►... -
Page 74: Troubleshooting
troubleshooting Problem Cause and Solution Page Afterimages appear in picture. ► Check Sens-Up settings. Camera switches between color ► Adjust Duration and Dwell Time in Day & Night menu. and B&W modes frequently. ► Check if power cable is securely connected to the camera and the monitor. Check if the video cable is properly connected. - Page 75 Problem Cause and Solution Page ► When the camera’s internal temperature drops down to -20º or lower, it becomes unable to transmit video signals and may cause a black screen. I can’t see the screen. ► A black screen does not indicate camera breakage; it resets itself and (The screen is black.) starts displaying video again once its internal temperature reaches -20º...
-
Page 76: Product Specifications
PRODUCT SPECIFICATIONS) Model SCP-2370RH 1/4” Super HAD CCD II Image Device NTSC : 811(H) x 508(V) Total Pixels PAL : 795(H) x 596(V) NTSC : 768(H) x 494(V) Effective Pixels PAL :752(H) x 582(V) Scanning System 2:1 Interlace... - Page 77 Alarm 8 In 3 Out Communication RS-485/422, Coaxial Control Coax : Pelco-C ( Coaxitron ) Protocol RS-485: Auto Detected, SAMSUNG-T, SAMSUNG-E, Pelco(D/P), Panasonic, Vicon,Honeywell,AD,GE,BOSCH Operating Temperature -50°C ~ +55°C / Less than 100% RH / Humidity Ingress Protection IP66 Input Voltage 24V AC ±10%, 50/60Hz...
-
Page 78: Dimensions
product specifications DIMENSIONS Unit : mm (inch) product specifications... - Page 79 MEMO...
- Page 80 SAMSUNG TECHWIN AMERICA Inc. SAMSUNG TECHWIN EUROPE LTD. 100 Challenger Rd. Suite 700 Ridgefield Park, NJ 07660 Samsung House, 1000 Hillswood Drive, Hillswood Business Park Toll Free : +1-877-213-1222 Direct : +1-201-325-6920 Chertsey, Surrey, UNITED KINGDOM KT16 OPS Fax : +1-201-373-0124 TEL : +44-1932-45-5300, FAX : +44-1932-45-5325 www.samsungcctvusa.com...