Table of Contents
Advertisement
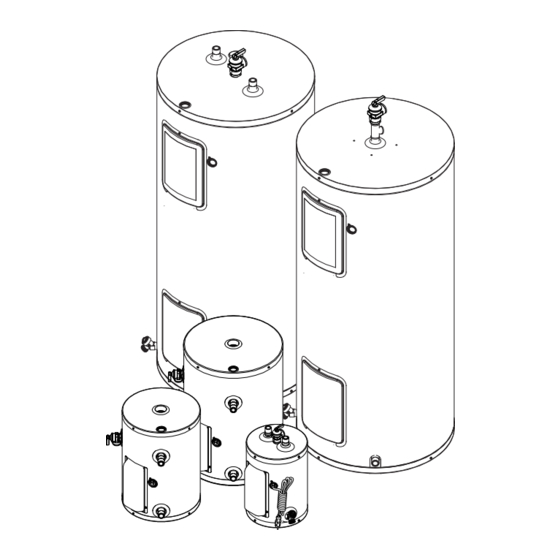
RESIDENTIAL ELECTRIC WATER HEATER
INSTALLATION AND OPERATING INSTRUCTIONS
45.0°
45.0°
48 3/4''
READ THESE INSTRUCTIONS CAREFULLY BEFORE BEGINNING THE INSTALLATION. PROPER INSTALLATION
WILL PROVIDE SAFE AND EFFICIENT SERVICE, AND AVOID NEEDLESS EXPENSE NOT COVERED BY THE
WARRANTY. READ THE PRODUCT WARRANTY CONTAINED IN THIS MANUAL AND REMEMBER TO FILL
OUT AND RETURN TO THE MANUFACTURER ALL RELEVANT WARRANTY CARDS AND CERTIFICATES.
SHOULD YOU HAVE ANY QUESTIONS, PLEASE CONTACT YOUR LOCAL DEALER OR REFER TO THE
GETTING SERVICE FOR YOUR WATER HEATER SECTION OF THIS MANUAL.
SAVE THIS MANUAL FOR FUTURE REFERENCES.
For your records, write the model and serial number here:
Model # ________________________________________
Serial # ________________________________________
54000028
© 2013 Giant Factories Inc. Printed in Canada
OWNER'S MANUAL
If the information in these instructions is not
followed exactly, a fire or explosion may result causing
property damage, personal injury, or death.
• DO NOT REMOVE the element and thermostat access
door before the power to the water heater is turned "OFF".
• DO NOT ATTEMPT to repair or replace any of the
electrical components installed on the water heater before
the power to the water heater is turned "OFF".
• DO NOT USE the water heater on a voltage other than
that specified on the water heater rating plate.
• DO NOT CONNECT the power supply wiring to
anywhere other than the main power connection on the
water heater.
• DO NOT TURN ON the power to the water heater unless
it is completely filled with water.
• DO NOT DRAIN the water heater unless the power
to the water heater has been turned "OFF".
• DO NOT STORE or use gasoline or other flammable
vapours and liquids in the vicinity of this or any other
appliance.
• Immediately turn "OFF" the power to the water heater.
• If after turning "OFF" the power the smoke
continues, call your local fire department.
• When the smoke has stopped, call a qualified service
technician to identify and repair the problem.
IMPORTANT
WARNING
DANGER
AVERTISSEMENT
WHAT TO DO IF YOU SMELL SMOKE
ISO 9001
ENREGISTRÉ
ISO 9001
REGISTRED
®
C
US
GI-IM017En-0113
Advertisement
Table of Contents

Related Manuals for Giant RESIDENTIAL ELECTRIC WATER HEATER


Summary of Contents for Giant RESIDENTIAL ELECTRIC WATER HEATER
- Page 1 GETTING SERVICE FOR YOUR WATER HEATER SECTION OF THIS MANUAL. ISO 9001 SAVE THIS MANUAL FOR FUTURE REFERENCES. ENREGISTRÉ For your records, write the model and serial number here: Model # ________________________________________ ® ISO 9001 Serial # ________________________________________ REGISTRED 54000028 GI-IM017En-0113 © 2013 Giant Factories Inc. Printed in Canada...
-
Page 2: Table Of Contents
TABLE OF CONTENTS Water Temperature Regulation ....9 Safety Information ....... . 2 Installation Instructions . -
Page 3: Installation Instructions
INSTALLATION INSTRUCTIONS Location as shown on the water heater rating plate. It should never be plugged or removed from the opening marked for it on the water heater. This water heater should be located as close as possible to a power supply and to the main use of hot water. - Page 4 INSTALLATION INSTRUCTIONS Figure 1A Models with one (1) element, top entry ID No. Description Hot water outlet Union Hot water manual shut-off valve Temperature & pressure-relief valve Combination outlet nipple/ magnesium anode rod Combination thermostat and high limit reset control Element and thermostat access door Screw-in element Drain valve...
- Page 5 INSTALLATION INSTRUCTIONS Figure 1B Models with two (2) elements, top entry Screw-in type element ID No. Description Check valve, water meter or pressure reducing valve Cold water manual shut-off valve Union Cold water intlet Temperature & pressure-relief valve Expansion tank Overflow tube Dip-tube Drain pan...
-
Page 6: Electrical Connections
INSTALLATION INSTRUCTIONS Electrical Connections Table 1 WARNING Recommended wire and breaker size Recommended Recommended Element Wire Size* Breaker Size This water heater uses an external electrical source for power. Wattage DANGER 120V 208V 240V 120V 208V 240V It must be electrically grounded in accordance with all local 1,500 W codes or, in the absence of local codes, CSA C22.1 Canadian 3,000 W... - Page 7 INSTALLATION INSTRUCTIONS Figure 2C Figure 2B Models with two (2) elements - screw-in type Models with two (2) elements - square flange and TWIST-LOCK type ROUGE ROUGE Voltage Line voltage Voltage Line voltage selon plaque according to selon plaque g to according to signalétique rating plate...
-
Page 8: Installation Checklist
OPERATING INSTRUCTIONS Installation Checklist Location • Is the water heater located close to a power supply and the main use of hot water? .................. L • Is the water heater protected from freezing temperatures? .......................... L • Has a drain pan been installed and piped to a free-flowing drain? ....................... L •... -
Page 9: Start-Up Procedure
GENERAL MAINTENANCE Start-up Procedure Condensation 1) Turn on the circuit breaker at the main service panel. Condensation can form on the surface of the water heater: 1) When the water heater is filled with cold water for the first time. 2) Make sure the fuse box or power switch (if one exists) next to the water heater is pushed to “ON”. -
Page 10: Temperature And Pressure-Relief Valve
GENERAL MAINTENANCE Figure 4 Figure 3 Screw-in element Type élément vissé 03G, 3AG and 04G Models Modèles 03G, 3AG et 04G Replacing a Thermostat (See Figure 3) 1) Turn “OFF” the power to the water heater. 1 - Porte d'accès 2) Remove the element and thermostat access door and the 2 - Support du thermostat 1 - Access door... -
Page 11: Draining The Water Heater
GENERAL MAINTENANCE in well systems. This problem can usually be eliminated or reduced Getting Service for your Water Heater by changing the magnesium anode rod to a type more suitable for If you are having problems with your water heater, follow these three these conditions (aluminum anode rod) and by chlorinating the water easy steps: heater and plumbing system. -
Page 12: Replacement Parts
REPLACEMENT PARTS Figure 5A Model with one (1) element, top entry ID No. Description Combination thermostat and high limit reset control ID No. Description High limit reset control Combination thermostat and high limit reset control Thermostat High limit reset control Element and thermostat access door Thermostat Screw-in element gasket... - Page 13 REPLACEMENT PARTS Figure 5B Num. Description Models with two (2) elements, top entry Compteur d’eau ou clapet ou soupape de réduction de pression ID No. Description Screw-in type element Robinet d’arrêt d’eau froide manuel Upper thermostat with reset Raccord High limit reset control Brise vide Upper thermostat Soupape de sûreté...
-
Page 14: Troubleshooting Guide
TROUBLESHOOTING GUIDE CONDITION CAUSE REMEDY No hot water. Dry-fired element. Replace with new element. Main power supply is “OFF”. Turn “ON” main power supply. Burnt fuse. Replace with new fuse. Circuit breaker has tripped. Reset circuit breaker. High limit reset control has tripped. Reset high limit control by pushing the red reset button. - Page 15 TROUBLESHOOTING GUIDE CONDITION CAUSE REMEDY Fuse contacts oxidized or fuse not Clean contacts and tighten fuse. Fuse burns often. screwed in tight enough. Power supply wiring is undersized. See Table 1 for correct wiring size. Lightning/Power surge. Inspect/replace fuse, element, and thermostat. Smoking wiring.
Need help?
Do you have a question about the RESIDENTIAL ELECTRIC WATER HEATER and is the answer not in the manual?
Questions and answers
How can you tell the year of your hot water tank?
You can determine the year of a Giant Residential Electric Water Heater by checking the serial number on the unit. The manual provides a space to record the serial number, which can be used for reference. Typically, manufacturers encode the production year within the serial number. If the format is unclear, you may need to contact the manufacturer or refer to their documentation for decoding instructions.
This answer is automatically generated