Table of Contents
Advertisement
Quick Links
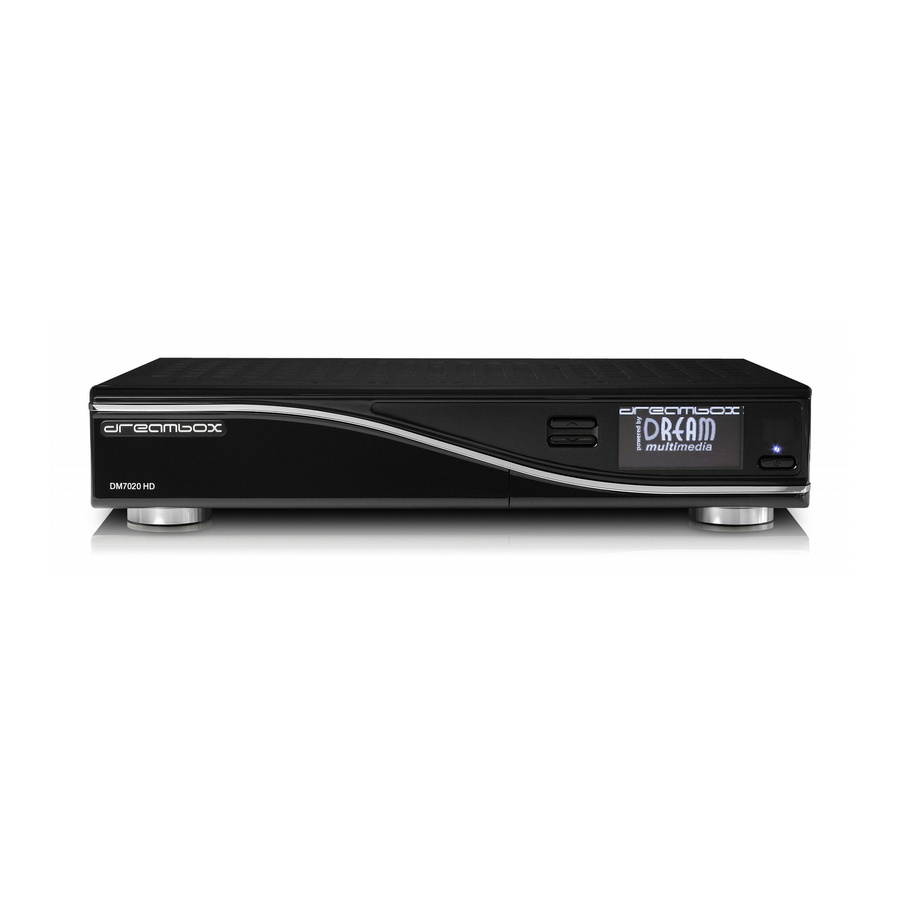
dreambox
DM7020 HD
User Manual
Digital satellite receiver for free and encrypted Digital
Video Broadcasting (DVB) with optional digital record-
ing capability.
HDTV
PNP DVB-S2 Tuner
PNP DVB-C/T Hybrid Tuner
Ethernet-Port 10/100 Mbit
contrasty OLED-Display
2x Common Interface
2x Smartcard-Reader Dreamcrypt
eSATA-Connector
3x USB 2.0
Scart
HDMI
Enigma2 (Linux OS)
Advertisement
Table of Contents

Related Manuals for Dreambox DM7020 HD


Summary of Contents for Dreambox DM7020 HD
-
Page 1: User Manual
DM7020 HD User Manual Digital satellite receiver for free and encrypted Digital 2x Common Interface Video Broadcasting (DVB) with optional digital record- 2x Smartcard-Reader Dreamcrypt ing capability. eSATA-Connector HDTV 3x USB 2.0 Scart PNP DVB-S2 Tuner HDMI PNP DVB-C/T Hybrid Tuner... - Page 2 Please note that the range of functions expands continiously by new software updates. If you updated the software of your dreambox or found some failure in the manual, please check if a new version is available in the download section of our website www.dreambox.de.
-
Page 3: Table Of Contents
3 Basic operation 3.1 Turning your Dreambox on and off ....... . . 17 3.2 Service selection... - Page 4 4.4 Remove a service from favorites ........32 4.5 Moving a service to favorites .
- Page 5 7.2 DVB-C Tuner configuration ........64 7.2.1 Tuner B setup (DVB-C) .
-
Page 6: Before Initial Operation Of The Receiver
Shut down • In case your Dreambox is in use for a longer period of time disconnect the power plug from the power outlet. • During thunder storm the unit should also be physically disconnected from the power outlet. -
Page 7: Additional Safety Instructions
Additional safety instructions • (Dis-)Connecting to a LNB: Turn the Dreambox off before you connect or disconnect a cable coming from or going to a LNB. • Connection to the cable wall box or terrestrial antenna: Before connecting or disconnecting your antenna cable to the Dreambox please turn it off. -
Page 8: Packaging Contents
Disposal instructions The packaging of the Dreambox only consists of reusable materials. Please recycle if possible. This symbol on the product or on its packaging indicates that this product must not be disposed of with your other household waste. Instead, it is your responsibility to dispose of your waste equipment by handing it over to a designated collection point for the recycling of waste electrical and electronic equipment. -
Page 9: Views
OLED display The OLED-Display shows all major information. IR sensor The remote control sensor receives the infrared signals of the Dream Remote Control. Status LED The Status-LED indicates the Standby-Status of your Dreambox. Standby button The Standby-Button switches your Dreambox on and off. -
Page 10: Rear View
Amplifier or DSP. The AC3 signal is also available at this port in case the selected channel transmits Dolby Digital signals. HDMI output You can connect a TV to the HDMI out of your Dreambox if your TV has the right input. - Page 11 Dreambox via HTTP, FTP, NFS, Telnet, SSH and Samba to access your recorded movies, to upload channel lists, etc. This port is also used to update the operating system of your Dreambox. Please use a regular patch cable to connect your Dreambox to your LAN.
-
Page 12: Remote Control
1.4 Remote control Battery charge indicator Standby-Button HELP-Button DREAM-Mode-Button TV-Mode-Button HELP Numeric Keypad pqrs wxyz Arrow-Left-Button Arrow-Right-Button Options-Buttons INFO MENU INFO-Button MENU-Button Navigation-Buttons OK-Button AUDIO AUDIO-Button PVR-Button EXIT-Button EXIT Volume +/- Buttons Bouquet +/- Buttons Mute-Button Rewind-Button Fast Forward-Button PLAY/PAUSE-Button STOP-Button RADIO TEXT... - Page 13 Battery charge indicator indicates the status of the battery voltage. Standby-Button The Standby-Button switches your Dreambox on and off. (see Chapter Turning your Dreambox on and off on page 17) DREAM-Mode-Button The DREAM-Mode-Button switches your remote control into Dreambox con- trol mode.
-
Page 14: Important Notes About Operation
All functions of the Dreambox can be controlled via OSD-Menu (On-Screen-Display). This makes the handling of the Dreambox very easy for you. All options are indicated by four colored dots or beams (red, green, yellow, blue) in the OSD-Menu and can be started with the Option-Buttons on the Remote Control. -
Page 15: Start-Up
Before using the Dreambox, please read the safety instructions under Chapter Safety instructions on page 1. In the following is described how to connect the dreambox to a Satellite-dish, a cable connection, a terrestrial connection, an a/v receiver, a tv-device and a network. 2.1.1 Satellite Dish (DVB-S/S2) Connect the (LNB) with a suitable coax cable to the LNB-Input of your Dreambox. -
Page 16: A/V Receiver
Connection via optical fiber cable If your a/v receiver (amplifier) has a suitable optcial S/PDIF Input, connect the connection jack S/PDIF OPTICAL at the Dreambox with an optical fiber cable (toslink) with the optcial S/PDIF Input of your amplifier. Dream-Multimedia GmbH... - Page 17 Connection via HDMI cable Use an hdmi-cable to connect the hdmi-out of your dreambox to an hdmi-input of the a/v receiver. After that take a second hdmi-cable for connecting the hdmi-out of your a/v receiver to the hdmi-input of the tv-device.
-
Page 18: Television
Connect the dreambox with the hdmi or scart-cable mit dem TV-input of your television. At least use the hdmi-interface for getting the best picture quality (through digital transmission). You can use the supplied HDMI cable for connecting the dreambox with the hdmi-input of your television. -
Page 19: Network
2.1.6 Network Connection via network cable Dream-Multimedia GmbH Video Power OFF/ON 230 /110V ~ 110/230V / 50/60Hz Tuner B Tuner A Audio S/PDIF eSATA Service Scart TV HDMI Ethernet optical +/- 15% Connection via WLAN-network WLAN USB connector WLAN router... -
Page 20: Turning The Device On
2.3 Start wizard If you switch on your Dreambox for the first time, you will see the setup wizard. The setup wizard will guide you through the first time installation. Follow the instructions on the screen and use the Navigation- ) and the OK-Button. - Page 21 Parental control makes it possible to lock selected channels. Detailed information can be found under Parental control on page 34. Chapter Network The network wizard will assist you with the network setup of your Dreambox. Detailed information can be found under Chapter Network on page 52.
-
Page 22: Basic Operation
) choose the option “Deep- Standby” and press the OK-Button. 3. Alternatively you can push down the Standby-Button on your Dreambox for 5 seconds. If no OSD Menu is visible on the screen this will also put your reambox into Deep-Standby-Mode. (If the OSD Menu is still open press the EXIT-Button). -
Page 23: Service Selection
3.2 Service selection Pressing the Navigation-Buttons ( ) on your Dreambox remote control will take you to the previous or next service. Pressing the 0 on the Numeric-Keypad will enable you to skip back and forth between the two most recently watched services. -
Page 24: Controlling The Volume
3.4 Controlling the volume The Volume +/- Buttons control the volume of the audio. Pressing + will make turn it up and pressing - will turn it down. Pressing the MUTE-Button mutes the volume. A crossed speaker symbol will appear on the screen. 3.5 Changing the audio track Pressing the AUDIO-Button in TV or Radio Mode. -
Page 25: Subtitles
3.8 Subtitles Follow this steps: 1. In TV- or Radio Mode press the AUDIO-Button. 2. By pressing the yellow Options-Button a list with the available subtitles will show up. 3. With the Navigation-Buttons ( ) select a desired subtitle and press the OK-Button to activate. The screenshot on the left shows you an example of how a subtitle looks. -
Page 26: Infobar
3.9 Infobar The Infobar appears when switching a channel and shows all necessary Information about the selected service. By pressing the OK-Button you can open the Infobar if needed! Active tuner Signal level Error rate Channel name Current time Progress bar Current show Next show Remaining time... -
Page 27: Electronic Program Guide - Epg
“Multi-EPG” (see Chapter 3.10 auf Seite 24). The Dreambox automatically searches for similar broadcasts in the background. If one or more similar broadcasts are found the label “Similar” will appear in the red window. Pressing the red Options-Button opens a listing of similar broadcasts. - Page 28 Single-EPG In this view you are supplied with detailed information about the currently selected channel’s programming. Follow this steps: 1. Press the INFO-Button. 2. Press the yellow Options-Button for getting the “Single-EPG” view. You can also access this view by pressing: 1.
- Page 29 Multi-EPG Follow this steps: 1. Press the Info-Button. 2. Press the blue Options-Button for switching to “Multi-EPG” view. Use the blue and yellow Options-Buttons to switch between the now, next and more views. Pressing the green Options-Button will give you the possibility to automatically copy the start and end time of the selected show into a recording timer.
- Page 30 Time/Date Input Press the Menu-Button in the Multi-EPG view. A window will appear where you can enter a time and date. After you have entered the desired time and date press the OK-Button to activate you selection. Graphical Multi-EPG You have another option to view the EPG of different services and successive shows. The Graphical Multi- EPG displays the EPG overview of the upcoming hours (can be set to 1-5 hours with the Buttons 1-5 on the Numeric-Keypad) for the chosen bouquet.
-
Page 31: Teletext (Videotext)
Time/Date Input Press the Menu-Button in the Multi-EPG view. A window will appear where you can enter a time and date. After you have entered the desired time and date press the OK-Button to activate your selection. 3.11 Teletext (Videotext) Press the Text-Button to enter the Teletext. - Page 32 the search is finished you can use the Navigation-Buttons ( ) to select the Teletext of another service without having to switch services. Press the OK-Button to select the desired Teletext. This option is only available if more than one service on the current satellite transponder actually transmits Teletext information.
-
Page 33: Picture-In-Picture Mode (Pip)
3.12 Picture-in-Picture mode (PiP) The Dreambox has a so called PiP-Function. With PiP you can display a small TV picture on top of the main big TV picture. Double press the blue Options-Button to activate Picture-in-Picture mode. activated Picture-in-Picture mode The main TV picture is now additionally displayed as a small PiP in the upper right corner of your screen and the last watched service is displayed in the main big TV picture. -
Page 34: Sleep Timer
3.13 Sleep timer Using the sleep timer you can put your Dreambox into standby or turn it off after a predeterminedamount of time. Follow this steps: 1. Press the Menu-Button to open the main OSD menu. 2. With the Navigation-Buttons ( ) choose the option “Standby / Restart”... -
Page 35: Edit The Channellist
Chapter 4 Edit the channellist What is a bouquet? A bouquet can be thought of something like a folder. Every channel equals a page in this folder and the pages are sorted into categories. This way you can create a bouquet called “Kids”, for example, under which you “file” all children’s stations. Another example would be to create a bouquet called “Sports”... -
Page 36: Add A Service To Favorites
4.2 Add a service to favorites If you want to add a service to your Favorites-view you can choose from services in the All-, Satellites- and Provider-views. You can switch views by pressing the red, green, yellow and blue Options- Buttons. -
Page 37: Remove A Service From Favorites
4.4 Remove a service from favorites 1. Press the Navigation-Buttons ( ) to open the channellist. 2. With the Navigation-Buttons ( ) choose the channel you want to delete. 3. By pressing the MENU-Button the “Channellist menu” will open up. 4. -
Page 38: Alternative Services
4.7 Alternative services Incase you are using two different types of tuners in your Dreambox, for example a DVB-S and a DVB-T tuner, you can link services that you receive on both tuners in the “alternative services” list. -
Page 39: Parental Control
How to link services will be explained in the following steps. 1. Press the Navigation-Buttons ( ) to open the channellist. 2. With the Navigation-Buttons ( ) choose the service for which you want to add an Alternative. 3. By pressing the MENU-Button the “Channellist menu” will open up. 4. - Page 40 In this example we decided to lock the service called “ProSieben”. Accordingly we selected the “P” as the first letter. The Parental control services Editor will open up. All services beginning with the letter “P” are shown. 5. With the Navigation-Buttons ( ) choose the service “ProSieben”...
-
Page 41: Hard Disk Operation
Hint: When using an external eSATA HDD it must have an own power supply!!! 5.1 Installation-Guide This capter describes how to install a 3,5“ SATA Hard disk in your Dreambox DM7020 HD. Please always adhere to ESD (Electrostatic Discharge) regulations when handling electronic devices. -
Page 42: Opening The Device
Opening the device 1. Unscrew the screw(s) on the left and right side of your Dreambox. Remove screw(s) on the left and right side 2. Remove the screw(s) on the rear panel, marked on the picture. Dream-Multimedia GmbH Video Power OFF/ON... - Page 43 1. Place the hard disk into the hard disk cage, ensure that the connection port is pointing towards the back of the dreambox. Place the hard disk carefully into the plug of the hard disk cage. Placing hdd to hard disk cage (Fig. 1)
- Page 44 Opening the device on page 37) backwards. 4. Reattach all necessary cables to your Dreambox making sure that you connect the power cord as last. Before you can use your hard disk for recordings it has to be initialized by the box as described in Initialization on page 40.
-
Page 45: Management
5.2 Management 1. Press the Menu-Button to open the main OSD menu. 2. With the Navigation-Buttons ( ) choose the option “Setup” and press the OK-Button. 3. With the Navigation-Buttons ( ) choose the option “System” and press the OK-Button. 4. -
Page 46: Recording
5.3 Recording 5.3.1 Instant recording Press the Record-Button. You have five available options. 1. Add recording (indefinitely) 2. Add recording (stop after current event) 3. Add recording (enter recording duration) 4. Add recording (enter recording endtime) 5. Don’t record Use the up/down-Buttons to navigate to you desired selection and press the OK-Button to select. A ongoing recording is indicated by a flashing symbol in the Infobar (see Chapter Infobar on page 21). - Page 47 For all four options you can set a date for the first execution of the timer You can decide what should happen after the recording finishes by selecting the “After event” option. You can choose between auto to keep your Dreambox in the same state as before the recording do nothing to keep your Dreambox turned on after the recording...
- Page 48 Programming via EPG Change into on of the EPG views in chapter (as described in Chapter 3.10 Electronic Program Guide - EPG on page 22). By pressing the green Options-Button you have the option to automatically add the selected show with it’s start and end time as a timer. All other options are the same as in the manually added timer.
-
Page 49: Recording By Timer 5.3.4 Timeshift
If you pressed the blue Options-Button you will be asked if you really want to delete the finished timer. Use the Navigation-Buttons ( ) to select. Press the OK-Button to activate. Your Dreambox will be turned on 5 minutes before the recording if a recording is supposed to start while the Dreambox is in Deep-Standby mode. 5.3.4 Timeshift Press the PLAY/PAUSE-Button to pause the screen (video and audio will pause). - Page 50 List of recordings Fast Forward-Button = Fast Forward Keep in mind that you have to be in the PVR-Mode to use these options. You can check this by pressing the OK-Button. The Infobar will reveal and should show the depicted control symbols. If they are not shown you simply have to press the PVR-Button.
-
Page 51: Watch A Recording (Playback)
5.5 Setting a marker (Bookmarks) Fast forward to the point where you want to add a marker and press the 0 on the Numeric-Keypad. This will set a marker at the desired point. Infobar Movieplayer with Markers The red dashes in the timeline correlate to a marker. Skip to a marker You can directly skip to a previously set marker during playback. - Page 52 List styles You have the choice between different list styles: List style default with ex- List style default tended description List style single line List style compact with de- List style compact sciption...
-
Page 53: Setup
Chapter 6 Setup 6.1 Language 1. If no OSD menu is visible on your screen, press the Menu-Button to open the main OSD menu. 2. With the Navigation-Buttons ( ) choose the option “Setup” and press the OK-Button. 3. With the Navigation-Buttons ( ) choose the option “System”... -
Page 54: Intermediate Mode
These settings supplement the settings in simple mode. Recordings always have priority: If this option is set to “Yes” your Dreambox will automatically switch to the service which is supposed to be recorded incase there is a conflict with an existing timer. If you set this option to “No”... - Page 55 HDMI If you have connected your TV to the HDMI output of your Dreambox set the “Output type” option to “HDMI”. Scart If you have connected your TV to the Scart output of your Dreambox set the “Output type” option to “Scart”.
-
Page 56: Oled-Display
Mode Scart Select the standard supported by your TV screen. This is usually either PAL or NTSC. If you own a TV screen which supports both modes you can also select the Multi option. Your TV screen will automatically switch depending on the input signal. These options are only available ifthe output type is set to “Scart”. -
Page 57: Network
Use interface This option toggles the integrated ethernet interface on and off. Use DHCP If enabled your Dreambox will get its IP from a DHCP server. If you are using a router to access the internet you usually have a DHCP server. Disable this option to set a static IP address. -
Page 58: Integrated Wireless (Wlan)
Network Wizard The network wizard will assist you with the setup of you network. 6.6.2 Integrated wireless (WLAN) Hint: Please remember to insert the WLAN-USB-Stick into the dreambox before you switch the device on. 1. Press the Menu-Button to open the main OSD menu. - Page 59 Use interface This options toggles the integrated ethernet interface on and off. Use DHCP If set to “yes” your Dreambox will get its IP from a DHCP server. If you are using a router to access the internet you usually have a DHCP server. Disable this option to set a static IP address.
-
Page 60: Common-Interface
Virtual Keyboard Virtual Keyboard Use the Navigation-Buttons ( ) to select a character and press the OK-Button to enter it into the text field. Once you have enterred the complete encryption key press the green Options-Button so save the key or the red Options-Button to discard it. -
Page 61: Skin
Reset This options resets your CI-Module. This function is needed if you are experiencing trouble with one of your encrypted services. Init This option initializes an inserted Smartcard. It is recommended to inset the CI-Module with the Smartcard already in it. No module found No CI-Module is inserted into the slot. -
Page 62: Factory Reset
) choose the option “Factory Reset” and press the OK-Button. You will be asked if you really want to reset all your settings to the factory defaults. If you select “yes” all your settings and bouquets will be lost. Afterwards your Dreambox will be restarted automatically. -
Page 63: Service Searching
Service searching In this chapter you will learn how to setup the tunerconfiguration for the reception with a satellite-dish (DVB-S/S2), via cable television (DVB-C) or via digital terrestrial television (DVB-T) in your dreambox and how to perform a service scan. -
Page 64: Two Satellites Via Toneburst A/B
Connect the two coax cables form the two LNBs to a so-called Toneburst switch and connect the coax cable from the Toneburst switch to your Dreambox. Two satellites via Toneburst Follow this steps: 1. -
Page 65: Two Satellites Via Diseqc A/B
9. With the Navigation-Buttons ( ) choose the desired Satellite. 10. With the Navigation-Buttons ( ) choose the option “Port B”. 11. With the Navigation-Buttons ( ) choose the desired Satellite. 12. Press the OK-Button to save this settings. Make sure you know which satellite is connected to which input on the Toneburst switch. If you do not find any services in the transponder scan later, exchange the two satellites in this list and try again. -
Page 66: Four Satellites Via Diseqc A/B/C/D
9. With the Navigation-Buttons ( ) choose the desired Satellite. 10. With the Navigation-Buttons ( ) choose the option “Port B”. 11. With the Navigation-Buttons ( ) choose the desired Satellite. 12. Press the OK-Button to save this settings. Make sure you know which satellite is connected to which input on the Toneburst switch. If you do not find any services in the transponder scan later, exchange the two satellites in this list and try again. -
Page 67: Stab Positioner Using Usals
find the coordinates of your residence. http://www.heavens-above.com The rest is done automatically by your Dreambox with build-in USALS. USALS is a model for calculating the position of all satellites in orbit with a margin of error less than 0.1 degrees. USALS was developed by the Stab company. -
Page 68: Stab Positioner Without Usals
7.1.6 Stab Positioner without USALS Use this type of configuration if you want to receive many satellites without a Stab positioner from a Single Universal LNB. The coax cable is directly connected from you Dreambox to the LNB. Stab Positioner without USALS Follow this steps: 1. -
Page 69: Tuner B Setup
4. With the Navigation-Buttons ( ) choose the option “Tuner configuration” and press the OK- Button. 5. With the Navigation-Buttons ( ) choose the option “DVB-S2 Tuner” and press the OK-Button. 6. With the Navigation-Buttons ( ) choose the option “Configuration”. 7. -
Page 70: Tuner B Setup (Dvb-C)
4. Use the Numeric-Keypad to set the step increment. 5. Press the OK-Button to save this settings. 7.2.1 Tuner B setup (DVB-C) The same setup possibilities apply if you are using a second DVB-C tuner in your Dreambox (see Chapter DVB-C Tuner configuration on page 64). -
Page 71: Dvb-T Tuner-Configuration
“Enable 5V for active antenna” option to “On”. 8. Press the OK-Button to save this settings. 7.3.1 Tuner B setup (DVB-T) The same setup possibilities apply if you are using a second DVB-T tuner in your Dreambox (see Chapter DVB-T Tuner-Configuration on page 66). 7.4 Automatic scan Follow this steps: 1. - Page 72 4. With the Navigation-Buttons ( ) choose the option “Automatic scan” and press the OK-Button. 5. Set all tuners with which you want to search to “yes”. Use the Navigation-Buttons ( ) choose the tuner and the Navigation-Buttons ( ) to switch to “yes”. 6.
- Page 73 You can see the progress of the scan here. The scan is done once you see this menu. It shows how many channels were found during the scan. Press the OK-Button to store the found channels or the EXIT-Button to cancel.
-
Page 74: Manual Scan
7.5 Manual scan Follow this steps: 1. Press the Menu-Button to open the main OSD menu. 2. With the Navigation-Buttons ( ) choose the option “Setup” and press the OK-Button. 3. With the Navigation-Buttons ( ) choose the option “Service searching” and press the OK- Button. -
Page 75: Systeminformation
Chapter 8 Systeminformation 8.1 Service This window shows detailed technical information about the current service. Kanal-Informationen Follow this steps: 1. Press the MENU-Button in order to open the main menu. 2. Navigate to the option “Information” and press the OK-Button. The “Information”... -
Page 76: About (Hard- And Software)
8.2 About (Hard- and Software) This window shows all relevant information about the Hard- and Software of your Dreambox. Hardware- and Software-Information Follow this steps: 1. Press the MENU-Button in order to open the main menu. 2. Navigate to the option “Information” and press the OK-Button. -
Page 77: Updating The Software
Chapter 9 Updating the software 9.1 Backing up your settings Before installing newer software on your Dreambox you should backup your settings, otherwise they will be lost. 1. Press the Menu-Button to open the main OSD menu. 2. With the Navigation-Buttons ( ) choose the option “Setup”... -
Page 78: Updating A New Software
9.3 Updating a new software 9.3.1 using the DreamUP program How do I install new software on my Dreambox DM7020 HD ? Requirements: • PC with Windows operating system • DreamUP software (current version under http://www.dreambox.de) • 1 mini-usb-to-usb cable •... - Page 79 7. Select the com-port which the “mini-USB-to-USB-cable” is connected to, as described above. In our example “COM4”. 8. Check the “Use network” box if your PC and Dreambox are connected using a network cable The software update can be done without network sup- port, but it takes at least 30 minutes.
- Page 80 12. After the flash loader has been transferred to your Dreambox select the “Flash Box” Button in the DreamUp software. 13. Select the software image and click on the “Open” button. 14. The new software is now being transferred to your Dreambox.
-
Page 81: With Browser
“*.nfi”. You can’t flash other images like “*.img” files. Don’t try it - it won’t work. If you connect your dreambox directly to the pc you need a “Cross-Over” networkcable, if you connect your Dreambox to a switch/hub/router you need a (“common” networkcable - a so-called patchcable. To flash a new image, you can use the second stage loader. - Page 82 You need to know which IP to give to your Dreambox If you don’t know which IP to choose, please ask someone who can help you. You can choose any IP which is "near" your PC’s IP address, but the IP should not be used by any other device.
-
Page 83: Troubleshooting
Batteries are inserted incorrectly Remove batteries and check polar- Batteries are empty Insert new batteries Wrong remote control mode Press Dream-Mode or TV-Mode (Dream-Mode, TV-Mode) button Software is not reacting Reboot Dreambox Dreambox does not react Dreambox is locked up Reboot Dreambox... -
Page 84: Tv-Mode Setup
Chapter 11 TV-Mode setup With the Dreambox remote control you have the possibility to control the dreambox and your tv device with only one remote control. In order that your tv device reacts to the signals of the remote control, you have to program it before. - Page 85 3. Press the desired button on the dreambox rcu, (except the DREAM- and the TV-Mode-Button) which you want to program. 4. Place the dreambox rcu and the tv-device rcu towards each other at a distance of ˜ 3-5 cm. Remote control...
- Page 86 TV-Mode By pressing the TV-Mode-Button the remote control unit switches to the tv-mode and the last stored rcu-code is used. Now you can use the dreambox rcu instead of the tv-device rcu in order to control your tv-device. Duration of lighting of the Dreambox-Symbol You can adjust (in seconds) the duration of how long the dreambox-symbol at the bottom is lit-up after you once pressed a button on the rcu.
-
Page 87: Technical Data
Chapter 12 Technical data • 400 MHz MIPS Prozessor • Enigma2 (Linux OS) • MPEG2 / H.264 Hardware decoding (DVB compliant) • 2x Smartcard-Reader (Dreamcrypt™) • 2x DVB Common-Interface • HDMI • Scart (TV) • 10/100 Mbit compatible Ethernet Interface •... - Page 88 Additional info: DVB/S2-Tuner: supports DVB-S2 Broadcast Services profile Frequency Range: 950 - 2150 MHz Demodulation DVB-S (QPSK) EN 302 307 Signal Level Input - 65 dBm...- 25 dBm Noise factor 12 dB max. DBS-Tuner Input Connector F-Type female Input Impedance 75 Ohm AFC-Capture range: +/- 3 MHz Demodulation Shaped QPSK und 8PSK FEC Viterbi and Reed-Solomon...
- Page 89 Function: Update of Firmware Ethernet: 10/100 Mbit compatible Interface Function: Update of Firmware USB: USB 2.0 Host (3x) SATA-Interface: Connector for internal 3,5” HDD external eSATA-Connector LNB power and polarisation per tuner: LNB Current 500mA max. ; short-circuit-proof LNB Voltage vertical < 14V without load, > 11,5V at 400mA LNB Voltage horizontal <...
-
Page 90: Features
Chapter 13 Features • Single-EPG (Electronic Program Guide): sortable by date or alphabetically • Automatic search for additional air dates of a show and easy recording them by timer • Multi-EPG: graphically and text-based • up to 8 simultaneous recording (4 for each Transponder) •... - Page 91 • Easy expansion of the base function with the use of Plugins • Remote controllable via Web-Interface and streaming of the TV-/Radio stations to any PC connected to the Dreambox through network • mp3 playback • Skinable OSD in many languages...
-
Page 92: Contact & Support Information
Chapter 14 Contact & Support Information Headquarter & Distribution: Dream-Multimedia GmbH Pierbusch 24-26 44536 Lünen Germany Dealer’s Hotline: (Dealers only) Tel.: +49 (0)180 - 3 44 11 30 992 Fax: +49 (0)180 - 3 44 11 30 993 You can reach the dealer’s hotline from: Mo - Fr. - Page 93 Dealers & Pricing: E-Mail: info@dream-multimedia-tv.de Technical Support: E-Mail: support@dream-multimedia-tv.de Website: Weblink: http://www.dreambox.de Support Forum: Weblink: http://www.dreambox.de/board Software Support (actual images): Weblink DM7020 HD: http://www.dm7020hd.de...
-
Page 94: Copyright Notes
Enigma2 is property of Dream Multimedia GmbH. All copyrights with regard to Enigma2 belong to Dream Multimedia GmbH only. The copyrights with regard to plug-ins may belong to third parties. Any existing version of Enigma2, original or derived, may only be used by the owner of a Dreambox for private purposes only.
Need help?
Do you have a question about the DM7020 HD and is the answer not in the manual?
Questions and answers