Table of Contents
Advertisement
Quick Links
dreambox
DM800 HD se
User Manual
Digital satellite receiver for free and encrypted Digital
Video Broadcasting (DVB) with optional digital record-
ing capability.
HDTV
HDMI-Interface
DVB-S2 Tuner plugable
Ethernet-Port 10/100 Mbit
internal SATA harddisk connector
eSATA-interface
colored OLED display
Linux OS
Advertisement
Table of Contents

Related Manuals for Dreambox Dreambox DM800 HD se


Summary of Contents for Dreambox Dreambox DM800 HD se
-
Page 1: User Manual
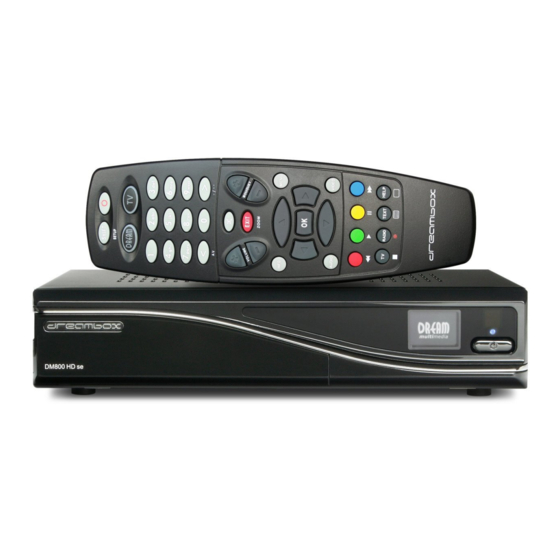
dreambox DM800 HD se User Manual Digital satellite receiver for free and encrypted Digital Video Broadcasting (DVB) with optional digital record- ing capability. HDTV HDMI-Interface DVB-S2 Tuner plugable Ethernet-Port 10/100 Mbit internal SATA harddisk connector eSATA-interface colored OLED display Linux OS... - Page 2 We hope that you take much pleasure in your new dreambox DM800 HD se. Your Dream-Multimedia Team The Dreambox DM800 HD se got the -Sign and fulfills all necessary EU-Norms.
-
Page 3: Table Of Contents
Contents 1 Before initial operation of the receiver 1.1 Safety instructions ......... . 1.2 Packaging contents . - Page 4 4.7 Parental control ..........31 5 Hard disk operation 5.1 Installation-Guide .
- Page 5 9 Updating the software 9.1 Backing up your settings ........66 9.2 Restoring your settings .
-
Page 6: Before Initial Operation Of The Receiver
Chapter 1 Before initial operation of the receiver 1.1 Safety instructions Please read the safety instructions completely and carefully, before using the Dreambox. The Manufacturer takes no responsibility for damages as a result of incorrect handling of the Dreambox. Allow enough space around the Dreambox for sufficient ventilation. Do not cover the top of the Dreambox and allow enough space to other devices. -
Page 7: Additional Safety Instructions
Additional safety instructions (Dis-)Connecting to a LNB: Turn the Dreambox off before you connect or disconnect a cable coming from or going to a LNB. Connecting to a TV: Before connecting or disconnecting your Dreambox to/from a TV please turn it off. In case you notice any damage to the power cord or power plug immediately disconnect the device from the power outlet. -
Page 8: Packaging Contents
Please note that empty batteries and electric waste is not to be put into the regular garbage. 1.2 Packaging contents Please check the completeness of the box’s contents. 2 Batteries Dreambox DM800 HD se Remote Control (1,5V Mignon / AA / LR6) HDMI-Cable... -
Page 9: Views
1.3 Views 1.3.1 Front view IR-Sensor Standby-Button OLED-Display Smartcard-Reader Status-LED Smartcard-Reader Insert your Dreamcrypt Smartcard with the golden chip facing down and forward into one of the two Smartcard reader slots. Dreamcrypt is a registered trademark of Dream-Multimedia. OLED-Display The OLED-Display shows all major information. IR-Sensor The remote control sensor receives the infrared signals of the Dream Remote Control. -
Page 10: Rear View
1.3.2 Rear view Scart TV output 2 USB 2.0 ports LNB input Power switch Modem connector Service connector Power on/off DC 12V 13/18V= / LNB IN Digital HDMI SERVICE Scart T V Ethernet Modem eSATA Audio eSATA port Network interface Power connector HDMI output S/PDIF optical audio... -
Page 11: Remote Control
1.4 Remote control SHIFT / SETUP-Button Standby-Button DREAM-Mode-Button TV-Mode-Button Numeric Keypad Arrow-Left-Button Arrow-Right-Button Mute-Button EXIT-Button Volume +/- Buttons Bouquet +/- Buttons INFO-Button MENU-Button Navigations-Buttons OK-Button AUDIO-Button VIDEO-Button Options-Buttons TV-Button HELP-Button RADIO-Button TEXT-Button... - Page 12 SHIFT-Setup-Button The SHIFT/ SETUP-Button is used to preprogram the remote control to operate a TV. (see Chapter TV-Mode setup on page 75) Standby-Button The Standby-Button switches your Dreambox on and off. (see Chapter Turning your Dreambox on and off on page 16) DREAM-Mode-Button The DREAM-Mode-Button switches your remote control into Dreambox con- trol mode.
-
Page 13: Important Notes About Operation
VIDEO-Button Pressing the VIDEO-Button shows the list of recordings. Options-Buttons All possible options are shown by the four colored dots/blocks (red, green, yellow, blue) and can be activated by the Options-Buttons. Depending on the menu you currently are in the options will change and will be named differently. These buttons are multi-assigned. They are also used for controlling the Playback-mode. -
Page 14: Start-Up
Chapter 2 Start-up 2.1 Connecting Before using the Dreambox, please read the safety instructions under Chapter Safety instructions on page 1. In the following is described how to connect the dreambox to a Satellite-dish, an a/v receiver, a tv-device and a network. 2.1.1 Satellite Dish (DVB-S/S2) Connect the (LNB) with a suitable coax cable to the LNB-Input of your Dreambox. -
Page 15: A/V Receiver
2.1.2 A/V Receiver Connection via optical fiber cable If your a/v receiver (amplifier) has a suitable optcial S/PDIF Input, connect the connection jack Digital Audio at the Dreambox with an optical fiber cable (toslink) with the optcial S/PDIF Input of your amplifier. Power on/off DC 12V 13 /18V= / LNB IN... - Page 16 Connection via HDMI cable Use an hdmi-cable to connect the hdmi-out of your dreambox to an hdmi-input of the a/v receiver. After that take a second hdmi-cable for connecting the hdmi-out of your a/v receiver to the hdmi-input of the tv-device.
-
Page 17: Television
2.1.3 Television HDMI Connect the dreambox with the hdmi or scart-cable mit dem TV-input of your television. At least use the hdmi-interface for getting the best picture quality (through digital transmission). You can use the supplied HDMI cable for connecting the dreambox with the hdmi-input of your television. -
Page 18: Network
2.1.4 Network Connection via network cable Power on/off DC 12V 13 /18V= / LNB IN Digital HDMI Modem SERVICE eSATA Scart T V Ethernet Audio... -
Page 19: Turning The Device On
2.2 Turning the device on 1. Place the batteries inside the battery compartment of the remote control keeping in mind the right polarity. 2. Plug in the power cable into the supplied power supply and connect it to the Dreambox. The power plug has to be plugged into a 110V/60Hz or 230V/50Hz power socket. - Page 20 Tuner Detailed information about the tuner setup can be found in chapter DVB-S2 Tuner-Configuration on page 52. Default services list/Service scan Depending on your tuner configuration in the previous step, you might be offered to install default services lists. Otherwise you will be asked to perform a service scan. Detailed information about the service scan can be found in Chapter Automatic scan on page 60.
-
Page 21: Basic Operation
Chapter 3 Basic operation 3.1 Turning your Dreambox on and off Your Dreambox has a standby mode and a so-called deep-standby mode. Both functions differ in their power consumption and the time which is needed until the box has booted. Standby about 1 Second (higher power consumption) Deep-Standby about 1-2 Minutes (less power consumption) Standby... -
Page 22: Service Selection
This is the Standby / Restart-Menu. With the Navigation-Buttons ( ) choose the desired option and press the OK-Button. 3.2 Service selection Pressing the Navigation-Buttons ( ) on your Dreambox remote control will take you to the previous or next service. Pressing the 0 on the Numeric-Keypad will enable you to skip back and forth between the two most recently watched services. -
Page 23: Controlling The Volume
3.4 Controlling the volume The Volume +/- Buttons control the volume of the audio. Pressing + will make turn it up and pressing - will turn it down. Pressing the MUTE-Button mutes the volume. A crossed speaker symbol will appear on the screen. 3.5 Changing the audio track Pressing the AUDIO-Button in TV or Radio Mode. -
Page 24: Subtitles
3.8 Subtitles Follow this steps: 1. In TV- or Radio Mode press the AUDIO-Button. 2. By pressing the yellow Options-Button a list with the available subtitles will show up. 3. With the Navigation-Buttons ( ) select a desired subtitle and press the OK-Button to activate. The screenshot on the left shows you an example of how a subtitle looks. -
Page 25: Infobar
3.9 Infobar The Infobar appears when switching a channel and shows all necessary Information about the selected service. By pressing the OK-Button you can open the Infobar if needed! Active tuner Signal level Error rate Channel name Current time Progress bar Current show Next show Remaining time... -
Page 26: Electronic Program Guide - Epg
3.10 Electronic Program Guide - EPG The Electronic Program Guide (EPG) shows information regarding the current tv service (similar to a TV guide). By pressing the INFO-Button in TV-Mode you are sup- plied with detailed information about the current show and by pressing the Navigationbutton ( ) afterwards about the next show. - Page 27 Single-EPG In this view you are supplied with detailed information about the currently selected channel’s programming. Follow this steps: 1. Press the INFO-Button. 2. Press the yellow Options-Button for getting the “Single-EPG” view. You can also access this view by pressing: 1.
- Page 28 Multi-EPG Follow this steps: 1. Press the Info-Button. 2. Press the blue Options-Button for switching to “Multi-EPG” view. Use the blue and yellow Options-Buttons to switch between the now, next and more views. Pressing the green Options-Button will give you the possibility to automatically copy the start and end time of the selected show into a recording timer.
- Page 29 Time/Date Input Press the Menu-Button in the Multi-EPG view. A window will appear where you can enter a time and date. After you have entered the desired time and date press the OK-Button to activate you selection. Graphical Multi-EPG You have another option to view the EPG of different services and successive shows. The Graphical Multi- EPG displays the EPG overview of the upcoming hours (can be set to 1-5 hours with the Buttons 1-5 on the Numeric-Keypad) for the chosen bouquet.
-
Page 30: Teletext (Videotext)
Time/Date Input Press the Menu-Button in the Multi-EPG view. A window will appear where you can enter a time and date. After you have entered the desired time and date press the OK-Button to activate your selection. 3.11 Teletext (Videotext) Press the Text-Button to enter the Teletext. - Page 31 service without having to switch services. Press the OK-Button to select the desired Teletext. This option is only available if more than one service on the current satellite transponder actually transmits Teletext information. If this is not the case you cannot make a selection. Screen format: Standard mode 16:9 = on/off...
-
Page 32: Sleep Timer
3.12 Sleep timer Using the sleep timer you can put your Dreambox into standby or turn it off after a predeterminedamount of time. Follow this steps: 1. Press the Menu-Button to open the main OSD menu. 2. With the Navigation-Buttons ( ) choose the option “Standby / Restart”... -
Page 33: Edit The Channellist
Chapter 4 Edit the channellist What is a bouquet? A bouquet can be thought of something like a folder. Every channel equals a page in this folder and the pages are sorted into categories. This way you can create a bouquet called “Kids”, for example, under which you “file” all children’s stations. Another example would be to create a bouquet called “Sports”... -
Page 34: Add A Service To Favorites
4.2 Add a service to favorites If you want to add a service to your Favorites-view you can choose from services in the All-, Satellites- and Provider-views. You can switch views by pressing the red, green, yellow and blue Options- Buttons. -
Page 35: Remove A Service From Favorites
4.4 Remove a service from favorites 1. Press the Navigation-Buttons ( ) to open the channellist. 2. With the Navigation-Buttons ( ) choose the channel you want to delete. 3. By pressing the MENU-Button the “Channellist menu” will open up. 4. -
Page 36: Parental Control
6. Press the OK-Button, to add the marker to your favorites list. If you have added two markers use the Arrow-Left and Arrow-Right-Buttons to jump between those two markers. 4.7 Parental control Parental control makes it possible to lock selected channels. Follow this steps: 1. - Page 37 2. With the Numeric-Keypad enter a 4-digit Pincode. You have to enter the new pincode twice to ensure you didn’t make any typing errors. If you already created a pincode earlier you will be prompted to enter the old pincode and afterwards the new one. You will see a notice that the pincode has been changed.
-
Page 38: Hard Disk Operation
Hint: When using an external eSATA HDD it must have an own power supply!!! 5.1 Installation-Guide This capter describes how to install a 2,5“ SATA Hard disk in your Dreambox DM800 HD se. Please always adhere to ESD (Electrostatic Discharge) regulations when handling electronic devices. -
Page 39: Opening The Device
Opening the device 1. Unscrew the screw(s) on the left side of your Dreambox. Remove screw(s) on the left side 2. Unscrew the screw(s) on the right side of your Dreambox. Remove screw(s) on the right side 3. Remove the marked screw(s) on the rear panel. Remove marked screw(s) on the rear panel... - Page 40 4. Lift the cover off as shown below. Lift cover as shown Installation of a 2,5" SATA Hard disk 1. Lift the hard disk cage upwards. Lift hard disk cage...
- Page 41 2. Place the hard disk in the cage and ensure that you place the hard disk carefully into the plug of the hard disk cage. Placing hdd to hard disk cage 3. Now you need a Phillips-tip screwdriver, the hard disk cage, your hard disk and two screws for mount- ing the hdd.
-
Page 42: Management
4. Now remount the hard disk cage in your Dreambox and ensure the correct fitting of the hard disk cage connector to the slot on the mainboard. Then tighten the hard disk cage with 2 screws to the housing of the dreambox (see figure). Fit hdd cage to dreambox housing 5. -
Page 43: Initialization
1, 2 or 4 Hours Once you have selected the desired time press the OK-Button or the green Options-Button to get back into the harddisk menu. 5.2.1 Initialization 1. Press the Menu-Button to open the main OSD menu. 2. With the Navigation-Buttons ( ) choose the option “Setup”... -
Page 44: Stop Recording
Pressing the Up/Down-Buttons on your remote control activates the service list. The recording continues in the background. Once a recording is started, no matter if manually or by timer (see Chapter 5.3.3 Recording by timer on page 39) it will be signaled by a note on the screen. Is the tuner used for recording and you are trying to access a service that is not on one of the recorded transponders you will get the “No free tuner”... - Page 45 daily weekly with choice of weekday Monday through Friday user defined (for each day from Monday through Sunday) For all four options you can set a date for the first execution of the timer You can decide what should happen after the recording finishes by selecting the “After event” option. You can choose between auto to keep your Dreambox in the same state as before the recording do nothing to keep your Dreambox turned on after the recording go to standby to put your Dreambox into Standby mode...
-
Page 46: Timeshift
Timerlist Pressing the red Options-Button will delete a timer. The green Options-Button adds a timer, the yellow Options-Button toggles active on and off (only possible in waiting status) and the blue Options- Button removes finished timers from the list. With the Navigation-Buttons ( ) choose an existing timer and press the OK-Button to edit. -
Page 47: Watch A Recording (Playback)
5.4 Watch a recording (Playback) 1. Press the Video-Button to get to the selection of recordings. 2. Use the Navigation-Buttons ( ) to select a recording. Press the OK-Button to start playing it. List of recordings During replay you can see the control symbols in the Infobar. Press the Navigation-Buttons ( ) or press the VIDEO-Button, to get back to the list of recordings. -
Page 48: Setting A Marker (Bookmarks)
Skipping in a recording Button Time Button Time Button 1 10 sec. back Button 3 10 sec. forward Button 4 1 min. back Button 6 1 min. forward Button 7 5 min. back Button 9 5 min. forward Skip backward Skip forward Spooling in a recording The following speeds for spooling in a recording are available:... -
Page 49: Movielist Options
3. With the Navigation-Buttons ( ) choose the option “delete” and press the OK-Button. You will be asked if you want to delete the recording. As a control feature the name of the recording is displayed as well. Choose “Yes” and you will be taken back to the selection of recordings. 5.7 Movielist options Follow this steps: 1. -
Page 50: Setup
Chapter 6 Setup 6.1 Language 1. If no OSD menu is visible on your screen, press the Menu-Button to open the main OSD menu. 2. With the Navigation-Buttons ( ) choose the option “Setup” and press the OK-Button. 3. With the Navigation-Buttons ( ) choose the option “System”... -
Page 51: Intermediate Mode
Infobar timeout: Set the desired time after which you want the Infobar to disappear. You can choose between one and ten seconds or “no timeout”. 6.2.2 Intermediate mode: These settings supplement the settings in simple mode. Recordings always have priority: If this option is set to “Yes” your Dreambox will automatically switch to the service which is supposed to be recorded incase there is a conflict with an existing timer. - Page 52 Video output This option selects to which output the video signal will be sent to. HDMI If you have connected your TV to the HDMI output of your Dreambox set the “Output type” option to “HDMI”. Scart If you have connected your TV to the Scart output of your Dreambox set the “Output type” option to “Scart”.
-
Page 53: Oled-Display
Mode Scart Select the standard supported by your TV screen. This is usually either PAL or NTSC. If you own a TV screen which supports both modes you can also select the Multi option. Your TV screen will automatically switch depending on the input signal. These options are only available ifthe output type is set to “Scart”. -
Page 54: Network
Standby 1. With the Navigation-Buttons ( ) choose the option “Standby”. 2. With the Navigation-Buttons ( ) choose the brightness of the OLED-Display for standby mode. 6.6 Network Connection via network cable Adapter-Settings 1. Press the Menu-Button to open the main OSD menu. 2. -
Page 55: Skin
Network test The network test will assist you in finding possible sources of error in your network configuration. Press the green Options-Button to start the test or to repeat it. Press the yellow Options-Button to abort the test. Once the test has finished you can get additional information and help to every subitem of the test. Use the Navigation-Buttons ( ) to select an item and press the OK-Button. -
Page 56: Factory Reset
The name of the default skin is “Default Skin”. With the Navigation-Buttons ( ) choose your desired skin and press the OK-Button. To fully activate the skin the system needs to be restarted. Use the Navigation-Buttons ( ) to select your desired option and press the OK-Button. -
Page 57: Service Searching
Chapter 7 Service searching In this chapter you will learn how to setup the tunerconfiguration for the reception with a satellite-dish (DVB-S/S2), via cable television (DVB-C) or via digital terrestrial television (DVB-T) in your dreambox and how to perform a service scan. 7.1 DVB-S2 Tuner-Configuration 7.1.1 Single satellite –... -
Page 58: Two Satellites Via Toneburst A/B
7. With the Navigation-Buttons ( ) choose the option “Single”. 8. With the Navigation-Buttons ( ) choose the option“Satellite”. 9. With the Navigation-Buttons ( ) choose the desired Satellite. 10. Press the OK-Button to save this settings. You are taken back to the “Choose tuner” menu. If you have trouble with “Tune failed”... -
Page 59: Two Satellites Via Diseqc A/B
9. With the Navigation-Buttons ( ) choose the desired Satellite. 10. With the Navigation-Buttons ( ) choose the option “Port B”. 11. With the Navigation-Buttons ( ) choose the desired Satellite. 12. Press the OK-Button to save this settings. Make sure you know which satellite is connected to which input on the Toneburst switch. If you do not find any services in the transponder scan later, exchange the two satellites in this list and try again. -
Page 60: Four Satellites Via Diseqc A/B/C/D
9. With the Navigation-Buttons ( ) choose the desired Satellite. 10. With the Navigation-Buttons ( ) choose the option “Port B”. 11. With the Navigation-Buttons ( ) choose the desired Satellite. 12. Press the OK-Button to save this settings. Make sure you know which satellite is connected to which input on the Toneburst switch. If you do not find any services in the transponder scan later, exchange the two satellites in this list and try again. -
Page 61: Stab Positioner Using Usals
7. With the Navigation-Buttons ( ) choose the option “DiSEqC A/B/C/D”. 8. With the Navigation-Buttons ( ) choose the option “Port A”. 9. With the Navigation-Buttons ( ) choose the desired Satellite. 10. With the Navigation-Buttons ( ) choose the option “Port B”. 11. -
Page 62: Stab Positioner Without Usals
2. With the Navigation-Buttons ( ) choose the option “Setup” and press the OK-Button. 3. With the Navigation-Buttons ( ) choose the option “Service searching” and press the OK- Button. 4. With the Navigation-Buttons ( ) choose the option “Tuner configuration” and press the OK- Button. -
Page 63: Dvb-C Tuner Configuration
4. With the Navigation-Buttons ( ) choose the option “Tuner configuration” and press the OK- Button. 5. With the Navigation-Buttons ( ) choose the option “DVB-S2 Tuner” and press the OK-Button. 6. With the Navigation-Buttons ( ) choose the option “Configuration”. 7. -
Page 64: Dvb-T Tuner-Configuration
3. With the Navigation-Buttons ( ) choose the option “Service searching” and press the OK- Button. 4. With the Navigation-Buttons ( ) choose the option “Tuner configuration” and press the OK- Button. 5. With the Navigation-Buttons ( ) choose the “DVB-C Tuner” and press the OK-Button. Frequency bands This type of searching scans the frequencies used by most cable providers. -
Page 65: Automatic Scan
2. With the Navigation-Buttons ( ) choose the option “Setup” and press the OK-Button. 3. With the Navigation-Buttons ( ) choose the option “Service searching” and press the OK- Button. 4. With the Navigation-Buttons ( ) choose the option “Tuner configuration” and press the OK- Button. - Page 66 Use the Navigation-Buttons ( ) to set the “Clear before scan” option to “Yes” if you want to delete all services before the scan starts. Otherwise leave the setting to “No” which results in only new services being added to the channel list. In order to find the new services, follow this steps: 1.
- Page 67 You can see the progress of the scan here. The scan is done once you see this menu. It shows how many channels were found during the scan. Press the OK-Button to store the found channels or the EXIT-Button to cancel.
-
Page 68: Manual Scan
7.5 Manual scan Follow this steps: 1. Press the Menu-Button to open the main OSD menu. 2. With the Navigation-Buttons ( ) choose the option “Setup” and press the OK-Button. 3. With the Navigation-Buttons ( ) choose the option “Service searching” and press the OK- Button. -
Page 69: Systeminformation
Chapter 8 Systeminformation 8.1 Service This window shows detailed technical information about the current service. Kanal-Informationen Follow this steps: 1. Press the MENU-Button in order to open the main menu. 2. Navigate to the option “Information” and press the OK-Button. The “Information”... -
Page 70: About (Hard- And Software)
8.2 About (Hard- and Software) This window shows all relevant information about the Hard- and Software of your Dreambox. Hardware- and Software-Information Follow this steps: 1. Press the MENU-Button in order to open the main menu. 2. Navigate to the option “Information” and press the OK-Button. The “Information”... -
Page 71: Updating The Software
Chapter 9 Updating the software 9.1 Backing up your settings Before installing newer software on your Dreambox you should backup your settings, otherwise they will be lost. 1. Press the Menu-Button to open the main OSD menu. 2. With the Navigation-Buttons ( ) choose the option “Setup”... -
Page 72: Updating A New Software
9.3 Updating a new software 9.3.1 using the DreamUP program How do I install new software on my Dreambox DM800 HD se ? Requirements: PC with Windows operating system DreamUP software (current version under http://www.dreambox.de) 1 mini-usb-to-usb cable 1 network cable (optional but recommended) 1. - Page 73 6. Start the DreamUp software on your PC. 7. Select the com-port which the “mini-USB-to-USB-cable” is connected to, as described above. In our example “COM4”. 8. Check the “Use network” box if your PC and Dreambox are connected using a network cable The software update can be done without network sup- port, but it takes at least 30 minutes.
- Page 74 12. After the flash loader has been transferred to your Dreambox select the “Flash Box” Button in the DreamUp software. 13. Select the software image and click on the “Open” button. 14. The new software is now being transferred to your Dreambox.
-
Page 75: With Browser
9.3.2 With browser With activated DHCP server Requirements: PC with browser like. Firefox, Opera, Internet Explorer latest Software for your Dreambox, downloadable under www.dreambox.de 1 networkcable DHCP-Server You need the image file you want to flash (downloadable under www.dreambox.de). Image files have the extension “*.nfi”. - Page 76 2. Click on “firmware upgrade” on the given site in your Browser. 3. On the next page, you can select the flash image you want to flash. Be sure that it has the “.nfi” extension. You can’t flash other images (like .img)! 4.
-
Page 77: Modem
Chapter 10 Modem If you have no option to connect your dreambox to the internet by using the ethernet port, you can also use the built in modem for this. 10.1 Connecting You need a connection-cable which has got both middle pins of the RJ11-Plug assigned. Connect the RJ11- Plug to the modem of the dreambox and connect the other side to your telephone jack. - Page 78 Enter login-data 1. Press the Menu-Button to open the main OSD menu. 2. With the Navigation-Buttons ( ) choose the option “Plugins” and press the OK-Button. 3. With the Navigation-Buttons ( ) choose the option “Modem” and press the OK-Button. 4.
-
Page 79: Troubleshooting
Chapter 11 Troubleshooting Problem Possible cause Solution No audio, no video, OLED-Display Faulty wiring Check wiring and connections Faulty LNB Exchange LNB Wrong Tuner setting Review settings (see Punkt DVB-S2 Tuner-Configuration on page 52) Dish aligned incorrectly Realign dish Beamlike blackouts in the video Heavy rain or snow Remove snow from dish Dish aligned incorrectly... -
Page 80: Tv-Mode Setup
Chapter 12 TV-Mode setup With the Dreambox remote control you have the possibility to control the dreambox and your tv device with only one remote control. In order that your tv device reacts to the signals of the remote control, you have to program it before. -
Page 81: Technical Data
Chapter 13 Technical data 400 MHz MIPS Prozessor Linux operating system colored OLED display MPEG2 / H.264 Hardware decoding (DVB compliant) Tunervariations: DVB-S/S2, DVB-C, DVB-T Tuner Module, Plug&Play 2x Smartcard-Reader (Dreamcrypt CA) Mini-USB Service-Port 10/100 Mbit compatible Ethernet Interface 1 x Scart-Output (RGB, FBAS or S-Video) HDMI 2x USB 2.0 port Analog Modem... - Page 82 Additional info: DBS-Tuner with DVB-S2: Frequency Range 950 ..2150 MHz Demodulation DVB-S (QPSK); DVB-S2 ((8PSK,QPSK) Symbol rate DVB-S: 2 ... 45 Mbaud/s, SCPC/ MCPC DVB-S2: 10 – 31 Mbaud/s (8PSK) , 10 –30 Mbaud/s (QPSK) DVB/C-Tuner (plugable): Input/Loop through Connector IEC 169-24, Female Frequency Range 50 - 870 MHz Signal Level Input -20 - 25dBm Demodulation QAM...
- Page 83 Video parameter: Input Level FBAS 1 Vss +/- 0.3 dB on 75 Ohm Teletext filter in conformity with ETS 300 472 Standard TV-Scart: Output: FBAS,RGB or S-Video Mini USB service connector: Function: Update of Firmware Ethernet: 10/100 Mbit compatible Interface Function: Update of Firmware Analoge modem: analoge modem for Internet connection...
- Page 84 Weight: 940 g without HDD...
-
Page 85: Features
Chapter 14 Features Single-EPG (Electronic Program Guide): sortable by date or alphabetically Automatic search for additional air dates of a show and easy recording them by timer Multi-EPG: graphically and text-based Timeshift List of recordings: sortable by date or alphabetically and free choice of different views Timer programming manually or by EPG Individually configurable timers, e.g. -
Page 86: Contact & Support Information
Chapter 15 Contact & Support Information Headquarter & Distribution: Dream-Multimedia GmbH Pierbusch 24-26 44536 Lünen Germany Dealer’s Hotline: (Dealers only) Tel.: +49 (0)180 - 3 44 11 30 992 Fax: +49 (0)180 - 3 44 11 30 993 You can reach the dealer’s hotline from: Mo - Fr. - Page 87 Dealers & Pricing: E-Mail: info@dream-multimedia-tv.de Technical Support: E-Mail: support@dream-multimedia-tv.de Website: Weblink: http://www.dreambox.de Support Forum: Weblink: http://www.dreambox.de/board Software Support (actual images): Weblink DM800 HD se: http://www.dm800.de...
-
Page 88: Copyright Notes
Chapter 16 Copyright notes Dream-Multimedia 2011. All rights reserved. This product contains files that are distributed under different licenses, especially a Open Source License, the GNU General Public License. You can find details about this License on the next three pages. Additional notes about the source code and patches under The GPL license can be found on the internet under this link: http://www.dream-multimedia-tv.de/deutsch/downloads.php... -
Page 89: Gnu Gpl (General Public License)
16.1 GNU GPL (General Public License) GNU GENERAL PUBLIC LICENSE Version 2, June 1991 Copyright (C) 1989, 1991 Free Software Foundation, Inc. 51 Franklin Street, Fifth Floor, Boston, MA 02110-1301, USA Everyone is permitted to copy and distribute verbatim copies of this license document, but changing it is not allowed. - Page 90 In addition, mere aggregation of another work not based on the Program with the Program (or with a work based on the Program) on a volume of a storage or distribution medium does not bring the other work under the scope of this License. 3.
- Page 91 HOLDERS AND/OR OTHER PARTIES PROVIDE THE PROGRAM "‘AS IS"’ WITHOUT WARRANTY OF ANY KIND, EITHER EXPRESSED OR IMPLIED, INCLUDING, BUT NOT LIMITED TO, THE IMPLIED WARRANTIES OF MERCHANTABILITY AND FITNESS FOR A PARTICULAR PURPOSE. THE ENTIRE RISK AS TO THE QUALITY AND PERFORMANCE OF THE PROGRAM IS WITH YOU.
Need help?
Do you have a question about the Dreambox DM800 HD se and is the answer not in the manual?
Questions and answers