Table of Contents
Advertisement
Quick Links
Download this manual
See also:
Service Manual
Advertisement
Table of Contents

Related Manuals for Canon LASERBASE MF3110


Summary of Contents for Canon LASERBASE MF3110
- Page 1 Please read this guide before operating this equipment. After you finish reading this guide, store it in a safe place for future reference.
-
Page 2: Manuals For The Machine
Adobe Systems Incorporated website. • Considerable effort has been made to ensure that this manual is free of inaccuracies and omissions. However, as we are constantly improving our products, if you need an exact specification, please contact Canon. - Page 3 F146600 (LaserBase MF3110) Copyright Copyright © 2004 by Canon, Inc. All rights reserved. No part of this publication may be reproduced, transmitted, transcribed, stored in a retrieval system, or translated into any language or computer language in any form or by any means, electronic, mechanical, magnetic, optical, chemical, manual, or otherwise, without the prior written permission of Canon, Inc.
- Page 4 Trademarks ® ™ Canon is a registered trademark, and UHQ is a trademark of Canon Inc. ® is a registered trademark. ® ® Microsoft and Windows are registered trademarks of Microsoft Corporation. Other brand and product names may be trademarks or registered trademarks of their respective companies.
-
Page 5: Table Of Contents
Contents Preface................vii How to Use This Manual . - Page 6 Chapter 4 Printing from Your Computer Before Printing ..............4-1 Printing Documents .
- Page 7 Chapter 9 Troubleshooting Clearing Jams ..............9-1 LCD Messages .
-
Page 8: Preface
Preface Thank you for purchasing the Canon LaserBase MF3110. Please read this manual thoroughly before operating the machine in order to familiarize yourself with its capabilities, and to make the most of its many functions. After reading this manual, store it in a safe place for future reference. -
Page 9: Chapter 1 Introduction
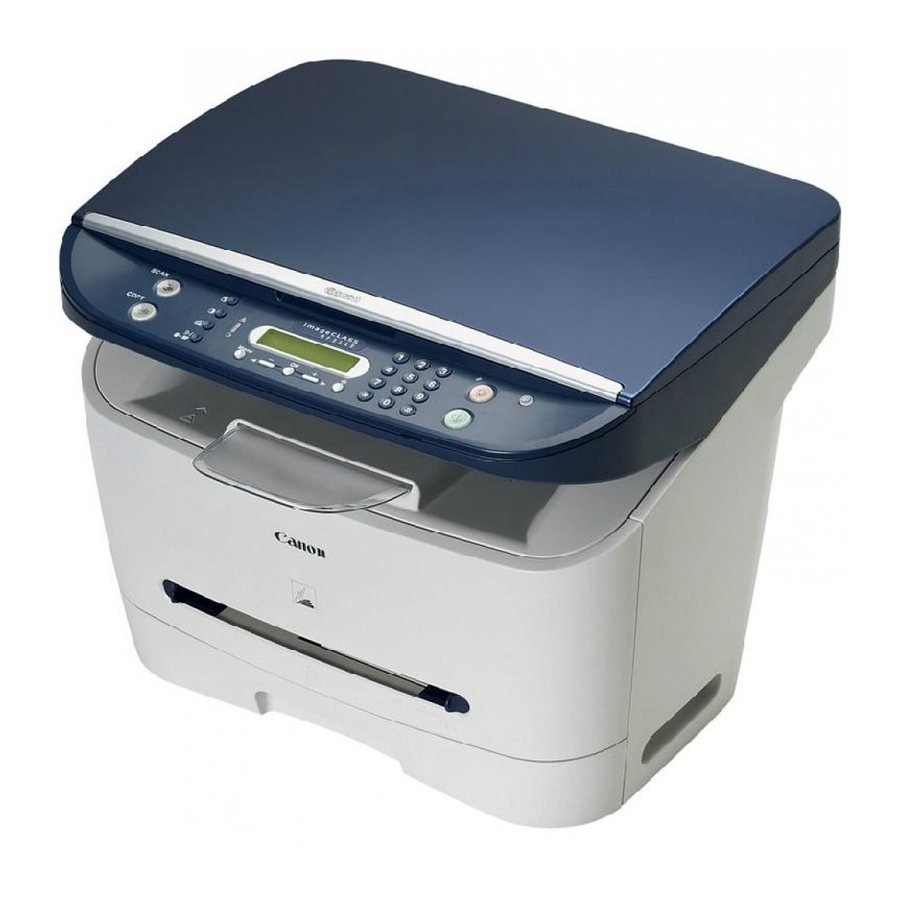
Chapter 9, "Troubleshooting." If you cannot solve the problem or if you think your machine needs servicing, contact your local authorized Canon dealer or the Canon help line. Main Components of the Machine This section describes the main components of the machine. - Page 10 Rear View USB port Power socket Connect the USB (Universal Serial Bus) cable. Connect the power cord. Face up cover Extension cover Open it when you output paper face up, or remove jammed paper. Protects paper supply in the cassette from dirt and dust.
-
Page 11: Operation Panel
Operation Panel SCAN COPY Menu COPY key Energy Saver key Switches the standby display to the Copy mode. Sets or cancels the energy saver mode manually. The key lights green when the energy saver mode is set, and goes off SCAN key when the mode is canceled. -
Page 12: Standby Display
Standby Display The standby display differs depending on which mode is selected. The standby display in the Copy or Scan mode is as follows: ■ Copy Mode Copy ratio Paper size Exposure Image Copy quality quantity ■ Scan Mode NOTE When the machine is plugged in, the LCD displays <INITIALIZING>... -
Page 13: Energy Saver Mode
Energy Saver Mode This machine provides an energy saver function. When no operations are performed for about 5 minutes, the machine automatically enters the energy saver mode. NOTE • The time until the machine enters the energy saver mode can be specified in a range of 3 minutes to 30 minutes. You can also turn off the energy saver function. -
Page 14: Paper Handling
For high-quality copies, we recommend using paper and transparencies recommended by Canon. Some types of paper available at office supply stores may not be suitable for this machine. If you have any questions about paper and transparencies, contact your local authorized Canon dealer or the Canon help line. -
Page 15: Printing Areas
Please note that the term "printing area" represents both the recommended area for optimum print quality and the entire area where the machine can technically print from your computer. Printing area (light shade): Canon recommends that you print within this area. ■ Paper MAX. -
Page 16: Loading Paper
Loading Paper This section describes how to load paper in the cassette and the multi-purpose feeder. CAUTION When loading paper, take care not to cut your hands on the edges of the paper. IMPORTANT Do not load paper from the back of the machine with the cassette in place. Doing so may damage the paper feeding assembly inside the machine. - Page 17 Pull out the cassette completely. While holding the lock release lever on the paper guide at the rear of the cassette, slide the paper guide to the mark indicating the desired paper size. IMPORTANT If the paper guide is not adjusted correctly for the size of the paper, the quality of your printouts may be adversely affected.
- Page 18 While holding the lock release lever on the paper guide on either side of the cassette, slide the paper guide to the mark indicating the desired paper size. The paper guides on the sides of the cassette move together. Make sure the paper stack does not exceed the load limit mark (A) and it is loaded under the hooks (B) on the paper guides.
-
Page 19: Loading Paper In The Multi-Purpose Feeder
Loading Paper in the Multi-Purpose Feeder Use the multi-purpose feeder when you want to copy or print on the different paper which is in the cassette. Load paper one by one in the multi-purpose feeder. NOTE The paper in the multi-purpose feeder is fed prior to the paper in the cassette. Slide the paper guides to the mark of the desired paper size. -
Page 20: Loading An Envelope In The Multi-Purpose Feeder
NOTE When you load paper with a logo on, position the paper with the print side up (logo side) and insert it so that the top of the paper feeds first in the multi-purpose feeder. Specify the size and the type of the paper you load. For details on how to specify the paper size and type, see "Specifying the Paper Size and Type (Common for Cassette and Multi-Purpose Feeder),"... -
Page 21: Specifying The Paper Size And Type (Common For Cassette And Multi-Purpose Feeder)
Insert the envelope square into the multi-purpose feeder with the print side up and the right edge (i.e., closer to the stamp) first. If the envelope to be loaded has a flap on the short edge, this edge must enter the machine first. Not loading it this way will result in a paper jam. -
Page 22: Specifying The Paper Type
Specifying the Paper Type <PLAIN PAPER> is selected as the default paper type. When using paper other than plain paper, you can specify the paper type according to the following. Specifying the paper type can prevent poor copy quality, or the printout not being printed correctly. Press [Menu]. -
Page 23: Selecting The Paper Output Area
Selecting the Paper Output Area Face down paper output delivers paper with the printed side down on the output tray. Face up paper output delivers paper with the printed side up from the output area. Select the area depending on your purpose by opening or closing the face up cover. -
Page 24: Face Down Paper Output Area
Face Down Paper Output Area The paper is delivered with the printed side down on the output tray. Paper is stacked in printed order. Close the face up cover, and pull out the output tray. IMPORTANT • Do not place the delivered paper back on the output tray. Doing so may result in paper jams. •... -
Page 25: Document Handling
Document Handling CHAPTER This chapter describes the types of documents you can scan or copy with this machine and how to set them on the platen glass. Document Requirements The documents you place on the platen glass for copying or scanning must meet these requirements: Platen Glass Type of Document Plain paper Thick documents... -
Page 26: Scanned Area Of A Document
Scanned Area of a Document The shaded area in the illustration below shows the scanned area of a document. Make sure your document's text and graphics are within this area. MAX. 5.5 mm MAX. 5.5 mm MAX. 3 mm Scanning direction MAX. - Page 27 The illustration below shows how to place an A4-size document on the platen glass. Gently lower the platen glass cover. The document is now ready for scanning.
-
Page 28: Printing From Your Computer
Printing from Your Computer CHAPTER This chapter explains how to print the documents from your computer using the printer driver included in the CD-ROM. Before Printing Before printing, software must be installed in your computer. • If not, please see the Set-Up Sheet or Chapter 1, "Installation," in the Software Guide. Check if the machine is selected as the default printer. -
Page 29: Canceling Printing
Select the command to print. In most cases, click [Print] in the [File] menu. The [Print] dialog box appears. From the [Select Printer] list box or the [Name] pull-down list in the [Print] dialog box, select the printer to be used. Click [Preference] or [Properties]. -
Page 30: Chapter 5 Copying
Copying CHAPTER This chapter explains how to make copies, adjust scan settings to improve the image quality, and enlarge or reduce the copy sizes. It also describes the special copy features. Documents You Can Copy For information on the types of documents you can copy, their requirements, and details on setting up documents, see Chapter 3, "Document Handling."... -
Page 31: Setting Enlarging/Reducing
Setting Enlarging/Reducing You can enlarge or reduce the copy size using preset copy ratios or using custom copy ratios. Enlarging/Reducing Using Preset Copy Ratios Press [Enlarge/Reduce]. Press [ (-)] or [ (+)] to select the copy ratio ➞ press [OK]. You can select from the following: - 200% MAX. -
Page 32: Improving Copied Image
Improving Copied Image Adjusting the Image Quality (Resolution) You can adjust image quality to the appropriate level best suited for a document with text or photos. Three modes are available for adjusting the image quality. Press [Image Quality]. Press [Image Quality] repeatedly until the image quality you want appears. You can select from the following: - <TEXT>... -
Page 33: Special Features
Special Features The machine has the following SPECIAL COPY features. These features allow you to sort copies in page order and create special copies easily. - Collate Copy Sorts copies in page order. - 2 on 1 Reduces two documents to fit on a single paper. - Reserve Copy Reserves the next job while the machine is printing out. -
Page 34: On 1 Copy
Press [OK]. The machine begins printing out. NOTE When scanning multiple page documents, <MEMORY FULL> may appear in the LCD and scanning is canceled. In this case, reduce the documents to be scanned. Or, change the image quality mode to <TEXT>. 2 on 1 Copy Use the 2 on 1 copy function to reduce two sheets to fit on one sheet. -
Page 35: Reserve Copy
Press [OK]. NOTE If the image quality mode is set to other than <TEXT> when making a 2 on 1 copy of a document which has many graphics or photos, <MEMORY FULL> will appear in the LCD and copying will be canceled. If this happens, change image quality mode to <TEXT>. -
Page 36: Chapter 6 Scanning
Scanning CHAPTER This chapter briefly explains how to scan documents into your computer using the scanner driver included in the CD-ROM. Before Scanning Before scanning, software must be installed in your computer. • If not, please see the Set-Up Sheet or Chapter 1, "Installation," in the Software Guide. Check if the scanner driver is installed in your computer by following this procedure. -
Page 37: More Information
Press [SCAN] ➞ [Start] on the machine. If you are asked to select the program to launch, select "MF Toolbox Ver4.7." Scanning starts. The MF Toolbox and the MF Toolbox settings dialog box will open, but the document will be scanned without pressing [Start]. -
Page 38: System Monitor
System Monitor CHAPTER This chapter explains how to check the status of the jobs stored in the machine, and to confirm or delete them as needed. Checking the Status of the Jobs Stored in the Machine Use [Status Monitor] to confirm or delete copy and print jobs stored in the machine. When using [Status Monitor], the LCD displays the jobs in the following order. -
Page 39: Confirming And Deleting A Print Job
Confirming and Deleting a Print Job Press [Status Monitor]. Press [ (-)] or [ (+)] to select <PRINT STATUS> ➞ press [OK]. NOTE • If there is no job, <NO PRINT JOBS EXIST> is displayed. • If there is only one print job, go to step 4. Press [ (-)] or [ (+)] to confirm the file name. -
Page 40: Chapter 8 Maintenance
Maintenance CHAPTER This chapter explains how to clean the machine, replace the toner cartridge, and repack and transport the machine. Periodic Cleaning Your machine requires little periodic maintenance. This section describes the necessary cleaning procedures for your machine. CAUTION • When cleaning the machine's exterior or the platen glass, be sure to disconnect the power cord before cleaning the machine. -
Page 41: When To Replace The Cartridge
When to Replace the Cartridge The cartridge is a consumable item and should be replaced when the toner runs out. If white streaks or light bands appear on the printouts, the toner is running low. Paper feeding direction NOTE Before handling the cartridge, see the precautions in "Handling and Storing the Cartridge," on p. 8-3. Remove the cartridge from the machine. -
Page 42: Print Yield
This section describes the approximate number of printouts that can be made per cartridge. ■ Approximate Print Yield Canon Cartridge EP-27: Approx. 2,500 printouts (A4 at 4% dot coverage*). * The term "A4 at 4% dot coverage" denotes a document on which the area covered with toner is 4% of the total area of an A4-size sheet. -
Page 43: Storage Precautions
• Always hold the cartridge as shown so that the side with the instructions (A) faces up. Do not forcefully move or push the drum protective shutter (B) in any way. ■ Storage Precautions WARNING Do not store cartridges or copy paper in places exposed to open flames, as this may cause the toner or copy paper to ignite, resulting in burns or a fire. -
Page 44: Replacing The Cartridge
■ Storing Partially Used Cartridges If you remove a cartridge from the machine, store the cartridge as described below. Place the cartridge in its protective bag so that the side with the written instructions faces up. Then, place the cartridge into its shipping box. Be sure to securely close the lid of the shipping box. If you do not have the protective bag or shipping box for the cartridge, store the cartridge in a dark location. - Page 45 Remove the new cartridge from its protective bag. NOTE Save the protective bag. You may need it later when you remove the cartridge from the machine. Rock the cartridge 5 or 6 times to distribute the toner evenly. Place the cartridge on a flat and stable surface. Fold the tab (A) on the sealing tape (B) as shown below, and pull it out straight while supporting the cartridge.
- Page 46 Hold the cartridge and align the projections (A) on both sides of the cartridge to the guides (B) in the machine, then gently slide the cartridge into the machine as far as it will go. Be sure to position the arrow mark (C) on the cartridge towards the inside of the machine. Close the front cover.
-
Page 47: Repacking And Transporting Your Machine
Repacking and Transporting Your Machine Be sure to unplug the power cord before transporting the machine. If the machine is likely to be subjected to vibration (e.g., when transporting over long distances), the following precautions should be taken. If you do not follow these precautions, the machine may be damaged or the quality of your printouts may be adversely affected. -
Page 48: Transporting The Machine By Car
Transporting the Machine by Car Pack the machine, using the original packing material and box. Place the machine on a level, stable surface. IMPORTANT • Do not leave the machine inside a car for a long period of time; the temperature can become very high or low. •... -
Page 49: Chapter 9 Troubleshooting
Troubleshooting CHAPTER This chapter describes the problems you might encounter when using the machine and their remedies. It also explains what to do if you cannot solve the problem by yourself. Clearing Jams This section describes how to remove jammed paper. When print media jams inside the machine, the LCD displays <REC. - Page 50 IMPORTANT • Remove watches and any bracelets or rings when touching the inside of the machine. These items might be damaged if they come into contact with the parts inside the machine. • To avoid possible damage to the machine, do not touch the pins (A) near the left end of the transfer roller (B). •...
- Page 51 Gently pull the jammed paper out of the machine. ● If the leading edge of the paper is visible but has not entered the imaging area: ❑ Pull the paper forwards and roll it inwards. IMPORTANT • Do not pull the jammed paper forward from the cassette. It may cause a machine malfunction.
- Page 52 • Do not pull the jammed paper upward; the toner on the paper will stain the machine and cause a permanent reduction in print quality. Gently pull the jammed paper between the output rollers until the leading edge emerges from the machine.
- Page 53 If the jammed paper is badly folded, similar to the folds of an accordion, ease the jammed paper loose and then pull it out of the machine. Close the front cover. Pull out the cassette completely. Hold both sides of the jammed paper and slowly pull it out in the direction of the arrow. ●...
- Page 54 Push the paper release levers back to their original position and close the face up cover. IMPORTANT • Be sure to push the paper release levers back to their original position. If the levers are left pushed down, the paper jam error will not be resolved. •...
-
Page 55: Lcd Messages
A problem has occurred in the printer. Remedy Reset the machine by opening the front cover and then closing it. If the message persists, unplug the machine from the power supply and contact your local authorized Canon dealer or the Canon help line. CHECK PRINTER COVER Cause The front cover is not closed completely. - Page 56 OUTPUT TRAY FULL Cause The output tray is full of paper. Remedy Pick up the printed pages in the output tray. PRINTER DATA ERROR Cause When you canceled a job being processed, the next job on the spooled job list may have been also deleted.
-
Page 57: Paper Feeding Problems
Paper Feeding Problems Paper does not feed correctly. Does the cassette or multi-purpose feeder contain an appropriate quantity of sheets? Make sure the paper stack in the cassette or the paper in the multi-purpose feeder does not exceed the capacity of the cassette or multi-purpose feeder. (See "Loading Paper," on p. 2-3.) Is paper loaded correctly? Make sure the paper stack in the cassette or the paper in the multi-purpose feeder is loaded properly, and that the paper guides are adjusted correctly. - Page 58 (See "Loading Paper," on p. 2-3.) Is the proper transparency loaded in the multi-purpose feeder? Do not use any transparencies designed for color copiers. They will cause a paper jam. Please use transparencies recommended by Canon. Paper feeds curled. Is the proper paper loaded? Check if the proper paper is loaded in the cassette or multi-purpose feeder.
- Page 59 Repeated paper jams occur. Is the proper paper loaded? Check that the size, thickness and type of the paper you are using. (See "Print Media Requirements," on p. 2-1.) Is the proper paper loaded correctly? Be sure to fan the paper stack before loading it in the cassette. This keeps the sheets of paper from sticking together.
-
Page 60: Copying Problems
Copying Problems The machine will not make a copy. Is the cartridge installed correctly? Make sure the cartridge is installed correctly. (See the Set-Up Sheet.) Is the sealing tape removed from the cartridge? Remove the sealing tape from the cartridge. (See the Set-Up Sheet.) Is the cassette inserted completely into the machine? Insert the cassette as far as it will go. - Page 61 Is the exposure adjusted correctly? Adjust the exposure correctly using [Exposure]. (See "Adjusting the Exposure (Density)," on p. 5-3.) Copies are dirty. Is the platen glass or the platen glass cover clean? Clean the platen glass or the platen glass cover. (See "Cleaning the Scanning Area," on p. 8-1.) Is the cartridge free of damage? If there is a scratch on the cartridge, replace with a new one.
-
Page 62: Printing Problems
3 minutes to 5 minutes, then plug it in again. If the problem is fixed, the Alarm indicator will turn off, and the LCD will return to the standby mode. If the Alarm indicator remains flash, unplug the machine, and contact your local authorized Canon dealer or the Canon help line. -
Page 63: Scanning Problems
Scanning Problems The machine will not scan a document. Did you connect the power cord to the machine just now? Wait for a while. After connecting the power cord, the machine cannot scan documents immediately. Is the USB cable connected securely? Check that the USB cable is connected securely to the machine and your computer. - Page 64 If the LCD remains blank, unplug the machine, and contact your local authorized Canon dealer or the Canon help line. Does the Energy Saver key go off? When the Energy Saver key lights up, the energy saver mode activates.
-
Page 65: If You Cannot Solve The Problem
IMPORTANT Attempting to repair the machine yourself may void the limited warranty. If you need to contact your local authorized Canon dealer or the Canon help line, make sure you have the following information: •... -
Page 66: Machine Settings
Machine Settings CHAPTER This chapter explains how to adjust machine settings. The list of all the settings is also provided for your reference. Accessing the Machine Settings Press [Menu]. Press [ (-)] or [ (+)] to select the menu you want to change ➞ press [OK]. You have now accessed the settings in the list. -
Page 67: Common Settings
COMMON SETTINGS Name Descriptions 1. DEFAULT SETTINGS Selects the Copy, or Scan mode for the machine's default mode. When the power cord is plugged in, or after the auto clear function activates, the standby display of the selected mode appears. COPY The Copy mode is selected as default. -
Page 68: Copy Settings
COPY SETTINGS Name Descriptions 1. STD. IMAGEQUALITY Selects the document type. TEXT/PHOTO: Text/photo mode TEXT: Character mode PHOTO: Photo mode 2. STANDARD EXPOSURE Sets how the exposure is adjusted. MANUAL Adjusts the exposure manually. The exposure can be adjusted in 9 increments. (center) AUTO The exposure is adjusted automatically. -
Page 69: Printer Settings
PRINTER SETTINGS Name Descriptions 1. ERROR TIME OUT Sets the length of time before the machine returns an error when no data is received from the computer. The error time out is on. Sets the time out period. 5SEC to 300SEC (15SEC) The error time out is off. -
Page 70: Chapter 11 Appendix
Organic Photosensitive Conductor Copying System Indirect Electrostatic Transfer System Developing System Toner Projection System Fixing System Canon's RAPID Fusing System™ Resolution Approx. 600 dpi x 600 dpi Number of Tones Up to A4 size Acceptable Documents Sheets, books, and three-dimensional objects (up to 2 kg) - Page 71 For high-quality copies, we recommended using paper and transparencies recommended by Canon. Some types of paper available at office supply stores may not be suitable for this machine. If you have any questions about paper and transparencies, consult your local authorized Canon dealer or the Canon help line.
-
Page 72: Index
Index Symbols type, 3-1 weight, 3-1 (–), (+) keys, 1-3 Document feed platen glass, 1-1, 3-2 Alarm indicator, 1-3 AUTO CLEAR setting, 10-4 Energy Saver AUTO SORT setting, 10-3 key, 1-3 restoring, 1-5 setting, 1-5 ENERGY SVR TIME setting, 10-4 Cartridge Enlarge/Reduce handling, 8-3... - Page 73 accessing, 10-1 PRINTER DATA ERROR message, 9-8 Making copies, 5-1 Printing MEMORY FULL message, 9-7 areas, 2-2 beforehand, 4-1 Menu canceling, 4-2 descriptions, 10-1 documents, 4-1 key, 1-3 problems, 9-14 Multi-purpose feeder, 1-1 Problems loading an envelope, 2-7 cannot solve, 9-17 loading paper, 2-6 copying, 9-12 print media requirements, 2-1...
- Page 74 System monitor, 7-1 Toner in the cartridge, 8-2 TONER SAVER MODE setting, 10-2 Transporting, 8-8 Tray output, 1-1 Troubleshooting, 9-1 USB port, 1-2 Weight document, 3-1 machine, 11-2 print media, 2-1 Zoom, 5-2 ZOOM RATIO setting, 10-3 11-5...
- Page 75 CANON INC. 30-2, Shimomaruko 3-chome, Ohta-ku, Tokyo 146-8501, Japan CANON U.S.A., INC. One Canon Plaza, Lake Success, NY 11042, U.S.A. CANON CANADA INC. 6390 Dixie Road Mississauga, Ontario L5T 1P7, Canada CANON EUROPA N.V. Bovenkerkerweg 59-61 P.O. Box 2262, 1180 EG Amstelveen, The Netherlands CANON FRANCE S.A.