Table of Contents
Advertisement
Advertisement
Table of Contents

Related Manuals for Sanyo MDF-136


Summary of Contents for Sanyo MDF-136
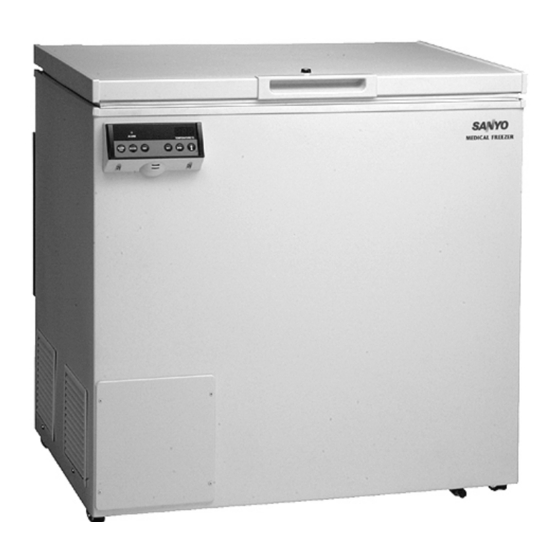
- Page 1 INSTRUCTION MANUAL MDF-136 MDF-236 MDF-436 BIOMEDICAL FREEZER MDF-236...
- Page 2 1. No part of this manual may be reproduced in any form without the expressed written permission of SANYO. 2. The contents of this manual are subject to change without notice. 3. Please contact SANYO if any point in this manual is unclear or if there are any inaccuracies. SANYO Electric Biomedical Co., Ltd.
-
Page 3: Table Of Contents
CONTENTS PRECAUTIONS FOR SAFE OPERATION P. 2 CAUTIONS FOR USAGE P. 6 ENVIRONMENTAL CONDITIONS P. 7 FREEZER COMPONENTS P. 8 INSTALLATION P. 11 OPTIONAL COMPONENTS P. 13 START-UP OF UNIT P. 15 REMOTE ALARM TERMINAL P. 15 TEMPERATURE SETTING P. 16 ALARMS &... -
Page 4: Precautions For Safe Operation
PRECAUTIONS FOR SAFE OPERATION It is imperative that the user complies with this manual as it contains important safety advice. Items and procedures are described so that you can use this unit correctly and safely. If the precautions advised are followed, this will prevent possible injury to the user and any other person. - Page 5 PRECAUTIONS FOR SAFE OPERATION WARNING Do not use the unit outdoors. Current leakage or electric shock may result if the unit is exposed to rain water. The installation by Only qualified engineers or service personnel should install the unit. unqualified personnel may cause electric shock or fire. Install the unit on a sturdy floor.
- Page 6 PRECAUTIONS FOR SAFE OPERATION WARNING Never splash water directly onto the unit as this may cause electric shock or short circuit. Any such work carried out by an Never disassemble, repair, or modify the unit yourself. unauthorized person may result in fire or injury due to a malfunction. Continued Disconnect the power supply plug if there is something wrong with the unit.
- Page 7 PRECAUTIONS FOR SAFE OPERATION CAUTION Do not climb onto the unit or do not put articles on the unit. This may cause injury by tipping or damage to the unit. Put on dry gloves when you take out refrigerated articles from the freezer. Handing frozen contents or the inside walls with naked hands may cause frostbite.
-
Page 8: Cautions For Usage
CAUTIONS FOR USAGE 1. Sometimes the alarm may not operate at the time of first start-up. This does not mean malfunction. It is due to the complete discharge of incorporated battery. 2-day continuous operation of the freezer is necessary to charge the battery fully. 2. -
Page 9: Environmental Conditions
ENVIRONMENTAL CONDITIONS This equipment is designed to be safe at least under the following conditions (based on the IEC 1010-1): 1. Indoor use; 2. Altitude up to 2000 m; 3. Ambient temperature 5 C to 40 4. Maximum relative humidity 80% for temperature up to 31 C decreasing linearly to 50% relative humidity at 40 5. -
Page 10: Freezer Components
FREEZER COMPONENTS MDF-236... - Page 11 FREEZER COMPONENTS 1. Door: To open the door, grip the handle. 2. Handle: Always grip this handle to open and close the outer door. 3. Door gasket: This provides a tight door seal and prevents cold air leak. Keep clean. 4.
-
Page 12: Control Panel And Keypad
FREEZER COMPONENTS Control panel and keypad 1. Alarm test key (ALARM TEST): Test key for alarm device. By pressing this key, the alarm lamp is flashed, remote alarm is activated and buzzer sound. This means all alarm function operate correctly. 2. -
Page 13: Installation
INSTALLATION Installation site To operate this unit properly and to obtain maximum performance, install the unit in a location with the following conditions: 1. A location not subjected to direct sunlight Installation in a location subjected to direct sunlight may lead to inadequate cooling. 2. - Page 14 INSTALLATION Installation 1. Remove the packaging materials and tapes Remove all transportation packaging materials and tapes. Open the doors and ventilate the unit. If the outside panels are dirty, clean them with a neutral detergent and wipe it up with a wet cloth. 2.
-
Page 15: Optional Components
OPTIONAL COMPONENTS Temperature recorder WARNING Always disconnect the power supply to the unit prior to attachment of a temperature recorder in order to prevent electric shock or injury. An automatic temperature recorders is available for this freezer as the optional component. The type of the recorder is MTR-G85. - Page 16 OPTIONAL COMPONENTS 6. As shown in the Fig. 4, fix the recorder sensor on the chamber wall by using 2 clips with a 10mm spacer Spacer located between the wall and the clip. The clips and spacers are enclosed with the mounting kit. 7.
-
Page 17: Start-Up Of Unit
START-UP OF UNIT Follow the procedures for the initial and consequent operations of the unit. 1. Turn the power switch ON with the chamber empty. 2. Turn ON the battery switch. 3. The alarm sometimes may operate. In this case, silence the alarm by pressing BUZZER key. 4. -
Page 18: Temperature Setting
TEMPERATURE SETTING Chamber temperature Table 1 shows the basic procedure for setting the chamber temperature. Perform key operations in the sequence indicated in the table. The example in the table is based on the assumption that the desired temperature is -35 Note: The unit is set at the factory that the chamber temperature -30 Table 1. -
Page 19: Alarm Temperature Setting
TEMPERATURE SETTING Alarm temperature setting This unit is provided with both high and low temperature alarms. The temperature at which the alarm is activated may be changed. The available set range for high temperature alarm is between +5 C and +15 C, and -5 C and -15 C for... -
Page 20: Alarms & Safety Functions
ALARMS & SAFETY FUNCTIONS This unit has the alarms and safety functions shown in Table 5, and also self diagnostic functions. Table 5 Alarms and safety functions Alarm & Safety Situation Indication Buzzer Safety operation If the chamber temperature is higher ALARM lamp is flashed. -
Page 21: Setting Of Alarm Resume Time
SETTING OF ALARM RESUME TIME The alarm buzzer and remote alarm are silenced by pressing BUZZER key on the control panel during alarm condition. The buzzer and remote alarm will be activated again after certain suspension if the alarm condition is continued. The suspension time can be set by following the procedure shown in the Table 6 below. -
Page 22: Routine Maintenance
ROUTINE MAINTENANCE WARNING Always disconnect the power supply to the unit prior to any repair or maintenance of the unit in order to prevent electric shock or injury. Ensure you do not inhale or consume medication or aerosols from around the unit at the time of maintenance. -
Page 23: Troubleshooting
TROUBLE SHOOTING If the unit malfunctions, check out the following before calling for service. The chamber is not cooled at all 1. The circuit breaker of power source is active. 2. The voltage is too low. (In this case, call an electrician.) 3. -
Page 24: Specifications
Temperature sensor Thermister sensor Temperature alarm Flash of digital indicator and alarm lamp, Buzzer, (Remote alarm) Accessories Key 1 set, Scraper 1, Basket 2 (MDF-136), 3 (MDF-236), 4 (MDF-436) Weight 45 kg 54 kg 71 kg For power failure alarm, Nickel hydrogen battery, DC 6V, 1100mAh, Automatic charge... -
Page 25: Performance
PERFORMANCE MDF-136 Cooling performance C (ambient temperature; 35 C, no load) Temperature control range C to -35 Rated voltage AC 110 V AC 115 V AC 220 V AC 220 to 240 V Rated frequency 60 Hz 60 Hz 60 Hz... -
Page 26: Safety Check Sheet
Procedure to be adhered to in order to reduce safety risk indicated in b) below. Date : Signature : Address, Division : Telephone : Product name : Model : Serial number : Date of Installation : Biomedical Freezer MDF-136/236/436 Please decontaminate the unit yourself before calling the service engineer. - Page 27 SANYO Electric Biomedical Co., Ltd. 7FB6P101279004 5-5, Keihan-Hondori 2-Chome Recycled paper Moriguchi City, Osaka 570-8677 Japan Printed in Japan...