JVC TH-P3 Instructions Manual
Dvd digital cinema system
Hide thumbs
Also See for TH-P3:
- Instructions manual (90 pages) ,
- Brochure & specs (26 pages) ,
- Instructions manual (44 pages)

Related Manuals for JVC TH-P3


Summary of Contents for JVC TH-P3
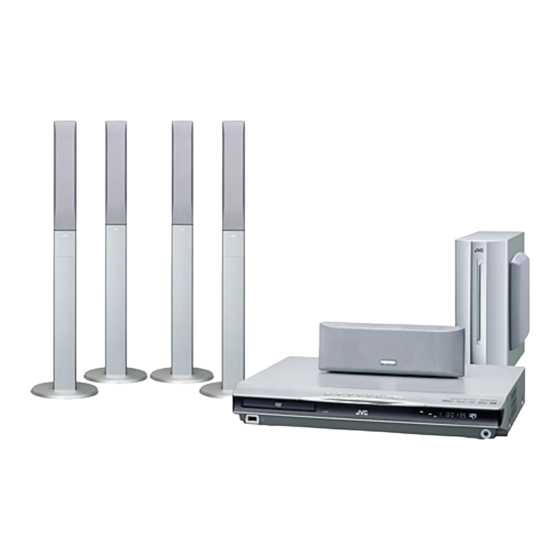
- Page 1 DVD DIGITAL CINEMA SYSTEM TH-P7 Consists of XV-THP7, SP-WP7, SP-THP7F, SP-THP7C and SP-THP7S TH-P3 Consists of XV-THP3, SP-WP5, SP-THP3F, SP-THP3C and SP-THP3S INSTRUCTIONS LVT1523-008A [US, UN, UG, UX, UW, UB, A]...
-
Page 2: Warnings, Cautions And Others
Warnings, Cautions and Others CAUTION To reduce the risk of electrical shocks, fire, etc.: 1. Do not remove screws, covers or cabinet. 2. Do not expose this appliance to rain or moisture. CAUTION— Disconnect the mains plug to shut the power off completely (the STANDBY lamp goes off). -
Page 3: Important For Laser Products
IMPORTANT FOR LASER PRODUCTS 1. CLASS 1 LASER PRODUCT CAUTION serviceable parts inside the unit; leave all servicing to qualified service personnel. CAUTION when open. Do not view directly with optical instruments. Caution: Proper Ventilation To avoid risk of electric shock and fire and to protect from damage, place the apparatus on a level surface. The minimal clearances are shown below: Front view Wall or... -
Page 4: Table Of Contents
Table of contents Introduction ...2 Notes on handling ... 2 Supplied accessories ... 2 About discs ...3 Playable disc types ... 3 Playable file types ... 4 Index of parts and controls ...5 Connections ...7 Connecting the FM and AM antennas ... 7 Connecting the satellite (front, center, surround) speakers and the subwoofer ... -
Page 5: Introduction
Introduction Notes on handling 7 Important cautions Installation of the system • Select a place which is level, dry and neither too hot nor too cold; between 5°C and 35°C. • Leave sufficient distance between the system and the TV. •... -
Page 6: About Discs
About discs Playable disc types This system has been designed to play back the following discs: DVD VIDEO √ in the list below shows available disc types and recording formats. Disc type CD-R/-RW* DVD-R* Recording format DVD Video — DVD VR —... -
Page 7: Playable File Types
About discs Playable file types For all playable files • The system can only recognize and play files with one of the following extensions, which can be in any combination of upper and lower case; MP3: “.MP3”, “.mp3” WMA: “.WMA”, “.wma” JPEG: “.JPG”, “.JPEG”, “.jpg”, “.jpeg”... -
Page 8: Index Of Parts And Controls
Index of parts and controls The numbers in the figures indicate the pages where the details of the parts are described. Front panel (center unit) Display window Disc tray (inside): Remote sensor: Rear panel (center unit) 9, 10... -
Page 9: Putting Batteries In The Remote Control
Index of parts and controls Remote control Number buttons: 19 20, 24, 33 15, 17 15, 17 17, 37 17, 37 19, 29 27, 28 28, 29 13, 15, 16, 25, 27, 29, 31, 32, 33 Putting batteries in the remote control R6P (SUM-3)/AA (15F) type dry-cell batteries (supplied) 20, 24,... -
Page 10: Connections
Connections Connecting the FM and AM antennas 7 AM loop antenna Setting up supplied AM loop antenna If the antenna cord is covered with the insulation coat, twist and pull the insulation coat off and remove. Connecting AM loop antenna White Black •... -
Page 11: Connecting The Satellite (Front, Center, Surround) Speakers And The Subwoofer
Connections Connecting the satellite (front, center, surround) speakers and the subwoofer 7 Assembling the front and surround speakers for TH-P7 Front speaker Surround Stand (4) (SP-THP7F) (2) speaker (SP-THP7S) (2) • Check the model name of each speaker from the label on the rear to locate each speaker correctly. - Page 12 Connections TH-P7 7 Connecting speakers for SP-THP7F Front speakers SP-THP7C Center speaker CAUTION • If you connect speakers other than the supplied ones, use speakers of the same speaker impedance (SPEAKER IMPEDANCE) indicated on the rear of the center unit. •...
- Page 13 Connections TH-P3 7 Connecting speakers for SP-THP3F Front speakers SP-THP3C Center speaker CAUTION • If you connect speakers other than the supplied ones, use speakers of the same speaker impedance (SPEAKER IMPEDANCE) indicated on the rear of the center unit.
-
Page 14: Speaker Layout
Connections Speaker layout To obtain the best possible sound from this system, you need to place all the speakers except the subwoofer at the same distance from the listening position. Center speaker Front left speaker Surround left speaker If your speakers cannot be placed at the same distance from the listening position You can adjust the delay time of the speakers. -
Page 15: Connecting An External Component
Connections Connecting an external component You can enjoy the sound of an analog component. Center unit To audio output RCA pin plug cord (not supplied) NOTE • If you connect a sound-enhancing device such as a graphic equalizer between the source components and this system, the sound output through this system may be distorted. -
Page 16: Operating The Tv
Operating the TV You can use the remote control to operate not only this unit but also JVC TVs. • Refer also to the manuals supplied for the TV. • To operate the TV, aim the remote control directly at the remote sensor on the TV. 7 To operate a JVC’s TV You can perform the following operations on the TV. -
Page 17: Basic Operations
Basic operations The buttons on the remote control are used to explain most of the operations in this manual. You can use the buttons on the center unit same as on the remote control for operations unless otherwise noted. The buttons described below are used on pages 14 to Turning the system on/off On the remote control: Press... -
Page 18: Selecting The Source To Play
Basic operations Selecting the source to play On the remote control: Press one of the source selecting buttons (DVD 3, USB MEMORY 3, FM/AM or AUX). DVD 3: To play back a disc (DVD VIDEO, VCD etc.). (See page 17.) USB MEMORY 3: To play back a file in a USB mass storage class device. -
Page 19: Sleep Timer [Sleep]
Basic operations Sleep Timer [SLEEP] The system turns off automatically when the specified period of time has passed. Press SLEEP with SHIFT pressed. Each time you repeat the procedure, the shut-off time changes. Example: To check the remaining time Press SLEEP once with SHIFT pressed. To change the remaining time Press SLEEP repeatedly with SHIFT pressed. -
Page 20: Playback
Playback • The icon such as shows the disc formats or file types the operation is available for. The buttons described below are used on pages 17 to Number buttons Cursor (3/2/Y/5)/ ENTER Basic Playback 7 To play a disc Press 0 on the center unit. - Page 21 Playback 7 Playback information on the display window DVD VIDEO Example: When a DVD VIDEO encoded with Dolby Digital 5.1ch is played Chapter number Signal and speaker indicators (See page 22.) Surround mode and digital signal format (See page 22.) Pressing FL DISPLAY Title number Chapter number...
-
Page 22: One Touch Replay
Playback JPEG file File number Pressing FL DISPLAY Group number NOTE • You can change the time information mode (except for MP3/ WMA/ASF/MPEG-2/MPEG-1/DivX). (See page 24.) • You can also check the playback information on the TV screen. (See page 23.) 7 Screen saver An image may burn in on a TV screen if a static picture is displayed for a long time. -
Page 23: Skipping At About 5-Minute Intervals
Playback Skipping at about 5-minute intervals While playing back a long file, you can skip within the file at about 5-minute intervals. 7During playback Press Cursor 3/2. Each time you press the button, the playback position skips to the beginning of the previous or next interval. NOTE •... -
Page 24: Advanced Operations
Advanced operations • The icon such as shows the disc formats or file types the operation is available for. The buttons described below are used on pages 21 to Number buttons Cursor (3/2/Y/5)/ ENTER Using the surround mode You can enjoy more realistic sound field than a stereo sound by using the surround mode. -
Page 25: Selecting The Surround Mode
Advanced operations 7 DSP • STADIUM STADIUM mode adds clarity and spreads the sound, like in an outdoor stadium. • All Channel Stereo All Channel Stereo (ALL ST) mode can reproduce a larger stereo sound field using all the connected (and activated) speakers. -
Page 26: Using The On-Screen Bar
Advanced operations Using the on-screen bar You can check disc information and you can use some functions using the on-screen bar. Showing the on-screen bar 7Whenever a disc is loaded Press ON SCREEN. Each time you press the button, the on- screen bar changes as follows on the TV screen. -
Page 27: Playing From A Specified Position On A Disc
Advanced operations Changing the time information You can change the time information in the on-screen bar on the TV screen and the display window of the center unit. 7During playback Press ON SCREEN twice. The on-screen bar appears on the TV screen. Press Cursor 3/2 to highlight Press ENTER repeatedly to select the desired information. - Page 28 Advanced operations Locating a desired scene using a VCD/SVCD menu with PBC A VCD or SVCD recorded with PBC has its own menus such as a list of contained songs. You can locate a specific scene by using these menus. 7During playback with PBC function Press RETURN repeatedly with SHIFT pressed, until the menu...
-
Page 29: Press Enter
Advanced operations Locating a desired position by specifying the time You can locate a desired position by specifying the time from the beginning the disc (while stopped) or the current title/track (during playback). 7For DVD VIDEO/DVD VR: During playback 7For VCD/SVCD: While stopped or during playback without PBC function 7For CD: During playback or while stopped 7 When specifying the elapsed playing time from the... -
Page 30: Resume Playback
Advanced operations 7For MP3/WMA: During playback or while stopped 7For JPEG/ASF/MPEG-2/MPEG-1/DivX: While stopped Press Cursor 3/2/Y/5 to select the desired group/track/file. • For MP3/WMA, playback starts from the selected track. • For JPEG, proceed to perform the following operation. Press play button for corresponding source (DVD 3 or USB MEMORY 3) or ENTER. -
Page 31: Selecting The Subtitle
Advanced operations Selecting the subtitle 7During playback of a disc/file containing subtitles in several languages When using the SUBTITLE button: Press SUBTITLE. Example (DVD VIDEO): “ENGLISH” is selected out of 3 subtitle languages recorded. Press Cursor Y/5 to select the desired subtitle. -
Page 32: Special Picture Playback
Advanced operations Special picture playback Frame-by-frame playback 7During playback Press 8 repeatedly. Each time you press the button, the still picture advances by one frame. To return to normal playback Press play button for corresponding source (DVD 3 or USB MEMORY 3). -
Page 33: Program Playback
Advanced operations Press ENTER. The current VFP settings appear again. Repeat steps 3 to 6 to adjust other parameters. Press VFP. NOTE • Although the setting display disappears in the middle of the procedure, the setting at that time will be stored. Program Playback 7While stopped Press PLAY MODE repeatedly until... -
Page 34: Repeat Playback
Advanced operations Repeat Playback Repeating the current selection 7For DVD VIDEO/DVD VR: During playback 7For VCD/SVCD: During playback without PBC function or while stopped 7For CD/MP3/WMA/JPEG/ASF/ MPEG-2/MPEG-1/DivX: During playback or while stopped When using the REPEAT button: Press REPEAT with SHIFT pressed. Repeat mode indicator Each time you press REPEAT, the Repeat mode changes. -
Page 35: Tray Lock
Advanced operations When using the on-screen bar: Press ON SCREEN twice. The on-screen bar appears on the TV screen. Press Cursor 3/2 to highlight Press ENTER. Press Cursor Y/5 repeatedly to select “A-B”. Press ENTER at the beginning of the part you want to repeat (point Press ENTER at the end of the part you want to repeat (point B). -
Page 36: Setting Dvd Preferences
Setting DVD preferences Using the setup menus • You can change the language used in the setup menus. See “Menu description” below. Basic operation on the setup menus 7While stopped Press SET UP with SHIFT pressed. Follow the instructions that appear on the TV screen. - Page 37 Setting DVD preferences 7 PICTURE SOURCE You can obtain optimal picture quality by selecting whether the content on the disc/file is processed by field (video source) or by frame (film source). Normally set to “AUTO”. • AUTO Used to play a disc/file containing both video and film source materials.
- Page 38 Setting DVD preferences 7 Subwoofer menu (SUBWOOFER) LEVEL You can set the output level of the subwoofer in the -6 dB to +6 dB range. CROSS OVER The signals below the preset frequency level will be sent to and be reproduced by the subwoofer. Select one of the crossover frequency levels according to the size of the small speaker connected.
-
Page 39: Tuner Operations
Tuner operations The buttons described below are used on pages 36 and Number buttons Setting the AM tuner interval spacing Some countries space AM stations 9 kHz apart, and some countries use 10 kHz spacing. You can only change the AM tuner interval spacing while selecting AM as the band. -
Page 40: Preset Tuning
Tuner operations Preset tuning Once a station is assigned to a channel number, the station can be quickly tuned in. You can preset 30 FM and 15 AM stations. 7 To preset the stations Tune in the station you want to preset. -
Page 41: References
References Maintenance 7 Handling Discs • Remove the disc from its case by holding it at the edge while pressing the center hole lightly. • Do not touch the shiny surface of the disc or bend the disc. • Put the disc back in its case after use to prevent warping. -
Page 42: Specifications
References Specifications 7 Center unit (XV-THP7/XV-THP3) Audio section 40 W per channel, RMS at 3 Ω at Front/Surround: 1 kHz, with 10 % total harmonic distortion. 100 W, RMS at 4 Ω at 1 kHz, with Center: 10 % total harmonic distortion. 100 W, RMS at 4 Ω... - Page 43 Sound Pressure Level: 73 dB/W·m Dimensions (W M H M D): 280 mm M 1106 mm M 280 mm Mass: 3.1 kg each 7 Satellite speakers (For TH-P3) Front speakers (SP-THP3F) Type: 1-Way Bass-Reflex Type (Magnetically-shielded Type) Speaker: 6.5 cm cone M 1 Power Handling Capacity: 40 W 3 Ω...
- Page 44 © 2006 Victor Company of Japan, Limited 0406RYMMDWJEM...
Need help?
Do you have a question about the TH-P3 and is the answer not in the manual?
Questions and answers