Table of Contents
Advertisement
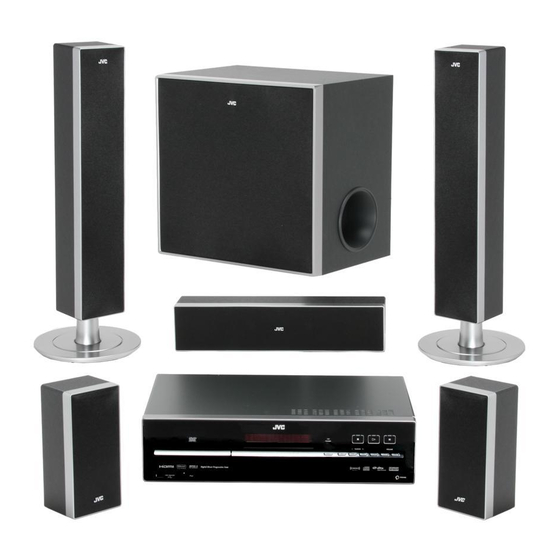
DVD DIGITAL THEATER SYSTEM
TH-D60
Consists of XV-THD60, SP-THD6W,
SP-THD6F, SP-THD6C and SP-THD6S
TH-D50
Consists of XV-THD50, SP-THD5W,
SP-THD5F, SP-THD5C and SP-THD5S
TH-D5
Consists of XV-THD5, SP-THD5W,
SP-THD5F, SP-THD5C and SP-THD5S
TH-D4
Consists of XV-THD4, SP-THD5W,
SP-THD5F, SP-THD5C and SP-THD5S
(TH-D60 only)
INSTRUCTIONS
For Customer Use:
Enter below the Model No. and Serial
No. which are located either on the rear,
bottom or side of the cabinet. Retain this
information for future reference.
Model No.
Serial No.
LVT1704-001B
[J,C]
Advertisement
Chapters
Table of Contents
Troubleshooting

Related Manuals for JVC TH-D5


Summary of Contents for JVC TH-D5
- Page 1 DVD DIGITAL THEATER SYSTEM TH-D60 Consists of XV-THD60, SP-THD6W, SP-THD6F, SP-THD6C and SP-THD6S TH-D50 Consists of XV-THD50, SP-THD5W, SP-THD5F, SP-THD5C and SP-THD5S TH-D5 Consists of XV-THD5, SP-THD5W, SP-THD5F, SP-THD5C and SP-THD5S TH-D4 Consists of XV-THD4, SP-THD5W, SP-THD5F, SP-THD5C and SP-THD5S (TH-D60 only)
-
Page 2: Note To Catv System Installer
Warnings, Cautions and Others Mises en garde, précautions et indications diverses CAUTION — button! Disconnect the mains plug to shut the power off completely (the STANDBY lamp goes off). When installing the apparatus, ensure that the plug is easily accessible. button in any position does not disconnect the mains line. - Page 3 (Pour le Canada) Rayonnement laser visible et/ou CAUTION invisible de classe 1M une fois ouvert. Ne pas regarder Changes or modifications not approved by JVC could directement avec des instruments optiques. void the user’s authority to operate the equipment. 4. REPRODUCTION DE L’ÉTIQUETTE: ÉTIQUETTE DE PRÉCAUTION PLACÉE À...
-
Page 4: Table Of Contents
How to read this manual Table of contents • Illustrations and button names of the TH-D60 are mainly used for explanation. Before using this System ..........2 • The following icons and illustrations are used to make the Playable discs/devices/files..........3 explanations simple and easy-to-understand. -
Page 5: Before Using This System
Before using this System Precautions Notes on installing and using the speakers There are no user-serviceable parts inside. If anything • Place the speakers and subwoofer on a flat and level goes wrong, unplug the power cord and consult your surface. -
Page 6: Playable Discs/Devices/Files
• DVD-R/-R DL/-RW Playable digital devices • +R/+RW Super Video CD • Discs on the market JVC bears no responsibility for any loss of data in an (SVCD)/Video CD • CD-R/-RW iPod and/or USB mass storage class device while using (VCD) this System. -
Page 7: Playable File Types
JPEG files Playable file types • It is recommended to record a file at 640 x 480 resolution. (If a file has been recorded at a resolution of more than The following files in a disc or a USB mass storage class 640 x 480, it will take a longer time to be displayed.) device can be played back. -
Page 8: Getting Started
(SP-THD6F/SP-THD5F) (SP-THD6F/SP-THD5F) • Speaker cords: 3 m (10 ft) (x 4), 8 m (26.3 ft) (x 2) • Feet – TH-D60: For surround speakers (x 8) – TH-D50/TH-D5/TH-D4: For front and surround To subwoofer speakers (x 16) (SP-THD6W/ SP-THD5W) • Screws (TH-D60 only): M5 x 85 mm (3-3/8 inches) (x 6) -
Page 9: Speaker Layout
Use the supplied screws (M5 x 85 mm/3-3/8 inches) to horizontally (see below). attach the base plate to the speaker. When placing the speakers horizontally Lay the speakers horizontally so that the JVC logos are Speaker layout positioned as illustrated below. Ex.: You can enjoy surround sound by placing the speakers as illustrated (Speaker layout A or B). -
Page 10: Connecting The Antennas
Getting started Connecting the antennas Connecting a TV Connect the TV to the appropriate video out jacks to view XM Mini-Tuner system—TH-D60 only the playback picture. XM Mini-Tuner Home Dock The picture quality order is as follows: antenna (not supplied) HDMI >... -
Page 11: Connecting External Components
Do not connect the power cord until all other connections have been made. Audio connection Connection using the component Connecting a digital component video jacks Digital coaxial cable Green DBS (Direct (not supplied) Broadcasting From component Blue Satellite) video input tuner, etc. -
Page 12: Connecting The Ac Power Cord
Do not connect the power cord until all other connections have been made. Connection for “VIDEO2”—TH-D60 Connection for “VIDEO” —TH-D50/TH- D5/TH-D4 Select “VIDEO2” as the source ( 11) for playing a component connected as follows. Select “VIDEO” as the source ( 11) for playing a component connected as follows. -
Page 13: Basic And Common Operations
Basic and common operations How to use the number buttons Listening with headphones To select 3: Press 3. When the headphones is connected, the System To select 10: Press 10. automatically deactivates the speakers and cancels the To select 14: Press h10, 1, then 4. surround mode ( 13) temporarily. -
Page 14: Adjusting The Volume
• TH-D50/TH-D5/ VIDEO* TH-D4: VIDEO To select the source from the center unit TH-D60 only TH-D50/TH-D5/TH-D4: The FM/AM button is used instead of FM/AM/XM. Make sure that the appropriate audio input setting have been made for the source (VIDEO1/VIDEO2 or VIDEO). -
Page 15: Sound And Monitor Settings
Hold « – TH-D60: DVD, USB, IPod, VIDEO1* , VIDEO2 TH-D50/TH-D5/TH-D4: DVD, USB, IPod, VIDEO Select the appropriate speaker position mode – TH-D60: FM, AM and VIDEO1* according to your speaker layout ( TH-D50/TH-D5/TH-D4: FM and AM TH-D60 only: When the source is “XM,”... -
Page 16: Adjusting The Bass And Treble
Sound and monitor settings TH-D60 only: Adjusting the bass and treble – When the source is “VIDEO 1” with “5.1CH” sounds selected as the audio input setting ( 14), the Adjusts the treble sound surround mode setting is ineffective. All incoming signals are emitted through the corresponding BASS Adjusts the bass sound... -
Page 17: Scanning Mode Setting
Select the scanning mode according to the type Set the audio input of the external component for “VIDEO1/ of TV and connection method. VIDEO2” (TH-D60) or “VIDEO” (TH-D50/TH-D5/TH- D4). To use the progressive mode, connect the TV to the HDMI MONITOR OUT terminal or COMPONENT... -
Page 18: Disc/File Playback
Disc/file playback The following icons show the available disc/file types for Basic playback the target function: Playing back a disc Select “DVD” as the source. ( Initial settings (On the center unit) Make the following settings before playing back discs/ Place a disc on the tray. - Page 19 DO NOT connect or disconnect the device when the Changing the playback System is turned on. information You cannot connect a computer to the USB MEMORY terminal of the System. Each time you press the button, the playback DO NOT connect the device through a USB hub. information alternates between “type A”...
-
Page 20: Using The Disc Menu
Confirm track/file number* For some discs, you can also select items by using the number buttons. Select the title/ TH-D50/TH-D5/TH-D4: The TOP MENU/PG button is used program or playlist/ instead of TOP MENU/PG/DIRECT. group number* For VCD/SVCD with PBC • Enter the number while “–... -
Page 21: Changing The Playback Mode
See page 15 for button locations. Playing at random—random Changing the playback mode play Program play and random play cannot be used for a USB mass storage class device. Programing the playing order—program play To return to normal playback Press the button repeatedly until both the program window and disappear from the TV. -
Page 22: Advanced Operations
Disc/file playback Special picture playback Advanced operations Disc/file To do Changing the language/sound/scene angle To do Disc/file Play back frame by frame Select the subtitle language* Play back in slow- motion* • To show/hide the Hold subtitle, press « SUBTITLE. Enlarge the picture* •... -
Page 23: Special Playback For Dvd Audio
See page 15 for button locations. Adjusting the picture Special playback for DVD Audio quality (VFP) Playing back a bonus group You can adjust the picture mode. Some DVD Audio discs have a “bonus group.” To play back a bonus group, you have to enter the specific “key number”... -
Page 24: Operation From The Tv Screen
The contents of the on-screen bar differ according to the type of discs/files. TH-D50/TH-D5/TH-D4: The ON SCREEN button is used instead of CAT/ON SCREEN. During playback of ASF, MPEG-1, MPEG-2, or DivX files, the function bar does not appear. - Page 25 (play button). – To play the selected file only, press ENTER. When the source is “DVD,” “FILE” appears, and when the source is “USB,” “USB” appears. For MP3/WMA/WAV only. TH-D50/TH-D5/TH-D4: The TOP MENU/PG button is used instead of TOP MENU/PG/DIRECT.
-
Page 26: Personal Settings
Personal settings You can change the settings of the System according Set the remote control mode to your preferences and playing environment. before operation. For disc playback Select the menu. For playback of a file on a USB mass storage class device Select the item, then confirm. - Page 27 Underlined items are the initial settings. Audio menu (AUDIO) DOWN MIX This menu is available only when the speaker position mode is set to “S.SPK F” ( 12). Select the audio signal output to the TV connected to the HDMI MONITOR OUT terminal. DOLBY SURROUND: For the TV equipped with Dolby Pro Logic decoder STEREO: For ordinary TV D.
-
Page 28: Xm Satellite Radio Operations
XM Satellite Radio operations How to subscribe XM Satellite Radio operations are available on Hardware and required monthly subscription sold TH-D60 only. separately. Other fees and taxes, including a one-time activation fee may apply. Subscription fee is consumer only. Set the remote control mode All fees and programming subject to change. -
Page 29: Manual Tuning
Manual tuning Preset tuning You can preset 30 XM Satellite Radio channels. To search a channel Storing the preset channels Tune in to the channel you want to preset. “_ _” flashes on the display. Perform the next step while “_ _” is flashing. While searching, the invalid and unsubscribed Select a preset number, then store the channel channels are skipped. -
Page 30: Fm/Am Tuner Operations
“_ _” flashes on the display. Perform the next or “AM”) you want to listen to. step while “_ _” is flashing. TH-D50/TH-D5/TH-D4: The FM/ Select a preset number, then store the station to AM button is used instead of FM/ that number. -
Page 31: Ipod Playback
* Attach the dock adapter (supplied for the iPod or You cannot send any data to your iPod from the separately purchased) before placing the iPod. System. TH-D5/TH-D4 only: To disconnect the TH-D5/TH-D4: iPod cable from the iPod, press the buttons on the sides, then pull it out. -
Page 32: Operating External Components
Operating external components Operating external components Set the remote control mode before operation. Set the remote control mode before operating each external component (see the left column). For TV Operating the TV Turns the power on and off For DBS tuner or CATV converter TV VOL +/–... -
Page 33: References
References Manufacturer’s code list Language code list AA Afar Hebrew RO Rumanian AB Abkhazian Yiddish RW Kinyarwanda Samsung AF Afrikaans JW Javanese SA Sanskrit Hitachi Sanyo 13, 14 AM Ameharic KA Georgian SD Sindhi AR Arabic KK Kazakh SG Sangho Magnavox Sharp AS Assamese... -
Page 34: Messages And Icons Shown On The Tv And Display
References Messages shown on the display while Messages and icons shown on listening to the XM Satellite Radio the TV and display NO SIGNL No signal is received. Messages and icons shown on the TV The XM Mini-Tuner is not properly during disc/file playback CHECK installed or the XM Mini-Tuner... - Page 35 No picture is displayed on the TV or no sound • This product incorporates copyright protection comes out through the HDMI connection. technology that is protected by U.S. patents and other ZThe connected TV is not HDCP-compatible. (“HDCP intellectual property rights. Use of this copyright ERR”...
-
Page 36: Specifications
× (13-15/16 inches 13-7/8 inches 9-13/16 inches) (VIDEO IN) Mass: 8.5 kg (18.8 lbs) 1.0 V(p-p)/75 Ω Composite: For SP-THD5W (TH-D50/TH-D5/TH-D4) (Y): 1.0 V(p-p)/75 Ω S-video Type: Bass-Reflex Type (C): 0.286 V(p-p)/75 Ω × Speaker: 16 cm (6-5/16 inches) cone Power Handling Capacity: 200 W 3 Ω... - Page 37 Satellite speakers (For TH-D60) Satellite speakers (For TH-D50/TH-D5/ TH-D4) Front speakers (SP-THD6F) Type: Front speakers (SP-THD5F) 2-Way Bass-Reflex Type (Magnetically Shielded Type) Type: × Speaker: 8 cm (3-3/16 inches) cone 1-Way Bass-Reflex Type (Magnetically Shielded Type) × 3 cm (1-3/16 inches) dome ×...
- Page 40 0107RYMMDWJEM © 2007 Victor Company of Japan, Limited...
- Page 41 DVD DIGITAL THEATER SYSTEM TH-D60WM Consists of XV-THD60WM, SP-THD60WMW, SP-THD6F, SP-THD6C and SP-THD6S INSTRUCTIONS For Customer Use: Enter below the Model No. and Serial No. which are located either on the rear, bottom or side of the cabinet. Retain this information for future reference.
- Page 42 Warnings, Cautions and Others Mises en garde, précautions et indications diverses CAUTION — button! Disconnect the mains plug to shut the power off completely (the STANDBY lamp goes off). When installing the apparatus, ensure that the plug is easily accessible. button in any position does not disconnect the mains line.
- Page 43 (Pour le Canada) Rayonnement laser visible et/ou CAUTION invisible de classe 1M une fois ouvert. Ne pas regarder Changes or modifications not approved by JVC could directement avec des instruments optiques. void the user’s authority to operate the equipment. 4. REPRODUCTION DE L’ÉTIQUETTE: ÉTIQUETTE DE PRÉCAUTION PLACÉE À...
- Page 44 How to read this manual Table of contents The following icons and illustrations are used to make the explanations simple and easy-to-understand. Before using this System ..........2 Icons for System operations Playable discs/devices/files..........3 Playable disc types ............3 Operations from the center unit Playable digital devices ..........
-
Page 45: Before Using This System
Before using this System Precautions Notes on installing and using the speakers There are no user-serviceable parts inside. If anything • Place the speakers and subwoofer on a flat and level goes wrong, unplug the power cord and consult your surface. -
Page 46: Playable Discs/Devices/Files
• DVD-R/-R DL/-RW Playable digital devices • +R/+RW Super Video CD • Discs on the market JVC bears no responsibility for any loss of data in an (SVCD)/Video CD • CD-R/-RW iPod and/or USB mass storage class device while using (VCD) this System. -
Page 47: Playable File Types
JPEG files Playable file types • It is recommended to record a file at 640 x 480 resolution. (If a file has been recorded at a resolution of more than The following files in a disc or a USB mass storage class 640 x 480, it will take a longer time to be displayed.) device can be played back. -
Page 48: Getting Started
Getting started Checking the supplied Connecting the speakers and accessories subwoofer If anything is missing, contact your dealer immediately. • Remote control (x 1) • Batteries (x 2) • FM antenna (x 1) • AM loop antenna (x 1) • Composite video cord (x 1) Center unit •... -
Page 49: Speaker Layout
Use the supplied screws (M5 x 85 mm/3-3/8 inches) to horizontally (see below). attach the base plate to the speaker. When placing the surround speakers horizontally Lay the surround speakers horizontally so that the JVC logos Speaker layout are positioned as illustrated below. Ex.: You can enjoy surround sound by placing the speakers as illustrated (Speaker layout A or B). -
Page 50: Connecting The Antennas
Getting started Connecting the antennas Connecting a TV Connect the TV to the appropriate video out jacks to view XM Mini-Tuner system the playback picture. XM Mini-Tuner Home Dock The picture quality order is as follows: antenna (not supplied) HDMI > Component video > S-video > Composite XM Mini-Tuner video (not supplied) -
Page 51: Connecting External Components
Do not connect the power cord until all other connections have been made. Audio connection Connection using the component Connecting a digital component video jacks Digital coaxial cable Green DBS (Direct (not supplied) Broadcasting From component Blue Satellite) video input tuner, etc. -
Page 52: Connecting The Ac Power Cord
Do not connect the power cord until all other connections have been made. Connecting an analog component Connection for “VIDEO2” Select “VIDEO2” as the source ( 11) for RCA pin plug cord playing a component connected as follows. VCR, etc. (not supplied) Video connection From audio output... -
Page 53: Basic And Common Operations
Basic and common operations How to use the number buttons Listening with headphones To select 3: Press 3. When the headphones is connected, the System To select 10: Press 10. automatically deactivates the speakers and cancels the To select 14: Press h10, 1, then 4. surround mode ( 13) temporarily. - Page 54 See page 10 for button locations. Turning the power on or off Adjusting the volume To turn off the System by using the sleep timer – – (off) = 10 = 20 = 30 = 60 = 90 = 120 To turn off the volume instantly = 150 = 180 = (back to the beginning) (unit: minutes)
-
Page 55: Sound And Monitor Settings
Sound and monitor settings As the speaker position mode is changed, the following settings are also changed automatically: Set the remote – The output level settings of the speakers and control mode subwoofer (see below) are initialized. before operation. – The surround mode ( 13) is set to “AUTO SUR.”... - Page 56 Sound and monitor settings When the source is “VIDEO1” with “5.1CH” selected Adjusting the bass and treble as the audio input setting ( 14), the surround sounds mode setting is ineffective. All incoming signals are Adjusts the treble sound emitted through the corresponding speakers. “MULTI CH”...
-
Page 57: Scanning Mode Setting
See page 12 for button locations. Setting the audio input for Scanning mode setting external components Select the scanning mode according to the type Set the audio input of the external component for “VIDEO1” of TV and connection method. or “VIDEO2.” To use the progressive mode, connect the TV to the HDMI MONITOR OUT terminal or COMPONENT jacks*... -
Page 58: Disc/File Playback
Disc/file playback The following icons show the available disc/file types for Basic playback the target function: Playing back a disc Select “DVD” as the source. ( Initial settings (On the center unit) Make the following settings before playing back discs/ Place a disc on the tray. - Page 59 DO NOT connect or disconnect the device when the Changing the playback System is turned on. information You cannot connect a computer to the USB MEMORY terminal of the System. Each time you press the button, the playback DO NOT connect the device through a USB hub. information alternates between “type A”...
-
Page 60: Using The Disc Menu
Disc/file playback Using the disc menu Locating a desired scene or song For DVD Video/DVD Audio Selecting the beginning of a desired scene or song For a DVD Video disc For a DVD Audio disc To do Disc/file Select the desired item, then confirm the Skip chapter/track/file selection. -
Page 61: Changing The Playback Mode
See page 15 for button locations. Playing at random—random Changing the playback mode play Program play and random play cannot be used for a USB mass storage class device. Programing the playing order—program play To return to normal playback Press the button repeatedly until both the program window and disappear from the TV. -
Page 62: Advanced Operations
Disc/file playback Special picture playback Advanced operations Disc/file To do Changing the language/sound/scene angle To do Disc/file Play back frame by frame Select the subtitle language* Play back in slow- motion* • To show/hide the Hold subtitle, press « SUBTITLE. Enlarge the picture* •... -
Page 63: Special Playback For Dvd Audio
See page 15 for button locations. Adjusting the picture Special playback for DVD Audio quality (VFP) Playing back a bonus group You can adjust the picture mode. Some DVD Audio discs have a “bonus group.” To play back a bonus group, you have to enter the specific “key number”... -
Page 64: Operation From The Tv Screen
Disc/file playback On-screen bar functions Operation from the TV screen Selects the time information mode shown Using the on-screen bar on the display and the status bar. : Elapsed time of chapter/track You can use various functions from the on- screen bar. - Page 65 See page 15 for button locations. Using the file control Using the program list/ display playlist (for DVD VR) The file control display appears in the Program list following cases. – Audio files: Always appears. – Movie and picture files: When TOP MENU(/PG/DIRECT) or MENU(/PL) is pressed or playback is stopped.
-
Page 66: Personal Settings
Personal settings You can change the settings of the System according Set the remote control mode to your preferences and playing environment. before operation. For disc playback Select the menu. For playback of a file on a USB mass storage class device Select the item, then confirm. - Page 67 Underlined items are the initial settings. Audio menu (AUDIO) DOWN MIX This menu is available only when the speaker position mode is set to “S.SPK F” ( 12). Select the audio signal output to the TV connected to the HDMI MONITOR OUT terminal. DOLBY SURROUND: For the TV equipped with Dolby Pro Logic decoder STEREO: For ordinary TV D.
-
Page 68: Xm Satellite Radio Operations
XM Satellite Radio operations How to subscribe Set the remote control mode XM monthly service subscription sold separately. XM Mini- before operation. Tuner and Home Dock required (each sold separately) to receive XM service. Installation costs and other fees and taxes, including a one-time activation fee may apply. -
Page 69: Manual Tuning
Manual tuning Preset tuning You can preset 30 XM Satellite Radio channels. To search a channel Storing the preset channels Tune in to the channel you want to preset. “_ _” flashes on the display. Perform the next step while “_ _” is flashing. While searching, the invalid and unsubscribed Select a preset number, then store the channel channels are skipped. -
Page 70: Fm/Am Tuner Operations
FM/AM tuner operations Preset tuning Set the remote control mode before operation. You can preset 30 FM stations and 15 AM stations. Storing the preset stations Tune in to the station you want to preset. • Select the desired source (“FM” “_ _”... -
Page 71: Ipod Playback
iPod playback Play/pause/search/skip Set the remote control mode before operation. To do Start playback Pause playback Hold Hold « Fast-forward/fast-reverse « search Skip to the next/previous item* Before selecting the video source to play Operate on your iPod to skip to the next/previous item while Make the appropriate setting for playing back a video. -
Page 72: Operating External Components
Operating external components Operating external components Set the remote control mode before operation. Set the remote control mode before operating each external component (see the left column). For TV Operating the TV Turns the power on and off For DBS tuner or CATV converter TV VOL +/–... -
Page 73: References
References Manufacturer’s code list Language code list AA Afar Hebrew RO Rumanian AB Abkhazian Yiddish RW Kinyarwanda Samsung AF Afrikaans JW Javanese SA Sanskrit Hitachi Sanyo 13, 14 AM Ameharic KA Georgian SD Sindhi AR Arabic KK Kazakh SG Sangho Magnavox Sharp AS Assamese... -
Page 74: Listening To The Xm Satellite Radio
References Messages shown on the display while Messages and icons shown on listening to the XM Satellite Radio the TV and display NO SIGNL No signal is received. Messages and icons shown on the TV The XM Mini-Tuner is not properly during disc/file playback CHECK installed or the XM Mini-Tuner... - Page 75 No picture is displayed on the TV or no sound • This product incorporates copyright protection comes out through the HDMI connection. technology that is protected by U.S. patents and other ZThe connected TV is not HDCP-compatible. (“HDCP intellectual property rights. Use of this copyright ERR”...
-
Page 76: Specifications
References Specifications HDMI Center unit (XV-THD60WM) HDMI Input (VIDEO 1 IN)*: Output power PASS THROUGH (up to Front/Surround: 225 MHz) 200 W per channel, RMS at 3 Ω at 1 kHz, with 10% total HDMI Output (MONITOR OUT): harmonic distortion. 480p/720p/1080i Center: USB storage... - Page 77 Satellite speakers Dimensions of the wall-mount attachment on the center and surround speakers: Front speakers (SP-THD6F) SP-THD6C Type: 2-Way Bass-Reflex Type (Magnetically Shielded Type) × Speaker: 8 cm (3-3/16 inches) cone × 3 cm (1-3/16 inches) dome Power Handling Capacity: 200 W 3 Ω...
- Page 80 0207RYMMDWJEM © 2007 Victor Company of Japan, Limited...
Need help?
Do you have a question about the TH-D5 and is the answer not in the manual?
Questions and answers