Table of Contents
Advertisement
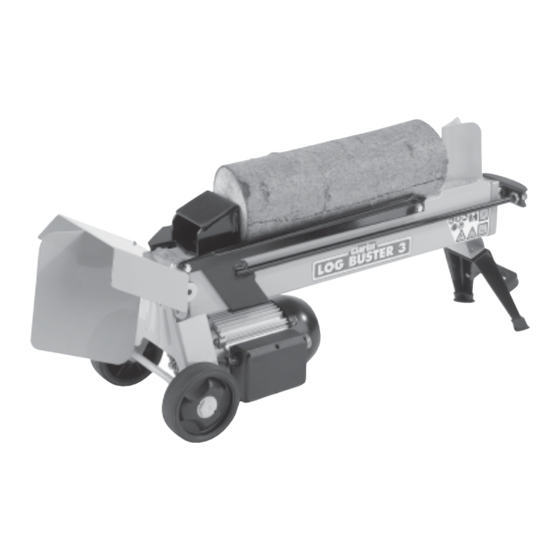
LOG SPLITTER
LOG SPLITTER
4 Tonne Force
4 Tonne Force
MODEL NO: Log Buster 3
PART No: 3402020
Operation & MAINTENANCE
INSTRUCTIONS
0205
Advertisement
Table of Contents

Summary of Contents for Clarke Log Buster 3
-
Page 1: Log Splitter
LOG SPLITTER LOG SPLITTER 4 Tonne Force 4 Tonne Force MODEL NO: Log Buster 3 PART No: 3402020 OPERATION & MAINTENANCE INSTRUCTIONS 0205... -
Page 2: Specifications
Maximum Diameter: ........250mm Minimum Diameter: ........50mm Please note that the details and specifications contained herein, are correct at the time of going to print. However, CLARKE International reserve the right to change specifications at any time without prior notice. - Page 3 Check List Before commencing to assemble your log splitter, please check for shortages and or damage, any discrepancies should be reported to the Clarke dealer where the machine was purchased as soon as possible. Double Ended Spanners 2 off 10mm x 12mm & 1 off 13mm x 16mm.
- Page 4 Safety Precautions WARNING: As with all machinery, there are certain hazards involved with their operation and use. Exercising respect and caution will considerably lessen the risk of personal injury. However, if normal safety precautions are overlooked or ignored, personal injury to the operator or damage to property, may result. ALWAYS Learn the machines applications, limitations and the specific potential hazards peculiar to it.
- Page 5 Extra Precautions for Log Splitters Extra special care is required when using this powerful tool to safeguard yourself and that of others around you. • Before using the log splitter, check for fluid leaks. Be sure the tool and the work area around it is clean and free of oil spills.
- Page 6 • If the log moves away from the blade, retract the ram and rotate the log through 90 as shown in Fig. 3. • Do not attempt to load the log in the machine whilst the log pusher is in motion, you could get trapped and injured.
-
Page 7: Electrical Connections
Electrical Connections This product is provided with a standard 13 amp, 230 volt (50Hz), BS 1363 plug, for connection to a standard, domestic electrical supply. Should the plug need changing at any time, ensure that a plug of identical specification is used. WARNING ! THIS APPLIANCE MUST BE EARTHED This machine must be wired up in accordance with the following colour code: BLUE... - Page 8 With the assistance of another person, carefully remove all contents from the carton, carefully lay out and check for shortages or damage etc, ref check list on page 2. Any discrepancies should be reported to the Clarke dealer where the machine was purchased. Safety Cover...
- Page 9 Attach the legs to the body using nuts bolts and washers supplied (Fig. 7), loosely fit both nuts and bolts, line up legs and tighten bolts. Attach the handle to the front legs using screws, nuts and washers supplied Fig. 8. NOTE: insert screw with washer through the handle and secure to the legs with locknut.
- Page 10 Carefully turn the machine over onto its feet. Stand the log splitter on a firm level surface, attach the handles by screwing onto short shafts in a clockwise direction (Fig. 11). Tighten handles using spanner supplied, DO NOT overtighten. Fig. 11 Attach the safety cover using nuts bolts and washers supplied (Fig.
- Page 11 Operation Splitting Wedge Log Support Guides Log Pusher Safety Cover Motor Start/Stop Button Operating Handles Motor Fig. 13 Oil Pump Assembly Before plugging in and switching ON, ensure the machine is sited safely on a raised • flat level surface. •...
- Page 12 3.2 Loosen and remove the oil filer plug/dipstick, slowly tilt the machine as in Fig. 17 to empty the oil. 3.4 To refill with new oil, tilt machine as in Fig. 15, using a clean funnel, pour in 2.1 Litres of Clarke hydraulic oil, -12-...
- Page 13 IMPORTANT: use ONLY CLARKE HYDRAULIC OIL, available from your nearest dealer. Part No: 1Ltr 3050830 5Ltr 3050835 3.5 Wipe the dipstick, using a clean soft cloth and check the oil level as before, and add more oil as required. 3.6 Clean the filler neck and plug/dipstick washer/seal thoroughly and refit, tighten sufficiently to prevent oil leaking, DO NOT overtighten.
-
Page 14: Trouble Shooting
Fit new oil seals, consult your nearest Clarke dealer. IMPORTANT: The use of parts other than CLARKE replacement parts may result in safety hazards, decreased tool performance and may invalidate your warranty. PARTS & SERVICE TEL: 020 8988 7400 e-mail as follows: PARTS: Parts@clarkeinternational.com... - Page 15 Parts Diagram -15-...
- Page 16 Parts List Item Part No Description SD30001 Locking Hex Nut M14 SD30002 Hex Nut (thin) M14 SD30003 Piston Ram SD30004 Spring SD30005 ‘O’ Ring (oil seal) SD30006 Piston SD30007 ‘O’ Ring (seal 43.5 x 3.5) SD30008 ‘O’ Ring (oil seal) SD30009 Cylinder Body SD30010...
- Page 17 Parts List Cont Item Part No Description SD30037 Bolt M8 x 16 SD30038 Plastic Insert SD30039 Log Pusher Assembly SD30040 ‘O’ Ring (seal 50 x 3.1) SD30043 Wire Connector Assembly SD30044 Cross Head Screw M4 x 12 SD30045 Cross Head Screw M4 x 8 SD30046 Capacitor Bracket SD30047...
- Page 18 -18-...


Need help?
Do you have a question about the Log Buster 3 and is the answer not in the manual?
Questions and answers