
Related Manuals for Clarke LOGBUSTER V6


Summary of Contents for Clarke LOGBUSTER V6
-
Page 1: Log Splitter
LOG SPLITTER MODEL NO: LOGBUSTER V6 PART NO: 3402150 OPERATION & MAINTENANCE INSTRUCTIONS LS1218 - ISS 1 ORIGINAL INSTRUCTIONS... - Page 2 INTRODUCTION Thank you for purchasing this CLARKE product. Before attempting to use this product, please read this manual thoroughly and follow the instructions carefully. You will find your new log splitter easy and safe to operate and with proper care, it will give you many years of dependable service.
-
Page 3: Safety Symbols
SAFETY SYMBOLS The following symbols represent important information about the product or instructions on its use. Read these Dispose of any used oil instructions in full in an environment- before using the friendly way. machine. Wear safety footwear! Do not use in the rain. Wear protective Danger! Keep clear of gloves! -
Page 4: General Safety Rules
GENERAL SAFETY RULES WARNING: READ ALL OF THESE INSTRUCTIONS. FAILURE TO FOLLOW ALL INSTRUCTIONS LISTED BELOW MAY RESULT IN ELECTRIC SHOCK, FIRE AND/ OR SERIOUS INJURY. SAVE THESE INSTRUCTIONS FOR FUTURE REFERENCE. WORK AREA 1. Keep the work area clean and well lit. Cluttered and dark areas invite accidents. -
Page 5: Usage And Care
under the influence of drugs, alcohol or medication. A moment of inattention while operating log splitters may result in serious personal injury. 2. Use safety equipment. Always wear eye protection. Safety equipment such as non-skid safety shoes, close fitting clothing and suitable work gloves should always be used. -
Page 6: Log Splitters Specific Warnings
LOG SPLITTERS SPECIFIC WARNINGS UNDERSTAND YOUR LOG SPLITTER • Read and understand the owner's manual and labels affixed to the log splitter. Learn its limitations as well as the specific potential hazards. DRUGS, ALCOHOL AND MEDICATION • Do not operate the log splitter while under the influence of drugs, alcohol, or any medication that could affect your ability to use it properly. -
Page 7: Dress Properly
DRESS PROPERLY • Do not wear loose clothing, gloves, neckties or jewelry (rings, wrist watches). They can be caught in moving parts. Protective electrically non-conductive gloves and non-skid footwear are recommended when working. Wear protective hair covering to contain long hair, preventing it from get caught in machinery. -
Page 8: Keep Bystanders Away
KEEP BYSTANDERS AWAY • Allow only one person to load and operate the log splitter. • Always keep bystanders, including visitors, children and pets away from the work area, especially when the log splitter is in use. • Only the operator should stand near the machine during use. •... -
Page 9: Protect Your Hands
PROTECT YOUR HANDS • When the ram of the log splitter is in the return mode, keep your hands off the machine – the log splitter is designed to automatically stop when the cylinder is fully retracted. • Keep your hands away from splits and cracks which open in the log. They may close suddenly and crush or amputate your hands. -
Page 10: Specifications
SPECIAL WARNINGS & INSTRUCTIONS The splitting operation of the machine is designed to be activated by one person. While there is the possibility that additional operators could be working with the machine (e.g. for loading and unloading), only one operator should perform splitting operations: •... -
Page 11: Electrical Connections
ELECTRICAL CONNECTIONS Connect the mains lead to a standard, 230 Volt (50Hz) electrical supply through an approved 13 amp BS 1363 plug, or a suitably fused isolator switch. WARNING: THIS APPLIANCE MUST BE EARTHED IMPORTANT: The wires in the mains lead are coloured in accordance with the following code: Green &... -
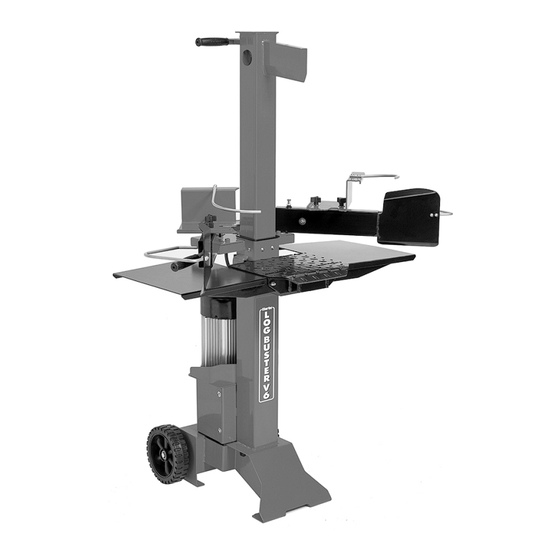
Page 12: Know Your Machine
KNOW YOUR MACHINE Parts & Service: 020 8988 7400 / E-mail: Parts@clarkeinternational.com or Service@clarkeinternational.com... - Page 13 CONTENTS OF THE BOXES 1 Log splitter frame 5 Wheels (1 Pair) 2 Control Lever and Guard 6 Support Table Assembly (1 Pair) 3 Adjustable Log Holder (1 Pair) 7 Operating manual 4 Retainer 1 and 2 8 Hardware Bag, containing Parts &...
- Page 14 ASSEMBLY WHEELS 1. Loosen the bolt on the axle mounting bracket by turning it counterclockwise, until the axle can be inserted into the bracket. 2. Insert the axle into the mount bracket. 3. Tighten the bolt in the mounting bracket to secure the axle. 4.
- Page 15 SUPPORT TABLE 1. Loosen the star knob on the mounting bracket by turning it counterclockwise. 2. Unfold the log support table, so that the three parts of it are level. 3. Insert the hooks of the log support table into the mounting brackets. 4.
-
Page 16: Control Lever
CONTROL LEVER 1. Insert an M10 bolt with a washer through the hole in the side arm 2. Pass the control lever through the slot in the control handle (2) 3. Position a large washer between the side arm and the main frame •... -
Page 17: Moving By Hand
TRANSPORT MOVING BY HAND To move the log splitter to the work site. 1. Hold the handle (A) and tilt the log splitter back slightly onto the wheels. • Make sure the oil filler cap is tight. WARNING: THE LOG SPLITTER IS VERY HEAVY, TAKE CARE WHEN MOVING IT TO A NEW LOCATION. -
Page 18: Splitter Operation
SPLITTER OPERATION Before operation, attach the machine to a level floor using M10 hold down bolts (not supplied). 1. Plan your work site. • Work safely and save effort by planning your work before hand. • Have your logs positioned where they can be easily reached. - Page 19 5. Loosen the oil filler cap a few turns before use to allow air into the oil tank during use. • Retighten the oil filler cap when you have finished using or moving the log splitter. 6. While operating under extremely low temperature, keep the log splitter running under no load for 15 minutes to preheat the hydraulic oil.
- Page 20 10. Adjust the Log Holders (A) according to the diameter of the log to obtain most comfortable Control Lever angle. 11. Hold the log with log holders Lower the levers to start the splitting. • Releasing either lever stops the motion of the splitting wedge.
-
Page 21: Maintenance
MAINTENANCE WARNING: MAKE SURE THAT THE LOG SPLITTER IS SWITCHED OFF AND DISCONNECTED FROM THE MAINS SUPPLY BEFORE STARTING ANY CLEANING OR MAINTENANCE PROCEDURES. HYDRAULIC SYSTEM • Low oil levels can damage the oil pump. • The oil should be completely changed once a year. •... -
Page 22: Sharpening The Wedge
Extension lead is defective Unplug, check and replace if necessary Switch is defective Return the log splitter to your local Clarke dealer for servicing. Log splitter does Air bleeder is not open Open oil bleeder. not work while the... -
Page 23: Declaration Of Conformity
DECLARATION OF CONFORMITY Parts & Service: 020 8988 7400 / E-mail: Parts@clarkeinternational.com or Service@clarkeinternational.com...
Need help?
Do you have a question about the LOGBUSTER V6 and is the answer not in the manual?
Questions and answers