Table of Contents
Advertisement
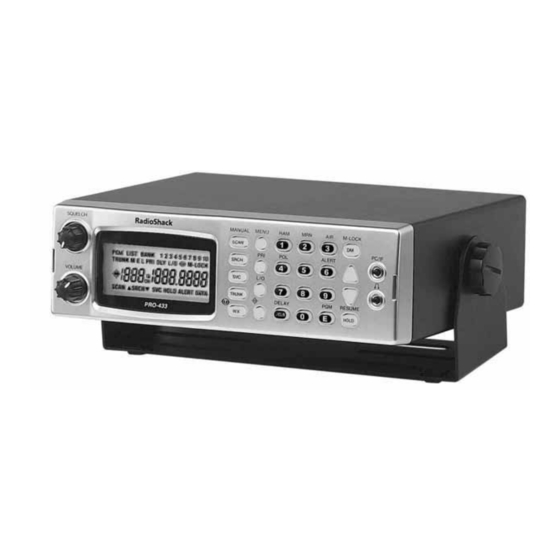
Thank you for purchasing your PRO-433 1,000 Channel Trunking
Desktop/Mobile Scanner from RadioShack. Your scanner is one of
a new generation of scanners designed to track Motorola
Type II, hybrid analog, and many other systems.
Scanner
DC cable with fuse
DIN sleeve
Mounting bracket
Lock washers (2)
Rubber feet (4)
Preprogrammed frequency sheet
Please read this user's guide before installing,
setting up and using your new scanner.
www.radioshack.com
PRO-433 1,000 ch Trunking
Desktop/Mobile Scanner
Quick Start
p. 4- 10
AC adapter
Antenna
Removal keys (2)
Knobs (2)
Screws (2)
User's guide
20-433
Type I,
®
Advertisement
Table of Contents

Related Manuals for Radio Shack PRO-433


Summary of Contents for Radio Shack PRO-433
-
Page 1: Quick Start
20-433 PRO-433 1,000 ch Trunking Desktop/Mobile Scanner Thank you for purchasing your PRO-433 1,000 Channel Trunking Desktop/Mobile Scanner from RadioShack. Your scanner is one of a new generation of scanners designed to track Motorola Type I, ® Type II, hybrid analog, and many other systems. -
Page 2: Table Of Contents
Contents quick start step 1: installing your scanner step 2: power your scanner step 3: connect your scanner step 4: setting up your scanner step 5: monitoring and scanning the basics your scanner’s controls your scanner’s display replacing the fuse beyond the basics channel-storage banks priority channels... - Page 3 Contents type I and hybrid trunked systems programming base and offset frequencies Motorola disconnect tone detect function special features PC programming scanner cloning care troubleshooting resetting the scanner service and repair specifi cations RF emissions information limited one-year warranty...
-
Page 4: Quick Start
Quick Start quick start step 1: installing your scanner You can mount your scanner as a base station or in your vehicle. If you are unsure how to install your scanner in your vehicle, consult your automobile manufacturer, dealer, or a qualifi ed installer. base station Attach the four protective rubber feet to the mounting bracket when you use the scanner as a base station on a fl... -
Page 5: Step 2: Power Your Scanner
Quick Start Your scanner requires a 2 x 7-1/8 x 5-5/16 inch (50 x 180 x 135 mm) mounting area. Allow an additional 2-3/8 inch (60 mm) space behind the scanner for connectors and wires. . Remove the four rear screws that secure the outer metal case and pull off the case with care. -
Page 6: Step 3: Connect Your Scanner
To power your scanner from your vehicle’s 12V power source, use a 12V DC cigarette-lighter adapter (not supplied, available at RadioShack). If you use a cigarette-lighter adapter, you might hear some NOTE electrical interference from your engine while scanning. - Page 7 You also may need a BNC adapter (not supplied). external speaker To use an external speaker (available at your local RadioShack store), plug the speaker’s 1/8 inch (3.5 mm) plug into the scanner’s EXT SP jack.
-
Page 8: Step 4: Setting Up Your Scanner
Your scanner comes with 150 preprogrammed frequencies. You can manually store frequencies using a frequency guide such as the “RadioShack Police Call Guide including Fire and Emergency Services, and Offi cial Aeronautical Frequency Directory.” . Press E/PGM. PGM appears in the display. - Page 9 Quick Start . Select the target bank. The smallest empty channel number fl ashes over the frequency. . Press to access the target channel. . Press E/PGM. If there is no empty channel, the scanner automatically selects the fi rst channel of the bank. o cancel the copy or move, press .
-
Page 10: Step 5: Monitoring And Scanning
Quick Start step 5: monitoring and scanning monitoring To monitor a channel, press SCAN/MANUAL while the scanner is pausing on the channel, or stop the scanning by pressing SCAN/ MANUAL, enter the channel number, and press SCAN/MANUAL. scanning To scan, press SCAN/MANUAL. When the scanner fi nds a transmission, it monitors the transmission until it ends. -
Page 11: The Basics
The Basics the basics A frequency is the tuning location of a station. A channel is a programmable memory location for storing frequencies that you can scan for activity. Channels are grouped into 10 channel- storage banks, each of which contains 100-channels. Service banks are preset channel-storage banks of frequencies used by HAM operators, marine, aircraft, and police (fi... -
Page 12: Your Scanner's Controls
The Basics your scanner’s controls SQUELCH PC/IF Adjusts the squelch. PC interface cable connection. VOLUME Turns on the scanner and Headphone connection. adjusts the volume. SCAN/MANUAL Starts and stops channel scans, or lets you directly enter a frequency or channel number. SRCH Searches for frequencies, or active talk group IDs. -
Page 13: Your Scanner's Display
The Basics Number keys Enter a channel, a frequency, or an ID number. Selects the ham band when in service mode. Selects the marine band when in service mode. Selects the air band when in service mode. Selects the police band when in service mode. ALERT Activates the NWR-SAME weather alert. - Page 14 The Basics DATA Appears when the data skip function is active, and in the trunking mode when the dis connect tone detect function is off. Appears when Signal Stalker I is active. SCAN Appears during channel scan. LIST Appears with numbers (1–5) during trunking. A bar indicates which ID scan list banks are turned on for scanning.
-
Page 15: Replacing The Fuse
The Basics Indicates the search direction during a chain, direct, or service search, and normal and weather scan. ALERT Appears when the weather alert is turned on, or fl ashes when the scanner detects an alert coded signal. M, E or L Indicates the trunking system: Motorola (M), EDACS (E), or LTR (L). -
Page 16: Beyond The Basics
Beyond the Basics beyond the basics channel-storage banks The scanner displays the channel-storage bank number while scanning a channel. You can turn off a bank by pressing the bank’s number, but one bank must always be active. To increase scanning speed, you can lock out channels with continuous transmission, such as weather channels or birdies. -
Page 17: Chain Search
Beyond the Basics chain search Chain search lets you search through preset frequency ranges and store found frequencies. You can also modify each range. At least one bank must be active. If you disable all the NOTE banks, the error tone beeps. . -
Page 18: Service Bank Search
Beyond the Basics . Enter the lower limit frequency, and then press E/PGM. . Press to change to the upper limit frequency. . Enter the upper limit frequency, and then press E/PGM. . When you fi nish programming frequency ranges, press SRCH. service bank search You can search preprogrammed frequencies allocated to HAM, marine, aircraft, or police (fi... -
Page 19: Fips Codes
Beyond the Basics When the scanner receives a SAME-coded signal, ALERT fl ashes one of the following codes to indicate the alert level: L1....................Warning L2......................Watch L3....................Advisory WXA ..............Weather Alert (1050 Hz) To activate tones for the alert levels, press WX to activate the weather service, then hold down ALERT for about 1 second. -
Page 20: Skywarn
Beyond the Basics Skywarn Skywarn jumps directly to the last channel in memory from any mode. The scanner pauses any active scans and starts receiving transmissions in the last channel. If no frequency is programmed in the last channel, No Prog appears and the scanner sounds an error tone. -
Page 21: Signal Stalker I
Beyond the Basics Signal Stalker I Signal Stalker I searches for frequencies in a specifi ed range. This works well for locating strong local transmissions, such as mobile and handheld two way radios in areas with no other strong transmission sources; however, if you are in an area with many transmission sources (such as pager radio transmitters, multiuse radio towers, traffi... -
Page 22: Data Skip
Beyond the Basics S-S.ALt ................... Alert settings S-S.Lit ................Back light settings S-S.PS ............... Pager screen settings S-S.OnlY ................Mode settings To turn off normal scanning, when Signal Stalker I is running, turn S-S.OnlY setting to ON. S-S.Int ..............Voice interrupt settings To keep Signal Stalker I active while receiving an audio signal, set this function to ON. -
Page 23: Keytones
Beyond the Basics . Press MENU to exit the menu mode. keytones The keytones feature beeps when you press a button on the scanner. To modify keytone settings, complete the following steps: . Press MENU. . Press to until bEEP appears in the display, then press E/PGM. -
Page 24: Trunking Operations
Trunking Operations trunking operations The scanner can track transmissions for up to 10 Motorola Type I, Type II, hybrid, EDACS or LTR analog trunking systems. When the scanner fi nishes checking activity in the trunked system, it scans other conventional frequencies in the bank. For trunked reception, set the squelch at the center position. -
Page 25: Talk Group Id
To locate talk group ID lists for your local police, fi re, or NOTE other agencies, refer to frequency guides available at your local RadioShack store. Storing talk group IDs . Select the trunking programming mode and the bank you want to change. - Page 26 Trunking Operations . Enter the talk group IDs for each trunk system. LTR talk groups are identifi ed as six-digit numbers in the form AHHUUU: A ................Area code (0 to 1) H ............Home repeater (01 through 20) U ..............User ID (000 through 254) .
-
Page 27: Priority Talk Group Id Scanning
Trunking Operations . When the selected trunked system is displayed, press E/PGM. . Use to choose Id Lout, and press E/PGM. . Press L/O, the ID is unlocked and the next locked ID displays. . If you unlocked all locked IDs, the scanner displays Non. o unlock all talk group IDs, hold L/O untill you hear two beeps. -
Page 28: Afs Format
Trunking Operations AFS Format Your scanner can translate decimal talk group lists to the much more powerful AFS format. Become familiar with AFS partial entry, and your scanning will become more fl exible and effi cient. The AFS format allows you to enter full or partial EDACS IDs for powerful fl... -
Page 29: Status Bit (S-Bit) Ignore
Trunking Operations You can enter partial group numbers for EDACS talk groups. By entering only the desired portion of a group, you can select either 128, 8, or 1 talk group. For example, you might program every talk group in a police department by pressing just four keys. NOTE You cannot use partial talk groups in decimal mode. -
Page 30: Trunk Search And Scan
Trunking Operations trunk search and scan You can trunk scan and scan conventional frequencies at the same time. You can program conventional frequencies in the same bank as trunking systems, but not while in trunk mode. To scan both trunking and conventional banks, turn off trunking, select the banks to scan, then turn on trunking again. - Page 31 Trunking Operations Subfl eet information is included with the frequency list for a Type I system. There are 16 preset fl eet maps to choose from, and it is best to start with these when setting up a Type I or hybrid trunk scanning bank.
- Page 32 Trunking Operations E1P10 Block Code Size E1P11 Block Code Size E1P12 Block Code Size E1P13 Block Code Size E1P14 Block Code Size (S12) E1P15 Block Code Size (S12) E1P16 Block Code Size (S12) . Press E/PGM . The scanner return to the previous screen (FLEEt).
-
Page 33: Programming Base And Offset Frequencies
Trunking Operations codes S-12, S-13, or S-14, these restrictions apply: • S-12 can only be assigned to Blocks 0, 2, 4, or 6 • S-13 can only be assigned to Blocks 0 and 4 • S-14 can only be assigned to Block 0 Because these size codes require multiple blocks, the scanner prompts you for the next available block when NOTE... -
Page 34: Motorola Disconnect Tone Detect Function
Trunking Operations . Enter the frequency using the number keys according to the following guide, then press E/PGM. • For Motorola Type II VHF (E2-VHF Hi band) use 5kHz steps between 5 kHz – 100 kHz. • For Motorola Type II UHF (E2-UHF band) use 12.5kHz steps between 12.5 kHz –... -
Page 35: Special Features
fi eld error occurred. scanner cloning You can clone all the frequencies, trunking talk groups, and fl eet maps programmed in your PRO-433 to another PRO-433 or PRO- 528 using an optional interface cable (available at your local RadioShack or www.radioshack.com). - Page 36 Special Features . Connect the interface cable into each scanner’s PC/IF port. . While you press and hold E/PGM on both scanners, turn on both scanners. . Determine the scanner which has the frequency data that you want to transfer. This one must be set up as the First Unit, and the other must be set as the Clone Unit .
-
Page 37: Care
If your scanner is not working as it should, these suggestions might help you eliminate the problem. If the scanner still does not operate properly, take it to your local RadioShack store for assistance. Why won’t my scanner scan? Before you can scan frequencies, you must save some frequencies into channels. -
Page 38: Resetting The Scanner
If your scanner is not performing correctly, take it to your local RadioShack store for assistance. To locate the nearest RadioShack, use the store locator feature on RadioShack’s website (www. radioshack.com), or call 1-800-The Shack (800-843-7422) and follow the menu options. -
Page 39: Specifi Cations
Specifi cations specifi cations Frequency Coverage: ........29–54 MHz (in 5 kHz steps) ..........108–136.9875 MHz (in 12.5 kHz steps) ..............137–174 MHz (in 5 kHz steps) ..........179.7500-215.7500 MHz (in 6 MHz steps) ............216–224.995 MHz (in 5 kHz steps) ...........225-399.9875 MHz (in 12.5 kHz steps) ............ -
Page 40: Rf Emissions Information
Cet appareil numérique de la classe B est conforme à la norme NMB-003 du Canada. This product is warranted by RadioShack against manufacturing defects in material and workmanship under normal use for one (1) year from the date of purchase from RadioShack company-owned stores and authorized RadioShack franchisees and dealers. For complete warranty details and exclusions, check with your local RadioShack store.
Need help?
Do you have a question about the PRO-433 and is the answer not in the manual?
Questions and answers