Table of Contents
Advertisement
www.radioshack.com
OWNER'S MANUAL —
Please read before using this equipment.
Thank you for
purchasing the
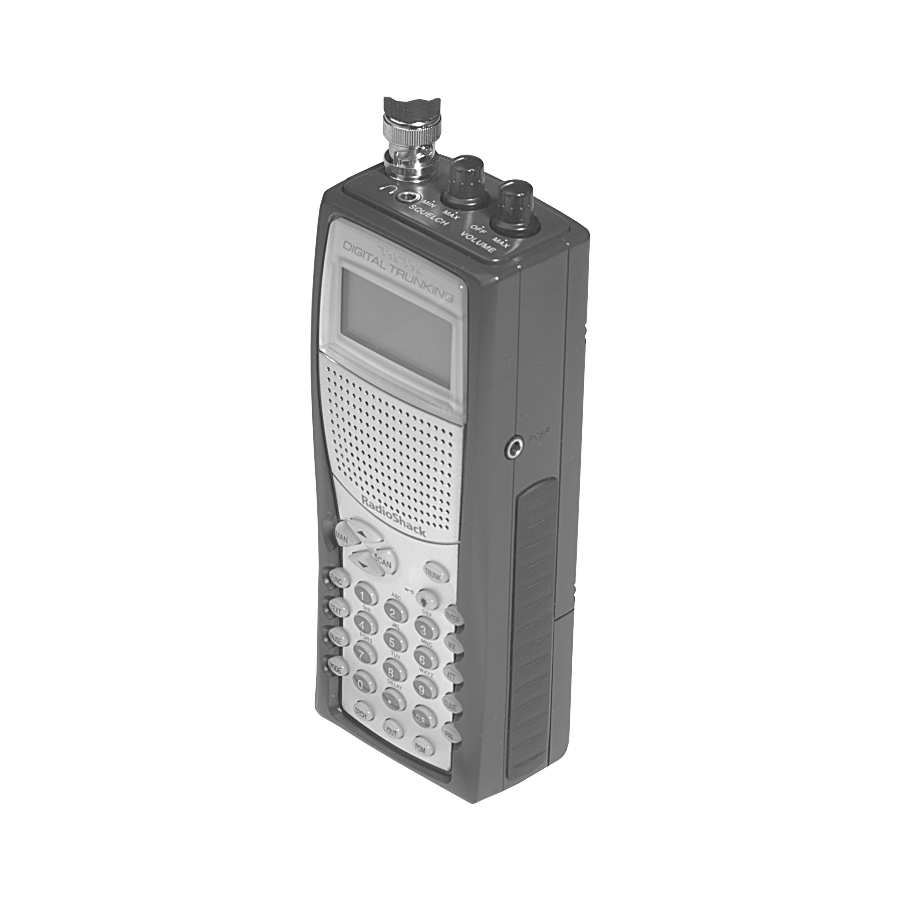
RadioShack PRO-96
Digital Handheld
Scanner. This product
is the first of an
innovative and exciting
new generation of
RadioShack scanning
receivers capable of
receiving Phase 1
APCO-25 C4FM/IMBE
digital voice
modulation from the
newest and most
sophisticated
conventional and
trunked radio
networks.
Your Radio Shack
Digital Handheld
Scanner is ready to
receive digital
conventional and
trunked radio
transmissions. No
additional hardware or
add-on cards are
needed.
If an icon appears at the end of a paragraph, go to the box on that page
with the corresponding icon for pertinent information.
o
— Warning
Ó
— Hint
SM
PRO-96 Digital
Trunking Scanner
Catalog # 20-526
!
!
IMPORTANT
!
— Important
Ô
— Note
— Caution
Advertisement
Table of Contents
Troubleshooting

Related Manuals for Radio Shack PRO-96


Summary of Contents for Radio Shack PRO-96
- Page 1 Trunking Scanner OWNER’S MANUAL — Please read before using this equipment. Thank you for purchasing the RadioShack PRO-96 Digital Handheld Scanner. This product is the first of an innovative and exciting new generation of RadioShack scanning receivers capable of...
-
Page 2: Table Of Contents
Understanding Your Scanner’s Memory Organization ... 16 Channel Storage Banks ... 17 Channels ... 18 Search Banks ... 18 Understanding Your Scanner’s Channel Receive Modes .. 19 Preparation ... 24 Listening Safely ... 24 Traffic Safety ... 25 Power Sources ... 25 Using Batteries ... - Page 3 Command Quick Reference Guide ... 113 © 2003 RadioShack Corporation All Rights Reserved. RadioShack, RadioShack.com, Hypersearch, Hyperscan, V- Scanner, and Adaptaplug are trademarks used by RadioShack Corporation. Motorola, Smartnet, ASTRO and Privacy Plus are registered trademarks of Motorola Inc. EDACS is a registered trademark of MA-COM Inc.
-
Page 4: Features
FEATURES Your Radio Shack Digital Handheld Scanner features Intelligent Adaptive Digital Tracking for optimal reception of digital signals from a variety of digital conventional and trunked radio system types. No special sound quality settings or adjustments are needed for the different digital systems that you monitor. - Page 5 Your RadioShack Digital Handheld Scanner features RadioShack’s exciting new 11-in-1 V-Scanner technology. V-Scanner stands for Virtual Scanner. V- Scanner allows you to build and store eleven separate configuration profiles in V-Scanner folder memory. Stored V- Scanners can be recalled, edited...
- Page 6 Phase 1 APCO-25 Digital Reception – automatic detection and reception of digital voice modulation from conventional, trunked and mixed-mode networks. Intelligent Adaptive Digital Tracking – ensures optimal reception of digital signals from a variety of digital conventional and trunked radio system types. Digital AGC –...
- Page 7 Data Cloning – lets you transfer the programmed data to another PRO-96 scanner. You can also upload or download the programmed data to or from a PC using an optional PC interface kit and application software.
- Page 8 Priority Channel — allows you to configure the scanner to check one channel every 2 seconds so you do not miss important transmissions. Attenuator — allows you to set,...
- Page 9 Lock Out Function — lets you set your scanner to skip over specified channels or frequencies when scanning or searching, and skip over IDs when tracking trunked systems. Key Lock — lets you lock the scanner's keys to prevent accidentally changing the scanner's programming.
-
Page 10: The Fcc Wants You To Know
• 806 – 823.9875 MHz • 849 – 868.9875 MHz • 894 – 960 MHz • 1240 – 1300 MHz Use “A General Guide To Frequencies” on Page 96 to help you target frequency ranges in your service area so you can search for a wide variety of transmissions. -
Page 11: Scanning Legally
This device must accept any interference received, including interference that may cause undesired operation. CANNING EGALLY Your scanner covers frequencies used by many different groups including police and fire departments, ambulance services, government agencies, private companies, amateur radio services, military operations,... -
Page 12: Getting Familiar With Your Scanner
Do not open your scanner's case to make any modifications that could allow it to pick up transmissions that are illegal to monitor. Doing so could subject you to legal penalties. - Page 13 PRO-96 scanning receiver. Once you understand a few simple terms used in this manual and familiarize yourself with your scanner's features, you can put the scanner to work for you. You...
-
Page 14: About The Keypad
Each time the scanner finds an active frequency, it stops and monitors the radio traffic on that channel until the transmission ends, then resumes scanning. For detailed programming instructions, see “Programming Your Scanner” on Page 30. BOUT THE... - Page 15 TUNE — allows you input a frequency and tunes up or down automatically or manually with the keys. ATT — turns attenuation on to reduce the scanner's sensitivity and block extremely strong signals, or turns it off to increase sensitivity. — selects the scan or search direction.
-
Page 16: Understanding Your Scanner's Memory Organization
The PRO-96 V-Scanner feature extends this functionality by allowing you to store or recall up to eleven scanner configurations in V-... -
Page 17: Channel Storage Banks
Scanner feature to build and store configurations for different areas or different scanner applications. Using the cloning feature it is possible to exchange scanner configurations with your friends without losing your existing data. V-Scanners also provide a way for you to easily back up your... -
Page 18: Channels
EARCH ANKS Your scanner has six preprogrammed search banks configured to search various radio services, and one limit search bank that you can configure. You can set the lower and higher frequency limit in the limit search Ó... -
Page 19: Understanding Your Scanner's Channel Receive Modes
Each receive mode affects how your scanner operates when scanning and receiving Ô transmissions. AM Mode (AM) The AM mode sets the scanner to receive transmissions using amplitude modulation (AM), primarily used for aircraft, military, 27 MHz citizen’s band, some amateur radio, and some government transmissions. -
Page 20: Ctcss Mode (Ct)
CTCSS allows multiple users to share a single radio frequency without hearing each other’s transmissions. In your PRO-96 scanner, the CTCSS feature can be used to block the reception of transmissions on shared channel to only those that use the CTCSS tone that you have specified. -
Page 21: Motorola/Apco-25 Trunking Mode (Mo)
CTCSS, DCS allows multiple users to share a single radio frequency without hearing each other’s transmissions. In your PRO-96 scanner, the DCS feature can be used to block the reception of transmissions on a shared channel to only those that use the DCS tone that you have specified. - Page 22 Motorola mode, it first decodes the talkgroup ID data included with the transmission. In the Open Mode, the scanner stops on the transmission and displays the talkgroup ID on the bottom line of the display. In the Closed Mode,...
- Page 23 Type I/II hybrid systems use both fleet-subfleet and 5-digit formats for talkgroup IDs. EDACS Trunking Mode (ED) You can set your scanner so it decodes the talkgroup IDs used with EDACS (GE/Ericsson/M/A- COM) trunking systems. This setting is called the EDACS mode.
-
Page 24: Preparation
Number (LCN). For the scanner to correctly switch to an active frequency, you must program the frequencies in LCN order, starting with Memory 01. EDACS talkgroup IDs are entered as a 4- digit decimal number from 0001 to 2047 or AFS (Agency Fleet Subfleet) number from 00-001 to 15-157. -
Page 25: Traffic Safety
Exercise extreme caution! OWER OURCES You can power your scanner from Ô any of these sources: • Internal non-rechargeable batteries or rechargeable batteries (not supplied – see “Using Batteries”... - Page 26 Ô Ô NOTES cover on the back of the • Dispose of old scanner and slide the cover batteries promptly down to remove it. and properly. • Do not burn or bury 2. Pull the battery holder out of batteries.
-
Page 27: Charging Rechargeable Batteries
RadioShack store. Make sure the adapter’s voltage is set to 9V. It takes about 16 hours to recharge fully discharged 1800 mAh NiMH rechargeable batteries. You can operate the scanner while recharging the rechargeable batteries, but charging takes Ô longer. -
Page 28: Using Vehicle Battery Power
SING scanner’s PWR DC 9V jack. Using an OWER adapter that does not meet these You can power the scanner from a specifications could vehicle’s 12V power source (such damage the scanner or the adapter. as cigarette-lighter socket) using a •... -
Page 29: Connecting An Optional External Antenna
Press the antenna down over the jack and turn the antenna’s base clockwise until it locks into place. Connecting an Optional External Antenna... -
Page 30: Connecting An External Speaker
When the scanner is You can use the belt clip attached in Manual or Program mode, indicated with to the back of the scanner for in the top left hands-free carrying when you are hand corner of the display, you can on the go. - Page 31 4. Press to store the ENTER frequency into the channel. 5. By default, the scanner will configure the channels you enter for a two second delay after a transmission is received. This is indicated by the D character that appears in the top row of the display.
-
Page 32: Programming Trunked Systems
If you are just getting started with trunked system monitoring or have any questions about how your PRO-96 scanner operates when tracking trunked radio systems. See Ó Ó HINT “Trunking Special Features”... -
Page 33: Programming Motorola Analog, Digital, And Apco-25 Trunking Systems
ID TRUNK list and set the correct trunking bank type. If the bank has never been programmed with a trunking system, the scanner will display trunked! Press mode Motorola 3. Press until MODE appears in the display. This sets the channel storage bank for Motorola operation. -
Page 34: Programming Edacs Trunking Systems
7. Repeat Steps 5 and 6 to enter the other EDACS trunking system channels for the system you wish to monitor. ROGRAMMING OTOROLA UHF T Your scanner is capable of receiving Motorola trunked radio EDACS YSTEMS , and FUNC to select the Ô... - Page 35 VHF and UHF bands. To monitor these systems it is necessary to program the scanner with three additional parameters, the base frequency, Ó step and offset. Follow these steps to program Motorola trunking frequencies in the VHF or UHF bands: 1.
-
Page 36: Programming Fleet Maps
800 MHz band plan. These when monitoring an 800 MHz system, you systems are known as “splinter should try to systems”. Your scanner features configure the system for splinter operation. an offset mode to allow reception Splinter systems •... - Page 37 1. Press , and then TRUNK 2. Press , and then FUNC to select the desired bank. 3. Press , and then press FUNC Block 0 size code. Use 15 for type II. S-00 is displayed. 4. Enter the size code supplied with the Type I system information, referring to the prompts that appear in the...
-
Page 38: Storing Talkgroup Ids
150 talkgroup IDs in each bank, so you can program up to 1500 talkgroup IDs in 10 banks. When the scanner stops on a transmission in the Motorola or EDACS mode, it checks to see if the ID has been stored in the associated ID list. - Page 39 To automatically store a talkgroup ID, press when the TRUNK scanner stops on a voice channel transmission or when a talkgroup ID is indicated in the manual mode. The ID of the active talkgroup will be automatically stored in the next available ID memory location.
-
Page 40: Programming A Stored Channel Frequency In The Priority Channel
When priority is turned time. Traffic on the priority channel may on, the scanner checks the priority be missed if it occurs channel every 2 seconds, and while the scanner is stays on the channel if there is monitoring a trunking voice call. -
Page 41: Programming The Priority Channel Directly
2. Use the number keys to enter the channel number that contains the frequency you want to program as the priority channel, and then press again. 3. Press , and then FUNC Pri Channel blinks on the bottom line to indicate storage of the current frequency into priority channel memory. -
Page 42: Activating The Priority Feature
Programming channels for weather frequency if the alert tone is CTCSS and DCS operation detected. Your PRO-96 scanner features an • Because the scanner does not priority advanced, DSP based CTCSS sample the weather and DCS decoder. CTCSS and... - Page 43 You can also set a special search code up that will instantly decode the CTCSS or DCS code on a received transmission. Channels programmed with the search code will receive all traffic on the...
- Page 44 CTCSS or DCS code. You can also use the keypad to enter the code manually. Note that the scanner will automatically fill the code field as you enter the code. selected, press ENTER store the code in the channel memory.
-
Page 45: Storing Text Tags
167.9 Hz DCS Code Table: ENERAL ROGRAMMING OTES Storing Text Tags You can customize your scanner by storing text tags (up to 12 characters) for easy identification of channel transmissions, trunk IDs, or banks. Assigning a Text Tag to a Channel 1. - Page 46 3. Press appear at the third line. 4. Enter the text using the numeral keys (see “Text Input Ô Ô NOTE Chart” on Page 48). If you make a mistake, press to move to For example, to identify a the character you want channel as “FIRE Ch 6”...
-
Page 47: Assigning A Text Tag To A Channel Storage Bank
5. Press to store the text ENTER with the channel. Assigning a Text Tag to a Group ID 1. Press 2. Press TRUNK 3. Press then FUNC select the desired bank. 4. Press to select the TRUNK desired sub-bank. 5. Press or hold down select the desired group ID. -
Page 48: Turning On The Scanner And Setting Squelch
./DELAY Space OPERATING YOUR SCANNER NITIAL Turning on the Scanner and Setting Squelch 1. To turn on the scanner, turn VOLUME loading message To Digital Trunking the display. After about 5 seconds, you might hear a rushing sound. Then adjust... -
Page 49: Turning Channel Storage Banks Off And On
MIN, turn clockwise until SQUELCH the rushing sound stops. 3. To turn off the scanner, turn counterclockwise to VOLUME Ô Scanning To begin scanning channels or to start scanning again after monitoring a specific channel, Ô... -
Page 50: Using Ctcss And Dcs
Page 66. You can monitor a single channel • You can set CTCSS or DCS mode when with your scanner by navigating to searching any search that channel while in manual range, except for mode. The scanner will receive SR0, SR1, and SR4. -
Page 51: Deleting Frequencies From Channels
If the transmitted and stored codes match, the scanner stops on the transmission and allows the audio to pass to the speaker. If the codes do not match, the scanner resumes scan operation. -
Page 52: Finding And Storing Active Frequencies
SR0 to SR5. You can change the search range of Bank SR6 manually by setting the lower and higher ends of the search range. EARCHING A REPROGRAMMED REQUENCY The scanner contains these preprogrammed search ranges, stored in the search bank (SR0- SR6). Bank_________Band SR0________Marine SR1________CB... - Page 53 SR6________Limit search (User configurable) Follow these steps to select preprogrammed search bands and search them for active frequencies: 1. Repeatedly press SRCH select your desired search bank (SR0, SR1, SR2, SR3, SR4, SR5, or SR6). 2. In the marine and CB bands, you can directly select a channel or search through the band.
-
Page 54: Search Band Charts
After 2 seconds (if the delay feature is on), the received frequency appears and the scanner starts searching. 5. When the scanner finds an active frequency, it stops searching, and resumes when the transmission ends. If delay is programmed with the... - Page 55 Channel Frequency (MHz) Channel Frequency (MHz) 156.5250 156.6250 156.7250 156.9250 157.0250 157.1250 157.2250 161.8250 157.3250 161.9250 157.4250 Search bank: SR1 CB band Receive mode: AM Channel Frequency (MHz) 26.9650 26.9850 27.0150 27.0350 27.0650 27.0850 27.1150 27.1350 27.1650 27.1850 27.2150 27.2550 27.2450 27.2750 27.2950...
- Page 56 Channel Frequency (MHz) 27.3750 27.3950 Search bank: SR2 FRS/GMRS/MURS Receive Mode: FM/Digital, CT or DC Channel Frequency (MHz) Channel 462.5625 462.6125 462.6625 462.7125 467.5875 467.6375 467.6875 462.5500 462.6000 462.6500 462.7000 151.8200 151.9400 154.6000 Channel Frequency (MHz) 27.3850 27.4050 Frequency (MHz) 462.5875 462.6375 462.6875...
- Page 57 Search bank: SR3 Police/Fire band Receive Mode: FM/Digital, CT or DC Group Frequency (MHz) 33.420 – 33.980 37.020 – 37.420 39.020 – 39.980 42.020 – 42.940 44.620 – 45.860 45.880 45.900 45.940 – 46.060 46.080 – 46.500 153.770 – 154.130 154.145 –...
- Page 58 Search bank: SR4 Aircraft Receive mode: AM Frequency (MHz) 108.000 – 136.9875 Search bank: SR5 Ham band Receive mode: FM/Digital, CT, DC or AM (depending on group) Group Frequency (MHz) 28.0000 – 2937000 50.0000 – 54.0000 144.0000 – 148.0000 222.0000 – 225.0000 420.0000 –...
-
Page 59: Using Zeromatic
Zeromatic off, the scanner will unmute faster on a detected signal but the frequency may not be exact. If the scanner stops on a signal before it reaches the correct center frequency, you can step up or down to the correct... -
Page 60: Using Seek Search
SING While the scanner is searching, you can activate seek search by pressing appears on the bottom line. The scanner stops on each active frequency for five seconds and resumes searching automatically. Seek functions only in search banks 1, 2, 3, 4, 5, and 6. -
Page 61: Manually Tuning A Frequency
ANUALLY UNING A REQUENCY You can manually set the scanner to move through all receivable frequencies, or select a specific frequency as a starting point. TUNE 1. Press and the TUNE current frequency appear in the display. The scanner automatically begins tuning up or down. -
Page 62: Copying A Frequency Into A Specified Channel
INTO A HANNEL You can copy a frequency into a specified channel when the scanner stops on that frequency during search mode or manual tuning. If a CTCSS or DCS code is detected on the transmission, the detected code will be copied into the channel memory as well. -
Page 63: Copying A Frequency Into A Vacant Channel In A Specified Bank
REQUENCY INTO A ACANT HANNEL IN A PECIFIED You can copy a frequency into a vacant channel in a specified bank when the scanner stops on the frequency during search or tune Ô mode. 1. Press , and then FUNC... -
Page 64: Same Standby Mode
If necessary, use attenuation to weather channels with interference. SAME Standby Mode The National Weather Service precedes each weather alert with , and then when FUNC HANNEL . Your scanner scans repeatedly to to apply... - Page 65 SAME alerts for areas you specify. You can program your scanner with up to 10 FIPS codes for the areas you desire. The National Weather Service maintains a current list of FIPS codes at http:// www.nws.noaa.gov/nwr/ .
-
Page 66: Using The Delay Function
2 second delay to avoid missing reply traffic on the same channel. When delay is set for a conventional channel, the scanner will pause for reply traffic before resuming the scan operation. to lock out or L/OUT to exit the FIPS Ô... -
Page 67: Locking Out Channels Or Frequencies
./DELAY OCKING HANNELS OR REQUENCIES You can lock out channels to force the scanner to skip and ignore any traffic while scanning. You can also lock out up to 50 frequencies while searching to skip undesired transmissions. Locking Out Channels... -
Page 68: Reviewing Locked-Out Search Frequencies
SRCH and then FUNC L/OUT Lockout list appear. Press to scroll through the . (The tenth of ). If the search bank Empty. Lockout appears in the scanner’s to cancel SRCH Empty. Lockout list appears in SEARCH... -
Page 69: Changing The Receive Mode
If you try to listen to a transmission when the scanner is not set to the correct receive mode, the transmission might sound weak or distorted. To change the receive mode, repeatedly press . -
Page 70: Using The Attenuator
Global attenuator mode applies attenuation to every channel in the scanner, and overrides any normal mode attenuator settings that you may have entered To assign attenuation to a channel in the scanner:... -
Page 71: Turning The Key Tone On And Off
2 seconds. URNING THE N AND Each time you press any of the scanner’s keys, the scanner sounds a tone. You can turn the scanner’s key tone off or on. Ô Ô NOTES • The attenuator is very effective at... -
Page 72: Using The Display Backlight
Trunking turn on the key tone or turn it off. SING THE ACKLIGHT Your PRO-96 features a backlit keypad and display for easy viewing and use in dark environments. There are three backlight modes you can choose from to control backlight activation, Normal mode, Keypress mode, and first keypress Ignore mode. - Page 73 Press while the backlight is on to turn it off. You can also change the backlight mode and duration. 1. If the scanner is on, turn it off Welcome and back on again. To Digital Trunking appears in the scanner’s display.
-
Page 74: Using The Keylock
Ignore operation for the selected duration. 4. Press selection. SING THE Once you program your scanner, you can protect it from accidental program changes by turning on the key lock feature. When the keypad is locked, the only controls... -
Page 75: Working With V-Scanners
ENTER display contrast. ORKING WITH CANNERS The PRO-96 V-Scanner (Virtual Scanner) feature allows you to edit, store, recall and use up to eleven full sets of scanner memory profiles. With V-Scanners it is possible to create separate... - Page 76 4 from the current working memory configuration. This information is saved when you store the V-Scanner. Follow these steps to edit the V- Scanner name stored in Line 4 of the Welcome screen: 1. Press 2. Press P708•••D•+CT...
- Page 77 V- Scanner folder name to the current working memory. This name will be stored with the V- Scanner when it is saved, and will appear while you are performing V-Scanner operations. If you press while in a V-Scanner...
- Page 78 V-Scanner: 1 working memory, or press ENTER if YES My V-Scanner Scanner menu. If you select a V-Scanner folder, the scanner will prompt you to verify your choice. For example, if you to accept the ENTER...
- Page 79 Press the number key that corresponds with the V- Scanner folder you wish to clear, or press to return to the V-Scanner menu. If you select a V-Scanner folder, the scanner will display the name of the V-Scanner currently stored in that folder, and prompt you to verify your choice.
- Page 80 You may then use either your original configuration or the modified one. Be sure to assign a name to each V-Scanner before you save it to a V-Scanner folder. You assign a V- Scanner name while using the configuration in working memory...
-
Page 81: Using The Digital Agc Function
During this period the scanner is transferring V-Scanner data to or from working memory. It is important not to interrupt power to the scanner while this is taking place. Loss of power while performing V-Scanner operations may result in lost data. The... -
Page 82: Cloning The Programmed Data
• Digital AGC has no effect on analog memory to and from another transmissions. PRO-96 scanner using an optional • You may notice more connecting cable with background noise with Digital AGC on. mm) phone plugs on both ends... -
Page 83: Trunking Special Features
5. The scanner sends the data. Do not disconnect the PC/IF cable or interrupt power to either scanner while the transfer is taking place. - Page 84 • For detailed trunked system programming talkgroups. instructions, see “Programming Your PRO-96 automatically Trunked Systems” on calculates Motorola and APCO-25 Page 32 and “Storing Talkgroup IDs” on trunking system voice channel Page 38. frequencies while decoding the control channel.
-
Page 85: Setting Squelch For Trunking
Ô into the same bank. When the scanner decodes the Motorola control channel and finds talkgroup activation on a voice channel, the scanner displays the control channel memory location... -
Page 86: Talkgroup Id Hold
Talkgroup ID Hold You can set your scanner to follow a trunking signal that you want to track during scanning. While the scanner is stopped on a... -
Page 87: Open And Closed Mode Operation
4 on or off, press , then FUNC Open and Closed Mode Operation You can set your scanner to change the way it receives transmissions on Motorola, APCO-25 and EDACS trunked radio systems. These settings, called Open Mode and Closed... - Page 88 Closed Mode, - appears under the channel storage bank’s number while scanning. Traffic on locked out talkgroup IDs is ignored when the scanner is operating in Open and Closed Modes. In Open Mode, the scanner will stop on all talkgroup traffic, except...
-
Page 89: Manual Id Lockout Toggle
To toggle Open or Closed Mode state for a bank, press FUNC while stopped on a channel in the bank in SCAN, MAN or PGM modes. The scanner will briefly Bank OPEN display Bank CLOSED to indicate the new Open or Closed state for the bank. -
Page 90: Reviewing Locked-Out Talkgroup Ids
You can toggle the display to show the text tag or the talkgroup ID code by pressing the scanner is stopped on a trunked talkgroup call. RUNKED UNCTION The trunking ID delay is set... -
Page 91: Clearing Talkgroup Ids
Trunking ID delay specifies the amount of time the scanner dwells on the control channel looking for reply traffic on the previous talkgroup before resuming scan operation. Customizing the trunked ID delay may be useful if you are missing a lot of reply traffic on a particular system. -
Page 92: Digital Operation
This section of the manual will help you understand the differences between traditional analog and digital modulation. For ease of use, your scanner is designed to automatically detect digital modulation on any conventional channel programmed for FM/Digital (FM) modulation. It... - Page 93 Certain user groups on these systems may use analog modulation, while others use digital modulation. Your scanner will automatically detect the type of modulation being used and switch to the correct modulation mode without special programming or user intervention.
-
Page 94: Updating The Dsp Firmware
With updateable DSP firmware, you can ensure that your scanner is using the most recent DSP version available. To update your scanner’s DSP firmware, you will need the... - Page 95 1. Go to http:// www.radioshack.com 2. Click on the Support button. 3. Click on Scanner Firmware Downloads. 4. Click on PRO-96 DSP Firmware 5. Full download and upgrade instructions are provided on the Firmware Upgrade page. 6. To check the DSP version...
-
Page 96: Us Weather Frequencies
A GENERAL GUIDE TO FREQUENCIES Reception of the frequencies covered by your scanner is mainly “line-of-sight.” That means you usually cannot hear stations that are beyond the horizon. US Weather Frequencies (in MHz) 162.400 162.425 162.475 162.500 162.550 Ham Radio Frequencies... - Page 97 If the interference disappears, the interference may be the result of other electronic equipment in the vicinity of the scanner. If the interference remains, it is likely a birdie signal. It may be possible to adjust the squelch control and/or attenuator to minimize the effects of a birdie signal on scanning operation.
-
Page 98: Vhf Band
950.07500 1251.30000 1251.37500 1271.80000 1282.10000 1282.32500 1299.46250 Though your scanner’s receiver is an advanced, triple conversion design engineered to minimize birdie interference, some birdie signals cannot be avoided and may impair your ability to monitor certain frequencies. GUIDE TO THE ACTION BANDS... -
Page 99: Primary Usage
UHF band. LLOCATION To help decide which frequency ranges to scan, use the following listing of the typical services that use the frequencies your scanner receives. These frequencies are 806.000–824.000 851.000–869.000 894.000–960.000 1240.000–1300.000 Frequencies (MHz) 153.785–155.980... - Page 100 subject to change, and might vary from area to area. For a more complete listing, refer to Police Call Radio Guide including Fire and Emergency Services, available at your local RadioShack store. Abbreviation BIFC Boise (ID) Interagency Fire Cache CTSB Conventional/ Trunked Systems FIRE GOVT...
- Page 101 Abbreviation ROAD Road & Highway Maintenance Radio/TV Remote Broadcast Pickup TAXI TELM TRAN (Trucks, Tow Trucks, Buses, USXX UTIL WTHR HIGH FREQUENCY (HF) — (3 MHz-30 MHz) CB Band (26.965-27.405 MHz) 10-Meter Amateur Band (28.0-29.7 MHz) 28.000-29.700 ... HAM VERY HIGH FREQUENCY (VHF) —...
- Page 102 38.000-39.000... GOVT, MIL 39.020-39.980...PUB 40.000-42.000... GOVT, MIL, MARI 42.020-42.940...POL 42.960-43.180...IND 43.220-43.680...TELM, IND, PUB 43.700-44.600... TRAN 44.620-46.580... POL, PUB 46.600-46.990...GOVT 47.020-47.400...PUB 47.420 ...American Red Cross 47.440-49.580... IND, PUB 49.610-49.990... MIL 6-Meter Amateur Band (50-54 MHz) 50.00-54.00... HAM Aircraft Band (108-136 MHz) 108.000-121.490...
- Page 103 154.655-156.240...MED, ROAD, ... POL, PUB 156.255-157.425... OIL, MARI 157.450... MED 157.470-157.515... TOW 157.530-157.725... IND, TAXI 157.740...BUS 158.130-158.460...BUS, IND, OIL, ...TELM, UTIL 158.730-159.465... POL, PUB, ROAD 159.480... OIL 159.495-161.565... TRAN 161.580-162.000... OIL, MARI, RTV 162.0125-162.35... GOVT, MIL, USXX 162.400-162.550... WTHR 162.5625-162.6375... GOVT, MIL, ...
- Page 104 70-Centimeter Amateur Band (420-450 MHz) 420.000-450.000 HAM Low Band (450-470 MHz) 450.050-450.925... RTV 451.025-452.025... IND, OIL, TELM, ... UTIL 452.0375-453.00... IND, TAXI, ... TRAN TOW, NEWS 453.0125-454.000... PUB, OIL 455.050-455.925... RTV 457.525-457.600... BUS 458.025-458.175... MED 460.0125-460.6375.. FIRE, POL, PUB 460.650-462.175... BUS 462.1875-462.450...
- Page 105 Locally Assigned (in 6.25 kHz steps) Frequency Range Service 856.0125–860.9875 MHz CTSB Trunked Systems Band — Locally Assigned (in 6.25 kHz steps) Frequency Range Service 861.0125–865.9875 MHz Public Safety Band — Locally Assigned (in 6.25 kHz steps) Frequency Range Service 866.0125–868.9875 MHz 33-Centimeter Amateur Band (902-928 MHz in 6.25 kHz steps)
-
Page 106: Frequency Conversion
300 by the number of megahertz: 300/50 MHz = 6 meters TROUBLESHOOTING If you have problems with your scanner, please refer to the following chart for some suggestions that might help you eliminate the problem. If the scanner is still not operating correctly after trying these tips, take your scanner to your local RadioShack store for assistance. -
Page 107: Troubleshooting Chart
Page 108. Tighten squelch, apply attenuator or lock out the “birdie” frequency. See “Resetting / Initializing the Scanner” on Page 108. Ensure that the scanner has more than one channel programmed and enabled for scanning. Turn SQUELCH clockwise until scanning... -
Page 108: Resetting / Initializing The Scanner
CANNER memory. If that does not work, you can initialize If the scanner’s display locks up or the scanner. does not work properly after you You may be able to save connect a power source, you the information in your scanner’s memory into... -
Page 109: Care
Initializing Clr Main Mem V-Scan is OK Please Wait CARE Keep the scanner dry; if it gets wet, wipe it dry immediately. Use and store the scanner only in normal temperature environments. Handle the scanner carefully; do not drop it. Keep the scanner away... -
Page 110: Specifications
or tampering with the [product]'s internal components can cause a malfunction and might invalidate its warranty and void your FCC authorization to operate it. SPECIFICATIONS Frequency Coverage: Frequency Range (MHz) Programming/Search Step Value 25–54 108–136.9875 137–174 216.0025–221.9975 222.0000 –225.0000 406–512 806–823.9875 849–868.9875 894–960... - Page 111 1240–1300 MHz ... 0.7 µV 25–54 MHz ... 1 µV 108–136.9875 MHz ... 1 µV 137–174 MHz ... 1.5 µV 216–225 MHz ... 1.5 µV 406–512 MHz ... 2 µV 806–960 MHz ...2 µV` 1240–1300 MHz ... 3 µV Selectivity: 25 –...
- Page 112 Audio Output Power (10% THD) ...170 mW Built-in Speaker ... 1 Inches (36 mm) 8-ohm Dynamic Type Power Requirements: Batteries ... 4 AA Alkaline Batteries or ... 4 AA Rechargeable Batteries External Power ...9 V/300 mA DC Current Drain (Squelched) ... 90 mA Battery Charge Current ...
-
Page 113: Scan Mode
TRUNK If monitoring a trunking talkgroup, stores the ID into the next available ID list memory location. TRUNK (hold) If monitoring a trunking talkgroup, activates ID Hold Mode, scanner holds on the active talkgroup. Toggles priority. TUNE Enters Tune Mode. -
Page 114: Manual Mode
Keystrokes ENTER When monitoring a conventional channel that is programmed for CT or DC Search Mode, stores a detected CT or DC code with the channel memory. Changes scan direction, up or down. FUNC + MAN Toggles digital AGC FUNC + When monitoring a talkgroup call, toggles TRUNK display of control channel text tag or Trunked... -
Page 115: Program Mode
Keystrokes When monitoring a conventional channel that is programmed for CT or DC Search ENTER Mode, stores a detected CT or DC code with the channel memory. steps to the next channel, previous channel. Hold down to scroll. FUNC + MAN Toggles digital AGC. - Page 116 FUNC + L/OUT Jumps to the next locked out channel. Edits welcome screen line 4 (stored with V- FUNC + TEXT Scanner as folder name). FUNC + PGM Enters V-Scanner function menu. jumps forward to the next bank, FUNC + jumps to the previous bank.
-
Page 117: Search Mode
Search Mode Keystrokes SCAN Activates Scan Mode. Activates Manual Mode. Activates Program Mode. Activates Weather Mode. Toggles priority. TUNE Enters Tune Mode. Toggles attenuation for active search range, or, if global attenuation is set, toggles global attenuation on or off. Locks out undesired search frequencies or L/OUT search channels. -
Page 118: Weather Mode
Keystrokes When searching SR3, SR4, SR5 and SR6, stores active search frequency in desired FUNC + PGM bank and channel (e.g., “123 + ENTER” stores the active frequency in Bank 1, Channel 23). When searching SR3, SR4, SR5 and SR6, stores active search frequency in next FUNC + available channel in desired bank (e.g., “1 +... -
Page 119: Id List Edit
Tune Mode Keystrokes SCAN Activates Scan Mode. Activates Manual Mode. Activates Program Mode. Activates Weather Mode. Toggles priority. Toggles attenuation for active search range, or, if global attenuation is set, toggles global attenuation on or off. PAUSE Pauses and resumes tune operations. MODE Cycles through AM/FM/CT/DC modes. - Page 120 Jumps to the next locked out ID. FUNC + TRUNK Launches ID hold mode on selected ID. FUNC + PGM Enters V-Scanner function menu. jumps forward to the next ID bank, FUNC + jumps to the previous ID bank. Hold down to scroll.
-
Page 121: Startup Keys
Adjust backlight properties. Destructive - Initializes working memory 0 then 1 to factory defaults. Does not affect V- Scanner memory. Destructive - Loads test frequencies into 0 then 2 working memory. Does not affect V- Scanner memory. Destructive / EEPROM memory test #1 - 0 then 5 Initializes working memory. - Page 122 NOTES...
- Page 123 NOTES...
- Page 124 Limited One-Year Warranty This product is warranted by RadioShack against manufacturing defects in material and workmanship under normal use for one (1) year from the date of purchase from RadioShack company- owned stores and authorized RadioShack franchisees and deal- ers. EXCEPT AS PROVIDED HEREIN, RadioShack MAKES NO EXPRESS WARRANTIES AND ANY IMPLIED WARRAN- TIES, INCLUDING THOSE OF MERCHANTABILITY AND FIT- NESS FOR A PARTICULAR PURPOSE, ARE LIMITED IN...
Need help?
Do you have a question about the PRO-96 and is the answer not in the manual?
Questions and answers