Table of Contents
Advertisement
Advertisement
Table of Contents

Related Manuals for Creative MuVo V200


Summary of Contents for Creative MuVo V200
- Page 2 Creative MuVo V200 Information in this document is subject to change without notice and does not represent a commitment on the part of Creative Technology Ltd. No part of this manual may be reproduced or transmitted in any form or by any means, electronic or mechanical, including photocopying and recording, for any purpose without the written permission of Creative Technology Ltd.
- Page 3 Contents...
-
Page 4: Table Of Contents
Before You Begin Introduction ................... v Minimum System Requirements ..........v 1 A Tour of Your Player Your Player at a Glance ............1-1 Using the Scroller ..............1-2 Scroll Select ..............1-2 Selecting menu options ..........1-2 2 Getting Started Step 1: Setting Up Your Computer ........... - Page 5 Audio and FM Recording ............3-9 Recording Audio ............3-9 Recording FM Radio ........... 3-10 Playing Recordings ..............3-11 Play Modes ................3-12 Repeat track ............... 3-13 Repeat Folder ............. 3-13 Repeat All ..............3-13 Repeat Portion ............3-14 Shuffle Once ............... 3-14 Shuffle Repeat ............
- Page 6 Playback Formats ..........A-1 Recording Formats ........... A-1 Signal to Noise Ratio ........A-1 Channel Separation .......... A-2 Frequency Response ........A-2 Harmonic Distortion .......... A-2 Operating System/Firmware ......A-2 Headphone Out ..........A-2 LCD Display ............A-2 Data Connector ..........A-2 Firmware Support ..........
-
Page 7: Before You Begin
Before You Begin... -
Page 8: Introduction
Before You Begin Introduction Thank you for purchasing Creative’s new multi-format player, Creative ® MuVo V200! Your player can store thousands of songs in its music library, and comes equipped with an USB 2.0™ connector, so you can transfer audio tracks and data quickly and easily. -
Page 9: Tour Of Your Player
A Tour of Your Player... -
Page 10: Your Player At A Glance
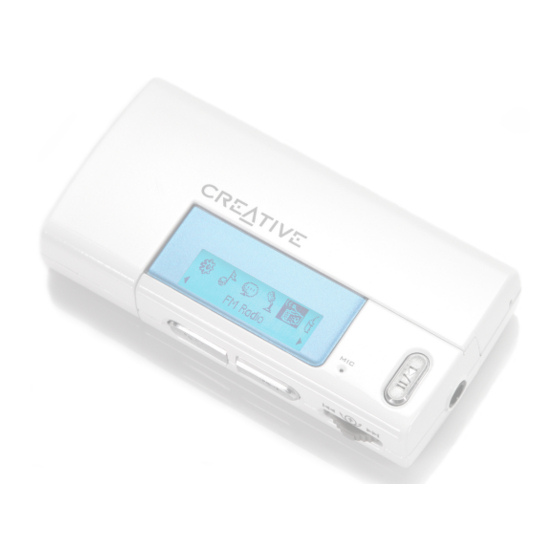
A Tour of Your Player Your Player at a Glance Battery module Earphone jack Scroller Play/Pause button Microphone Volume Increase button USB Flash Volume Drive Decrease LCD (Liquid button Crystal Display) USB connector Front View Side View A Tour of Your Player 1-1... -
Page 11: Using The Scroller
Using the Scroller Scroll Select The Scroller is one of the most important features of your player. In this document, we will use the term, “Scroll Select”, to mean that you should use the Scroller to scroll through options, and then select the option by pressing the Scroller. - Page 12 What It Does Usage Tips ❍ To turn on your player, press and hold until ❍ Turns the player on and off. the MuVo V200 logo appears on the screen. PLAY PAUSE ❍ ❍ Activates the LCD backlight. To turn off your player, press and hold until ❍...
-
Page 13: Getting Started
Getting Started... -
Page 14: Step 1: Setting Up Your Computer
1. Make sure that your player is NOT connected to your computer. 2. Insert the MuVo V200 CD into your CD-ROM/DVD-ROM drive. Your CD should start automatically. If it does not, follow the steps below: Windows 98 SE users i. - Page 15 7. Connect your player to your computer. Your computer’s USB USB Flash Drive port may be located on the back panel. If your USB Flash Drive does not fit into the USB port located on the front panel, connect it to the USB port located USB connector on the back panel.
-
Page 16: Step 2: Inserting The Battery
Step 2: Inserting the Battery Getting Started 2-3... -
Page 17: Power Source And Level Indicators
Power Source After inserting the battery, your player displays one of the following icons, depending on the battery’s status. and Level Icon What the icon means Notes Indicators ❍ this battery state icon ❍ your player’s battery is full shows that the battery is full The amount of playback time... -
Page 18: Step 3: Transferring Audio And Data
2-7. Data Music files can be encoded into the supported formats (MP3 or WMA file formats), then transferred to your player with Creative MediaSource Organizer. To listen to Data files can also be transferred and stored in your player, for example, you transferred audio can transfer a large data file from one computer to another. -
Page 19: Downloading From The Internet
Downloading To get MP3 files from the Internet, use a search engine to locate sites with MP3 content. You can use your player to download audio files from all the from the internet major Internet music download services. ❍ Walmart.com ❍... -
Page 20: Ripping From Acd
To get music tracks from your CDs to your player, you will need a CD-ROM drive that can extract digital audio data, and Creative MediaSource Organizer. Creative MediaSource Organizer will read the audio information on your CD and convert it to MP3 files using the bitrate you choose. Rather than manually... -
Page 21: Step 4: Stopping Your Player Properly
To stop your player in Windows XP, Windows 2000 or Windows Me Step 4: Click the Safely Remove Hardware icon on the Taskbar, click Safely Stopping Your remove USB Mass Storage Device, and disconnect your player when you Player are prompted to do so. Properly To stop your player in Windows 98 SE In Windows Explorer, right-click the Removable Disk icon, click the Eject... -
Page 22: Using Your Player
Using Your Player... -
Page 23: Turning On/Off Your Player
Press and hold the Play/Pause button until your player turns on. If your player contains The CREATIVE logo appears on the screen, followed by the MuVo V200 no audio tracks, the logo. Audio tracks stored in your player are automatically played back. -
Page 24: Enabling A Mode
2-5. Tracks Follow these steps to play audio tracks. 1. Press the Play/Pause button until the MuVo V200 logo appears on the screen, and audio tracks stored in your player are automatically Audio tracks are sorted played back. -
Page 25: Deleting Audio Tracks
Figure 3-3 Managing For more advanced song management tasks, such as creating and managing playlists, you can use Creative MediaSource Organizer. Creative Audio Tracks MediaSource Player/Organizer is your digital audio center for playing, creating, organizing and transferring digital audio. To launch Creative... -
Page 26: Skipping Folders
Skipping This action skips the playback to a selected folder. To go to the next folder Folders 1. Press the Scroller. 2. Scroll Select the Skip Folder icon (Figure 3-4). 3. Scroll to the folder that you want to go to. Your player can only 4. - Page 27 To change the FM region Perform these steps when scanning for stations for the first time. 1. Press the Scroller. Only two FM regions are available — The Main Menu (Figure 3-6) appears. International and Japan. Figure 3-6 2. Scroll Select the Settings icon (Figure 3-7). A list appears.
- Page 28 To manually set a preset channel 1. Press the Scroller. The Main Menu similar to Figure 3-13 appears. Figure 3-13 2. Scroll Select the FM Radio icon (Figure 3-14). A radio frequency appears on the LCD screen (Figure 3-15). Figure 3-14 3.
- Page 29 To select a channel 1. Press the Scroller. The Main Menu similar to Figure 3-17 appears. Figure 3-17 2. Scroll Select the FM Radio icon (Figure 3-18). A radio frequency appears on the LCD screen (Figure 3-19). Figure 3-18 3. Turn the Scroller to select the preset channel you If you do not see a want.
- Page 30 5. Scroll Select the Delete Preset icon (Figure 3-23). Figure 3-23 6. Scroll Select the Delete Preset x icon (Figure 3-24). The preset channel is deleted and your player plays the next available preset channel. Figure 3-24 To switch to FM Preset view or Manual Scan view In FM Preset view, you can see the preset channels and scroll from one preset channel to another.
-
Page 31: Audio And Fm Recording
Audio and FM Another great MuVo V200 feature is its ablility to record audio and FM radio. Recorded audio is encoded directly into IMA ADPCM (at 8 kHz, 4-bit, Mono) Recording file format and recorded FM radio is encoded directly into IMA ADPCM (at 16 kHz, 4-bit, Stereo) file format. -
Page 32: Recording Fm Radio
Recording FM When recording FM radio, you will see one bar showing you the time available for recording, and another showing you the elapsed recording time. Radio Also the FM Radio icon appears in the bottom-left corner of the LCD screen. Elapsed recording time Battery level... -
Page 33: Playing Recordings
6. Press the Play/Pause button to end the recording. A name is automatically assigned to your FM radio recording and the file is saved in your player. The naming convention typically used is: FM [Current File Number]. Playing It is simple to play back the audio and FM Radio tracks you have recorded. In Recordings mode, your player will display the elapsed time, track number Recordings and file name of the recorded track. -
Page 34: Play Modes
Play Modes Your player has Play Modes that allow you to change how your tracks are played back. Play Modes are disabled by setting the “Normal” mode as described on page 15. The following Play Modes are available: Only one Play Mode ❍... -
Page 35: Repeat Track
Repeat track To repeat a track Scroll Select the Repeat Track icon The Repeat Track icon appears on the screen and the track is repeated continuously until you stop it or go to another track. Repeat Folder To repeat a folder Scroll Select the Repeat Folder icon The Repeat Folder icon appears on the screen and tracks in the... -
Page 36: Repeat Portion
Repeat Portion To repeat a portion of a track 1. Scroll Select the A-B icon . The icon appears, prompting you to select a start point for the portion of music to repeat. 2. Press the Scroller to mark the begining of the portion you wish to repeat. icon appears, prompting you to select an end point for the repeat function. -
Page 37: Shuffle Repeat
Shuffle Repeat To Shuffle Repeat all tracks continuously Scroll Select the Shuffle Repeat icon. The Shuffle Repeat icon appears on the screen. Selected tracks are in random sequence and played back continuously until you stop playback. Track Once To stop playback once the current track ends Scroll Select the Track Once icon. -
Page 38: Enhancing Audio
Enhancing Audio Enhancing Audio EQ is a collection of equalizer settings that can enhance the sound of your audio. Select preset settings such as Rock or Jazz, or customize your own setting. 1. Press the Scroller. The Main Menu (Figure 3-40) appears. -
Page 39: Defining Custom Eq
Defining Custom 1. Scroll Select the Custom EQ icon. The Custom EQ screen (Figure 3-42) appears. 2. Five vertical control levers appears in the display. Each lever represents successively higher Figure 3-42 frequencies that can be controlled. 62 Hz controls bass frequency, 250 Hz adjusts the low mid-range frequency, 1 kHz adjusts the mid-range frequency, 4 kHz adjusts the upper mid-range frequency and 16 kHz adjusts the treble frequency. -
Page 40: Setting Preferences
Setting Preferences Settings Settings is a collection of options that enable you to adjust your preferences. You can adjust preset display settings such as Contrast or Backlight, change your player’s default language and view useful information such as available memory space. 1. - Page 41 To rotate the LCD screen 180 degrees Your player has a handy feature: you can rotate the LCD screen by 180 degrees. This may be useful for left-handed users. Follow the step below to rotate the LCD screen on your player. Using your left hand Using your right hand Scroll Select the LCD Orientation icon...
- Page 42 To specify how long the player remains inactive before it automatically shuts down 1. Scroll Select the Idle Shutdown icon. 2. Scroll Select the duration you want the player to wait before automatically shutting down. To change the default language 1.
-
Page 43: Locking And Unlocking Your Player
Locking and Locking your player will disable all buttons except the Scroller on the player. This feature is useful when you do not want any buttons (for example, unlocking your Play/Pause) pressed accidentally. Player If you press a button while the player is locked, a popup window appears, prompting you to unlock the player. -
Page 44: Formatting Your Player
Formatting If you need to format your player, first backup the files on your player to your computer. When you format your player, all songs and files will be deleted. Your Player By default, your player is already formatted. 1. Connect your player to your computer’s USB port. 2. -
Page 45: A Technical Specifications
Technical Specifications... -
Page 46: Size
Technical Specifications ❑ 36.50 mm (L) x 74.50 mm (H) x 15.00 mm (W) Size ❑ 33 g (without the battery) or 45 g (with a AAA battery) Weight ❑ 128, 256 or 512 MB built-in memory Capacity ❑ One Alkaline AAA size battery Battery type ❑... -
Page 47: Channel Separation
1/8" stereo minijack, 5~7 mW Headphone Out ❑ Large 96 x 32 pixel, blue EL backlit display LCD Display ❑ USB 1.1 Data Connector ❑ USB 2.0 ❑ Programmable Firmware Support Firmware upgrades are available from www.creative.com Technical Specifications A-2... -
Page 48: B Onscreen Diagram And Icon Guide
Onscreen Diagram and Icon Guide... -
Page 49: Information Diagrams
Onscreen Diagram and Icon Guide Information Diagram Action/Meaning Diagrams ❍ your player is connected to your computer. To use your player, disconnect it from your computer. ❍ files are being transferred to your player. Onscreen Diagram and Icon Guide B-1... -
Page 50: Playback Icons
Playback Icons Icon Action/Meaning ❍ Play The following icons appear onscreen when ❍ Pause the associated playback action is used. ❍ Stop ❍ Forward ❍ Reverse ❍ Skip forward ❍ Skip back Onscreen Diagram and Icon Guide B-2... -
Page 51: Play Mode Icons
Play Mode Icon Action/Meaning Icons ❍ Repeat Track ❍ Repeat Folder ❍ Repeat All ❍ Shuffle Once ❍ Shuffle Repeat ❍ Shuffle Folder ❍ Track Once ❍ Repeats a selected section of a track Onscreen Diagram and Icon Guide B-3... -
Page 52: Error Diagrams
Error Diagrams If an error occurs, you may see the following diagram, indicating the general nature of the problem. Diagram Likely Causes Suggested Action ❍ physical defects ❍ contact Customer ❍ numerous high- Support Services impact shocks ❍ download a newer ❍... - Page 53 Diagram Likely Causes Suggested Action ❍ check that the file you ❍ unsupported file are trying to play back is format a WMA, MP3 or recorded voice file ❍ the player’s low remaining storage ❍ space is depleted; delete some files recording cannot proceed ❍...
-
Page 54: C Frequently Asked Questions
Frequently Asked Questions... -
Page 55: Autoplay
CD-ROM drive). 2. Double-click the ctrun.exe file. General Where can I get official information on all MuVo products? Visit www.creative.com for updates and downloads relating to all MuVo products, Creative’s MP3 players and accessories. Frequently Asked Questions C-1... -
Page 56: Usage
Usage I have to change the battery quite often. Is there anything I can do to make it last longer? Some operations consume more battery power: ❍ a long backlight timeout setting. A shorter timeout conserves battery power. ❍ a high contrast setting. Position the player so that you can read the display without using a high contrast setting. -
Page 57: Digital Rights Management
Digital Rights Can I play DRM-protected WMA files on my player? Yes. To transfer DRM protected WMA files to your player, you can use Management Creative MediaSource. Frequently Asked Questions C-3...
Need help?
Do you have a question about the MuVo V200 and is the answer not in the manual?
Questions and answers