Table of Contents
Advertisement
Advertisement
Table of Contents

Related Manuals for Creative Muvo Muvo2 FM


Summary of Contents for Creative Muvo Muvo2 FM
- Page 2 Creative MuVo Information in this document is subject to change without notice and does not represent a commitment on the part of Creative Technology Ltd. No part of this manual may be reproduced or transmitted in any form or by any means, electronic or mechanical, including photocopying and recording, for any purpose without the written permission of Creative Technology Ltd.
- Page 3 Contents...
-
Page 4: Table Of Contents
1 Before You Begin Introduction... 1-1 Minimum System Requirements ... 1-1 2 A Tour of Your Player Your Player at a Glance... 2-1 Using the Menu Button... 2-2 Select... 2-2 Volume... 2-2 Your Wired Remote... 2-5 3 Getting Started Step 1: Setting Up Your Computer ... 3-1 Step 2: Inserting the Battery... - Page 5 4 Using Your Player Turning Your Player On/Off... 4-1 Enabling a Mode ... 4-2 Playing Audio Tracks ... 4-3 Deleting Audio Tracks ... 4-4 Managing Audio Tracks... 4-4 Listening to FM Radio... 4-5 Audio and FM Recording... 4-9 Recording Audio ... 4-9 Recording FM Radio...
- Page 6 5 Software Applications About Creative MediaSource and Creative AudioSync Wizard ... 5-1 Appendixes A Onscreen Diagram and Icon Guide Play Status Icons... A-1 Information Diagrams... A-2 B Frequently Asked Questions Usage ... B-1 Updates... B-3 C General Specifications Size (WxHxD)... C-1 LCD...
-
Page 7: Before You Begin
Before You Begin... -
Page 8: Introduction
Before You Begin Introduction Thank you for purchasing Creative’s new multi-format player, Creative MuVo comes equipped with a USB 2.0 connector, so you can transfer audio tracks and data quickly and easily. ❑ Microsoft® Windows® XP, Windows Millennium Edition (Me), Windows 2000 or... -
Page 9: Tour Of Your Player
A Tour of Your Player... -
Page 10: Your Player At A Glance
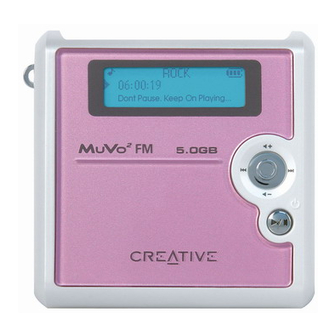
A Tour of Your Player Your Player at a Glance Front View Power adapter Earphone connector port connector Top View Liquid Crystal Display (LCD) Menu button Play/Pause button A Tour of Your Player 2-1... -
Page 11: Using The Menu Button
Using the Menu Button Select The Menu button (Figure 2-1) is one of the most important features of your player. In this document, we will use the term, “Select”, to mean that you should move the Menu button towards the left or right to browse through options, and then select an option by pressing the Menu button. - Page 12 Button What It Does ❍ Displays Menu options on the LCD. ❍ Turns your player on and off. AUSE ❍ Enables various functions, depending on the mode you are Indicator What It Means ❍ Goes to the beginning of the REVIOUS current track, or to the previous track.
- Page 13 Connector/Port POWER ADAPTOR ❍ Connect your power adaptor to this CONNECTOR connector. USB PORT ❍ Connect your USB cable to this port. EARPHONE ❍ Connect your earphones or wired remote CONNECTOR to this connector. What It Does Usage Tips A Tour of Your Player 2-4...
-
Page 14: Your Wired Remote
Your Wired The wired remote lets you access the controls of your player without having to take the player out of your bag. Remote In Music mode, each button on the wired remote has the same function as its respective button on the player. -
Page 15: Getting Started
Getting Started... -
Page 16: Step 1: Setting Up Your Computer
Computer iii. Right-click the CD-ROM/DVD-ROM drive icon, and then click AutoPlay. 3. Follow the instructions on the screen to complete the installation. Creative MediaSource™ and Windows 98 SE drivers (only if applicable) DO NOT connect your player to your will be installed on your computer. -
Page 17: Step 2: Inserting The Battery
Step 2: Insert the supplied battery into your player as shown below in Figure 3-1. Inserting the Battery Figure 3-1: Inserting the battery. Getting Started 3-2... -
Page 18: Step 3: Charging The Battery
Step 3: You can charge your battery by connecting your player to a power outlet using the supplied power adapter, or by connecting your player to your Charging the computer’s USB port using the supplied USB cable. Battery Using the Power Connect one end of the power adapter to the wall outlet and the other end to your player’s power adapter connector, as shown in Figure 3-2. -
Page 19: Using The Usb Cable
Using the USB You can also charge your player’s battery using the supplied USB cable. Connect the USB cable to your player and computer’s USB ports, as shown Cable in Figure 3-3. DO NOT charge your player’s battery via the USB port until after you have installed the software. -
Page 20: Power Source And Level Indicators
Power Source Your player displays one of the following icons, depending on the battery’s charged status or the power source (battery or external power). and Level Indicators Icon What the icon means ❍ Your player is running from battery power. ❍... -
Page 21: Step 4: Transferring Audio And Data
You can use your player as a portable Music files can be encoded into the supported formats (MP3, WMA or WAV storage device to store file formats), and then transferred to your player with Creative MediaSource any data file, such as Organizer. documents, presentations and photos. - Page 22 3. On the left pane, locate and select the files you want to transfer to your player. Using the standard drag-and-drop method, transfer the files to your player. For information about transferring DRM protected WMA files, refer to "Usage" on page B-1. 4.
-
Page 23: Downloading From The Internet
Downloading To get MP3 files from the Internet, use a search engine to locate sites with MP3 content. You can also try out these sites (web sites listed here are From the Internet correct at the time of this document’s release): ❍... -
Page 24: Ripping Audio Cds
The first phase in making an MP3 file is extracting audio data from an audio CD. To extract audio data, you will need a CD-ROM drive that can extract digital audio data, and a program known as a ripper. With Creative MediaSource Organizer, you can rip tracks from most audio CDs. This program uses the CD-ROM drive to read the audio tracks from the audio CD and stores it on your hard disk. -
Page 25: Step 5: Stopping Your Player Properly
To stop your player in Windows XP, Windows Me or Windows Step 5: 2000 Stopping Your Click the Safely Remove Hardware icon on the Taskbar, click Safely Player remove USB Mass Storage Device (Figure 3-4), and disconnect your player when you are prompted to do so. Properly To stop your player in Windows 98 SE In Windows Explorer, right-click the Removable Disk icon (Figure 3-5), click... -
Page 26: Step 6: Connecting The Earphones And Wired Remote
Step 6: You can connect the earphones directly to your player’s earphone connector for hours of listening pleasure (see Figure 3-6 below). You can Connecting the also have convenient one touch access to your player’s controls by Earphones and connecting the earphones to your player via the wired remote (see "Connecting the Wired Remote"... -
Page 27: Connecting The Wired Remote
Connecting the Connect your earphones, wired remote and player as shown below in Figure 3-1. Wired Remote Earphones Using other wired remotes with your player is not recommended. Earphone jack Wired remote jack Wired Remote Figure 3-7: Connecting the player to the wired remote. Earphone connector Getting Started 3-12... -
Page 28: Using Your Player
Using Your Player... -
Page 29: Turning Your Player On/Off
For more information, see "Play Modes" on page 4-12. To turn on your player Turning Your Player On/Off Press and hold the Play/Pause button CREATIVE logo appears onscreen, followed by the To turn off your player If your player contains no audio Press and hold the Play/Pause button tracks, the message appears. -
Page 30: Enabling A Mode
Enabling a Your player can function in Music, Microphone or FM Radio mode. Different modes enable you to select different functions. Mode 1. Press the Menu button. The menu similar to Figure 4-1 appears. 2. Select the Music icon The term "Select" is used throughout this document. -
Page 31: Playing Audio Tracks
Playing Audio Audio selections have been preloaded to your player to get you started quickly. If you wish to listen to music immediately, simply press the Play/ Tracks Pause button It is simple to play back audio tracks. In Music mode, your player will display the elapsed time, track number and file name of the track. -
Page 32: Deleting Audio Tracks
Managing For more advanced song management tasks, such as creating and managing playlists, you can use Creative MediaSource Organizer. Creative Audio Tracks MediaSource Player/Organizer is your digital audio center for playing, creating, organizing and transferring digital audio. To launch Creative... -
Page 33: Listening To Fm Radio
Listening to FM With your player, you can listen to your favorite radio station. Your player can automatically scan for stations available in your region, and store the stations Radio as channels for you. In FM Radio mode, your player will display the current radio channel and its preset number. - Page 34 To perform an autoscan and autosave 1. Select the FM Radio icon (Figure 4-7). A radio frequency appears on the LCD screen (Figure 4-8). 2. Press the Menu button again. 3. Select the Autoscan icon (Figure 4-9). The player scans and stores channels it detects. At the end of the autoscan, it automatically saves all channels and plays the first channel.
- Page 35 5. Select the Save Preset icon (Figure 4-13). 6. Select the preset number you want and press the Menu button to store your channel. 7. Repeat steps 2 to 6 to store another channel. To select a channel 1. Select the FM Radio icon (Figure 4-14). A radio frequency appears on the LCD screen (Figure 4-15).
- Page 36 5. Select the Delete Preset <number> icon (Figure 4-19). The preset channel is deleted. To switch to FM Preset view or Manual Scan view In FM Preset view (Figure 4-21), you can see the preset channels and scroll from one preset channel to another. If you need to fine-tune a radio channel, switch to Manual Scan view (Figure 4-23).
-
Page 37: Audio And Fm Recording
Audio and FM Another great MuVo Recorded audio is encoded directly into IMA ADPCM (at 16 kHz, 4-bit, Recording Mono) file format and recorded FM radio is encoded directly into IMA ADPCM (at 22 kHz, 4-bit, Stereo) file format. When recording, note that the available recording time is determined by: •... -
Page 38: Recording Fm Radio
Recording FM When recording FM radio, you will see one bar showing you the time available for recording, and another showing you the elapsed recording time. Radio Also, the FM Radio icon appears in the bottom-left corner of the LCD screen. You cannot pause and continue an FM radio recording. -
Page 39: Playing Recordings
Playing It is simple to play back the audio and FM Radio tracks you have recorded. In Music mode, your player will display the elapsed time, track number and file Recordings name of the recorded track. A recorded audio filename starts with "VOC"... -
Page 40: Play Modes
Play Modes Your player has Play Modes that allow you to change how your tracks are played back. Play Modes are disabled by setting the “Normal” mode as described on page 4-13. The following Play Modes are available: • Repeat Track Only one Play Mode can be enabled at a •... -
Page 41: Repeat All
Repeat All To repeat all tracks Select the Repeat All icon. The Repeat All icon appears onscreen and all tracks are repeated continuously until you stop playback. Track Once To stop playback once the current track ends Select the Track Once icon. The Track Once icon appears onscreen. -
Page 42: Enhancing Audio
Enhancing Audio EQ is a collection of equalizer settings that can enhance the sound of your audio. Select preset settings such as Rock or Jazz, or customize your own setting. 1. Press the Menu button. 2. Select the Music icon. A screen similar to Figure 4-34 appears. - Page 43 2. Select a control level. 3. Move the Menu button left or right to adjust the level. 4. Select , and press the Menu button to confirm the Custom EQ setting. 5. Repeat steps 2 to 4 to adjust another control level. Using Your Player 4-15...
-
Page 44: Setting Preferences
Setting Preferences Settings Settings is a collection of options that enable you to adjust your preferences. You can adjust preset display settings such as Contrast or Backlight, change your player’s default language and view useful information such as available memory space. 1. -
Page 45: Locking And Unlocking Your Player
Locking and Lock your player when you want to prevent buttons from being accidently pressed, such as when your player is in your pocket or bag. If you press a Unlocking Your button while the player is locked, a popup window appears, prompting you to Player unlock the player. -
Page 46: Formatting Your Player
Formatting If you need to format your player, first backup the files on your player to your computer. When you format your player, all songs and files will be deleted. Your Player By default, your player is already formatted. 1. Connect your player to your computer’s USB port. 2. -
Page 47: Software Applications
Software Applications... -
Page 48: About Creative Mediasource And Creative Audiosync Wizard
Creative MediaSource, Creative AudioSync Wizard and other useful software, are included on your Creative MuVo MediaSource Creative MediaSource is the best way to organize and transfer your audio to and Creative and from your player. You can also use Creative MediaSource to burn your AudioSync audio CDs. -
Page 49: A Onscreen Diagram And Icon Guide
Onscreen Diagram and Icon Guide... -
Page 50: Play Status Icons
Onscreen Diagram and Icon Guide Play Status Play status icons appear at the left side of the LCD. Icons Play Pause Moves ahead within track Moves back within track Next track Previous track Onscreen Diagram and Icon Guide A-1... -
Page 51: Information Diagrams
Information The following information diagrams may appear on the LCD. Diagrams Player is connected to your computer. To use your player, disconnect it from your computer. Files are being transferred to your player. DO NOT disconnect your player. Corrupted recorded voice file. Check that your recorded voice file is not corrupted, or reformat your player. -
Page 52: B Frequently Asked Questions
Frequently Asked Questions... -
Page 53: Usage
This section covers questions you might have while using your player. It has been divided into a few categories for your easy reference. For further assistance, you may wish to consult our self-help tool “Knowledge Base”. Go www.creative.com Why does the player skip certain tracks? Usage The player will only play valid media formats (MP3, WMA and WAV files). - Page 54 If I damage or lose my power adapter, can I buy a similar, off-the- shelf adapter? No. The power adapter may not be compatible with your player, and may even damage it. You should get a replacement adapter from Creative at www.creative.com, or your local Creative office/distributor. Frequently Asked Questions B-2...
-
Page 55: Updates
Can I transfer DRM protected WMA files to my player? Yes. To transfer DRM protected WMA files to your player, you can use Creative MediaSource, Creative AudioSync Wizard or Windows Media Player. Where can I get official information on all MuVo products? -
Page 56: C General Specifications
General Specifications... -
Page 57: Signal-To-Noise Ratio
General Specifications Size (WxHxD) 66.5 mm (2.6") x 67.0 mm (2.6") x 20.0 mm (0.8") 132 x 32 pixel backlit display Playback MPEG Audio Layer 3 (MP3), Windows Media Audio (WMA) and Waveform (WAV) Formats Signal-to- Up to 98 dB Noise Ratio Harmonic <0.05%... -
Page 58: Usb Connectivity
USB 1.1 and USB 2.0 compatible Connectivity General Specifications C-2...
Need help?
Do you have a question about the Muvo Muvo2 FM and is the answer not in the manual?
Questions and answers