
Related Manuals for Perlick 24" series


Summary of Contents for Perlick 24" series
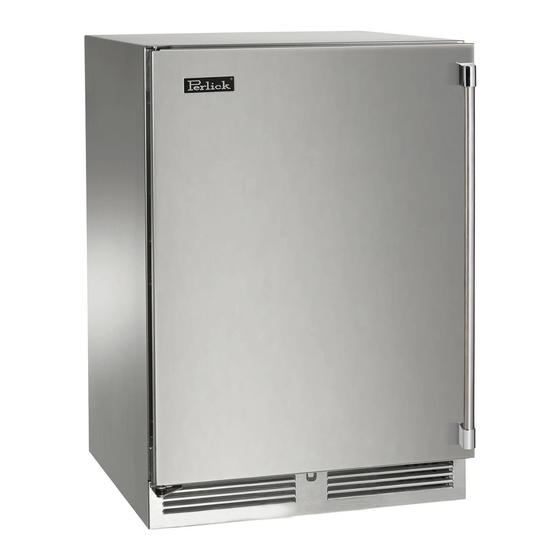
- Page 1 Installation & Operation Manual 24”, 48” & 72” Signature Series Freezer Freezer Drawers Refrigerator Refrigerated Drawers Beer Dispenser Beverage Center Wine Reserve...
-
Page 3: Introduction
If you do not complete your Warranty Registration Card on-line or have questions that are not addressed here, call 800 return via U.S. mail, Perlick will use the date of sale as the first date 558-5592. of warranty for your new Refrigerated Cabinet. Please record the purchase date of your Perlick product and your dealer’s name, ad-... -
Page 4: Table Of Contents
Table of Contents INTRODUCTION ..................................3 YOUR MODEL’S INFORMATION ............................3 WARRANTY REGISTRATION CARD ............................. 3 TABLE OF CONTENTS ................................4 GENERAL PRECAUTIONS ............................... 5 INSTALLATION INSTRUCTIONS FIGURE 1-3. INSTALLATION SPECIFICATIONS ......................4-5 24” SIGNATURE SERIES DIMENSIONS .......................... 6 48” SIGNATURE SERIES DIMENSIONS .......................... 7 72”... -
Page 5: General Precautions
Obstructing free airflow can cause unit to malfunction, and may void the warranty. • Width: 72” CAUTION Use only genuine Perlick replacement parts. Imitation parts can damage the unit, and may void the warranty. INSTALLATION INSTRUCTIONS General • All electrical instructions assume that outlet is located 4 to 10 inches from the floor • Floor must be level in area of installation. -
Page 6: 24" Signature Series Dimensions
Figure 1. 24” Signature Series Dimensions © 2011 24”, 48” & 72” Cabinet Installation / Operation Manual Document No. Z2305... -
Page 7: 48" Signature Series Dimensions
Figure 2. 48” Signature Series Dimensions © 2011 24”, 48” & 72” Cabinet Installation / Operation Manual Document No. Z2305... -
Page 8: 72" Signature Series Dimensions
Figure 3. 72” Signature Series Dimensions © 2011 24”, 48” & 72” Cabinet Installation / Operation Manual Document No. Z2305... -
Page 9: Preparing The Space
3. Before moving unit, secure door to unit with tape to the door closed. All Perlick units come equipped with a NEMA 5-15P 90° 4. Carefully move unit to installation site and plug with a minimum of 5-feet of cord extending be- place in front of opening. -
Page 10: Anti-Tip-Over Installation
ANTI-TIP BRACKETS WARNING Unit may tip forward if loaded racks/shelves are all pulled out at the same time. To prevent tipping and provide a stable installation, the unit must be secured in place with the anti-tip brackets provided with the unit. A set of metal anti-tip brackets are supplied with the unit. -
Page 11: Figure 5. Two-Door Anti-Tip Layout
Figure 5. TWO-DOOR ANTI-TIP LAYOUT Figure 6. THREE-DOOR ANTI-TIP LAYOUT © 2011 24”, 48” & 72” Cabinet Installation / Operation Manual Document No. Z2305... -
Page 12: Installation
measurement. Using an adjustable wrench or pliers, INSTALLATION turn legs counterclockwise to raise the unit or clock- IMPORTANT NOTE: If installing on a concrete wise to lower the unit floor, concrete fasteners are required and not included with the anti-tip kit. Slide the cabinet into position, making sure the rear cabinet leveling legs slide under the anti-tip CAUTION... -
Page 13: Toe Plate Installation
TOE PLATE INSTALLATION When the unit is secured in place, install the louvered toe plate. Secure louvered toe plate by snapping the latch into the latch catch on the unit. Refer to Figure 7 TOE-PLATE INSTALLATION ILLUSTRATION CAUTION The louvered toe plate must be removable for servicing. The floor cannot interfere with removal. The louvered sections of the toe plate must not be covered or obstructed so as to prevent proper air circu- lation. -
Page 14: Door Options
Proper wood working materials and equipment should be used to avoid damage or errors in workmanship. All Perlick units accept any of the above door con- figurations and are fully hinge reversible and inter- changeable. See page 15 for Door Reversing Instruc- With the unit secured in position, open the tions. - Page 15 Milwaukee, WI 53223 THIS DOCUMENT/PUBLICATION/SOFTWARE/DRAWING CONTAINS PROPRIETARY INFORMATION WHICH IS THE PROPERTY OF THE PERLICK CORPORATION. IT MAY NOT BE REPRODUCED OR TRANSMITTED IN ANY FORM, ELECTRONIC OR MECHANICAL, INCLUDING PHOTOCOPYING, RECORDING, OR USED IN ANYINFORMATION STORAGE, TRANSMISSION, OR RETRIEVAL SYSTEM, WITHOUT WRITTEN PERMISSION FROM THE PERLICK CORPORATION COPYRIGHT 2001 PERLICK CORPORATION.
-
Page 16: Installation Of Wood Overlays
The following instructions cover installing a solid wood overlay or glass overlay panel and handle to a door or drawer. IMPORTANT NOTE: Contact the factory or visit www.perlick.com for full-size wood overlay panel lay- outs. See Figure 8 for details for the design of a solid wood overlay panel. -
Page 17: Figure 8. Solid Wood Overlay
Figure 8. SOLID WOOD OVERLAY PANEL © 2011 24”, 48” & 72” Cabinet Installation / Operation Manual Document No. Z2305... - Page 18 Figure 8-A. LOCK INSTALLATION -SOLID WOOD OVERLAY PANEL © 2011 24”, 48” & 72” Cabinet Installation / Operation Manual Document No. Z2305...
- Page 19 Figure 9. WOOD OVERLAY, GLASS DOOR PANEL © 2011 24”, 48” & 72” Cabinet Installation / Operation Manual Document No. Z2305...
- Page 20 Figure 9-A. LOCK INSTALLATION -WOOD OVERLAY, GLASS DOOR PANEL © 2011 24”, 48” & 72” Cabinet Installation / Operation Manual Document No. Z2305...
- Page 21 Figure 10. SOLID WOOD OVERLAY DRAWERS © 2011 24”, 48” & 72” Cabinet Installation / Operation Manual Document No. Z2305...
- Page 22 Figure 10-A. LOCK INSTALLATION -SOLID WOOD OVERLAY DRAWERS © 2011 24”, 48” & 72” Cabinet Installation / Operation Manual Document No. Z2305...
-
Page 23: Shelving
Wine Reserve SHELVING The 24” wine reserve comes standard with five full- IMPORTANT NOTE: Interior louver openings and extension black vinyl coated wine racks capable of fan guard openings should never be obstructed storing 40 total wine bottles with additional room on to achieve maximum performance. -
Page 24: Figure 11. Wooden Wine Rack Trim Design
THREE DOOR REFRIGERATOR/WINE RESERVE/WINE vinyl coated wine racks capable of storing 88 total wine bottles. If the cabinet is a multi-zone wine RESERVE reserve the first door can hold 40 total wine bottles while the second door can hold 48 total wine bottles. The three door refrigerator/wine reserve/wine reserve (HP72RWO or HP72RWW) comes standard with two black vinyl coated pull-out shelves and... -
Page 25: Operation
(cooling coil) automatically defrosts on de- mand at predetermined intervals. The controller also Perlick’s 48” Signature Series comes equipped with a has a manual defrost soft button on the front panel state of the art refrigeration system. The compressor signified by a melting snowflake. -
Page 26: Temperature Control
Loading Product Interior Light IMPORTANT NOTE: Before storing perishables, The 72” unit has three interior lights that are illu- allow unit to run for a minimum of 24 hours to al- minated when the corresponding door is opened. low temperature stabilization after start-up. The unit also comes standard with manual light switches located next to each light for displaying When loading items into unit, do no block internal... -
Page 27: Temperature Control Adjustments
TEMPERATURE CONTROLLER © 2011 24”, 48” & 72” Cabinet Installation / Operation Manual Document No. Z2305... - Page 28 © 2011 24”, 48” & 72” Cabinet Installation / Operation Manual Document No. Z2305...
- Page 29 IMPORTANT NOTE: Dependent on the model and configuration, the controllers have been programmed to only allow a temperature adjustment within a specified range (see chart below for the specified range al- lowed for your cabinet). © 2011 24”, 48” & 72” Cabinet Installation / Operation Manual Document No.
-
Page 30: Chart 1. Product Temperature Set Points And Ranges
CHART 1. PRODUCT TEMPERATURE SET POINTS AND RANGES. Single Door Freezer (HP24F) 0°F Range: -5°F to +5°F Single Door Refrigerator (HP24R) 38°F Range: 33°F to 43°F Single Door Beer Dispenser (HP24T) 38°F Range: 33°F to 43°F Single Door Beverage Center (HP24B) 42°F Range: 36°F to 48°F Single Door Wine Reserve (HP24W) -
Page 31: Checking Product Temperature
CAUTION Your Perlick units are pre-set in order to achieve the Do not use abrasive cleaners or cloths on any of recommended temperature range when installed in a 70°F ambient room temperature. Factors, which the interior or exterior surfaces or removable parts. -
Page 32: Troubleshooting
TROUBLESHOOTING BEFORE CALLING FOR SERVICE If the unit appears to be malfunctioning, read through NORMAL OPERATION first. If the problem persists, check the TROUBLESHOOTING GUIDE. Locate the problem in the guide and refer to the cause and its rem- edy before calling for service. The problem could be something, which can be solved without a service call. - Page 33 Check the model and serial number of your unit located on the label attached to the inside top of the cabinet. Then call your Perlick Factory Authorized Service Center. For the location of the Service Center in your area, contact your dealer, inquire via the WEB at www.perlick.com, or write to: Perlick Corporation, ©...
-
Page 34: Warranty
TERMS: The Perlick Warranty applies to products installed in the fifty United States, the District of Columbia or the ten provinces of Canada. All service provided by Perlick Corporation under the above warranty must be performed by authorized Perlick service representatives, unless otherwise specified by Perlick. - Page 35 Perlick’s sole liability and your exclusive remedy under this warranty are set forth in the initial paragraph above. Perlick Corporation shall have no liability whatsoever for any incidental, conse-...
- Page 36 © 2011 24”, 48” & 72” Cabinet Installation / Operation Manual Document No. Z2305...
- Page 37 8300 W. Good Hope Road • Milwaukee, WI 53223 • 1-800-558-5592 • Fax: 414-353-7069 • www.perlick.com Perlick is committed to continuous improvement. Therefore, we reserve the right to change specifications without warning. Document No. Z2305 © 2011 24”, 48” & 72” Cabinet Installation / Operation Manual...
Need help?
Do you have a question about the 24" series and is the answer not in the manual?
Questions and answers