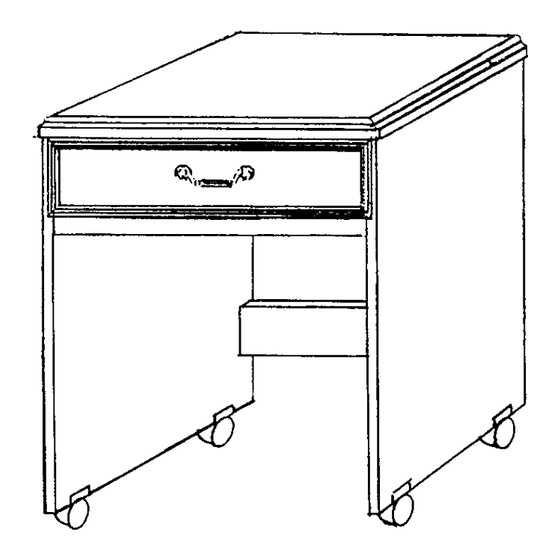
Summary of Contents for Kenmore 272.98100.491 Sewing machine cabinet
- Page 1 OWNER'S MANUAL SEWING MACH_N! CABINET " Model No. 272,98100.491 Model No • ASSEMBLY • PARTS LIST IMPORTANT: Read instructions before assembling. 98100-FC...
- Page 2 Notice to Customer: TO ORDER REPLACEMENT PARTS CALL 1-800-366-7278 Before beginning assembly, remove all parts from the MANUALS DE ASAMBLEA EN ESPAI_OL carton. Check closely with illustrations below to deter- Gracias por comprar su gabinete de costura. Si usted mine that all the parts are included. necesita el "Manual en Espahol"...
- Page 3 Understanding How the "ARROW-LOC" Cam Fastener Works ARROW TOWARDS HOLE IN 1. Position bolt in 2. Press cam into 3. insert bolt through 4. To lock, rotate cam pre-drilled hole and pre-drilled hole until pre-drilled hole in until tight, using turn until tight, flush with surface, edge of panel,...
- Page 4 Assembly Instructions STEP 1. Place Top and Sides on flat surface to thread the (12) Connecting Bolts into the pre-drilled holes (as shown in FIGS. 1 and 2). NOTE: = Cam FIG. 1 • = Connecting aott FIG. 2 Top Assembly •...
- Page 5 (2) #8x1/2" Panhead Screws (as shown in FIG. 4). " ¢_ ack Panel o-- --- STEP3. AttachthePlatformStoppertotheBackusing (,/8 Platform Stopper FOLLOWING ASSEMBLY DONE WITH CABINET UPSIDE DOWN: STEP 4. Attach the Back Panel, Front assembly and Back Brace onto the Connecting Bolts in the Right Side Panel (as shown in FIG.
- Page 6 NOTE: The following assemblies should be done with the Cabinet upright. STEP5. Attach Hinges to Leaf Supports with (4) #8x5/8" Flathead Screws each, tap in Magnet with hammer, (as shown in FIG. 8B). STEP 6. Attach the Leaf Support to Left Side Panel with (4) #8x5/8" Flathead Screws, (as shown in FIG. 7). Attach the Bronze Strike to Side Panel with (1) #5x1/2"...
- Page 7 Installing Sewing Machine in your new Cabinet. It may be helpful to read the directions for operating the mechanism before proceeding with the fol|owing steps. See page 7, and FIG. 12, on this page. STEP3 STEP 1. To prevent damage to Cabinet surface, place cushioning material just to the left of cut-out.
- Page 8 Operating the Mechanism in your Cabinet To move from FLATBED POSITION TO To move your machine from FREE-ARM position to FLATBED position: (See FIGS. 13, 14 and 15). FREE-ARM position: (See FIG. 13, 14 and 15.) (1.) Lift and tilt machine slightly forward. (1.) Remove INSERT (2.) Rotate release lever to the right, (clockwise) to (2.) Lift and tilt machine slightly backwards.
- Page 9 Wood Parts List (D) Hinge Rail_ (A) Leaf Mach_nePlatform o_'J/_/ oo o ooz!i (N) Filler Strip Left Side (F) Right Side (G) Back Panel Panel Ii IH)Front (L) Back Brace PART # REF, I DESCRIPTION Leaf 003259 (J) Insert (Plastic) 003263 Machine Platform 003265...
- Page 10 Hardware Parts List REF. DESCRIPTION PART# 19mm Cam 000709 Connecting Bolt 002892 (A) 19mm Cam (B) Connecting Bolt (C) Rubber Bumpers Rubber Bumper 002466 Mounting Bolt 002890 1/4" Washer 000220 p_._(UU) #8x5/8" FL-ZN-YW 1/4" - 20 Wing Nut 000488 _Leaf Screw Bronze Magnet Strike 000839...
- Page 11 3-Position Mechanism Parts (HH) Left Hinge (FF) Left Bracket (GG) Right Hinge (EE) Right Bracket © (MM) 1/4" 20 Hex Nut (OO) Cotter Pin J) Small Rod (LL)_ (RR) Spring (PP) Release Lever (SS) Plastic item Description Part Number Spacer Right Bracket 000151 Left Bracket...
- Page 12 API Specialty Furniture (A Division of ARROW PRODUCTS, Inc.) P.O. Box 410, Elkhorn, WI 53121 1-800-533-7347 09"9_C 98100-BC...


Need help?
Do you have a question about the 272.98100.491 Sewing machine cabinet and is the answer not in the manual?
Questions and answers